
Adding a Greenhouse to a New Home Landscape Plan
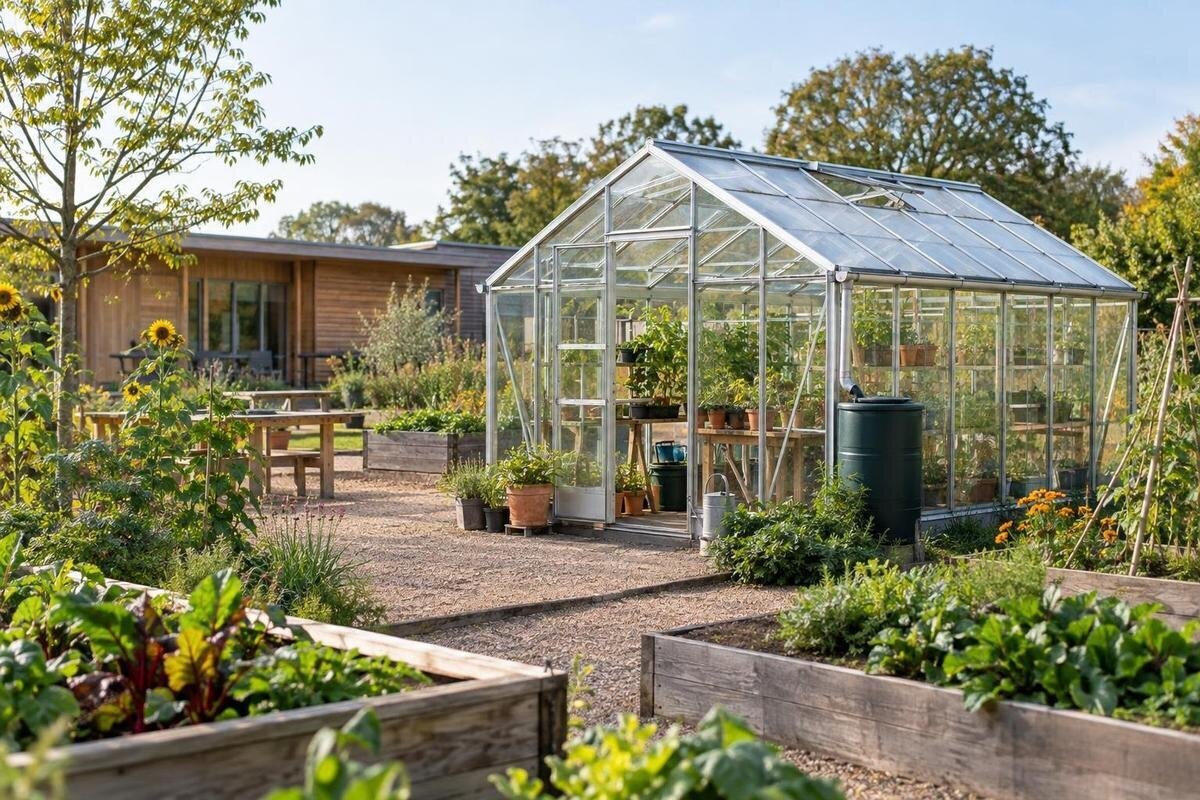
Greenhouse planning for a new home
A greenhouse is easier to coordinate while the landscape around a new home is still being planned, before grading, service routes and finished surfaces limit the options. The work involves handoffs between the home builder, landscape designer, site-work contractor and greenhouse supplier or installer. Treat the structure as part of the site plan, and carry its proposed location through access, levels, utilities and planting. You do not need every detail settled at once; you do need clear decisions and responsibilities early enough to keep one part of the project from undoing another.

Include the greenhouse in the first landscape drawings
Set the purpose and approximate scale while the house and landscape concepts are still flexible. Propagating seedlings, caring for seasonal plants, potting or combining those activities will affect the usable floor area, storage and proximity to a garden path or water source. Note who will use the greenhouse and what they need to reach; do not turn an early sketch into a fixed base size. If built-in storage is part of the brief, the Limited-Edition greenhouse with built-in storage is one catalogue option to review. Its listed area range is 5.52 to 28.08 m², useful for an initial comparison but not a substitute for confirming the chosen configuration’s dimensions. Also decide whether installation belongs in the initial landscaping contract or a later phase. If it will happen later, identify which parts of the garden can be finished now and which areas should remain available. This lets the team plan around a future greenhouse without treating an undecided purchase as a construction-ready design.
At the first coordinated site-plan review, ask the team to show the greenhouse’s provisional outline, entrance, approach path, service corridor and nearby planting areas on the same drawing as the home and other landscape features. Mark which details are still being decided, who owns each decision and when it is needed. That makes it easier to see whether a change affects another trade’s work before it is underway. A plan that only shows a greenhouse symbol can hide important questions, such as whether a path reaches the entrance or whether later planting will restrict access.
Choose a location from a measured site plan
Base the location on a measured site plan rather than a convenient blank patch in a rendering. Include the home and garage, doors and windows, property lines as confirmed by the project team, existing and proposed trees, grade changes, known buried services and likely maintenance routes. If boundaries or service records are uncertain, label them for confirmation instead of treating the drawing as complete. A site walk with the landscape designer can also reveal everyday routes—such as the way people move between the house, patio and garden—that a top-down concept may miss. Where two locations seem workable, mark both and record the differences that matter to you: distance from the house, access to growing beds, visibility and the space left for other uses. A brief comparison gives the team a clear reason for the preferred position rather than allowing the first sketch to become the default.
Consider changing shade from the house, fences and trees, as well as views from the rooms and outdoor areas you use most. A sunny-looking corner is not the only consideration: the entrance, garden paths, future planting and room to maintain the structure need to work together. For an early area comparison, the Prestige Greenhouse with a metal base is listed in options from 3.77 to 28.08 m². Treat that as catalogue area information, not an exact ground outline; request the dimensions for the chosen configuration before setting out its position.
Coordinate finished levels and water flow
Ask the landscape or site-work professional to coordinate the greenhouse’s proposed base level with the finished ground, entrance and connecting path. Those elements affect one another: a path that meets an entrance awkwardly may need a different layout, while ground shaped after the base location is chosen can change how water moves around it. Use a consistent reference on the drawings and identify which elevations remain provisional. Do not assume that a spot that looks level during a site visit is suitable for the planned base or that the final landscaping will resolve a level difference.
Review where water currently travels and how the finished plan will manage runoff from the house, hard surfaces and greenhouse area. Ask the grading professional to consider temporary construction drainage separately from the completed landscape, and to check that the proposed location will not receive concentrated runoff or create unwanted pooling. Do not assume a greenhouse includes a particular water-management feature. For any candidate, including the Classic aluminum greenhouse listing, request details for the selected configuration before the team finalizes surrounding levels and surfaces.
Keep construction and delivery access open
Plan the route from the delivery or staging point to the greenhouse location before access becomes restricted by fences, planting or finished paving. Ask the supplier or installer what they need to know about unloading, package dimensions, equipment and assembly access; do not assume how a particular delivery will be handled. Walk the route with the builder or site-work contractor and note gates, tight turns, overhead obstructions, changes in level and areas that may be difficult to cross during construction. These checks can help the team protect the route and identify questions early. Include access arrangements in the delivery discussion: who will be on site, whether another trade will be using the route, and who can resolve an obstruction on the day. If the driveway or entrance is shared with ongoing house work, agree how the teams will coordinate their use of it rather than leaving that discussion until materials arrive.
Show temporary construction access separately from the finished garden path. Agree where materials can be staged, which surfaces need protection and when heavy work on the route is expected to end. If you are considering a lean-to greenhouse listing, mark the intended wall relationship and the approach to its entrance, then confirm the selected model’s placement details before landscaping closes the adjacent route. The goal is to preserve access for installation without treating a temporary work area as a permanent part of the garden.

Compare the full layout, not just floor area
Compare greenhouse options against the usable space around them, not just the area figure in a listing. You will need to consider the actual external dimensions, entrance position, nearby paths, planting edges and room to reach the structure for routine care. For scale, the Spacious Greenhouse (Orangerie) listing gives an area range of 47 to 70 m². That can help frame an early conversation about the scale of the project, but it is not a site-fit verdict or the outline to mark on the ground. Ask for the chosen configuration’s drawing before deciding how it fits the lot.
Place each serious option on the whole landscape plan and check how it relates to the home, patio, garden beds and other planned features. Look at whether the route to the entrance feels direct, whether the structure blocks a useful view or circulation route, and whether proposed trees and shrubs will leave the access you intend. Keep enough space for the garden’s other uses instead of filling every gap with a path or planting bed. A simple overlay of confirmed dimensions can expose conflicts while the landscape design is still easy to adjust. Add a provisional interior layout too, showing the benches, storage and working spaces you intend to use. Compare how you would carry a tray from the house, bring in potting supplies and move between the entrance and work area. This makes the size comparison about your gardening routine as well as the structure’s place in the landscape.
Plan water and electrical routes before hardscaping
Decide whether the project actually calls for water, electrical service, lighting, heating, drainage or another service; do not assume that every greenhouse needs or includes them. Write down what you want to use each service for and where it should be available. Have the relevant qualified trades confirm what is suitable and feasible for the project, including any required reviews. This is a planning conversation, not a reason to specify installation details before the professionals have assessed the proposed setup. Separate what you intend to use at installation from possible future additions. For example, explain whether lighting is intended for the approach path or for work inside, and whether water is wanted at the greenhouse or elsewhere in the garden. These distinctions give the trades a clearer brief without committing you to equipment or services you have not chosen.
Put intended service routes on the landscape plan before paving, planting or other finishes make access harder. Mark each route as provisional until the greenhouse configuration and connection points are confirmed, and agree who will update the drawing if they change. When comparing options in the Limited Edition Aluminum Greenhouses range, use the selected configuration and intended interior layout to discuss where services would be useful. The listing covers areas from 3.77 to 28.08 m², but that information alone does not locate an entrance, workbench or service point. Show nearby garden uses on the same drawing so the trades can distinguish greenhouse connections from those serving the wider landscape. Keep any proposed future routes clearly labelled as possibilities, rather than allowing them to be mistaken for authorized work.
Define the base and installation handoff
Make the boundary between site preparation, base work, greenhouse installation and landscape restoration explicit. The project documents should say who confirms the requirements for the selected model, who sets out and prepares the area, who checks the completed base against those requirements, and who restores the surrounding surfaces. Do not assume that base preparation or assembly is included in a package or another contractor’s scope. A written handoff helps prevent gaps where each party expects someone else to complete a necessary part of the work.
Use the chosen configuration’s drawings and installation information to coordinate the base outline, entrance and adjacent paths. For a T-Shaped Orangery Greenhouse, for example, work from the selected layout rather than approximating the structure with a rectangle or relying on its area figure alone. Agree on a review point before work that would cover or obscure the prepared area, and decide who can confirm that the relevant information has been followed. Questions about the base or site conditions should go to the supplier, installer or qualified professional responsible for them.
Set milestones before trades begin
Build the greenhouse into the project schedule as a series of decisions and handoffs, not simply as a final landscaping task. The team can identify when the location and model need to be settled, when local reviews should be checked, when service routes and grading are coordinated, and when access must remain available for base work and installation. The exact order depends on the project and the selected greenhouse, so confirm it with the contractors involved rather than assuming one sequence fits every installation.
Use written hold points before important work moves ahead: confirm the layout before setting out, review service routes before they are covered, and agree when the surrounding paths and planting can be completed. If a Pyramid Greenhouse remains under consideration, include its selected layout and access details in the same decision schedule as other candidates. Name the person who records changes and updates the shared drawings; a model substitution or moved entrance can affect grading, service points and nearby finishes.

Assign decisions, scope and local checks
Create a simple responsibility record that names a person for each decision and deliverable. Depending on the project, this may involve the homeowner, home builder, landscape designer, site-work contractor, greenhouse supplier or installer, and qualified service trades. Clarify who provides the current site drawing, who confirms the chosen model’s dimensions and requirements, who coordinates access, and who arranges any service work. Even when one contractor coordinates several others, a named contact for each handoff makes it easier to resolve questions before work is delayed. Use that record when comparing quotations, checking that each one describes the work you expect that contractor to perform. Identify exclusions and work assigned elsewhere, including removal of temporary materials and restoration of disturbed areas. A lower total is not a useful comparison if the quotations cover different parts of the landscape project.
Check local requirements and any applicable property or community rules before contracts and landscape details make a preferred location difficult to change. Requirements can depend on the place and project, so confirm them with the municipality and relevant project professionals rather than relying on a general rule of thumb. Keep that check separate from product selection: approval of a location does not confirm that a particular configuration fits the site. If the design changes, record what else must be reviewed and who will update the drawings and contractor scopes.
Complete the garden after greenhouse work
Plan for a clear handover once installation and site work are complete. Keep the final greenhouse information and any supplied instructions with the landscape plan, and ask the responsible trades to record the locations of completed service routes or other work that may matter to future digging. Note any changes from the approved layout, including a moved path or revised planting edge. A current record is more useful than relying on a construction sketch that no longer matches the finished site. At handover, distinguish completed work from outstanding items and agree who will address each remaining task. If part of the planting or surface restoration is deferred, record the intended finish and the area affected. This gives later contractors a usable reference and keeps unfinished landscape work from disappearing into a general statement that the greenhouse is installed.
Complete lawns, beds, paving and other vulnerable finishes when the agreed heavy access is no longer needed. Inspect areas used for staging or construction, restore disturbed ground as planned, and make sure the finished route still reaches the entrance and leaves the access intended for maintenance. After rain, note any unexpected pooling or changed runoff and raise it with the responsible site-work professional. This final review connects the greenhouse installation back to the landscape plan instead of leaving the garden to absorb uncoordinated changes.
Frequently asked questions
When should I involve the greenhouse supplier or installer?
Bring them in while the landscape plan is still flexible, before final grading, paths or service routes are set. An approximate use and size are enough for an early discussion; confirm the exact model and its requirements before the base and surrounding finishes are finalized.
Should the greenhouse location be decided before grading?
Yes. Its proposed base level, entrance and path need to be considered alongside the finished ground and drainage plan. The landscape or site-work professional can coordinate those elevations; avoid relying on a flat-looking patch or setting the final level from a preliminary sketch.
Do utility routes need to be planned before the paths go in?
Plan any intended water or electrical service routes before paving and planting restrict access. Have qualified trades confirm what is appropriate for the project and where connections can go, using the selected greenhouse layout rather than a generic symbol.
Who should prepare the greenhouse base?
That depends on the project scope and the selected greenhouse. Put in writing who will confirm the base requirements, set out and prepare the area, install the greenhouse and restore nearby surfaces. The supplier or installer and site-work contractor should agree on the handoff.
Do I need approval to add a greenhouse?
Requirements can vary with location and project details. Check with the municipality and any applicable property or community rules before committing to a location or size. Ask the relevant project professionals to identify any reviews that apply to your plans.
A useful new-home plan shows the greenhouse alongside access, grading, drainage, service routes, finishes and the people responsible for each handoff. It also distinguishes confirmed details from those that depend on the selected model or local review. Keeping that information together gives the home and landscape teams a shared reference as work progresses. When installation is complete, the greenhouse can sit naturally within the finished garden rather than prompting avoidable changes to paths, planting or buried services.
