
Why Greenhouse Plants Scorch on Only One Side
Greenhouse troubleshooting
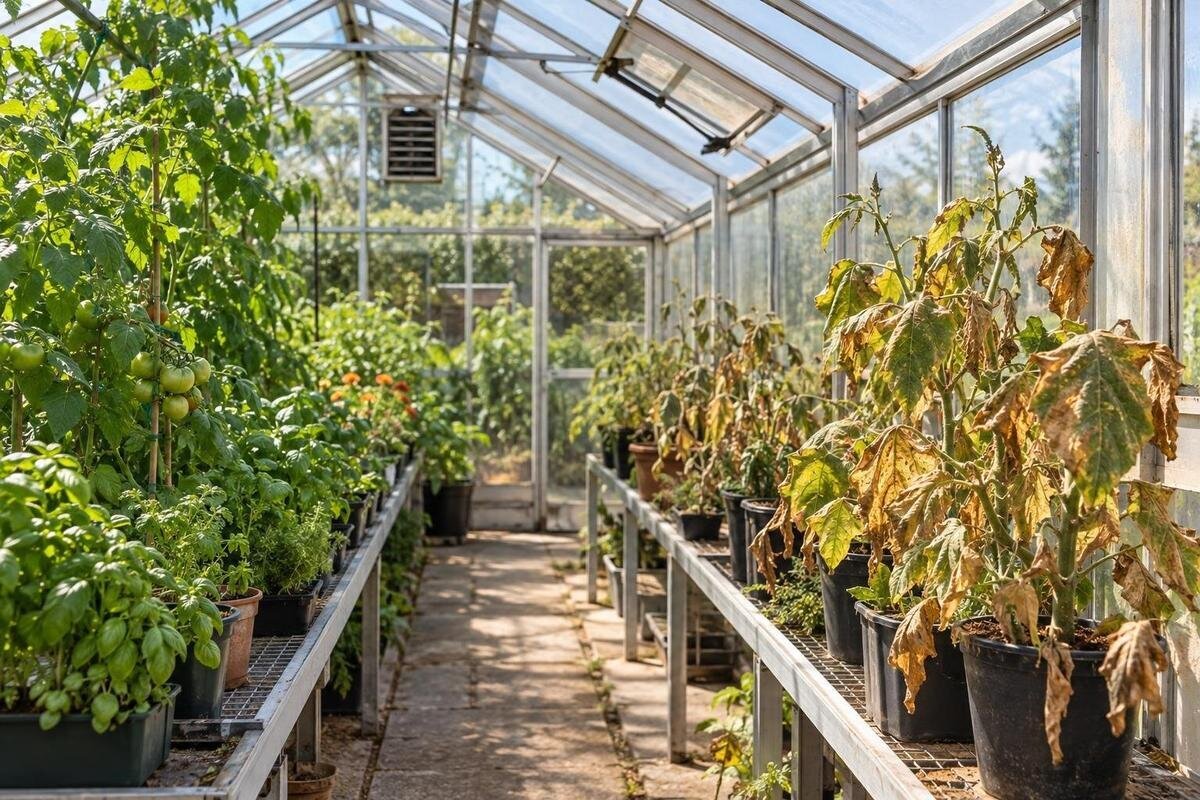
Scorching confined to one side of a plant, one row, or one end of a greenhouse is a location clue. It often points to local exposure—direct sun, reflected heat or weak air movement—rather than a condition shared by the whole structure, but water stress and spray injury can look similar. Map the affected leaves, follow the light, and compare the damaged area with an unaffected one before changing shade or ventilation. That sequence helps you find a response for the vulnerable plants without unnecessarily darkening the rest of the greenhouse.

What one-sided scorch can—and cannot—tell you
The location of the injury is as important as its colour. If exposed leaf surfaces are bleached, tan and dry while tissue sheltered by another leaf remains green, intense light or heat is a reasonable first lead. If several plants in one strip show the same pattern, look for a shared beam, nearby surface or local air pocket; if only one plant is affected, compare its pot, watering and position before blaming the greenhouse. Note whether the damaged face points toward the glazing, a light source or simply the same part of the bench. Leaves turn and overlap, so the sun-facing side is not always obvious at a glance. One-sided damage tells you where to investigate, not the cause.
A sharp edge that matches a shadow can support an exposure explanation, especially when the boundary repeats on several leaves. It is less convincing if spots also appear on shaded surfaces, if lesions have distinct rings or speckles, or if fresh damage keeps expanding after you reduce the suspected exposure. Scorched tissue will not regain its original colour, so judge a change by the condition of new leaves and whether the injury stops progressing. If many plants decline or the marks spread in a pattern unrelated to light, seek crop-specific identification from a local horticultural service or qualified plant-health professional instead of treating every mark as sunburn.
Map the damage before changing the layout
Make a quick plan of the beds or benches, doors, vents, glazing and nearby walls. Mark a compass direction, then note where affected and unaffected plants sit. Be precise about the pattern: is it the same side of each plant, the same greenhouse wall, or just one row? Tag a few representative plants and photograph the same leaves from the same angle, with a date. Record the crop, growth stage, which leaf surfaces show damage and when you first noticed it. Add any recent move, pruning, watering gap or spray. Give each location a simple code and mark which leaves are already damaged; that makes later photographs easier to compare.
Record the original layout before moving the whole crop; moving everything can erase the comparison that would explain the pattern. When planning beds for a new structure, draw crop zones against the exact footprint before deciding where plants will go. The Limited-Edition Aluminum Greenhouses with Storage listing covers area options from 5.52 to 28.08 m². Confirm the dimensions of the selected configuration so you can place benches and beds accurately on your drawing. Mark the proposed positions of comparable plants, including a less exposed group, rather than treating the total floor area as a measure of usable growing space in each light zone.
How direct sun moves through the greenhouse
Watch the affected area at several times on a bright day—morning, around midday and later afternoon—and repeat if clouds interrupted the first check. Mark the beam and shadow line at plant height, not just on the floor. A greenhouse can look evenly lit from the doorway while framing, shelving, tall crops or a nearby structure shade one side of a plant. Check light entering through side glazing and doors as well as overhead; a narrow beam can pass along a single row before the sun moves behind a tree or neighbouring building. Note when direct exposure begins and ends, and look over the outside of the greenhouse for moving shadows from buildings and trees.
Record the time with each photograph, along with whether the sky was clear or hazy and which surfaces were lit. Sun height and direction shift with season and site, so a spring observation may not describe a later crop cycle. Do not infer the sunniest side from a general rule about greenhouse orientation; watch the actual plot. If you are comparing the Bloomcabin Prestige Greenhouse, available in areas from 3.77 to 28.08 m², use those dated observations when considering its position. Mark nearby shade sources around the selected footprint and trace light at the intended plant locations, rather than choosing a growing zone from orientation alone.
Reflected light and heat from nearby surfaces
Inspect beyond the greenhouse for surfaces that could direct or add heat to one patch: a bright window, glazed door, metal panel, pale wall or hard paving. A reflected beam may line up with the damaged area for only part of the day, so compare its timing with your map. A sun-warmed wall or paving can also radiate heat without producing an obvious bright reflection. Neither a surface’s colour nor its distance alone proves it is the source; angle, finish and time of year change what reaches the leaves. A reflected patch may shift as the sun moves, so check whether it meets the injured area at the same time the plants are exposed.
Compare the affected and unaffected zones at the same time. If you log temperature or humidity, put the sensor at canopy height where air can circulate and shield it from direct sun using its proper radiation shield; a sunlit sensor can heat up and misrepresent the air. Keep it away from glass and frames, and use equivalent placement for both readings. A normal greenhouse air reading does not rule out a brief strong beam on a leaf. The Spacious Greenhouse range covers 47 to 70 m². When planning monitoring across that area, identify separate growing zones on the map rather than relying on a central reading to describe every bed.

Air movement around affected plants
Once direct and reflected light have been mapped, look for a pocket where warm air lingers. Check whether an opening near the affected plants is shut or obstructed by stored items or dense foliage. Note the state of doors and vents when scorching is most likely to occur; if openings are used only at certain times, record that too. If the greenhouse has a fan, check its operating status and intended airflow direction in the manual rather than guessing from sound alone. A vent or fan may move air near itself without reaching every corner. Compare the affected canopy with a nearby unaffected group, noting how benches, stored items and foliage are arranged around each.
Compare temperature and relative humidity at canopy height in the affected and unaffected zones at the same times, using consistent sensor placement and allowing the logger to settle as instructed. If you have one sensor, move it between the two spots on comparable days; do not compare readings taken during very different weather. Record outside conditions and vent state so you can identify a repeatable local difference rather than chase a universal set point. For buyers comparing the Aluminum Greenhouses range, listed from 3.77 to 28.08 m², the relevant layout detail here is the position of openings in the selected configuration. Check those positions against the proposed crop zones and consult the manual for their operation.
Watering and spray damage can mimic scorch
Sun injury may be more likely when roots cannot replace water lost from leaves, and uneven watering can make only one side of a bench show symptoms. Check moisture in the root zone, not only the surface, using a method suitable for the crop and growing medium. Compare affected and unaffected pots or beds: a blocked emitter, smaller container, poor drainage or crowded roots can create a local difference. Note whether plants wilt during the bright part of the day and recover later, but do not use wilting alone as proof of scorch. Avoid reacting by keeping all soil constantly wet; first verify the actual root-zone condition and the crop’s normal watering needs.
Review the timing of foliar feed, pesticide, soap or cleaning products as well. Some plant damage can follow a recent application or appear where droplets dried, so write down what was used, when and how, then check its label. Do not repeat a suspected treatment as a test. For buyers considering a wall-side growing area, the Lean-To Greenhouses listing covers 3.69 to 14.34 m². Include watering access in the site plan alongside the wall’s shade and sun exposure. Compare how easily you could check and water each proposed bed or container; the greenhouse format alone does not explain why one group of plants becomes damaged.
Testing a different plant position
With the map and first observations in hand, test one likely cause at a time. Move one or two comparable plants to a less exposed spot for a period of similar weather, leaving similar plants in the original position as controls. Keep watering, feeding and care as consistent as possible, label each group and take repeat photographs. If new leaves remain healthy in the changed position while the control develops fresh damage, a local exposure is more likely to be the cause. If both groups worsen, review water, spray and broader conditions instead. Existing scorched areas will remain; compare new growth and the rate of change, not whether old tissue turns green.
A small temporary screen can test direct sun without relocating a plant, but it should not cover vents or create heavy shade. Avoid changing position, watering and ventilation all at once: even a good outcome would not tell you what worked. Choose plants of similar size and condition, and keep their other growing conditions as consistent as possible. The trial can also inform a future layout. If you are considering the Limited Edition Aluminum Greenhouses range, listed from 3.77 to 28.08 m², mark the positions that worked well on your proposed plan. Compare the selected footprint with those crop zones rather than assuming that a larger floor area will resolve the exposure.
When targeted shade is worth testing
If the injury follows a regular sunbeam, a small shade trial may be more useful than covering every roof panel. Decide what needs shade—the exposed side, the beam’s path or just a group of plants—and keep unaffected crops in their usual light for comparison. A removable test lets you see whether new growth improves before committing to wider coverage. Check that any shade product is intended for greenhouse use, fits the actual structure and does not obstruct doors, vents or moving parts. Use the product instructions for placement and compatibility; an improvised cover that blocks airflow can exchange one problem for another.
Judge the result over comparable bright conditions, not by how cool the space feels immediately after hanging shade. Crops differ in their light needs, so follow crop-specific growing guidance before extending a successful local test to other beds. Recheck as plant height and sun angle change, and adjust or remove the temporary shade if it begins affecting other crops. When considering the T-Shaped Orangery Greenhouse, listed from 16.52 to 30 m², use the trial to identify where shade may be needed in the proposed growing layout. Check whether a compatible shading option is available for the selected configuration and how it would fit around the glazing and openings.

When ventilation adjustments are justified
Adjust ventilation only when the observations point to a local air-movement issue or an equipment problem. Check the manufacturer’s manual for normal operation of the vents or opener, and look for an obstruction or a mechanism that is not moving as described. Make one modest change at a time and repeat readings at the same two canopy positions during comparable weather. A change that alters the entire house may affect crops that were not scorching, so keep those plants under observation too. Do not set an opening angle or temperature target from a single plant; crop needs, equipment and conditions differ.
If air readings stay similar but the damage follows a brief sun patch, more ventilation may not address the main exposure; a targeted shade test or small plant move may be more informative. If the affected zone repeatedly records different conditions and an opening appears faulty, consult the equipment manual or a qualified service professional instead of modifying the structure or electrical components. Humidity readings help describe the local environment, but a single humidity number does not diagnose leaf injury. Correct a documented obstruction or malfunction, and use light mapping to decide whether shade is the more relevant test.
Keep a seasonal record of local conditions
Keep a concise record after the first adjustment: date, affected location, sunlight timing, outside conditions, canopy readings, vent state, watering and the result of any shade or relocation test. Revisit the same map as crops grow. Taller foliage can change both shadows and airflow, and the seasonal sun path can bring a bright beam onto a previously protected row. Repeat observations after moving benches, changing the crop or servicing equipment. A consistent comparison of one affected zone with one unaffected zone is more useful for this problem than an occasional temperature reading from the centre of the greenhouse.
For a new site, plot crop zones, nearby shade sources, reflective surfaces and access to vents before settling on a footprint. The Pyramid Greenhouse range is listed from 5.53 to 18.9 m², but neither floor area nor model name establishes how sunlight will reach a particular bed. Add the selected model’s exact dimensions to your site map, then observe the intended growing positions at different times. Keep those dated observations for comparison as the season changes. For an existing greenhouse, continue the record through a bright period after each adjustment so you can judge the result in the affected zone without applying the same change to every plant.
Frequently asked questions
Can leaves scorch if the greenhouse thermometer looks normal?
Yes. A thermometer measures the air where it sits, not the radiant energy reaching a sunlit leaf. It may also be far from the affected plants, and direct sun on the sensor can distort its reading. Compare shielded readings at canopy height in affected and unaffected spots, and note when sunlight reaches the damaged leaves.
Does scorch on one side always mean too much sun?
No. Uneven root-zone moisture, reflected heat, stagnant air, spray injury or another plant-health issue can create similar damage. Check whether the pattern follows direct sun and shadows, then review watering and recent product use. If fresh damage keeps spreading after you address the likely exposure, seek crop-specific advice rather than assuming it is sun scorch.
Why are plants beside one wall affected but not those in the middle?
That pattern points to local conditions worth comparing: a sunbeam, reflected light, a warm surface, airflow or watering differences. Observe the area at different times and compare plants and readings at the same height. If the bright patch moves with the sun, that is useful evidence; a fixed affected corner may need a closer look at airflow and root moisture.
Should I remove scorched leaves?
Scorched patches will not regain their original colour, but a leaf with healthy tissue may still contribute to the plant. Avoid removing leaves just to improve the plant’s appearance. Follow crop-specific care guidance, and focus first on preventing fresh damage. Use the condition of new growth and whether the injury is progressing to judge your changes.
When should I try targeted shade?
Try a small, temporary shade test after you have mapped when and where direct sun reaches the plants. Keep unaffected crops in their usual light for comparison, and check that the shade is intended for greenhouse use and will not obstruct openings. Reassess the result during comparable bright conditions before extending shade to more of the greenhouse.
The most useful diagnosis explains both where the damage appears and when it develops. A patch that lines up with a moving beam calls for a different response than a fixed corner with poor air movement or roots that dry sooner. Change one factor at a time, leave a comparable plant or zone unchanged for comparison, and judge the result on new growth. Once the local cause is clearer, you can adjust shade or ventilation for that area without needlessly changing conditions for every crop.
