
Planning a Greenhouse Between a House and Fence
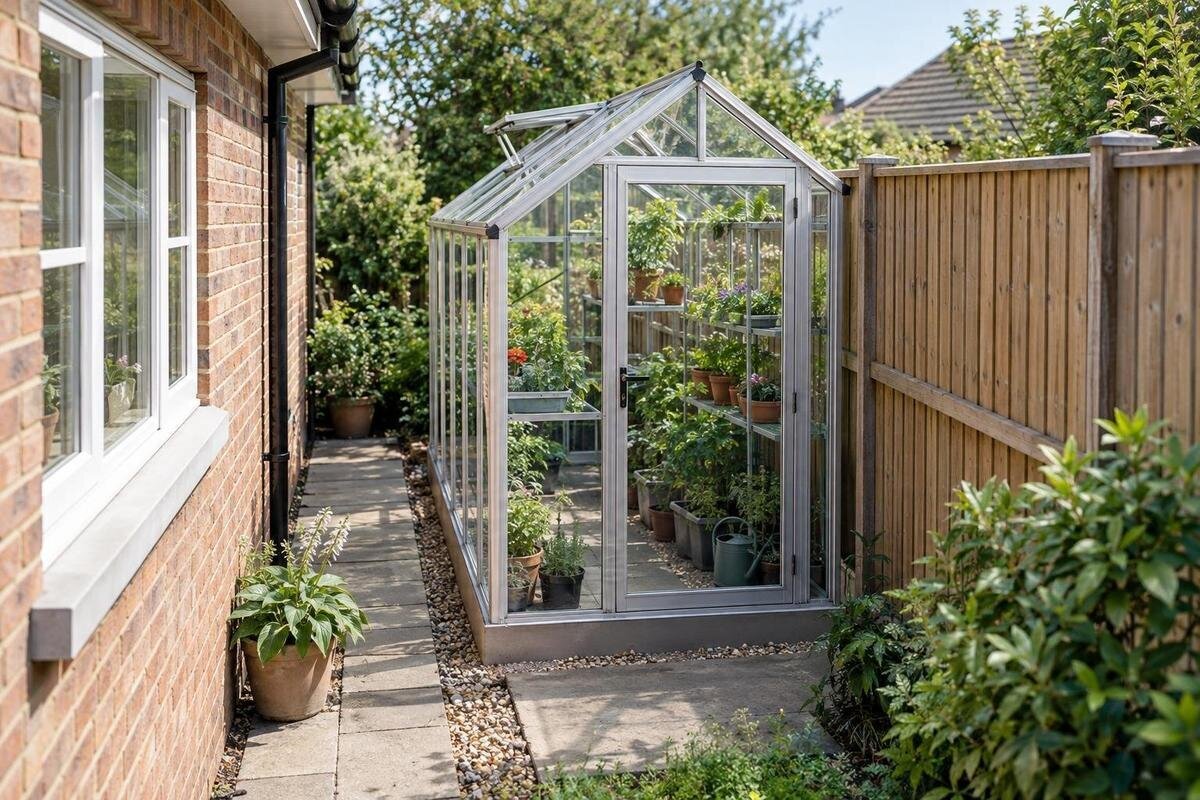
Greenhouse site planning
Finding a greenhouse for a side yard is not just a matter of comparing its advertised width with the gap between the house and fence. The usable opening changes along the passage, and the greenhouse needs room for its outside frame, entry, assembly and maintenance. House eaves can send rain or snow into the same space, while walls and fences cast shade that changes through the season. Even when the exterior outline fits, framing and benches can leave too little room inside. A scaled site plan, seasonal observations and the exact drawing for a candidate model give you a more reliable answer than a single tape measurement.

Measure the narrowest part of the passage
Measure the clear distance from the house to the fence at several points along the full length you might use. Include both ends, the middle, and places where either boundary changes direction, a post projects inward, or a downspout, step, window well or paved edge narrows the route. Record available length as well as width; a long, narrow strip is not interchangeable with a short, broad one. If the boundaries are not parallel, the passage tapers, so a greenhouse can fit near the gate but cross the fence line farther in. Use the narrowest uninterrupted section as your first screening measurement instead of averaging widths and hiding the bottleneck. Mark where each reading was taken.
Draw a simple plan to scale and label each measurement, then photograph the site from both ends so you can match obstacles to the sketch. A ground-level reading will not show an eave, window trim or fence cap projecting into the greenhouse’s upper outline, so note those separately. A lean-to greenhouse may be worth comparing for a house-side location, but “lean-to” does not establish that a particular model can attach to your wall. Check its exact model drawing and installation requirements; if the wall, cladding, openings or service lines are involved, confirm the arrangement with the manufacturer or a qualified installer.
Draw the greenhouse’s full outside footprint
For each candidate, use a dimensioned plan for the exact model and configuration rather than relying on a product photograph or a headline floor-area figure. Check what the listed width and length measure: the frame, a base, the roof or another part of the structure. Note any projections shown on the drawing and the position of the entrance. Plot the complete outside outline on your site plan at the same scale. This makes it easier to see whether the shape fits along the whole passage, not merely whether one width is smaller than one tape measurement.
The listed floor-area range for Limited Edition Aluminum Greenhouses is 3.77–28.08 m², but an area figure alone does not tell you how wide and long a selected model is. Compare the exact configuration’s outside dimensions with the narrowest part of your yard. Include the base or other dimensions identified on its drawing, and note any projections that extend beyond the main frame. If a plan does not make clear which dimensions apply, ask for clarification before treating the greenhouse as a fit.
Plan the usable space inside
An outside footprint is not the same as usable growing space. Look for the selected model’s interior dimensions and use them to sketch the layout you actually want: beds, pots, benches, shelves and a route for reaching the plants. Allow for the room you need to stand, turn and tend crops, not just the area covered by containers. A single growing bed with access from one side may suit your plans better than two rows, or it may not; the right arrangement depends on what you intend to grow and how you work. Draw the layout for established plants as well as newly planted seedlings, so the walking route does not depend on everything staying small. Include the containers and equipment you use regularly rather than filling every available corner with growing space. You can test a proposed bench depth or aisle at home by arranging empty pots and boxes, then checking whether you can comfortably reach the back of the growing area.
For greenhouses with built-in storage, check the exact drawing to see where the storage is located and how much clear growing and walking space remains. Mark its position alongside the beds and route, then consider how you will reach stored items without moving plants every time. If your layout works only by removing the walking space you need for watering, pruning or harvesting, the outside fit may not be useful in practice.
Plan the entrance and everyday route
Find the entrance on the drawing for the model you are considering, then map the route from the gate or house door to it. Include the space needed to approach and use the entrance, as well as any door movement shown on the plan. Think through ordinary tasks: carrying a watering can, bringing in a tray of seedlings, moving a bag of soil or taking out a pot. A passage can accommodate the greenhouse frame yet make these tasks awkward if the doorway faces a tight corner or the approach is blocked. Measure the items you expect to carry through the entrance, not just the person carrying them. A tray held in front of you needs a different approach from a pot carried at your side. Also consider where you will set something down while opening the door. That spot should remain available in your planned layout rather than doubling as permanent storage.
Do not infer the entry position or usable aisle from a model’s shape alone. For a pyramid greenhouse, check the exact product drawing for the entrance and the route through the selected configuration. Draw the door in its open position if its movement uses space, and trace your approach from the yard gate. Check whether you can pass with the items you expect to carry and whether another door, gate or window needs room to open. If the only route depends on shifting furniture or containers each time, include that in your assessment.

Keep access for cleaning and repairs
Consider how you will reach the greenhouse’s outside surfaces and the parts of the house and fence beside it. Cleaning glazing, replacing a panel, inspecting a wall or repairing fence boards can require access that a site plan’s simple frame outline does not show. Check the model’s assembly and maintenance instructions for any space needed around it. There is no one clearance that suits every structure and task, so use the requirements for the specific model and the work you expect to do. Separate access for routine cleaning from access for occasional repairs: being able to walk along a side does not necessarily answer how a component would be removed. Note which tasks you could carry out from the passage and which would depend on access from elsewhere. Do not count space on the other side of the fence as available unless you have confirmed that you can use it.
A T-shaped orangery greenhouse should be compared using its complete drawn outline, not just one width across the main part. The same principle applies to maintenance: identify each side or projection that needs access, then see whether the passage leaves a workable route to it. Include the fence gate and any space needed to maintain the fence itself. If one face would be inaccessible after installation, decide how that affects cleaning, repairs and the greenhouse’s placement before choosing a model.
Trace roof runoff and ground drainage
Look above the proposed site as well as at the ground. Mark the house eaves, roof valleys, gutters and downspout outlets, then note where water reaches the ground. If possible, observe the area during rain and after snowmelt: dry-weather inspection may not reveal a splash zone, a low spot where water gathers or a downspout that discharges towards the passage. Record these observations on the site plan and photographs so they can be compared with the greenhouse outline.
Do not assume a greenhouse or its location can accommodate water or snow coming from the house roof. Rainwater, meltwater or snow sliding from a roof can create a separate siting issue; the product name alone does not establish what a model can withstand. If the proposed footprint is in the path of roof runoff or falling snow, ask the manufacturer or a qualified professional whether that location is appropriate. Moving the greenhouse or reviewing the roof-water route may be more practical than trying to resolve a conflict after installation. Check applicable local requirements for handling discharge.
Check shade across the growing season
Use photographs and a simple shadow diagram to track how the house and fence shade the proposed footprint. Take pictures from the same points at different times of day, and repeat the observations at more than one point in the growing season if you can. Mark which parts of the site receive direct light and when. A visit on one sunny afternoon cannot show how the passage behaves in the morning or when the sun is lower at another time of year. Include the full greenhouse outline, since shade may fall differently at each end. Label each photograph with its date, time and viewing direction so you can compare observations without relying on memory. On a copy of the site plan, shade the areas blocked by the house and fence at each observation. Keep unobserved periods clearly marked as unknown rather than extending one observation across the whole day. This gives you a usable record of the light pattern without suggesting more certainty than your observations support.
Relate the observed light to the plants you plan to grow rather than treating “bright” or “shady” as a complete answer. A greenhouse enclosure does not create daylight where the house or fence blocks it, and light may not be even across the interior. Note whether a sunny patch covers the planned growing area or only one corner, and whether the pattern changes through the season. If the site seems marginal for your intended crops, revisit the layout or consider another location instead of relying on a single current snapshot.
Map fixtures and the installation route
Add fixed features to your plan: exterior doors and windows, outdoor taps, vents, meters, lights, drain access points and other service equipment. Make sure the greenhouse will not obstruct routine access to them. If a fixture has specified clearance or service requirements, follow the information from its manufacturer or service provider rather than guessing. Also record overhead projections and the route from the gate: long components may be difficult to carry around a sharp turn or through a narrow entrance even when the final footprint fits.
The name Prestige Greenhouse with Metal Base identifies a model with a metal base, but it does not supply the dimensions or site requirements you need for a particular layout. Use the drawing for the selected model to check the base outline and compare it with the measured passage. Confirm the assembly route and any ground-preparation requirements with the manufacturer or a qualified installer. Before any digging, have underground services located through the appropriate service. Include space to lay out parts during assembly, not just the room the finished greenhouse will occupy.

Compare model dimensions and layouts
Floor area is useful for comparing models, but it cannot show how a particular footprint fits a narrow or tapering passage. The listing for Spacious Greenhouse gives an area range of 47–70 m²; that figure alone does not establish the outside width or outline of a selected model. Apply the same caution to smaller area figures. Use the exact model drawing to check how its dimensions are distributed, and do not treat a catalogue image or a product-family name as a substitute for a dimensioned plan.
A comparison table can keep the details straight. For each shortlisted model, record the exact configuration, outside width and length, base or roof projections shown on the drawing, interior width, entrance position and any specified assembly or maintenance space. Keep measurements in the same units and compare them with the same site locations. Leave unanswered entries marked as unknown rather than treating a blank as zero clearance or no projection. Alongside the measurements, record what each option means for your layout: fewer benches, a different approach to the entrance, or a change in the space left beside the fence. This makes the comparison about everyday use as well as size. Distinguish features you need from those you would merely prefer, so an attractive option does not obscure an access problem. A small difference in width can matter more than a larger difference in total floor area when the yard narrows.
Test the complete layout before choosing
Overlay the chosen model’s full outline on your scaled site sketch. Add the entrance and door movement, planned interior route, nearby fixtures, maintenance access and the roof-water locations you recorded. Where the ground surface allows, mark the proposed outline with removable chalk or tape, or lay out string without driving stakes. Walk the approach as you normally would, and consider how you would bring in plants, reach the house wall and maintain the fence. This physical check can reveal a pinch point that is easy to miss on a page.
For a candidate from the aluminum greenhouse range or another product range, identify the exact model and configuration before relying on its dimensions. Then check applicable local requirements, property boundaries and any utility or easement constraints with the relevant authority or provider; requirements vary by location and site. If the plan depends on an unclear clearance, attachment or runoff arrangement, resolve that question with the appropriate professional before committing. If the footprint blocks access or leaves too little practical room inside, reconsider the model or the location rather than forcing the layout.
Frequently asked questions
How narrow can a side yard be for a greenhouse?
There is no single width that works for every site or model. Compare the narrowest clear part of the passage with the selected greenhouse’s outside dimensions, then account for the entrance, installation and maintenance access, and any applicable local requirements.
Is a lean-to greenhouse always the best choice between a house and fence?
No. The format may be worth comparing, but the model’s installation requirements determine whether it suits your site. Do not assume your house wall is an approved support or that the greenhouse can be attached without affecting cladding, openings, drainage or services.
How can I tell whether the side yard gets enough light?
Photograph the proposed footprint at several times of day and at different points in the growing season. Note which parts receive direct light, then consider whether that pattern suits the plants you intend to grow. One sunny visit cannot show the whole season.
Can the greenhouse sit under the house eaves?
Check where rainwater, snowmelt and any sliding snow from the roof reach the ground. Do not assume the greenhouse or its site can accommodate roof runoff. Confirm the proposed location with the greenhouse manufacturer or a qualified professional if the roof affects it.
How do I estimate the usable space inside?
Use the selected model’s interior dimensions, not just its exterior footprint or advertised floor area. Draw in beds, pots, benches, storage and a walking route. The result should leave enough room for the way you plan to plant and work.
A side yard works as a greenhouse site only when the complete outside outline and the space needed to use and maintain it both fit. The narrowest gap, usable interior width, entrance, access to nearby surfaces, roof runoff and seasonal shade each affect the decision. Check them together on a scaled plan and against the exact model drawing. If a workable layout depends on blocking access or relying on an unverified clearance or drainage arrangement, another model or location is likely the better fit.
