
Planning a Greenhouse Next to a Garage
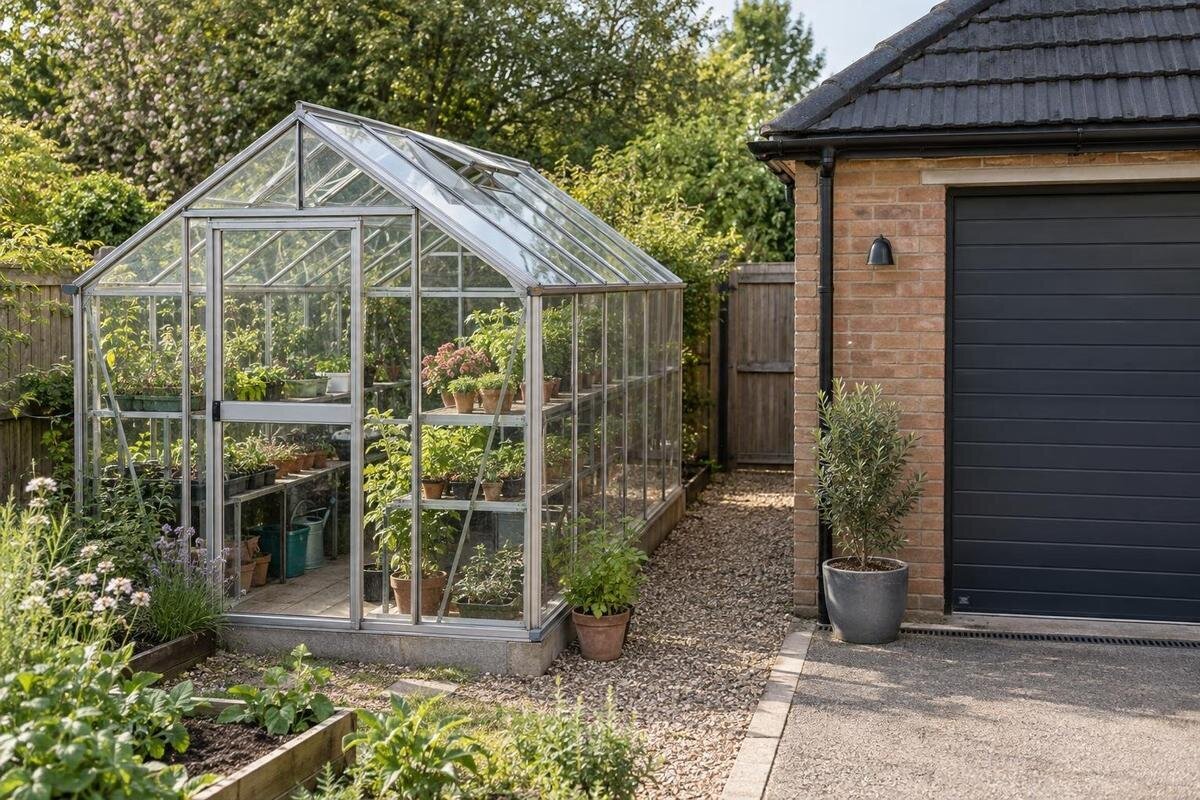
Greenhouse location guide
A greenhouse beside a garage can make use of a convenient part of the yard, but the building changes more than the available space. It can cast shade, direct roof water toward the proposed site, interrupt garage access and create a tempting wall for attachment. Treat a nearby freestanding greenhouse and an attached greenhouse as separate layouts. A measured sketch, seasonal shadow observations and photographs after rain will reveal conflicts that are difficult to spot from a product image or a single visit.

Freestanding and attached greenhouse layouts
A greenhouse standing independently beside the garage is a different project from one fastened to the garage. A freestanding greenhouse needs its own support and access; the garage is not automatically a suitable fixing point or part of its enclosure. An attachment creates a junction with an existing wall, where framing, cladding, doors, windows, moisture protection and roof edges may matter. Even without a physical connection, a nearby greenhouse can be affected by the garage’s shade, roof runoff and access needs, so separation does not remove the need for site checks. The label lean-to describes a form, not approval for a specific building. If you are considering a lean-to greenhouse, establish whether the proposed connection is suitable for both the model and your garage.
Before pursuing a shared wall, ask the manufacturer for installation information for the exact model, then have a qualified building professional assess the existing garage and proposed interface. Review should account for the wall’s construction and condition, cladding, eaves, doors, windows and any visible services, as well as how the junction can be weather-protected; do not infer these details from a photograph. Ask whether the manufacturer supports the proposed arrangement and whether a separate design is required. Check with the relevant local authority whether approvals or location rules apply, and check with your insurer if building changes could affect coverage. Until those questions are answered, compare a freestanding layout instead of treating attachment as a simple shortcut.
What to include on a scaled site plan
Begin with a plan at a consistent scale and show the garage footprint, wall, roof overhang, eaves and any downspouts. Add garage doors and the space they occupy while opening, not only their closed outlines; mark side entrances, windows, vents, exterior taps, utility meters, outdoor storage and the usual path from the driveway. If a reliable property plan shows a lot line or easement, mark it as a reference and confirm any applicable location requirements separately. A sketch made from memory can miss a roof projection or a door people use every day. Record measurements on site, note how you obtained them and mark any dimensions that still need confirmation.
Draw each candidate greenhouse at the position and orientation you are considering, including its outside footprint and entrance. Use a grid, tracing paper or a digital plan, but keep the scale consistent so you can compare the gap, door movement and walking routes. The Pyramid Greenhouse is listed across area options from 5.53 m² to 18.9 m²; area alone does not reveal the dimensions or door position of a selected version. Get the drawing for the exact model and size, then overlay it rather than estimating from a product photo. Show access routes separately from the greenhouse outline, and keep separate copies for freestanding and attached layouts.
How garage shade changes through the seasons
Do not judge the garage’s shade from a single sunny afternoon. Its wall and roof cast shadows in different directions as the sun moves, and the pattern changes over the year. Make a seasonal shadow diagram on the same site plan: mark the proposed greenhouse outline, compass direction, date and observation times, then note which parts of the outline are shaded. Repeat in the morning, around midday and later in the day when practical. Take matching photographs from fixed viewpoints, record whether conditions were clear or cloudy, and include other obstructions affecting the same patch of ground. A labelled series is more useful than several uncaptioned photos.
Interpret those observations against what you want to grow and when you plan to use the greenhouse. Starting seeds, growing sun-demanding crops and keeping plants under cover year-round are different goals, so a partly shaded position may suit one plan better than another. Compare the light you recorded with reliable guidance for your intended crops; do not assume glazing or warmth compensates for lost direct sun. If the garage shades most of the growing area during the hours that matter to your plan, compare a shifted freestanding position before accepting the wall-side location. There is no single daily sunshine target that answers every use.
Where water from both roofs will go
Trace where water travels from both roof surfaces, not just where the greenhouse frame would sit. Mark the garage eaves, gutters, downspouts and visible outlets; during rain, observe where discharge and surface runoff go. Note overflow, splashback, water that crosses the proposed gap, and spots that stay wet or collect runoff near a base. Photograph the path from more than one angle after substantial rainfall or spring melt if possible. Include the greenhouse roof in the plan: once installed, its runoff may change the way water moves through the same strip beside the garage. The position of a downspout alone does not tell you where the discharged water ends up.
Winter conditions add another check. Snow or ice shed from the garage roof can land beside the wall, while melting snow and freezing conditions may reveal drainage problems that are hard to see in dry weather. Mark where snow is piled or shovelled now, and whether that pile would block an entrance, downspout or maintenance route. Do not assume a narrow opening between structures will stay clear or dry, and do not choose a separation based on a universal rule of thumb. If runoff, gutter changes or roof shedding are uncertain, ask a qualified roofing or drainage professional to assess the actual buildings and advise on a suitable route.

Keep garage doors and daily routes usable
Draw the garage as it is actually used. Show each vehicle’s approach and parked position, the full operating area of garage doors, and any side door that opens toward the proposed greenhouse. Test the greenhouse entrance at the same time: an outward-opening door can conflict with a narrow route, while carrying trays, tools or a wheelbarrow needs more than a line on the plan. Include the walk between the house, driveway and garden, plus access to bins, hose connections and stored equipment. Keep everyday movements separate from the greenhouse footprint on the sketch, so a layout that technically fits does not turn a regular garage task into an obstacle.
Think about supplies and temporary items before fixing a position. Pots, compost, watering cans and harvested produce may travel between the garage, greenhouse and yard; a route that works when empty can become awkward when a door is held open or a cart is loaded. If you are considering the Limited-Edition Aluminum Greenhouse with Built-In Storage, use the exact model plan to locate the storage and check how it affects access and space for loading or unloading. Mark where you would set down supplies, retrieve stored items or park a cart temporarily. Make sure those activities do not block a garage entrance or the greenhouse door.
Leave access for cleaning and repairs
Daily circulation is only one part of the space between buildings. Leave a practical way to inspect and maintain the garage wall, eaves, gutters and greenhouse exterior, and to reach surfaces that may need cleaning or repair. A very tight slot can make ordinary work awkward or impossible, and leaves or other debris may be hard to remove. Ask the relevant contractor or manufacturer what access is needed for the specific wall and model rather than copying a gap from another yard. Include existing trim, window operation and downspout service in that check. The aim is a workable maintenance route, not the smallest measured separation.
Allow for seasonal work and occasional deliveries too: bringing in soil, moving replacement parts, clearing a path after snowfall or carrying bulky garden items can require more room than walking through. Put those routes on the plan and consider how they change when the garage door is open or snow is stored at the side. The Spacious Greenhouse listing covers an area range of 47 to 70 m². If you are considering that range, use the exact drawing to check access around both buildings, including the sides farthest from the entrance. Keep maintenance routes distinct from places where you expect to store supplies or set down a delivery.
Review the greenhouse base and garage foundation separately
A greenhouse beside a garage can sit over very different surfaces: soil, paving, an existing slab, a foundation edge or a drain cover. A finished surface does not show what lies beneath it, and being close to the garage does not make its foundation part of the greenhouse support. Do not assume that a greenhouse base should rest on, bridge or be fastened to the garage foundation. If the proposal involves excavation, shared support or a wall connection, ask a qualified building professional to assess the actual site before fixing the layout. Visual alignment between the two buildings is not evidence that their bases are compatible.
Check the selected greenhouse’s base and installation requirements against the surface that is actually available, and note any changes in level across the proposed area. The Prestige Greenhouse with Metal Base listing identifies a metal base, but its suitability for your ground, paving or garage-side foundation still needs assessment. Ask for documentation for the exact size and configuration, and get site-specific advice if work could affect the existing building or buried services. Mark the proposed greenhouse base and garage foundation separately on your sketch, with any uncertain edges or levels clearly labelled. This keeps the support question separate from whether the greenhouse footprint fits.
Check wind exposure and winter snow
Do not assume the garage automatically shelters a greenhouse from wind. The open side, the gap between buildings, the roof edge and surrounding structures all influence what reaches the proposed position; exposure can differ across a small yard. Note the directions from which strong winds usually arrive at the property, and whether the site is open or interrupted by other structures. Where practical, photograph the area after typical windy conditions and record where snow drifts or piles now. This does not calculate a design load, but it gives the manufacturer and a local professional useful context about the exact spot rather than a generic description such as sheltered.
Ask the manufacturer for applicable wind and snow information for the exact model and size, then have a qualified professional relate it to the proposed placement and any approved attachment. If you are comparing the Limited Edition Aluminum Greenhouse with other options, keep the selected size and configuration alongside the information you receive. Check what installation conditions and support details the documentation assumes, and whether the garage changes exposure or snow shedding. Your observations of the yard help describe the location, but they do not replace an assessment of suitability. Resolve any mismatch between the documented conditions and the proposed site before purchasing or building.

Confirm the exact greenhouse dimensions
Once the site has passed the first checks, match it to one exact greenhouse size and configuration. Request a dimensioned plan showing the outside width and length, entrance position, base outline and any projections relevant to the space; verify that the drawing applies to the model you intend to buy. If several sizes or orientations are offered, compare them separately rather than treating a range as one fixed shape. Product photographs can help you recognize a style, but perspective makes them a poor measuring tool. Record the selected configuration beside its outline so later revisions do not quietly change the fit.
The Classic Aluminum Greenhouse listing gives an area range from 3.77 m² to 28.08 m². That range helps you compare listed options, but it cannot tell you whether a particular version clears a garage door, fits between an eave and path, or leaves room for service work. Match the exact dimensions to the site sketch, then confirm orientation, entry and any base requirements with the product documentation. If the listed size and measured space seem close, do not round away a conflict; recheck the measurements and obtain clarification before treating it as a fit.
Compare both layouts on the same plan
Put the same measurements onto two versions of the plan: a freestanding greenhouse near the garage, and an attachment only if the building and model have been approved for that arrangement. For each, mark shade, roof runoff, garage and greenhouse door operation, maintenance access, the base area and winter routes. Use the seasonal diagram and rain photographs as evidence, and label any point that still needs a professional answer. A simple column for confirmed, unresolved and not applicable can keep assumptions visible. Comparing the plans side by side makes trade-offs easier to see: moving a freestanding structure may change its sun exposure, while an attachment introduces a junction that needs review.
If the shape is not a simple rectangle, trace the actual plan rather than measuring only its widest points. When considering the T-Shaped Orangery Greenhouse, use the drawing for the selected version to compare its outline and orientation with the garage, paths and entrances. Walk the routes in both proposed layouts at the times you normally use the garage, and repeat the check after rain or snow when conditions differ. Keep the marked drawings and dated photographs together for any supplier, contractor or local-authority discussion. The comparison should show which layout preserves access and usable growing space, as well as which practical or approval questions remain unresolved.
Frequently asked questions
Is it better to place a greenhouse beside the garage or attach it?
Neither option is automatically better. A freestanding greenhouse avoids a designed connection to the garage, but still needs a suitable position, drainage and maintenance access. Consider an attachment only after checking the exact model information and having the proposed connection reviewed by a qualified professional.
How much space should I leave between a greenhouse and a garage?
There is no universal gap that works for every building and model. Account for the garage eaves and gutters, door movement, greenhouse dimensions, drainage and the room needed for cleaning or repairs. Check the model documentation and any applicable local requirements rather than copying a distance from another yard.
Will a garage make a greenhouse too shady?
It depends on the garage’s position, the season and what you plan to grow. Record shadows across the proposed greenhouse area at different times of day and year, then compare those observations with the needs of your intended crops.
Can water from the garage roof drain beside a greenhouse?
Check where water from both roofs and their outlets actually goes during rain and snowmelt. If runoff reaches the proposed greenhouse area or the space between the buildings, ask a qualified roofing or drainage professional to assess the site before finalizing the layout.
Can I attach a lean-to greenhouse to my garage?
The term lean-to describes a format; it does not confirm that a particular model can be attached to your garage. Check the exact model’s installation information and have a qualified building professional assess the garage and proposed connection. Confirm any applicable local approvals before proceeding.
The best position is not necessarily the smallest gap or the side that looks most sheltered. Look for a layout that preserves useful light, gives both roofs a workable route for water, keeps garage movements and maintenance possible, and has a sound basis for any attachment. If those tests favour separation, a nearby freestanding greenhouse remains a distinct option. If they favour attachment, resolve the building interface with the relevant professionals before committing to the plan.
