
Add a Greenhouse Potting Station Without Crowding Plants
Greenhouse planning guide
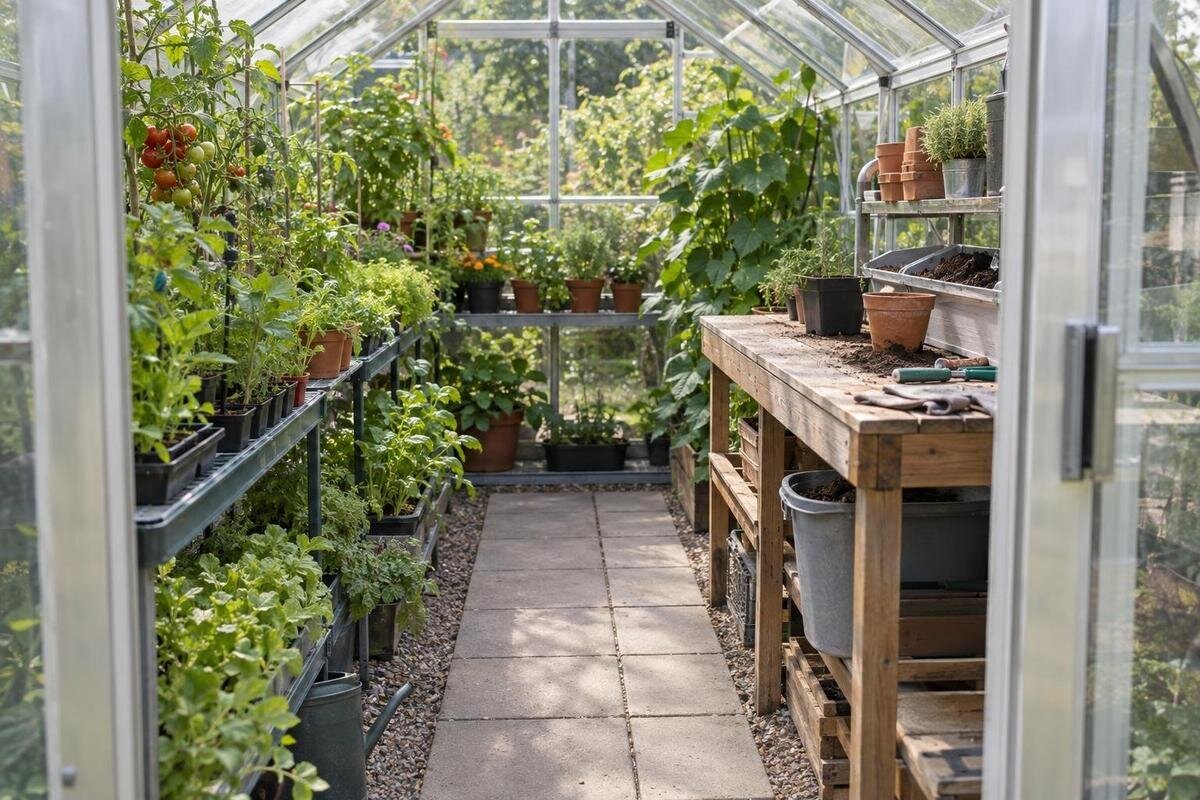
A greenhouse potting station can save repeated trips for tools and supplies, but a bench that looks small on its own may take substantial growing room once its user, storage, trays and open containers are included. Plan the work surface around the tasks you repeat, then draw its full operating footprint and the busiest tray period. This guide focuses on the surface depth, nearby storage and seasonal clearance that let you keep a useful potting area without quietly giving up plant space.

01
Decide which potting jobs the station must handle
Before choosing furniture, list the jobs you will do there: sowing, pricking out, potting on, mixing a small amount of growing medium, labelling, or holding plants briefly while you prepare a growing area. Frequency matters as much as the task. Work you do most weeks may justify a ready-to-use surface; an occasional repotting session may not justify a deep work surface and a permanent footprint. Note the largest tray, pot or container involved in each job, and whether two items need to sit side by side. Also record which items you handle at the same time; that determines how much clear surface the station really needs.
Map the order of each job before settling on furniture. A tray needs somewhere to rest before and after you work on it, not just space on the work surface during potting. If you fill pots and label them after watering, those actions may need separate dry and wet zones, or a container you can move. Do not assign the same space to storage, active work and tray staging if those functions are needed simultaneously. Identify which functions must be ready together and which can take turns. Items used in sequence can share space; a container that stays open while you pot needs its own spot. That distinction often reduces the bench size without making routine work awkward.
Measure the work surface from your largest containers
Measure the trays, tubs, pots and tools you expect to use, including lids or domes that make propagation containers wider or taller. Depth is driven by the item that must sit on the surface and by how you handle it; width depends on whether that item shares the space with labels, pots or another tray. Avoid choosing dimensions from a generic bench image. As an illustrative planning exercise only, draw a 90 cm-wide by 60 cm-deep rectangle, then place your own largest items on it. Those figures are illustrative, not available product sizes or universal standards. Replace them with measurements from your equipment before making a decision.
Leave usable room for the action, not merely the container’s outline. A pot that fits at the back can still crowd the near edge where your hands, a scoop or labels need space. Mark which items are used together, then test those combinations on paper or with boxes at home. The Limited Edition Aluminum Greenhouses catalogue lists floor-area options from 3.77 m² to 28.08 m², but that range does not describe a work surface or the clear growing area left in a chosen model. Use the exact model and size drawing for the fit check; treat the work surface as a measured object, not an assumption based on total floor area.
02
Count the standing and storage footprint
A work surface’s top is only one part of the floor space it uses. Include legs or supports, a shelf or cabinet below it, storage beside the frame, and the space needed to stand, bend, open a container or bring a tray in and out. If drawers or bins slide outward, draw them in the open position too. Use a separate outline for the working area so the plan distinguishes furniture from the person using it. There is no universal clearance formula for every task: map your own normal movements and equipment rather than copying a minimum aisle figure.
Preserve a route to the entrance and growing areas when the station is occupied, not only when it is empty. When comparing the T-Shaped Orangery Greenhouse, listed with area options from 16.52 to 30 m², trace the exact internal outline, door opening and fixed growing areas on the same sketch. The total area alone does not show the uninterrupted bench space or turning room available in a particular size. Add the standing zone and open storage to see whether either extends into a plant row or the route. If so, try a narrower surface, a different location or storage that does not project into the aisle before reducing the space reserved for plants.
Place the station clear of beds, doors and controls
Choose a location where carrying a tray does not require stepping over pots or reaching through a crop. Check the door swing, the route in and out, and access to vents, controls or equipment you need to reach. Consider plants at mature size: young transplants may leave a clear strip that closes once foliage fills it. A wall or end zone can look convenient, but count it as usable only after measuring the surface, the space where you stand and the approach together. If the station is used intermittently, decide where it will go when parked elsewhere and whether moving it would disturb containers or block an entrance.
Check the clear stretch where you intend to put the station against the selected model’s drawing. For the Pyramid Greenhouse, listed with area options from 5.53 m² to 18.9 m², neither the product name nor an exterior photograph establishes how much unobstructed space is available for a bench. Mark supports, doors and fixed growing areas, then measure the proposed location. Keep access points visible on the sketch so a convenient-looking wall position does not hide a conflict. If the work surface fits only by covering a route, an access point or space needed by a mature crop, choose another location even if the bench itself fits within the outline.

03
Plan for the busiest period of tray use
Plan for the week when the most trays are in use, not an average quiet day. Count seed trays, covered trays, pots waiting to be moved and anything that must stay level while you work. Measure each footprint and, where relevant, the height of its cover. Include trays on the work surface and those staged nearby. A propagation container can need more room than its base if a lid or nearby handling space must stay clear. Record which trays need simultaneous access and which can be brought out in sequence. This gives you enough room for a busy period without permanently reserving every surface for seedlings.
Draw two versions of the station: its ordinary working state and the busiest tray period. Use a different colour or hatch for temporary tray space, and do not count that patch as the place where you expect to mix growing medium at the same time. Check whether shelves above or below the surface would block a cover, label or hand movement; test the actual items rather than relying on a shelf description. When considering the Limited-Edition Aluminum Greenhouses with Storage, listed with area options from 5.52 m² to 28.08 m², distinguish storage space from space where trays can remain while you work. The storage wording alone does not establish either fit. Assign each activity its own time or area on the chosen plan.
Size storage around tools and supplies
Organize storage by frequency and size. Labels, pencils, snips and hand tools used at almost every session belong close enough to reach without crossing the work surface; spare pots, empty trays and unopened supplies can sit farther away if they remain accessible. Group small items in containers so they do not claim a permanent patch of bench, and list the actual tubs, pot stacks or bags you intend to keep nearby. Assigning a home before arranging shelves prevents storage from expanding onto the space needed to fill a pot or hold a tray. Keep frequently used items easy to retrieve, rather than placing them behind supplies brought out only seasonally.
Account for how each storage item opens and is reached. A cupboard door, pull-out bin or stack of pots needs room in front of it, while an overhead shelf must not make the active work area difficult to use. Measure any contents that project beyond a shelf or cabinet, and decide whether the floor beneath the counter is for storage or for the person working there. The Bloomcabin Prestige Greenhouse is one model page to compare, but its name does not indicate that a potting cabinet or bench is included. Distinguish the features listed for the chosen configuration from furniture you plan to add, then include the measured storage and its access space in your sketch.
04
Contain potting mix and cleanup supplies
Potting mix, used pots and dirty tools can turn a small station into a cluttered one if there is no containment plan. Set a tray, tub or other removable catch surface beside or under the mixing task, and keep clean pots, labels and seed packets away from the patch where loose medium is handled. Decide where empty containers and plant debris will wait before they leave the station; a bin placed in the aisle can obstruct routine access. These are separate footprints. Mark them on your plan instead of assuming that the counter can also hold every supply and receive all waste.
Cleaning needs some room too: allow space to lift out the catch tub, wipe the surface and set a recently used tool or tray down without covering the seed-starting area. Keep the route to any water source or waste-storage spot clear, and do not assume a hose, sink or drain is present; use the facilities that actually exist. Even when considering the Spacious Greenhouse, listed with area options from 47 to 70 m², give mixing materials and cleanup supplies defined places near the station. Otherwise, they can spread into growing areas despite the larger stated floor area. Include these spots in the station’s footprint rather than treating any open floor space as spare storage.
Use internal drawings to confirm the fit
Use the dimensioned drawing for the exact greenhouse size and configuration, not just overall exterior measurements. A frame, door opening, built-in feature or raised growing area can change the usable interior and available wall length. On a clean copy, outline the inside dimensions and mark fixed elements first; then add your work surface, storage and standing area. If a drawing gives a measurement that is unclear, confirm what points it runs between before you order or build a fitted station. Small differences matter most when a narrow strip is doing two jobs, such as serving as both an aisle and tray access.
The Aluminum Greenhouses range is listed from 3.77 m² to 28.08 m²; a category-wide area span cannot serve as the plan for any one option. Use the size selector to narrow your candidates, then use the selected model page’s internal dimensions to test the complete station footprint. Keep a second outline for the area left to grow in: account for the work surface, base, access and storage rather than subtracting only the top. This makes comparisons fair. A larger nominal area is useful only if its internal shape leaves the specific growing areas and working space you intend to keep.

05
Fixed and movable potting stations
Choose between a fixed and a movable station according to how often you use it and how much floor space plants need at different times of year. A fixed surface is always ready, but the surface and its storage remain in place during a peak growing period. A movable table can be parked elsewhere between jobs only if you have a defined parking spot and can move it without disturbing plants or access. Measure both positions, including anything stored under or beside it. Do not plan to move a loaded or unstable station; move containers separately and choose a setup you can handle safely.
Compare the fixed and movable arrangements within one specific greenhouse size. The Lean-To Greenhouses range has listed area options from 3.69 m² to 14.34 m², so use the exact version’s internal outline rather than assuming every option has the same usable potting corner. Show the table in its working position and, if movable, its parking position, alongside the peak-season tray footprint. If a fixed station takes space needed for plants or access, compare a smaller surface or a movable one before removing planting space. A movable arrangement is useful only if its parking place also fits the plan; shifting the table should not simply move the conflict to another growing area.
Test the plan at full scale
Before setting up the station, mark its footprint on the floor with removable tape or represent it with boxes of similar size. Add the standing area, largest storage container, open drawer or bin, and temporary tray space. Then rehearse a real task: bring in a tray, set it down, fill a pot, find a label and carry the finished plants to their next spot. Test the busy-season version as well as an ordinary day. A floor mock-up exposes collisions that a tidy overhead sketch can hide, especially when the entrance or a growing area is close.
Keep a measurement sheet with the chosen surface dimensions, measured containers, storage footprints and internal greenhouse dimensions used. Mark which tray area is temporary and what must stay accessible while it is occupied. If working or storage space conflicts with plant space or access, change one item and test again rather than hoping the conflict will resolve itself after setup. The finished plan should distinguish the work surface, standing room, storage, travel route, peak tray staging and plant area, showing which uses can share space at different times. Once those boundaries are clear, the growing space you retain is a deliberate part of the plan, not leftover space.
Frequently asked questions
How deep should a greenhouse potting work surface be?
There is no single depth that suits every station. Measure the largest tray, tub or pot you will use, then leave room for the task itself, such as handling labels or filling containers. Test the arrangement with your own items; example dimensions are planning illustrations, not product sizes or universal standards.
How much clear floor space should I leave in front of the station?
Map the space you need to stand, reach, open storage and bring trays in and out. The right working area depends on your movements and equipment, so test it with boxes or floor markings rather than relying on a general clearance figure. Include the route to the door and growing areas.
Should seed trays stay on the potting station?
Only if the work surface can still support the potting task when trays are there. Count the number of trays in use at the busiest point in the season, then decide which need a permanent place and which can be brought to the station as needed. Do not count one patch as both work and staging space at the same time.
Can storage go under the work surface?
It can, if stored items do not take up the space you need to stand or make tools difficult to reach. Include bins, drawers and the room needed to open or remove them in your sketch. If the area beneath the work surface is for a person’s legs, do not also count it as storage.
How can I tell whether my greenhouse has room for a potting station?
Use the internal drawing for the specific model and size, then add the work surface, storage, standing area, route and peak tray space. Compare that complete footprint with the growing area you want to retain. A total floor-area figure on its own cannot show whether the arrangement works.
The right potting station is the one that suits the work you repeat and still leaves room for plants during the busiest tray period. When the work surface, storage, standing area and temporary staging each have a place on the plan, you can see what growing space remains before setting anything up. If those zones overlap, adjust the station or how it is used rather than counting on the conflict to disappear once the greenhouse is full.
