
Planning a School Greenhouse for Classes and Breaks
School greenhouse guide
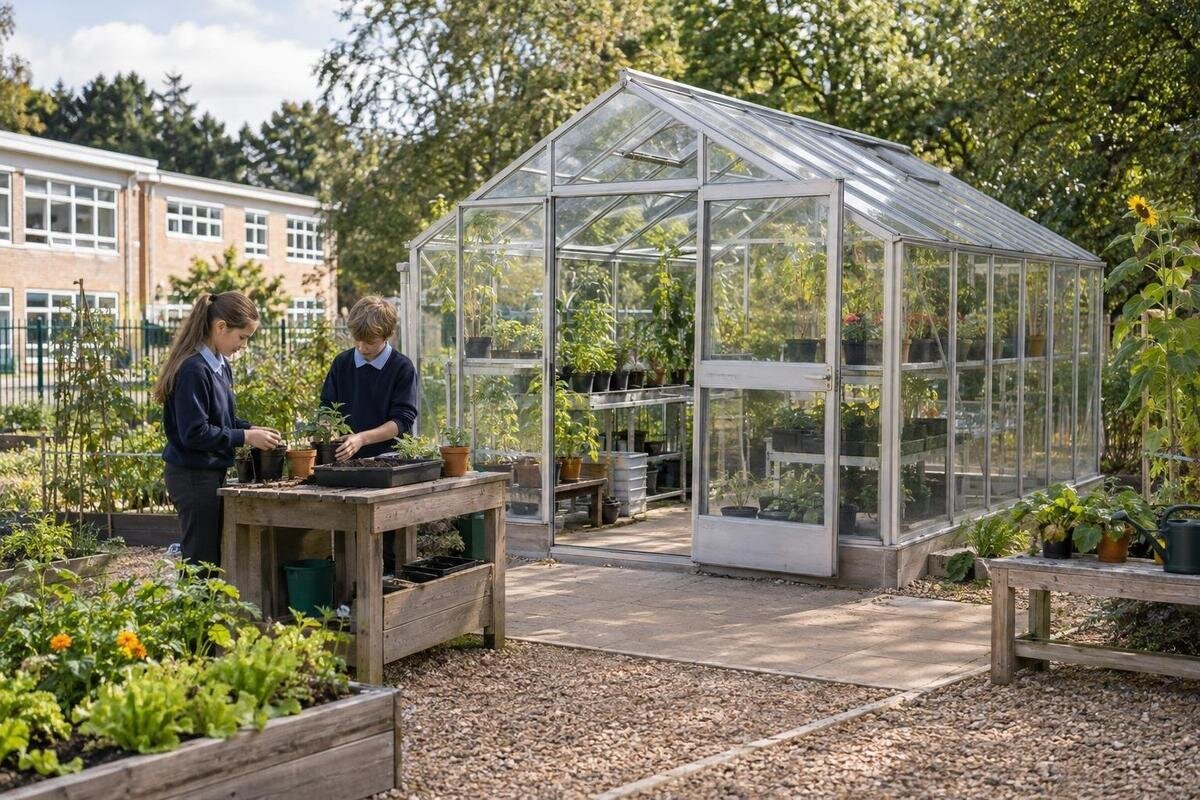
Planning a school greenhouse means planning more than planting lessons. Students need supervised access, while water, ventilation, tools and living plants still need care when classes are not in session. A clear operating plan links the learning schedule to site access, school safeguarding procedures and responsibility during every closure. Use it to define requirements before comparing greenhouse footprints or requesting a project proposal.

School planning checklist 1
Define what students should learn
Decide whether the greenhouse is primarily for starting seedlings, comparing plant growth, practising propagation, studying soil and water, or maintaining crops for another school program. Write down the learning question, age groups, class format and what students will record. A lesson might compare germination dates, measure leaf growth over several weeks or track changes in one crop. Each activity needs materials, a suitable work surface and a clear way for students to record and explain their observations. Allow time for the group to arrive, wash hands, return equipment and record results within the class period. The goal is not to fill every available period, but to know why the greenhouse belongs in a course or club.
Build a term calendar before choosing plants or equipment. Mark when classes can sow, transplant, observe and harvest, then flag exams, field trips and closures that interrupt the sequence. Decide whether the emphasis is repeatable experiments, seasonal growing or maintaining a school garden; each calls for a different lesson frequency and record-keeping approach. Give the greenhouse one main learning purpose and list secondary uses separately. This helps prevent a harvest or display task from quietly replacing planned instruction. Keep an activity outline where teachers and substitutes can find it, with the learning aim, supplies, clean-up steps and instructions for leaving the space ready for the next group.
Estimate the space a class can use
A listed floor area is not a student-capacity figure. Work back from the class format: the number of groups, where the adult stands, whether students use benches or ground-level beds, and where trays, watering cans and personal items wait. Draw the entrance, door swing, work surfaces and a continuous walking route on a scaled plan. Allow one group to enter or leave without crossing another carrying equipment, and reserve a place to set down a class kit. If students move between outdoor beds and the greenhouse, count that transition as part of the lesson. Test the busiest planned session rather than designing around an empty structure or a single learner.
For an initial catalogue comparison, the Bloomcabin Prestige Greenhouse with Metal Base is listed in sizes from 3.77 m² to 28.08 m². That range is a footprint reference only; it does not establish class size, clear circulation area or suitability for a school site. Ask for dimensioned drawings of the configurations under consideration, and confirm which measurements describe the structure and which describe usable interior space. Test a paper layout with staff and, where appropriate, students. Include the largest planned group and ordinary equipment, not just a few empty pots. If the drawing works only when bags, benches or adults are left out, revise the proposed use or footprint.
School planning checklist 2
Choose a site with a clear approach
Walk the route from the classroom to the proposed site during the times it would actually be used. Note thresholds, crossings, busy play areas, delivery routes, drainage, shade and where a supervising adult can see the group assemble. Consider how students will carry trays or tools, where a class can wait if it arrives early, and whether the path can be maintained during the seasons when the greenhouse is open. A route that is easy on a dry afternoon may be less practical after rain, freeze-thaw weather or snow clearing. Ask facilities staff to identify services and maintenance access before anyone marks a foundation area.
The catalogue lists Lean-To Greenhouses in sizes from 3.69 m² to 14.34 m², which can be noted while comparing possible footprints. The name alone does not confirm that a particular school wall or location is suitable. Check the actual siting and installation requirements with the supplier and school facilities team, including clearances, door approach, drainage and maintenance access. Do not select a corner simply because it appears sheltered or close to a classroom. The site plan should show where students queue, where an adult can monitor the route and how equipment reaches the greenhouse without cutting through unrelated school activities.
Plan work areas and movement inside
Lay out the interior for a class moving through tasks, not just for a photograph of neatly arranged plants. Show an entrance zone for boots or trays, planting and potting surfaces, growing areas, tool storage, a place for labels and records, and a route that stays usable when equipment is in hand. Keep wet work where spills can be noticed and managed, and avoid making one group pass through another’s work area. Decide whether classes will rotate between stations or work together; label each station on the plan and estimate how many students and adults occupy it at once. A simple floor plan can expose bottlenecks before equipment is ordered.
If a larger shape is under consideration, the T-Shaped Orangery Greenhouse listing gives a range from 16.52 m² to 30 m². To compare configurations, place benches, bins and door openings on dimensioned plans and trace how each group would move between stations. Account for students waiting for equipment as well as those using it, and check where the supervising adult would stand during each task. Keep shared routes clear in every version. If the design relies on students carrying full trays through a crowded aisle, move the station or change the task. Review the layout with both the teacher leading classes and the staff member responsible for cleaning and plant care.

School planning checklist 3
Confirm the school’s supervision and safeguarding requirements
Use the school’s actual student-safety and safeguarding procedures; do not borrow a supervision ratio or volunteer rule from another organization. Ask the principal or the school board contact responsible for student safety which requirements apply to this activity, including adult-to-student supervision, permitted access, volunteer screening, visitor sign-in and one-to-one contact. Requirements can depend on the age group, activity and school or board policy. Record the decision in the operating plan and compare it with existing procedures for field trips, clubs and outdoor learning. This article cannot establish the standard for a particular school. If the rules are unclear, settle the question with school leadership before inviting a class into the space.
Translate those rules into a routine people can follow: who unlocks the greenhouse, where the lead adult stays, how the group is counted before leaving and who takes over if a staff member is called away. Decide whether students may enter at recess or only with a scheduled class, and how access is controlled outside lessons. Tell substitute teachers and approved volunteers whom to contact, which areas or tools are off-limits and how to report a concern. Use the school’s normal consent, emergency communication and incident-reporting processes. The greenhouse should not create an informal exception to the rules that govern student activities elsewhere on school grounds.
Set rules for tools, water and shared materials
Choose a limited kit that matches planned lessons and assign an adult to issue and return it. Set student-use permissions under school policy, and keep sharp tools, cleaning products and any restricted materials under the controls the school requires. Label approved supplies and place storage so it does not narrow routes or obstruct doors, work areas or access to water. Make a simple check-and-report routine for damaged tools, spills, loose components or a damaged panel, with a named staff member deciding whether an area must close until it is assessed. Review the inventory periodically. Students can reset a station without taking responsibility for judging whether equipment is safe.
Water also needs an owner: decide who fills cans, handles hoses, wipes spills and confirms taps are off, following the school’s procedures. The catalogue lists Limited-Edition Aluminum Greenhouses with Storage in sizes from 5.52 m² to 28.08 m². The listing name and area do not confirm how much equipment fits or where it sits, so request configuration details and check storage against the circulation plan. Keep only program-approved supplies in the greenhouse; any cleaning or gardening products should follow school rules and product labels. Include a handwashing point or a clear route to the school’s designated wash-up area, then state who leaves it clean and ready for the next class.
School planning checklist 4
Make access workable for different students
Access has to work in the occupied layout, not only on a site drawing. Walk from the classroom through the entrance to each activity and check thresholds, turning room, door clearance, surface condition, bench reach and a place to pause without blocking others. Consider what students with different mobility, vision, hearing, dexterity or sensory needs will encounter during the task. Consult the school’s accessibility or student-support staff and, through established school processes, the students and families affected. Build practical adjustments into the activity and timetable; do not assume a student can participate only if another person moves equipment or provides informal assistance.
The catalogue lists a Pyramid Greenhouse in sizes from 5.53 m² to 18.9 m². When comparing its configurations, have the person responsible for accessibility and facilities review the entrance and proposed work areas using dimensioned drawings. Include the approach to each station, space to turn and the position of shared supplies, rather than considering only the main aisle. Check the layout again with benches, pots and tools in place, because they can change the usable route. If a lesson includes standing at a shared table, plan another way to complete the same observation or task where needed, without separating a student from the group.
Assign everyday plant care to named staff
Write daily and weekly care tasks as a calendar, with a named staff owner and a backup, rather than assuming whoever has the class will notice every need. Include plant checks, watering based on the crop and observed conditions, opening or closing vents where appropriate, collecting fallen leaves, cleaning work surfaces and securing the space after use. Students can record observations or complete approved jobs under supervision; staff should retain responsibility for decisions that affect the structure, systems, access or response to damage. Use a dated log to note what was done, what was missed and what another adult must follow up.
The Classic Aluminum Greenhouse is listed in sizes from 3.77 m² to 28.08 m². For the configuration being considered, use its drawings and operating information to plan access to doors and vents, cleaning, routine inspections and any service needs. Assign these tasks separately from lesson preparation so staff know which work belongs to classroom teaching and which belongs to ongoing care. Match the growing area to staff time available in a normal week, not an ideal week with every volunteer present. Add a way to report a failed latch, damaged panel, unusual plant condition or missed check. Review the log periodically and reassign recurring work when necessary, rather than allowing it to become an undefined addition to a teacher’s workload.

School planning checklist 5
Plan plant care before school closures
Treat each school closure as a separate care period. Before the last class leaves, list what is growing, what needs doing, the planned visits, the person responsible, a backup and how the greenhouse can be accessed under school policy. Confirm that visits fit building hours and site-security procedures; do not rely on a key being available or a volunteer being free without checking. Leave a concise handover with the last watering or inspection, the next task, relevant contacts and the process for reporting a leak, ventilation concern or other problem. Include the first day back in the plan, with an adult checking conditions before students resume work.
Choose plants for the longest closure the school expects, rather than relying on a generic description such as low-maintenance. Ask a local horticulture adviser about realistic watering, ventilation and harvest needs for the site, then decide whether those tasks can be covered. If not, simplify the planting or pause production rather than leaving students with a problem on return. The catalogue lists the Spacious Greenhouse in sizes from 47 m² to 70 m². When considering that range, identify which areas would remain planted during holidays and who would care for each one. Match the expected tasks to the time available for approved adult visits, including backup coverage, before deciding how much to plant.
Review the project before committing
Before purchase, give school leadership, facilities staff and anyone responsible for procurement one written brief: the site plan, intended classes, approximate group size, accessible route, storage, supervision and holiday care. Confirm who can approve work on school grounds, which local or board approvals apply and whether professional review or inspection is needed. The answer depends on the site, proposed structure and applicable requirements, so a catalogue page is not evidence of approval or public-building compliance. Ask the facilities team to coordinate with qualified local professionals on siting, base or foundation requirements, drainage and structural or service questions beyond the school’s expertise.
For a size comparison, the catalogue lists Limited Edition Aluminum Greenhouses from 3.77 m² to 28.08 m². A product range does not establish which configuration suits the site or its conditions. Request drawings and project-specific written details for the exact proposal, including installation, access, panels, ventilation, maintenance and other requirements identified by the professionals reviewing it. Confirm how the structure will be inspected, who receives fault reports and who can authorize repairs. Keeping those decisions alongside the teaching, access and break-care plan makes it easier to evaluate the proposal as a school operation, not just a structure to be assembled.
Frequently asked questions
How many students can a school greenhouse accommodate?
There is no reliable class-capacity figure based on floor area alone. Map the door, work surfaces, storage, clear routes and adult positions, then test the largest group you expect to teach. Confirm that the layout works with the school’s supervision and accessibility requirements before deciding how many students can use it at once.
Can students use the greenhouse during recess without a scheduled class?
Set access rules with school leadership and follow the school board’s student-safety procedures. Decide whether students may enter during recess, what supervision is required, who controls access and what happens if the assigned adult is unavailable. Do not assume that being on school grounds makes unscheduled access appropriate.
Who should care for plants during school holidays?
Name an adult who is authorized to access the site, then assign a backup and document the visits, tasks and contact process. Check that the schedule fits building access and closure procedures. Students, volunteers or families should not be expected to enter unless the school has approved that arrangement.
What should a school verify before choosing a greenhouse?
Review the proposed location, route, class layout, access needs, supervision plan and year-round care responsibilities. Ask school facilities staff and qualified local professionals which project reviews, approvals or inspections apply. Request drawings and details for the exact configuration; a catalogue size range cannot establish site suitability or school-use compliance.
How can holiday plant care stay manageable?
Plan for the longest closure, not just a long weekend. Choose planting activities that fit the care visits the school can actually provide, and ask a local horticulture adviser about the needs of the plants and site. If care cannot be covered, simplify the planting plan rather than leaving tasks unassigned.
A school greenhouse works best when student activities and adult responsibilities are designed together. The lesson plan should show who enters, what they do and where supervision happens; the operating plan should name the people who manage tools, plant care, access and repairs. Model the busiest class and longest closure before settling on a footprint. When a substitute or backup adult can follow the routines without guesswork, the greenhouse is better placed to remain a useful part of school learning throughout the year.
