
How to Choose a Drip Irrigation System for Your Greenhouse
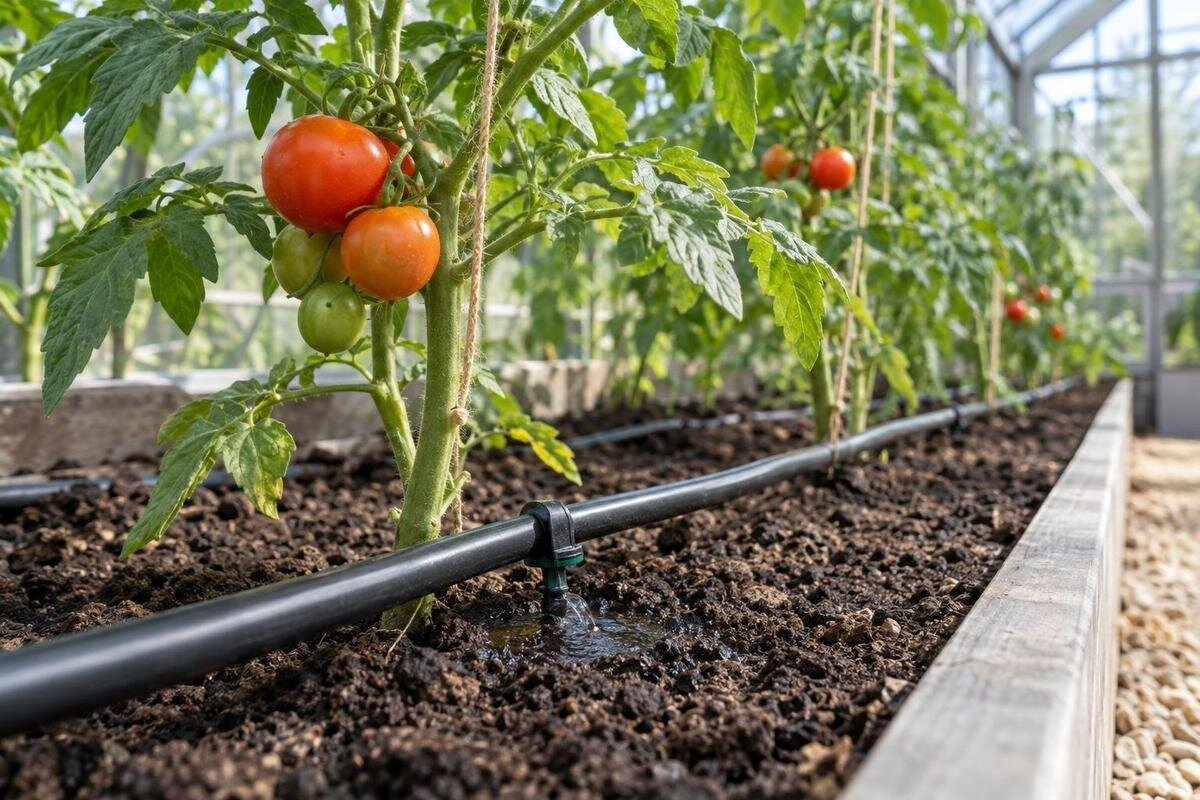
Greenhouse irrigation guide
Drip irrigation is easier to choose once you know what will be watered, where lines can run and what the water supply can deliver. Pots, grow bags and beds may need different outlets or separate zones. This guide explains how to compare emitters, filters and tubing, then check pressure and flow before committing to a layout.

Map the planting before choosing a system
Before choosing emitters, sketch the greenhouse as it will be planted. Mark each bed, container row, bench, water entry point and path you need to keep clear. Record where the water source sits in relation to the planting, not just to the greenhouse wall. A kit selected by greenhouse area alone can still put outlets in the wrong places or leave a far bed with an awkward, long branch. If you are comparing structures as well as irrigation, the listed area for a Classic aluminium greenhouse is only a starting figure; check the chosen model’s dimensions and measure the space actually available for plants. Note which items move between seasons.
Group plants by where they grow and how their growing medium holds moisture. Pots on a bench, grow bags and beds can need different emitter spacing, watering routines and checks, so one unbroken line is not automatically the simplest layout. Mark areas that need regular watering, parts to keep dry, plants with different needs and any temporary containers. This map becomes the basis for counting emitters, estimating tube lengths and dividing the system into zones. It also shows where shut-off points, the filter and line ends must remain reachable without moving every pot. Include likely seasonal changes, so replacing a seedling tray with larger containers does not force a complete redesign.
Choose emitters for pots and grow bags
For individual pots, point-source emitters are often easier to position than a line intended to water a continuous row. Compare each emitter’s stated flow and working-pressure range with the plant and system guidance. One outlet may wet a small, evenly filled pot adequately, but a wide container, mature plant or coarse potting mix can leave dry areas; some arrangements need more than one outlet. Do not choose by plant count alone: container width, root spread, growing medium and drainage openings affect how water moves. After a test, inspect the root zone and adjust outlet positions only as the system instructions allow.
Grow bags, nursery pots and mixed container rows make emitter counts less straightforward. Decide whether an outlet serves each pot, each plant or a cluster only after checking the wetting pattern and the emitter instructions. A row of identical containers is often easier to manage with outlets of consistent flow; if small herbs and larger plants share a bench, separate branches may make different routines easier. Count outlets and fittings, not just plants, and leave enough slack to move a pot without pulling a connection. When comparing the lean-to greenhouse range, plot the intended rows and clear access against the selected model’s dimensions before estimating branch lengths; the greenhouse choice does not set the emitter layout.
Plan drip lines for greenhouse beds
For a continuous bed, compare dripline with built-in outlets against plain tubing fitted with separate point emitters. The right arrangement depends on crop spacing, the product’s outlet spacing and flow, and how the soil accepts water. Check the manufacturer’s spacing or wetting guidance instead of assuming neighbouring outlets will make one continuous damp strip. Water can spread differently in coarser and heavier soils, and surface appearance alone may not show whether it has reached the intended rooting area. If bed widths or crop rows change during the season, favour a layout that can be inspected and adjusted without cutting every lateral.
Draw each bed, crop row and lateral on the greenhouse plan. Keep runs out of walkways where practical, and decide how each bed will connect to the main line before choosing branch lengths. A dedicated branch can make it easier to isolate or maintain a bed, but only if the fittings and water supply support that arrangement. Use the actual dimensions when planning beds in a Limited Edition aluminium greenhouse; a product name or total area does not indicate where the beds will sit. Leave clear access to the plants, emitters and any end-of-line fittings so checks do not require dismantling the layout.
Match the filter to the emitters and water source
Filtration helps protect small emitter passages from particles, but the right filter depends on the irrigation system’s requirements, not a universal mesh number. Check the emitter and filter manufacturers’ instructions for filter type and rating. Ratings may be stated as mesh or microns, and should not be compared without the manufacturer’s conversion guidance. Screen and disc filters are common options, but the source water and the particles it may carry matter. A filter can catch suspended solids; it is not a treatment for dissolved minerals. When planning irrigation for a T-model orangery greenhouse, listed from 16.52 to 30 m², include space to access and clean the selected filter.
Consider what the filter will encounter. A clear-looking supply can still contain material that clogs outlets, while stored or exposed water may bring debris that needs attention before it reaches the laterals. Follow the system diagram for filter placement, and choose a model that can be opened and cleaned as directed. Filters collect material over time and can restrict flow, so inspect them at the manufacturer’s recommended interval and after a change in water source. Cleaning the filter does not replace flushing the irrigation lines: particles may travel farther into the network, and line ends may need separate flushing.

Draw the tubing route and divide it into zones
Trace the system on paper from the water source through the inlet shut-off, filter and any regulator to a main tube, branches and individual laterals. The required parts and their order depend on the system diagram; use components specified as compatible rather than assuming similar-looking fittings will connect. Mark each route, junction, valve and endpoint on the planting map. Keep controls accessible and avoid routes that cross regular foot traffic or are likely to be snagged by tools. A clear route also makes tubing lengths and connection counts easier to estimate. Check the manufacturer’s allowed lengths before assuming that a shorter-looking path will meet the system’s requirements.
Divide the layout into zones when plants have substantially different needs or the total emitter flow cannot be supplied at once. A container bench and a bed may use different media, contain plants at different stages and dry at different rates. Separate controls, where the system supports them, let you adjust one group without changing every outlet’s routine. Do not put a mixed collection on one zone simply to use fewer fittings; if you choose a single zone, confirm that the emitter flows work together and test the wetting results. On a planting plan for an Oasis Pyramid Greenhouse, label each proposed zone and its outlets so you can calculate and check each zone’s combined flow separately.
Check pressure and flow while the system is running
Check the irrigation manufacturer’s minimum and maximum operating-pressure range for the emitters and other components before sizing a zone. Measure pressure while water is flowing: a static reading at a closed tap does not show what remains once emitters are running. If you use a gauge, take a reading at the supply and, where the system allows, near the far end of a representative line. Measure available flow under the same source conditions, then compare it with the sum of the rated flows for outlets running in that zone. A timed collection into a container can help establish supply flow, but it does not replace the product’s pressure requirements.
Long lines, narrow tubing, many fittings, elevation changes and concurrent zones can all affect delivery at the outlets. A regulator can reduce pressure when the supply exceeds a component’s range; it cannot make an inadequate supply deliver more water. Check any stated maximum line length and flow chart for the exact emitter and tubing combination, not just a general kit description. When drawing irrigation routes for a Limited Edition greenhouse with built-in storage, listed from 5.52 to 28.08 m², record the line lengths and outlet counts for each zone. Use these details to check the planned layout against the component limits and available supply.
Confirm tubing and fitting compatibility
Check connection dimensions before buying. Drip systems may specify tubing by inside or outside diameter, and a connector that appears close in size is not necessarily compatible. Compare the tubing size, emitter fitting, thread or barb type, regulator range and filter connections with the parts list and manufacturer’s diagram. If a kit combines components from different makers, ask the seller or manufacturer to confirm the exact combination rather than relying on a general claim such as “fits standard tubing”. Keep a record of product names and sizes so replacement emitters and fittings match the system later.
Plan how the lines will be supported and protected without assuming greenhouse framing is intended to carry irrigation tubing. If you are considering a Bloomcabin Prestige greenhouse, include tubing supports in your bench layout and confirm which fixing methods the greenhouse and irrigation manufacturers permit. Where attaching tubing to the framing is not permitted, consider a route along a bench or on a suitable independent support. Avoid placing joints where they may be kicked, crushed by pots or hidden behind permanent shelves. Keep connections accessible if you expect to rearrange benches or containers, so the tubing can be moved without straining fittings or leaving joints difficult to inspect.
Make filters and line ends easy to service
Plan service access while drawing the layout. Keep the filter, shut-off valves, junctions and any flushing points reachable, and check the system diagram to learn which lines should be opened or flushed during maintenance. An accessible flushing point at the end of each branch can make it easier to see whether water and debris are clearing, provided the manufacturer supports that arrangement. For a Bloomcabin Orangerie, listed from 47 to 70 m², mark these service points on the planting plan. Check that benches, beds and containers will not block access once the greenhouse is fully planted.
Build regular checks into maintenance: look for leaks at connections, clogged or damaged outlets, kinked tubing and filters that have collected debris. Follow the component instructions for cleaning and flushing rather than poking an emitter with an unapproved tool, which can damage its outlet. If lines will be exposed to freezing conditions, follow the irrigation maker’s winterizing directions and drain or store parts as specified. Water left in exposed lines can freeze, so do not assume a system is ready for seasonal shut-down just because it ran well at the end of summer. Check it again before putting it back into use.

Test water delivery before setting a routine
Run a newly assembled zone before planting, then check for leaks, loose joints and outlets that do not discharge. To compare delivery, collect water from several emitters—including one near the supply and one at a far end—for the same test period. Compare what you observe with the rated flow and system instructions. This practical check can help reveal a blocked outlet or uneven delivery, but it does not replace a pressure measurement. Repeat the test after adding outlets, lengthening a line, moving a branch or changing the filter, since each adjustment may affect how the system performs.
Look at where water reaches in the potting mix or bed, not just whether the surface looks wet. In a wide pot, check the root area at more than one point; in a bed, inspect below the surface near the planted row. Adjust emitter placement or group plants differently if one area stays dry while another drains heavily. Repeat the check as plants grow or when the medium, season or water source changes. There is no universal timer duration: set a routine around observed moisture and plant needs, then keep checking that the water is reaching the intended root area.
Compare the complete kit with your layout
Before ordering, compare the complete parts list with your drawing. Confirm the filter rating, any required regulator, tubing sizes and lengths, outlet type and count, branch connectors, shut-off parts and any end-flushing parts the layout needs. Check the operating-pressure range, maximum line length and total zone flow against the exact components supplied; do not assume that “kit” means every fitting or adaptor is included. A useful system diagram should show how the parts connect and identify any limits that matter for a multi-branch greenhouse layout. Check whether a timer is included or separate, but do not treat one as a substitute for suitable pressure and flow.
Count pots and beds by zone, and record the emitter model, rated flow and planned branch length beside each count. Compare that list with the manufacturer’s layout table, then identify what remains unknown: supply performance, compatibility with your water source or a fitting not named in the package. If the published diagram does not cover your proposed number of outlets or tubing run, ask the irrigation supplier to confirm it before purchase. Choosing from a checked parts list is more reliable than adding pieces by appearance after installation, when connections may be harder to reach.
Frequently asked questions
Do all emitters need the same flow rate?
Not necessarily across the whole greenhouse. Using similar emitters within one zone can make flow easier to plan, but different zones can suit different plants. If you mix emitter types or flow rates, check that the system is designed for that combination and test how evenly it waters.
Can pots and beds share one irrigation zone?
They can if the emitter layout, flow and watering needs work together. Pots and beds often use different growing media and dry at different rates, so separate zones can make adjustment easier. Test the wetting pattern before relying on a shared routine.
Which filter rating should I choose?
Use the rating specified for your emitters and filter, taking the water source into account. Ratings may be given in microns or mesh; use the manufacturer’s guidance rather than comparing the numbers directly. A filter catches particles but does not treat dissolved minerals.
How can I check whether my water supply is adequate?
Compare the supply’s pressure and flow while the system is running with the requirements for the active zone. A reading at a closed tap is not enough. Check the manufacturer’s limits and the total rated flow of the emitters in that zone.
Will a timer fix uneven watering?
No. A timer changes how long water runs, but it cannot correct a blocked emitter, unsuitable operating pressure, mismatched components or poor outlet placement. Find and address the cause of uneven delivery, then set a routine based on the plants and growing medium.
A well-chosen greenhouse drip system is a coordinated layout, not just a collection of outlets: the emitters suit the pots or beds, the filter matches the water and emitter requirements, and each zone receives the pressure and flow it needs. Once delivery and root-zone wetting have been tested, you have a practical basis for setting watering routines and adjusting the layout as plants and planting arrangements change.
