
A Practical No-Dig Setup for Greenhouse Beds
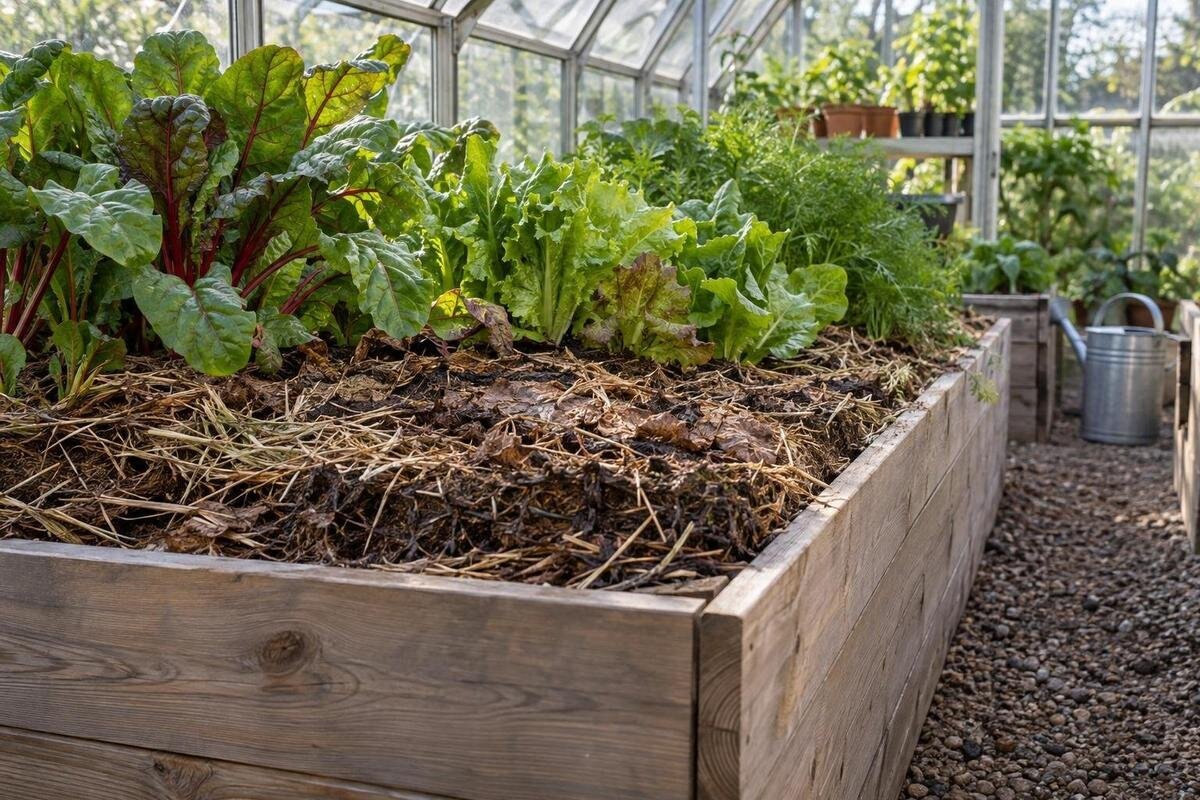
GREENHOUSE BED GUIDE
No-dig gardening keeps soil disturbance low by leaving the bed in place and adding suitable material at the surface. In a greenhouse, that approach depends on a little more planning than an outdoor bed: direct rainfall is excluded, paths compete with planting space, and the same soil is used repeatedly. A sound setup begins with a measured layout and an honest look at the existing ground. From there, make additions deliberately, keep records, and manage moisture at the roots rather than relying on the appearance of the surface.

01
What no-dig means in a greenhouse
In a no-dig system, each growing bed stays in a defined place. Instead of routinely spading or rototilling the whole surface, you apply suitable organic matter at the top and let roots, soil organisms, and time gradually incorporate it. You still sow, transplant, weed, harvest, and check the soil; no-dig is not a no-work method. It also does not forbid a small, careful adjustment where a crop needs one. The aim is to reduce repeated disturbance and maintain a stable surface between plantings, not to follow a rule that nothing can ever be moved. Planting holes and shallow hand weeding are compatible with that aim; routine whole-bed turning is the practice being avoided.
That distinction matters under permanent cover. A greenhouse roof excludes direct rainfall, so beds depend on water you supply or deliberately collect and deliver; do not treat the weather outside as a watering schedule. The same footprint may hold successive crops, which makes clear bed edges useful for tracking where material went and where roots grow. Keep walking on paths, not on growing soil. This reduces avoidable compaction and makes watering, weeding, and harvesting more consistent. No-dig is a way to organize ongoing soil care, not a one-time layer that removes the need for it.
Map permanent beds and paths first
Measure the usable interior at the level where beds will sit, rather than planning from the greenhouse’s listed area alone. Mark door openings, structural posts, vents or windows that affect access, water points, storage, and places where equipment will be set down. Draw paths before choosing bed widths: each bed should be reachable from a path without stepping into growing soil. Test reach with the people who will garden, not only by looking at a sketch. If a bed feels too wide from one side, add access on the other or split it. Leave turning room at the ends and enough clear path for the watering can or harvest bin you actually use.
Outline the beds and note which crops need more room or may shade others as they grow. Measure the bed surfaces separately, because that total—not the greenhouse floor area—is used to estimate surface additions. When comparing Limited-Edition Aluminum Greenhouses with Storage, listed from 5.52 to 28.08 m², include storage and access in your sketch rather than allocating the entire footprint to growing. Verify the interior clearances and openings for the layout you are considering. A sketch with paths and crop zones helps you decide whether beds should be narrow or divided into smaller areas. Keep the map for later crop changes without shifting the permanent beds.
02
Assess the soil before covering it
Before adding anything, record what the existing soil is like and how it has been used. Note whether it drains after watering, puddles, forms a hard crust, contains rubble, or has roots from previous crops. Look at plant history too: recurring poor growth, disease problems, and previous additions are useful clues, though none identifies a cause on its own. If the bed is made from unknown fill or may have been contaminated, do not assume a compost layer makes it suitable for food crops; arrange an appropriate assessment before planting. Keep separate beds separate in your notes if their conditions differ, and consider photographing them so you can compare changes later.
A soil test can establish a baseline before amendments make the picture harder to interpret. Follow the testing laboratory’s instructions for collecting and labelling samples; sample distinct bed areas separately rather than combining unrelated ground. Use results alongside crop plans and material information to decide whether a pH or nutrient change is actually needed. Yellowing leaves, weak growth, or a poor harvest can have more than one cause, so appearance alone is not proof that more compost or fertilizer is required. If you are comparing Bloomcabin Prestige Greenhouse options, listed from 3.77 to 28.08 m², mark the proposed beds on your site plan and keep the soil findings associated with each area.
Prepare an in-ground bed with minimal disturbance
Clear loose crop debris, labels, strings, and weeds before laying a new surface layer. Deal with persistent weeds while they are visible; burying an established, living weed under a light layer is not a reliable control plan. For a healthy crop, cutting plants at soil level can leave roots to break down in place and avoid pulling soil out with them. Remove roots or residue where disease, pests, or the next crop make that the prudent choice. Keep infected plant material out of a bed unless a reliable disease-management recommendation says it can be safely composted. Remove any loose ties or clips that could get mixed into later surface additions.
Once the bed is clear, level only the surface irregularities that interfere with sowing or planting. If you have found severe compaction, poor drainage, buried waste, or a hard layer that stops roots, correct the underlying problem before settling into a no-dig routine. Adding organic matter over a barrier does not make the lower soil functional. Where substantial correction is needed, do it before planting, then restore clear bed and path boundaries. Afterward, avoid repeated digging and keep feet, wheelbarrows, and stored supplies on paths so the prepared root zone stays as undisturbed as possible.

03
Starting beds over lawn or a hard floor
Starting over lawn needs a separate weed plan. Cut or remove existing vegetation where it will interfere, and identify perennial weeds before a bed frame or growing layer hides them. A surface barrier may help only if its material is suitable for food-growing, will not impede water movement, and can break down as intended; check guidance for the particular material instead of choosing an unknown sheet. Build the planting layer with enough continuous rooting space for the intended crops, not just enough to cover grass. Inspect the edges too, where surviving lawn can grow into a new bed.
A sealed or paved floor is not in-ground soil: roots cannot use the ground beneath it, and excess water needs somewhere appropriate to drain. A contained bed or planter needs a crop-appropriate root volume and an arrangement that prevents persistent ponding. When considering Spacious Greenhouse layouts, with listed areas from 47 to 70 m², distinguish the space available for containers from the suitability of the floor beneath them. Do not assume that the floor provides drainage or can support every intended container; verify drainage and load limits with the relevant supplier or a qualified professional where uncertain. Include paths and access in the plan before deciding how much of the floor will become planted space.
Choose surface materials by source and need
Treat compost and other organic materials as inputs that need a source and purpose, not as interchangeable topcoats. Choose a mature, clean material with known ingredients and a clear intended use; the word compost alone does not establish its suitability. Ask the supplier what went into it and look for analysis or application guidance where available. Consider the existing soil test, previous additions, and crops planned before deciding whether the bed needs more organic matter. Compost is not automatically a stand-alone growing medium. If the source or contents are unclear, do not use it simply because it is inexpensive or nearby.
Keep amendments distinct rather than mixing several products together without a reason. A material can add organic matter and nutrients at the same time; that does not mean every bed needs the same product or amount. Follow reliable crop-specific guidance, test results, and supplier directions. No-dig changes the placement of inputs—at the surface rather than routinely mixing them through the bed—but does not remove the need to monitor soil condition. For a planned T-Shaped Orangery Greenhouse, listed from 16.52 to 30 m², use your bed map to record which areas receive each material. Note the source and application date alongside the crop plan so later changes are easier to assess.
04
Calculate additions from bed area
Calculate quantities from the area you will actually cover. For a rectangular bed, multiply its length by width to get square metres; divide an irregular outline into simple shapes and add their areas. Multiply the total bed area by the layer depth in metres to get cubic metres, then multiply by 1,000 for litres. For example, two beds each 1.2 m by 3 m have a combined area of 7.2 m². A hypothetical 2 cm layer is 0.02 m deep: 7.2 × 0.02 = 0.144 m³, or 144 L. This demonstrates the arithmetic only; it is not a crop-specific application rate.
Use the supplier’s stated volume unit and check whether it describes loose or compressed material; different bag sizes do not cover the same area. Measure the growing surface, not the greenhouse footprint or the outside edge of a frame. If you are comparing Classic aluminum greenhouse sizes, listed from 3.77 to 28.08 m², subtract paths and other unplanted areas before using your bed measurements in the compost calculation. Keep separate totals for beds that will receive different materials or depths. Save the calculation and compare it with the amount you actually used. This gives you a useful application record without adding an unmeasured extra amount by habit.
Apply a surface layer without burying crops
Spread a planned addition evenly over the bare soil surface rather than digging it in. Leave stems, crowns, seed rows, and small seedlings uncovered; a material piled against plants can obstruct sowing or make young growth harder to inspect. If the bed is already planted, apply between rows or around plants with enough care not to rake through roots. Keep paths free of compost so future top-ups do not gradually narrow access. When transplanting, open only the small hole needed for each plant and avoid turning a whole bed just to mix a surface layer.
Match the timing to the crop: bare beds between plantings are easier to cover evenly, while a growing crop needs careful application around stems and foliage. Water after spreading only as needed for the bed and crop, not automatically because the surface material looks dry. Access matters here as well as at planting time. If you are considering Lean-To Greenhouse options, listed from 3.69 to 14.34 m², check your proposed layout for places where reaching between rows would be difficult. If foliage prevents an even application, wait until the crop is cleared rather than forcing material through dense growth. Mark completed applications on the bed map to avoid treating the same area twice.

05
Watering under a permanent cover
A roof excludes direct rainfall, so outdoor rain does not automatically wet soil beneath the greenhouse. Check below the surface near the active root zone, not just the top layer: a dry crust can sit above damp ground, and damp-looking mulch can cover dry soil. Compare several points, including bed edges and centres, because watering and drying can vary within the same structure. Use a hand check or suitable moisture tool consistently, and adjust to soil type, crop stage, and current conditions rather than copying a fixed calendar. If a watering point serves only part of the beds, inspect areas beyond its reach as well.
Apply water in a way that reaches the root zone without leaving the surface persistently wet. If it runs away, pools, or follows cracks, pause and investigate how the bed is taking water before simply adding more. Recheck after a new organic layer because surface drying can change, but do not treat mulch as a replacement for watering. When planning beds in one of the Limited Edition Aluminum Greenhouses, listed from 3.77 to 28.08 m², mark water points and the areas they serve on the interior plan. Identify separate watering zones where crops or soil conditions differ. A brief watering log can help you distinguish a change in soil moisture from a change in crop demand.
Maintain beds between crops
At each crop change, clear weeds, dropped fruit, and diseased or pest-affected material as appropriate. Leave healthy roots in place only where they will not carry a problem into the next crop or obstruct planting. Keep the bed outline fixed, but add material only when a measured need, suitable crop guidance, or a settling surface justifies it. Write down the crop, amendment source, date, and amount; compare those notes with test results and plant performance before making another change. That record helps separate soil issues from problems caused by water, pests, shade, or crop choice.
Between crops, review structure and moisture as well as fertility. If the soil still supports the planned crop and test results do not call for a change, there is no need to add a fresh layer by habit. Rotate crop families where practical and keep plant-health concerns in the record; permanent beds do not require permanent planting of the same crop. If you are planning a Pyramid Greenhouse, with listed areas from 5.53 to 18.9 m², map the beds and paths before assigning crops, then retain that layout in your records. Comparing successive plantings in the same bed is easier when its boundaries and application history remain clear.
Frequently asked questions
Can I start a no-dig bed over lawn?
Yes, provided you deal with living grass and persistent weeds before they are hidden, and create a planting layer with enough rooting space for your crops. Check that any weed barrier is suitable for food-growing and will not impede water movement. A thin layer over established weeds is not a dependable fix.
Do I need to dig before the first crop?
Routine whole-bed digging is not part of a no-dig approach. First assess problems such as severe compaction, poor drainage, or buried debris; address them before planting if they prevent roots from growing. After that, limit disturbance to the small areas needed for sowing or transplanting.
How often should I add compost?
There is no universal schedule or amount. Base additions on soil-test results, crop needs, the material’s contents, and what you have already applied. Use mature material with a known source, follow suitable supplier or crop-specific guidance, and avoid adding more simply because a new season has begun.
Does rainfall reach greenhouse beds?
Direct rainfall does not reach beds beneath a permanent greenhouse roof. Plan to check moisture and water according to the soil and crop rather than the weather outside. Only count on collected roof water if it is deliberately directed to the beds.
Can I put a no-dig bed over concrete?
A bed over concrete is a contained growing system, not an in-ground bed. It needs enough rooting space for the intended crops and a suitable way for excess water to drain. Verify drainage and any load limits with the relevant supplier or a qualified professional if you are unsure.
A practical no-dig setup gives each greenhouse bed a lasting place, with access for planting, surface additions, and watering. Resolve underlying soil problems before covering them, then make changes in response to the crop and the condition of the bed. Over successive plantings, measured additions and root-zone moisture checks become part of ordinary care—not a reason to dig up and rebuild the growing area every season.
