
Can a Greenhouse Be Installed Near a Pond?
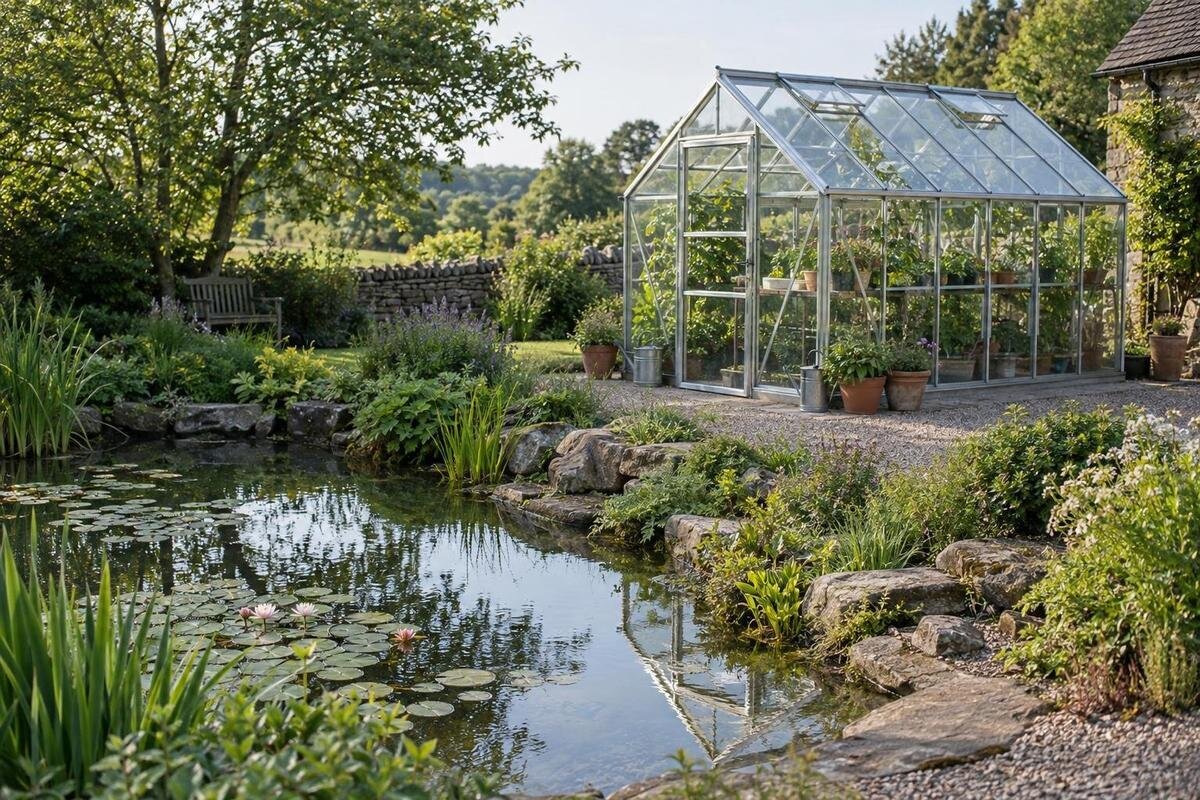
GREENHOUSE LOCATION GUIDE
Yes, a greenhouse can be installed near a pond, but the water’s edge alone cannot tell you whether the location will work. Check the bank and surrounding ground, where overflow and runoff travel, how sunlight changes through the seasons, and whether people, equipment and materials can reach both the greenhouse and pond. A scaled sketch, site photographs and observations after rain or spring thaw make these questions easier to assess before you choose a model.

01
Can a greenhouse go beside a pond?
Being close to water is not, by itself, a reason a greenhouse cannot be installed, but it is not proof that the ground is ready either. A pond may have a gradual shore, a retained bank or placed fill; the visible edge does not reveal what supports the surface below. Assess bank condition, water movement, sunlight and access separately instead of applying a customary distance from the pond. A dry-looking strip can still have site-specific limits.
Conditions can change after heavy rain, when pond levels rise or during spring thaw, so a dry-weather visit is only a snapshot. Note where pond maintenance takes place, how water is managed if you know, and whether people need a clear route to the edge. A nearby pond does not guarantee better growing conditions or replace planned watering. The location may work if the site and the chosen model’s requirements check out; proximity alone does not decide.
Draw the pond and proposed greenhouse to scale
Draw a plan to scale from measurements taken in the garden, rather than estimating from a photograph. Mark the pond’s usual waterline, the upper edge and foot of its bank, any retaining feature, nearby buildings, fences, trees, gates and established paths. Add the proposed greenhouse’s outside outline, orientation and entrance approach. Then mark where people reach the pond and any equipment or maintenance area that must stay accessible. Include beds, water points and regular walking routes. Use separate marks for water and bank, so a measurement to the waterline is not mistaken for one to the bank.
Use stated area only for an early comparison; it is not an outside-dimension drawing or a measure of the space needed around the structure. The Classic aluminum greenhouse range is listed from 3.77 to 28.08 m². To compare configurations, draw each one’s confirmed exterior dimensions on a separate copy of the garden plan, keeping the scale and existing features unchanged. Label the entrance and distinguish the greenhouse footprint from the surrounding working space. This lets you see whether a different position or orientation preserves the route to the pond without confusing a smaller growing area with a better overall fit. Measure from clearly identified points on the bank, rather than using an unlabelled distance to “the pond.” Keep any uncertain measurements visible on the sketch so they can be checked before the plan is used to choose a model.
02
Check whether the bank is stable
Look for changes that deserve attention: fresh slumping, cracks near the upper bank, washed-out soil, new depressions, leaning posts or retaining features, exposed roots, or an area that stays soft after nearby ground dries. Note where and when you see each sign, especially after substantial rain or a thaw, and take dated photographs from the same viewpoints. Record earlier repairs, excavation or placed fill if you know about them. These are clues to discuss, not a diagnosis; grass cover or a firm-looking surface cannot prove that the ground is stable below. Avoid excavating to test the bank yourself.
Where the bank is steep or retained, the ground has moved, or its construction is unknown, get advice from a qualified geotechnical or other site professional before settling on a foundation. Share the site plan and photographs, and ask the greenhouse supplier or installer for the exact requirements of the model being considered. The aluminum lean-to greenhouse range is listed from 3.69 to 14.34 m², but those areas do not establish whether the pondside ground can support the proposed installation. If a lean-to is on your shortlist, mark both the intended wall and the bank on the same plan so the assessment concerns the actual proposed position. Keep a dated record of your observations rather than relying on memory. Distinguish what you have seen, such as a crack or soft patch, from what remains unknown about the ground beneath it.
Map overflow and runoff routes
Map where water already goes before drawing a final position. Look at the ground above the pond, paved areas, existing downspout outlets, low spots and any visible pond outlet or overflow point, if present. After heavy rain or snowmelt, note channels, ponding, deposited leaves or sediment, and water marks on the bank; photograph them from a safe place. Record where flow moves and whether the pond level changes. Distinguish water arriving from the surrounding garden from water leaving the pond, since either route may affect the proposed footprint, path or staging area.
Overlay the greenhouse outline and access paths on this drainage sketch. Do not treat a low strip or an established overflow route as spare space simply because it is dry when you measure. Also avoid assuming that raising or filling ground, or directing water elsewhere, is a simple fix: a change could affect the pond or other parts of the garden. If the plan would alter drainage, the bank or the pond itself, consult a qualified pond or drainage professional and check applicable local requirements before work.

03
Record seasonal sunlight and shade
Check sunlight independently of the pond. Shadows from a house, fence, mature trees and nearby structures shift during the day, and tree cover can change across the growing season. Make a seasonal shadow record using observations or photographs at different times; a single midday visit cannot show the whole pattern. If trees lose their leaves, record the difference between leaf-on and leaf-off conditions. Note whether the proposed site receives light when your intended crops need it, and whether shade also moves over nearby beds or paths.
Mark the changing shade on the scaled plan, then place a candidate greenhouse outline over the area you are considering. The Limited Edition aluminum greenhouse range is listed from 3.77 to 28.08 m²; confirm the exact exterior dimensions of your preferred version before comparing it with the sunlight record. Label observations by date and time so a shaded corner in one photograph is not mistaken for a permanently shaded site. Compare alternative positions using observations from similar times, and note gaps in the record rather than filling them with assumptions. If your growing plans extend beyond summer, include the relevant seasons in that comparison. The aim is to understand the light available at the proposed footprint, not simply whether the pond looks sunny. Do not count on pond reflections to supply dependable light or warmth.
Check the delivery and installation route
Trace the delivery route from the place a vehicle can stop to the proposed greenhouse site. Measure gates and narrow passages, and mark turns, steps, slopes, soft ground and overhead obstructions. Identify a staging area that does not block pond access or rely on a soft section of bank. Check the route in wet conditions as well as dry ones, since a path that seems usable on a sunny day may be harder to cross after rain. Ask the supplier or installer what access and handling space the exact configuration requires.
The T-model orangery greenhouse is listed with area options from 16.52 to 30 m², but those figures are not delivery-package dimensions or proof that a route is wide enough. Confirm how the chosen greenhouse is delivered and assembled, whether equipment needs to reach the site, and where components can be placed temporarily. Separate these questions on your plan: the route for arriving materials, the unloading or staging space, and access to the assembly area. A passage may look adequate on its own while the turn into it remains unresolved. Walk the full route and record each pinch point, including any section shared with pond maintenance. Discuss these constraints with the supplier or installer before choosing the configuration. A clear final location is of little use if materials cannot reach it without obstructing pond access or crossing unstable ground.
04
Keep pond and greenhouse maintenance access
Plan how you will reach the greenhouse after installation, not only how it will be delivered. Leave a practical route to its entrance with garden tools, a hose or a watering can, and consider where you would stand to clean accessible exterior surfaces or inspect the structure. Preserve any route needed to maintain the pond, reach equipment if present, or work along the edge. If one path serves both jobs, mark it clearly and check whether stored items, planting or garden furniture could narrow it.
Keep outside access separate from the growing area inside the greenhouse. A bench arrangement that fits indoors does not guarantee room to move outside or reach the pond. The Pyramid greenhouse range is listed from 5.53 to 18.9 m²; confirm the selected model’s exact outline and entrance position before drawing the routes needed for routine work. Trace a few specific tasks on the plan: carrying a watering can through the entrance, bringing tools to the pond, and reaching the greenhouse exterior for cleaning or inspection. Mark where these routes overlap and where you would need to put items down. This makes the access assessment more useful than an empty margin drawn around the structure. Keep the routes visible when adding beds or furniture later, so space reserved for maintenance does not quietly become part of the planting or seating layout.
Plan the whole garden layout
Consider the greenhouse as part of the garden’s working layout, not as an isolated object beside the water. Mark vegetable beds, compost, potting space, tool storage, water sources, seating and routes between the house, greenhouse and pond. Check whether its position would divide a well-used path, make pond maintenance awkward or block a view you value. Think about the everyday movement of pots, soil and harvested produce, too. A direct route between the greenhouse and beds may matter more than putting the structure as close to the pond as possible.
If you want storage within the greenhouse, include that need when comparing options rather than assuming it can be added later without affecting the layout. The limited-edition aluminum greenhouse with built-in storage is listed from 5.52 to 28.08 m². That range does not describe storage capacity; confirm the selected configuration’s outside dimensions and storage layout. List the items you expect to keep there and consider which belong near the growing area and which need convenient access from the garden. Then trace the route from that storage space to the beds and pond work areas. This comparison helps you assess whether the proposed position suits everyday tasks, rather than treating storage as an isolated feature. Keep pond maintenance access on the plan, and do not sacrifice a useful working route merely to place the greenhouse closer to the water.

05
Match the model and base to the site
Compare actual model outlines rather than choosing by name or area alone. A freestanding greenhouse and a lean-to use the garden differently; if you are considering a lean-to, confirm that the intended wall and approach suit that model and leave the pond-side route usable. For either form, check the manufacturer’s information for the exact version, including its base and foundation requirements. A product category does not confirm that its listed models can be installed on a particular bank, and a nearby wall does not resolve questions about the ground.
The Prestige greenhouse with a metal base is listed with a metal base and stated areas from 3.77 to 28.08 m². Neither the base description nor the area range establishes suitability for your soil, bank or changing water levels. Keep the model’s installation requirements and the assessment of the ground as separate parts of the comparison, then bring them together for the proposed position. Ask the supplier or installer to explain what the selected base requires, and share your bank and drainage observations with a qualified site professional. Make sure both discussions refer to the same configuration and location on your plan. If you move the outline to another part of the garden, identify that change rather than assuming the earlier assessment still applies. A base option is not a remedy for shifting ground or an unresolved drainage route.
Review the proposed site before choosing a greenhouse
Bring the scaled plan, seasonal shade notes, photographs and drainage observations together before deciding. For each proposed position, record which checks are complete, which remain uncertain and which reveal a conflict. Include bank condition, overflow, exact outside dimensions, delivery, working access and the pond’s maintenance needs. Keep observations separate from assumptions so an appealing location does not appear more settled than it is. Uncertainty is not a reason to guess at a setback or foundation. If the bank shows movement, high water reaches the proposed footprint, or an important route would be blocked, pause and resolve the issue or compare another position. This keeps the decision based on the conditions you have recorded rather than open space alone.
Compare the final plan with the precise greenhouse configuration under consideration, including the surrounding space you have reserved. The large orangery greenhouse is listed with an area range from 47 to 70 m²; use confirmed exterior dimensions to assess its outline, orientation and access on your property. Keep alternative plans alongside one another so you can identify the reason for preferring a particular location: fewer conflicts with water routes, a workable delivery approach, suitable seasonal light or better access for garden tasks. If a model or position changes, update the affected parts of the plan before making the choice. A smaller model may reduce the area needed, but it does not solve an unstable bank or an overflow conflict. Choose the combination of location and configuration that meets the site’s practical needs, rather than the one that sits closest to the pond.
Frequently asked questions
Is there a standard distance to keep between a greenhouse and a pond?
There is no universal distance that can be chosen from the pond alone. Bank condition, water levels and overflow, the proposed foundation and access all affect the decision. If the bank is steep, retained or showing signs of movement, have the site assessed before settling on a position.
Will a nearby pond improve growing conditions in a greenhouse?
Not automatically. A pond does not guarantee suitable sunlight or replace a planned watering system. Check the light at the proposed location and consider the needs of the crops you intend to grow rather than counting on the water to create a growing benefit.
How can I check whether pond overflow could reach the site?
Note water levels, flow paths and any water marks after heavy rain or snowmelt, and photograph the site from a safe place. Dry-weather appearance alone can be misleading. If the likely flow route is unclear or the plan would change drainage, ask a qualified pond or drainage professional for advice.
What should I do if the pond bank looks soft or has cracks?
Treat those observations as a reason to pause, not as a diagnosis. Take dated photographs and note whether the signs change after rain or thaw. Before choosing a foundation, share that information with a qualified site professional and confirm the selected greenhouse’s requirements with its supplier or installer.
Does a lean-to greenhouse make pondside siting easier?
Not by itself. Its position still needs to suit the bank, water routes and garden access, and the intended wall and installation requirements need to be appropriate for the model. Check its exact outside dimensions and do not treat its shape as evidence that the ground is suitable.
A pondside greenhouse can be practical when the bank is suitable, water has a clear route, the seasonal light fits the growing plan, and the garden still allows installation and upkeep. Decide from a scaled plan and observations in different conditions, then compare that evidence with the exact model’s requirements. If the only available position interrupts overflow or restricts pond maintenance, choose another location rather than forcing the fit.
