
How Much Clear Space Is Needed Around a Greenhouse?
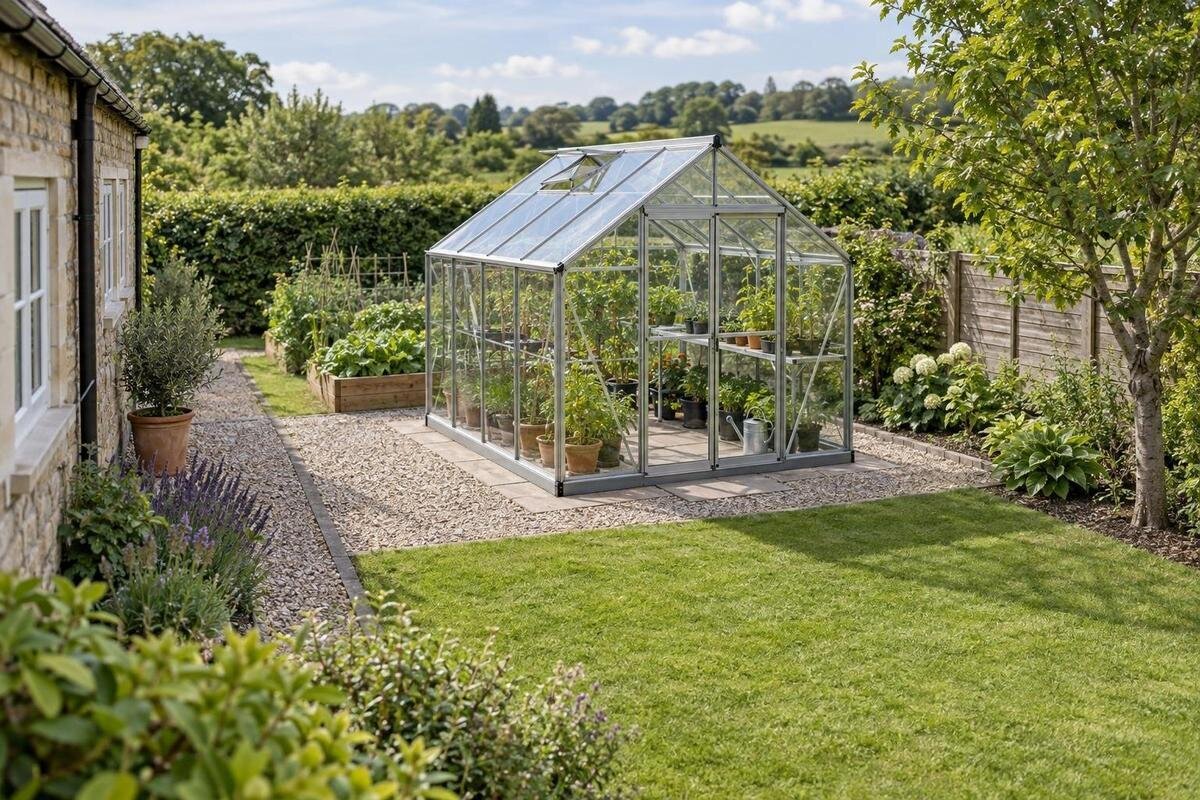
Greenhouse site planning
A greenhouse can fit on a site and still be difficult to assemble, clean or maintain if its perimeter has not been planned. Measure the full outside outline, then map the routes and working positions you will need for installation, doors, cleaning, repairs and surrounding garden work. There is no universal clearance that suits every model or property: use a scaled sketch and verify model-specific requirements and any local site restrictions separately.

Site-planning checks 1
There is no single clearance number
No single clearance number suits every greenhouse and property. The space you need depends on the selected model’s outside outline, where its doors and movable parts operate, how it will be assembled, and which exterior surfaces or equipment you must reach later. A useful maintenance path is different from any required separation from a boundary or another structure. Do not treat an access strip as proof that a location meets applicable local requirements, and do not assume every side needs the same broad gap. Begin with the work you plan to do around the greenhouse, then check separate property, municipal and manufacturer requirements for the chosen site. These questions answer different things, so label them separately on your sketch.
Think in zones rather than a magic number: the permanent footprint; temporary space for delivery and assembly; a route to doors, drains or controls; and a working position for cleaning or repairs. Some jobs need only a walking route; others need room to stand, turn, carry tools or use access equipment. Mark which areas need to stay clear year-round, seasonally or only during installation. This avoids both an oversized empty ring and a narrow gap that exists on paper but cannot be used. If one side will be difficult to reach, decide how you will maintain it before finalizing the location.
Measure the full outside footprint
Use the plan view for the exact greenhouse model and configuration rather than relying on an advertised floor area. Record the full outside length, width and outline, including any base edges, roof overhangs, gutters or other projections shown in its documentation. Mark where downpipes or drainage outlets sit, and note doors or panels that move outside the wall line. A floor-area figure does not establish the outside dimensions or shape, particularly for a design with several projections. If a listing gives only a general size range, ask for the drawing that matches the version you are considering before measuring access.
Draw the outline to a consistent scale on graph paper or in a simple site-planning app, and write the scale on the page so later measurements translate back to the ground. Add fences, walls, garden beds, existing paths, trees, sheds, paving, utility points and changes in level that could affect movement. Label dimensions and mark door positions so you can build the working routes around real obstacles. The Spacious Greenhouse listing states area options from 47 to 70 m²; that range alone cannot tell you the exact side lengths or outer projections of the version you choose. Use its precise footprint drawing, then add access space where a task calls for it.
Site-planning checks 2
Separate installation space from permanent access
Installation can call for more room than routine gardening. Map the route from the place where components will be unloaded to the greenhouse, including gate openings, tight turns, steps or surface changes that could make carrying items difficult. Ask the installer what space is needed to position components and work around the structure during assembly; requirements can vary with the model and method. If a fence, raised bed or established shrub sits close by, note whether it can be moved temporarily and who will do that work. Do not assume the finished garden path will also serve as an adequate assembly area.
Show temporary staging separately from permanent clearance on your sketch. A delivery route and place to set down parts may be needed for a short period, while the final layout can use that same ground for a path or bed once work is complete. The Classic Aluminium Greenhouse range lists area options from 3.77 to 28.08 m², but area figures do not specify component handling or assembly space for a selected model. Ask for those needs before the site is cleared, and confirm whether the installation crew expects access along particular sides. This keeps short-term construction needs distinct from permanent site requirements.
Allow access for cleaning and repairs
Plan cleaning access by naming the surface and how you will reach it. Consider the outside of panels, corners, lower frame edges and any gutters or drainage points shown for your model. A gap that lets a person squeeze through may still leave no practical place to stand with a cloth, brush or other chosen tool. Mark a continuous route only if the tasks require one; otherwise show the specific working positions and how you reach them. Keep a clear route back to the door so cleaning does not depend on stepping over beds, stored pots or hoses. Note where a hose or bucket will sit, too.
Allow for less frequent jobs such as checking joints, replacing a damaged component or clearing debris from a drainage point. Ask the supplier or installer how external surfaces and upper areas are intended to be accessed, and how much room their method needs; do not plan to stand on the greenhouse frame or roof. When considering the Lean-To Greenhouses, identify which maintenance tasks require outside access and which can be completed from inside the selected configuration. Mark a place to set down tools or removed parts without blocking the access route. This helps distinguish a usable working space from a gap that merely separates two structures.

Site-planning checks 3
Map doors and moving panels
Plot every door and movable panel in both its closed and open positions, using the selected model’s drawings. For a hinged door, its sweep takes up ground area; for other opening types, check what space they need and where the person using them must stand. Include handles and operating hardware if shown. A door that clears the greenhouse can still block the perimeter path when open, collide with a fence or leave too little room to carry a tray through. Plan where you will stand while opening it and how another person can pass, if that matters in your garden.
Use the opening information for the exact version, not an assumption based on a product family name. If you are comparing the Limited Edition Aluminum Greenhouses range, ask for the selected configuration’s door positions and any movable vents supplied with it, then draw the space they occupy when open on the site plan. Mark external equipment that could project into the route, but include it only where confirmed in the documentation. During a ground test, place markers where open doors would extend and keep pots, bins and tools in their usual positions. Check whether you could still pass comfortably or carry equipment along the path.
Connect the perimeter to garden paths
Perimeter access works better when it joins the paths you already use. Draw the route from the usual garden entrance to the greenhouse door and to the outside surfaces you maintain. Test it against the equipment you actually use: a wheelbarrow, cart, hose reel, compost bin or large pot. Allow for turning and for holding an item while the door opens, rather than choosing a path width from habit. A route that ends at a corner or forces you across a planting bed may be technically clear but frustrating to use. If garden beds change with the seasons, mark their working position as well as the bare ground.
Complex outlines need more than one overall length and width. For a T-shaped plan, draw each branch and the spaces between them, then check whether a path can reach the corners without narrowing at a bed, wall or fence. The T-Shaped Orangery Greenhouse page identifies a T-shaped greenhouse, but its selected model’s dimensions still need to come from the specific plan. Treat the perimeter around each projection as a separate working area where needed. This makes it easier to see which route is continuous, where tools can turn, and whether a bed or path should be repositioned before installation.
Site-planning checks 4
Check boundaries, services and drainage
Measure site constraints on the same drawing as the greenhouse. Mark the boundary using reliable property information, along with fences, walls, decks, trees and any access corridor you need to keep usable. A practical service path is not a substitute for checking the requirements that apply to the property. Before committing to a position, confirm relevant local rules with the municipality and review any property documents or site agreements that govern the space. Do not borrow a setback number from a different greenhouse or property: the required separation, if any, is a separate question from how much room you need to work.
Add utilities and water management: taps, hose connections, exterior outlets, drains, downpipes, irrigation lines and service controls. Show where runoff is directed and whether a discharge point would cross the path, collect beside a bed or interfere with an existing drain. Identify underground services before any excavation through an appropriate local locating service or qualified professional; a sketch alone cannot establish where they are. When placing the Pyramid Greenhouse outline on your plan, keep existing service points visible rather than hiding them beneath the drawing. Mark where you would stand to reach each tap or control, and check whether its access route remains usable with nearby doors open.
Plan for seasonal changes around the site
Photograph the proposed site from the approach, each side and the garden entrance, then label the images to match your scaled plan. Include trees, fences, eaves and nearby structures that may affect usable access. A seasonal shadow diagram can show when parts of the perimeter are shaded or crossed by shadows from buildings and vegetation; compare more than one season rather than relying on a midsummer snapshot. Record when paths are used and whether seasonal planting or branches make a route narrower. Photos are especially useful when an installer cannot inspect the location in person, but they do not replace measured dimensions.
Plan for changing ground conditions as well as light. Mark where you usually clear snow, where the cleared material is piled and which route must remain usable after a storm. Note leaf fall, spring thaw, wet patches and any routine yard equipment that occupies the perimeter at certain times of year. If you rely on a hose or outdoor tap, show its seasonal storage position too. When comparing the Limited-Edition Aluminum Greenhouses with Storage options, mark the storage access shown for your selected configuration. Trace the route for moving seasonal tools in and out, including somewhere to set them down without blocking the path. Use dated site photographs to record these changing conditions.

Site-planning checks 5
Compare freestanding and lean-to layouts
Freestanding and lean-to layouts create different access questions, but neither has a universal clearance band. With a freestanding greenhouse, you may be able to route a path around several sides; decide whether each face needs routine access before reserving space all the way around. Beside a wall, the rear side may be difficult to reach, so check how that side will be assembled, inspected and cleaned before accepting a narrow slot. The wall itself, door approach, drainage and nearby service points all belong on the drawing. Base the comparison on real work routes, not only the footprint.
Compare candidate locations on the same site sketch: rotate or shift each outline, then trace door access, maintenance positions, utility access and garden paths. Include the Bloomcabin Prestige Greenhouse in this comparison using the dimensions of the option you are considering. For each position, note which existing paths remain usable, which beds would need moving and whether a working area would be shared with another garden task. If the route fits only in one orientation, check that position against the other site constraints. Comparing these changes side by side helps you judge the effect on the whole garden rather than choosing solely by greenhouse floor area.
Test the marked layout before ordering
Lay out the footprint and routes on the ground with string, removable markers or chalk, without digging or fixing anything. Mark door swings and areas where you expect to stand while cleaning; walk the route with the wheelbarrow or other largest item you routinely move. Try the approach from the garden entrance, pause where you would operate the door, then check the passage with its open position marked out. Turn at the corners and reach every service point on your plan. Test with beds and stored items in their usual places, not in an artificially cleared garden. A physical test often exposes a pinch point that a scaled drawing makes easy to overlook.
Before finalizing the layout, check that you have the exact product dimensions and configuration; the installer’s temporary access and staging needs; access for cleaning and repairs; and a route that works with your garden equipment. Confirm boundary and utility questions with relevant local sources, and mark drainage and seasonal snow-clearing space separately from permanent paths. Keep the annotated sketch with site photos so the supplier or installer can answer questions against a specific plan. If a necessary task cannot be done from the proposed route, change the orientation, revise the garden layout or compare another footprint before work begins.
Frequently asked questions
Is there a standard clearance around a greenhouse?
No single figure suits every model and property. Working space depends on the tasks you need to do and the selected greenhouse dimensions. Any setback or other site requirement is a separate question; check with your municipality and review guidance for your exact model.
Do I need a path on every side?
Not necessarily. Plan access for assembly, cleaning, repairs, door operation and garden routes. If a side will be close to a wall or fence, work out how it can be maintained rather than leaving a narrow gap that is difficult to use.
How wide should a greenhouse path be?
Base it on the widest tool or item you need to move, plus room to walk, turn and operate the door. Measure your wheelbarrow or cart and test the route on the ground. No single width works for every yard and task.
How much room is needed during installation?
Ask the supplier or installer about the delivery route, temporary staging and assembly access for your selected configuration. Mark those needs separately from permanent maintenance space; some room may be needed only while the greenhouse is being assembled.
Can a greenhouse sit close to a fence or wall?
That depends on site requirements and whether the greenhouse can be assembled and maintained there. Check boundary requirements, then confirm access to panels, gutters, drainage points and the wall-facing side. A lean-to still needs model-specific planning.
Treat clear space as a working plan, not an arbitrary ring around the greenhouse. A measured outline, door openings, task-based routes and seasonal site notes show where access is useful and where it would go to waste. Test that plan with the exact model dimensions and the tools you actually use; the result should leave you able to maintain both the greenhouse and the garden around it.
