
Planning Greenhouse Bench Space for Spring Seed Trays
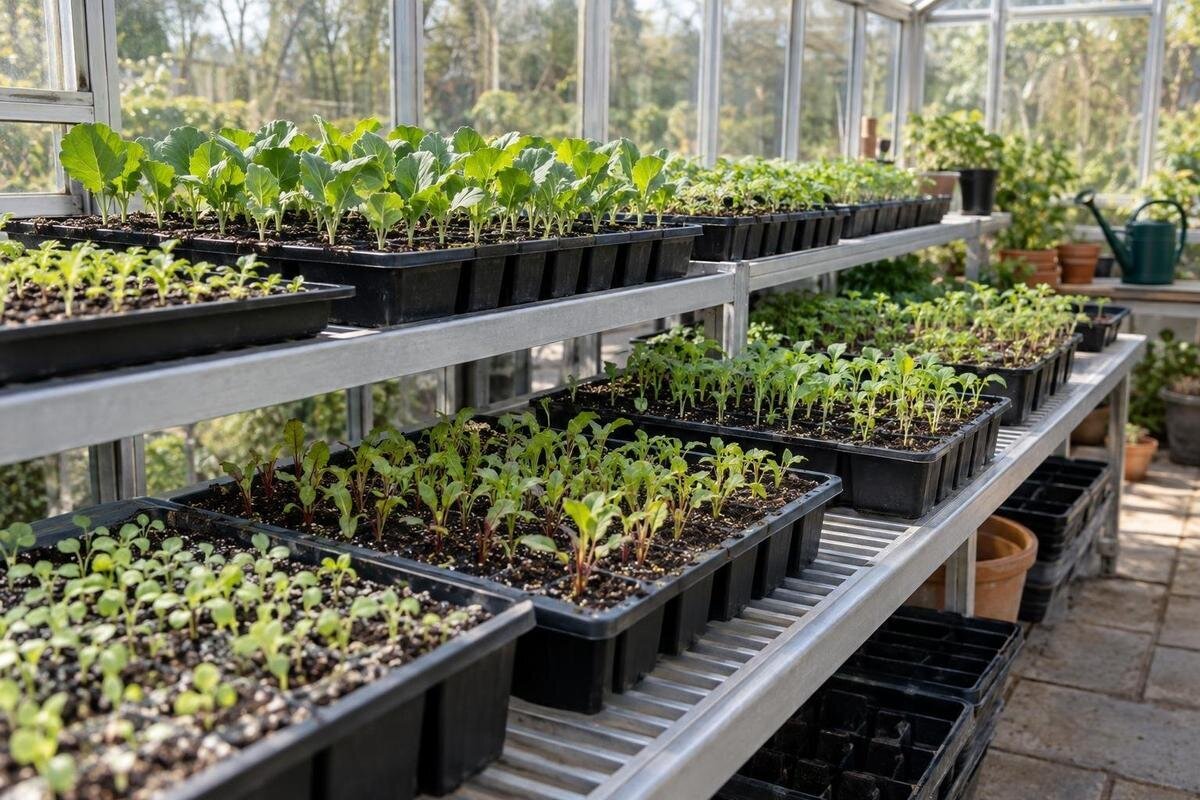
Greenhouse planning guide
Spring seed-tray demand is easy to underestimate when each sowing is planned on its own. An early batch may still occupy the bench as later batches arrive, and some lots change footprint when seedlings are moved into individual pots. The useful figure is the maximum number of trays on the bench at the same time, not the total sown over the season. Map that peak against the surface you can actually use, with enough room for the work around the trays. The method below uses your tray measurements, crop-specific timing and propagation records rather than a one-size-fits-all calendar.

Find the week with the most trays on the bench
Treat each propagation batch as an interval in which it occupies bench space. A new sowing does not make an earlier lot disappear: when both are on the surface, both count. The busiest point may come well after the first sowing or during a brief handover when one group is nearly ready to move and another has just arrived. Adding all spring seed packets together, or looking only at sowing dates, will not reveal this overlap. The planning target is the day or week when the greatest number of trays is present at the same time. Even a short crossover matters if the bench is close to full, so record it rather than smoothing it away.
Define occupancy consistently before counting. Include each physical tray kept on the bench, whether it holds freshly sown seed, emerging seedlings or plants growing on; do not count each cell as a separate tray. Exclude a batch only for the period it is genuinely somewhere else. A shelf, heated propagator or other surface is separate capacity only if it exists in your setup and is available when needed. If a batch is split across surfaces, split its record too. Give separate sowings or varieties their own rows even when they use the same tray type, because their dates and exit points may differ. Use batch names that you can match to both the calendar and the bench.
Measure the bench surface you can actually use
Measure the bench, not the greenhouse footprint. For every surface on which trays will sit, record the clear length and depth between the edges you can actually use. Note interruptions from posts, legs, fixed equipment, sinks or sections that need to stay clear. If the top is irregular, mark separate usable zones instead of treating its outline as one continuous rectangle. For modular benches, record each section and any gap, rather than relying on a nominal total length. A small patch separated by an obstruction counts only if a tray can be placed and handled there as part of your normal layout. Measure the bench in its planned position; moving it later can change which surface and access space are genuinely available.
Draw the measurements to scale or label a sketch with units, then mark surfaces for growing, staging and other work. If comparing a new structure, the Classic Aluminum Greenhouses listing gives a range from 3.77 m² to 28.08 m². That listed area helps compare size options, but it is not a bench-top measurement. Check the information for the exact size under consideration and add only surfaces you can actually use to your sketch. If you are considering more than one bench arrangement, draw each separately rather than adding its dimensions together in advance. Avoid converting square metres straight into a tray count: a long, narrow bench and several short benches can have the same area but different packing options.
Use the full footprint of each tray setup
Use the outside dimensions of each tray or carrier, not the area of its cells or the number of seeds. A rim, capillary mat or carrier holding several inserts can make the working footprint larger than one insert. Measure the length and width of the exact setup that will sit on the bench, and note the tray type beside each batch in your record. Use the same unit for every measurement, and be clear whether your dimensions describe an insert, its outer tray or a group of containers. If a group later changes from one shared tray to several plug trays or pots, enter that later arrangement as a separate phase. The batch is the same, but the count and footprint may no longer be.
Keep the tray footprint separate from handling clearance. A close-packed arrangement may fit on paper but leave no practical way to lift a tray, read its label, water it or reach the back row. There is no universal gap that suits every bench and workflow; test your own trays with the tools and access you use, then mark any space reserved for handling. Do not count a position that depends on a tray hanging over the usable bench edge. The Lean-To Greenhouses listing spans 3.69 m² to 14.34 m²; when comparing an exact size, verify its dimensions and internal layout rather than treating listed area as bench depth. Record your chosen clearance so it does not get counted as tray space later.
Calculate tray capacity for each bench zone
For a clear rectangular zone, calculate capacity by orientation. Divide the usable bench length by the tray length, keep only whole trays, do the same for depth, then multiply the two whole-number results. Repeat after rotating the trays and use the orientation that physically fits. For example, a clear 120 × 60 cm bench with 40 × 25 cm trays holds 3 × 2, or six, in one aligned arrangement; turned the other way, it holds 4 × 1, or four. This example assumes the whole rectangle is available and has no separate access strip. Keep bench and tray measurements in the same units, and never round a fraction up to a whole tray.
Calculate interrupted or different-depth sections separately, then add only the capacities that can operate at the same time. Total area divided by tray area is a rough cross-check, not a packing plan: leftover strips may be too narrow for a complete tray. If tray sizes are mixed, sketch their actual rectangles together; adding the separate maximum capacities can overstate what fits side by side. When comparing options in the Limited Edition Aluminum Greenhouses range, use the same tray footprints to draw a bench layout for each option. Count placements from those drawings so your comparison reflects the arrangement of the trays, rather than separate theoretical totals.

Give every batch an entry and exit window
Create a row for each batch or distinct sub-batch. Record the crop or variety, planned sowing date, number and type of trays, date the trays are expected to arrive at the bench, and likely date they will leave it. Bench entry is not always sowing day: if the batch starts on a different surface, count it when it actually reaches this bench. If a group changes to a larger container here, add a new phase with its new footprint and occupancy dates. Split staggered sowings into separate rows instead of assigning one exit date to the whole crop. Keep the planned dates separate from actual dates so you can see where the estimate changed.
Set expected entry and exit dates using crop-specific instructions, seed-supplier guidance and records from your own previous batches; do not assign one fixed duration to every crop. Use a range when timing can vary and note why a move may happen early or late. Once the calendar shows the tray peak, use that requirement when comparing a greenhouse. The T-Shaped Orangery Greenhouse range is listed from 16.52 m² to 30 m². Compare the planned bench layout for each option with the batches expected to occupy it during the busiest period. Update estimates with actual dates through the season so next year’s plan starts from observations rather than assumptions.
Add overlapping batches to find the peak
Transfer the entries to a calendar with one column for each day, or each week if batches rarely move within a week. For every period, sum the trays whose bench-entry date has arrived and whose exit date has not. A made-up example shows the arithmetic: batch A occupies six trays in weeks 1–3, batch B four in weeks 2–4, and batch C five in weeks 3–5. In week 3, the total is 6 + 4 + 5 = 15 trays, the peak in this example. The counts and weeks are illustrative only, not sowing advice. The calculation counts occupied trays, not the total cells, seeds or plants produced.
Choose a time scale that catches the handover you expect. If one lot leaves on Tuesday and another arrives Wednesday, a weekly total can disguise the exact maximum; a daily ledger shows it. If one batch leaves and a replacement arrives on the same day, record whether they actually share the bench at once. For a batch whose tray count changes, split it into phases so the calendar does not carry the old count forward after the change. If you are considering a Pyramid Greenhouse, use the busiest date in your calendar to select the batches that must fit in its proposed bench layout. Keep their tray types and footprints alongside the peak count for that surface-layout check.
Set aside room for work, access and storage
Not all usable bench space is available for trays. Decide which areas need to stay clear for lifting, watering, labelling, inspecting seedlings and setting down tools or empty containers. A patch used for potting cannot also be counted as full of trays at the same moment. Draw the route to the bench and mark fixed equipment or obstructions that reduce access. If a task can happen at another time or on a separate surface, record that arrangement explicitly; it may free the bench for trays at other times. The goal is to account for the work space you need, not to leave an arbitrary percentage unused.
Separate growing, temporary staging and storage in your sketch, particularly if one surface serves several roles. If you are considering the Limited-Edition Aluminum Greenhouses with Storage, mark any area you plan to allocate to storage separately, so it is not counted again as propagation bench space. For a shared potting surface, schedule the task as well as the trays: it may be available to plants for part of the week and needed for work at another time. A note such as “clear for handling” explains what the space is for and shows what could be adjusted if the peak does not fit.
Plan for dates that may shift
Timing estimates are not exact, so calculate a practical range rather than hiding uncertainty in a vague buffer. For batches with variable move-out dates, note an expected date and a later plausible date based on crop guidance and your own records. Recalculate a typical case and a conservative case; the second should include identifiable delays, not every imaginable problem. If one batch’s longer stay overlaps the next sowing, that difference may set your peak. If dates are stable, adding a large extra percentage may inflate the bench requirement without a reason. Make the uncertainty visible in the calendar so you can see which batch drives the higher estimate.
Do not solve a crowded calendar by assuming seedlings can leave the bench sooner than is appropriate for their next stage. Instead, identify which dates are firm, which are estimates and which batches can be staggered within the recommended sowing window. If reviewing the Bloomcabin Prestige Greenhouse, compare your typical and conservative tray layouts using measurements for the specific option. Note which delayed batches account for any extra bench space in the conservative layout. After spring, record which moves ran early or late and revise the corresponding estimates; observations from your own batches are more useful than carrying forward the same unexplained allowance every year.

Compare the peak with the greenhouse layout
Once you know the peak tray count and the working clearances, translate the layout into bench length and depth. Add the usable zones to your greenhouse sketch alongside access, storage and other planned uses. Check the arrangement at its busiest point, not only on an average day. If it fails, identify why: overlapping batches, an underestimated tray footprint, a surface that is not actually available, or work space counted twice. A shortfall for one brief overlap may need a different response from a shortage that lasts for weeks; diagnose the limiting factor before changing the plan.
Compare greenhouse choices on the same basis: dimensions for the exact option, usable bench positions and space retained for access and tasks. The Spacious Greenhouse listing covers options from 47 m² to 70 m². Use that range to identify sizes to compare, then draw the proposed benches within each layout. Keep the same tray demand and working requirements across the drawings so you can see whether an option resolves the shortfall identified in your plan. A larger area is not automatically a more efficient tray layout. Recheck both typical and conservative peaks before settling on the amount of bench space.
Test the layout before spring sowing begins
Before the first spring batch arrives, test the plan at full scale where possible. Set out actual trays on the bench, or mark their footprints and reserved work zones with removable tape. Try the tasks you have included: can you reach labels, lift a tray without shifting another, and use the access route in the sketch? Check the busiest layout, not just one row. If the plan relies on a separate shelf or staging spot, confirm it is genuinely available on the dates shown. This rehearsal can reveal an obstruction, awkward gap or overcounted surface before the overlap peaks.
Keep the calendar by the bench and update entry, move and exit dates as they happen. Record changes in tray format or number when plants move on, as well as any week when access or work space was the limit. At the end of spring, compare the observed peak with the estimate and carry those observations forward. If capacity falls short next time, review batch size, sowing dates within the crop’s suitable window, alternative staging or bench layout; do not make the arithmetic work by assuming a crop can move on sooner.
Frequently asked questions
How do I calculate peak greenhouse tray demand?
Give each batch bench-entry and exit dates, then add the trays present on each date. The highest total is your peak demand. After finding it, compare the tray arrangement with measured bench zones and the space you need for access and other tasks.
Can I use the greenhouse’s listed area as its bench capacity?
No. Listed area does not give you the dimensions or arrangement of usable bench surfaces. Check measurements for the exact size you are considering, then compare those surfaces with your tray layout, access route and other planned uses.
What if a batch changes from seed trays to pots?
Record the new arrangement as a separate phase, with its own tray or container count and footprint. Count both arrangements only if they are on the bench at the same time; otherwise, use the dates when the original trays leave and the new containers arrive.
How much bench space should I leave clear?
There is no universal percentage. Mark the space your routine needs for lifting trays, watering, labelling, setting down tools and reaching plants. If a task happens at a different time or on another surface, record that arrangement rather than subtracting the same area permanently.
What should I do if the peak does not fit?
Check for overlapping dates, changed tray footprints or surfaces that are not actually available. Within the crop’s recommended sowing window, you might stagger or reduce a batch, use a genuinely available separate space, or revise the bench layout. Do not crowd trays or shorten a growing stage just to match the calculation.
Spring bench planning works best when the calendar and the physical layout are calculated together: one shows how many trays overlap, while the other shows how they fit alongside the work you need to do. Measure the actual tray setups, mark every usable bench zone and compare expected occupancy with what happens through the season. The highest realistic overlap, not the total number of trays sown, is the useful target for planning spring propagation.
