
Starting Dahlia Tubers in a Greenhouse Before Outdoor Planting
Dahlia-growing guide
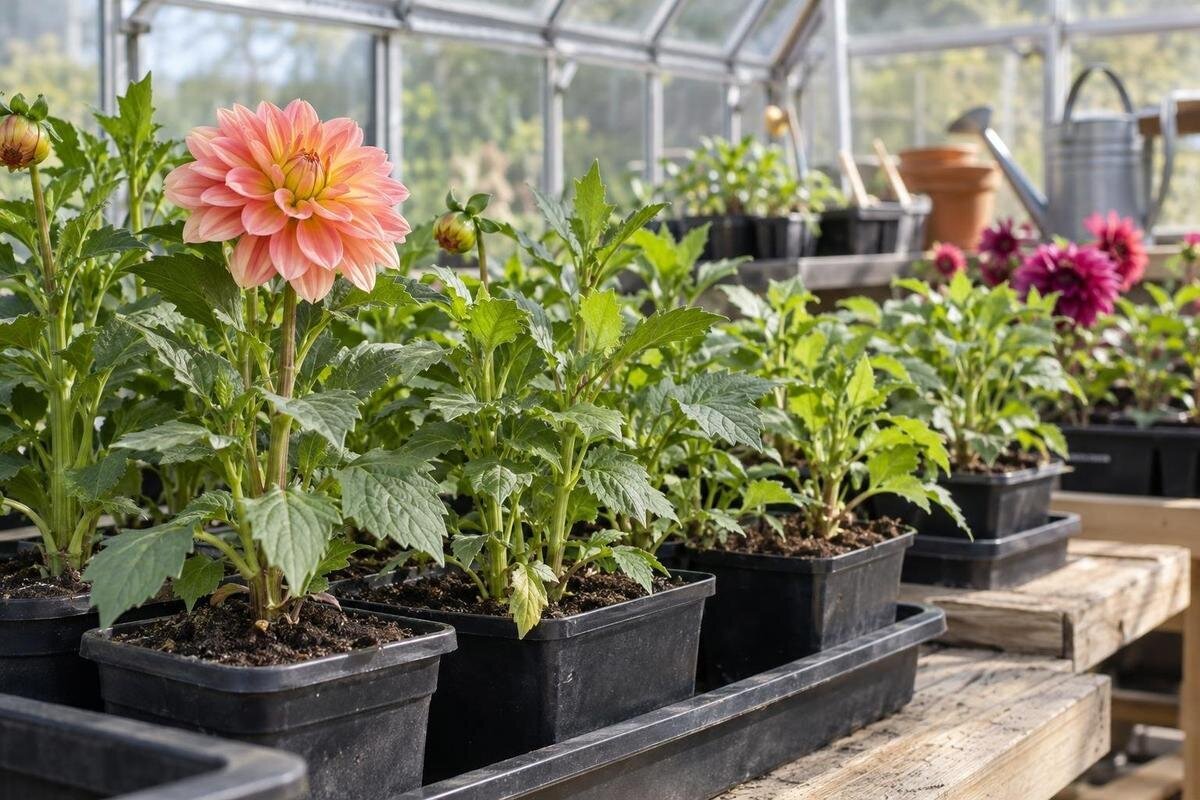
Starting dahlia tubers in a greenhouse can give them time to root and produce shoots before outdoor planting, but an early start only helps if the plants receive enough light and stay healthy and protected from cold. Plan backward from local frost risk, pot firm tubers in a free-draining mix, and leave enough room to check and move each container. A greenhouse is a staging space, not a guarantee of frost protection. This guide explains timing, potting, temperature and light management, greenhouse layout, hardening off and the final move to the garden.

01
Why start dahlia tubers under cover?
Starting tubers in a greenhouse can move the growing process forward while the garden is still too cold or wet for planting. Dahlias grow from tender tubers, and their foliage is easily damaged by frost, so an early start is a way to develop roots and shoots under cover—not a reason to ignore spring weather. Many gardeners use a frost-free potting environment around 15–18°C (59–64°F) to wake tubers. Treat this as a practical range, not a target every greenhouse can maintain. A moderate, steady setup is more useful than excess heat that pushes growth before there is enough light or space.
Strong light matters as soon as shoots break the surface. Put pots in the brightest workable area; warm, dim conditions encourage long, weak stems that are awkward to move outdoors. A greenhouse may offer better light than an indoor windowsill, yet an unheated structure can become cold overnight and heat rapidly in sun. The point is to advance the first stages of growth, not to create summer conditions in early spring. A handful of sturdy plants may offer a useful head start; dozens of overgrown pots can make the same greenhouse harder to manage. If you cannot monitor temperatures or move pots when needed, starting later—or keeping tubers dormant—is a sounder choice.
Plan the start around your local frost window
Use your local average last-spring-frost date as a planning reference, then count back about four to six weeks if you can maintain a bright, frost-free spot. That is a working window, not a deadline: average dates are not forecasts, and an unusually cold spring may push planting later. Also decide how much bench space you can give the pots and when you need to clear it for other plants. If your greenhouse cannot stay above freezing overnight, pot later or keep tubers dormant instead of producing shoots that must wait in cramped containers. Conditions can vary even within one property, so use your own observations as planting approaches.
Watch the forecast as the outdoor date approaches and assess the bed as well as the air. Soil should be workable and warming rather than cold and waterlogged; around 15°C (59°F) is a useful soil-temperature cue for planting, but it does not replace frost awareness. Put a min/max thermometer beside pots at foliage height and record several days of overnight lows and sunny-afternoon peaks. A reading against glazing can mislead. Write down conditions in the intended bed as well as the greenhouse, since the two places can warm at different speeds. If a cold snap approaches, move pots to a warmer frost-free place rather than assuming the greenhouse covering will protect new shoots.
02
Inspect the tubers and decide how many to start
Inspect each tuber before potting. Look for firm flesh joined to an intact crown or neck and an eye—the growing point—at the crown. A large tuber without a sound crown or viable eye may not sprout; a slightly wrinkled one is not automatically dead. Soft, wet, mouldy or foul-smelling tissue is a warning of decay. Keep suspect stock apart from healthy tubers, remove badly rotted material, and follow supplier guidance before cutting a clump: each division needs a piece of crown with an eye. Handle eyes and any early sprouts gently, and do not discard a dormant tuber simply because no green shoot is visible yet.
Label the variety and potting date before containers are grouped; labels prevent look-alike foliage from becoming a guessing game later. If you are starting several varieties, keep a written list as well, since labels can move or fade. Decide how many pots you can reach, water and inspect without moving others, and leave room for a tray or a plant that needs isolation. The listed sizes for the T-Shaped Orangery Greenhouse run from 16.52 to 30 m²; that gives a site-area reference, not the bench length or aisle width in any chosen layout. Check the specific plan and count usable work surface rather than estimating from the footprint alone.
Pot tubers in a free-draining mix
Use clean pots with drainage holes and fresh, free-draining potting mix. The container should hold the tuber without bending it, with some room beneath for roots; a very small pot dries quickly, while an oversized one takes up bench space and can leave a large volume of mix wet. Garden soil can compact in containers and is harder to manage during this early stage. Wash pots that previously held plants, and do not reuse old mix if it is contaminated. Fill the pot partway, set the tuber on its side with the crown and eye uppermost, and cover it. A layer of about 5–8 cm (2–3 in) is a common starting point, adjusted for the tuber and pot size.
Moisten the mix so it is evenly damp, not saturated, and let extra water drain before returning the pot to its place. Keep the eye close enough to the surface for a shoot to emerge without pushing through a deep, heavy layer. Separate pots preserve variety labels and make it easier to remove one tuber if it begins to rot. The Pyramid Greenhouse is listed in sizes from 5.53 to 18.9 m²; when comparing greenhouse footprints for a potting batch, map the pots, bench edge and walking lane on the selected layout. Total area alone cannot show how many containers will fit comfortably.

03
Organize the bench, labels and supplies
Prepare a clear growing zone before the shoots appear. Put labelled pots in the brightest workable area, group varieties without packing their foliage together, and leave a route to the door, vents and watering point. Keep spare mix, empty containers and tools off the light-facing bench so they do not shade plants or interfere with airflow. Set aside a tray for newly potted tubers and a separate spot for active shoots if the batch is large enough to justify zones. Clean reusable trays, remove spilled mix and decaying leaves, and keep questionable pots apart so rot is easier to notice. Check for uneven watering from drips or runoff, too.
If separate storage would keep supplies out of the growing area, the Limited-Edition Aluminum Greenhouses with Storage is a product option with built-in storage. Inspect the chosen layout to see where that section sits and how much room remains for a bench and aisle; do not count storage as planting area. Store tools where they are easy to reach but cannot tip pots or snag tender stems. A clear route also makes it possible to move containers quickly to a warmer place if overnight conditions turn cold. Leave space around larger pots for checking, not only for fitting them in.
Manage moisture, light and greenhouse temperature
Before shoots emerge, avoid keeping the mix constantly wet: a dormant tuber in cold, saturated potting mix is prone to rot. Water enough after potting to settle the mix, then let the upper layer begin to dry before watering again. Check at the edge of a pot or lift it to judge moisture rather than following a daily schedule; containers in sun and containers behind others dry at different rates. Once roots and foliage develop, plants use more water, so increase watering as growth warrants while keeping the mix moist but never waterlogged. Empty standing water from trays after each check.
After the first leaves open, give shoots strong light and check their shape every few days. Long, pale stems often mean growth is warm compared with the light available; move pots to a brighter spot, space the foliage and avoid adding fertilizer as a quick fix. Sunny-day temperatures can climb fast under glass, so use available vents or doors to release excess heat, then protect tender growth from cold nights. The Bloomcabin Prestige Greenhouse listing spans 3.77 to 28.08 m²; floor area does not indicate vent position or clear height. Review those details before setting benches or tall plants in place, and make sure the openings remain accessible.
04
Water growing shoots and keep access clear
Once foliage is established, water around the potting mix rather than soaking leaves, and check more than one container. A plant that wilts in dry mix may need water; one wilting in wet mix may instead be suffering from poor drainage or root trouble. Water needs increase as leaf area grows, but do not compensate for a cool, cloudy spell with unnecessary watering. Remove yellow leaves or fallen debris before they lie against damp mix, and turn pots if light consistently reaches only one side. Leave enough room for air to move through foliage without letting pots tip or stems rub against glazing.
Plan the route from water source to bench before the growing area fills. Hoses, cans and trays should not cross the only aisle, and the most frequently checked pots should not be hidden behind others. The Spacious Greenhouse page lists areas from 47 to 70 m², but a large footprint still needs a clear path, a reachable work surface and practical water access. In a compact setup, use a movable tray only if it is safe to lift without shifting mix; in a larger one, zone plants by variety or stage. Check edge pots too, since their conditions may differ from those in the centre.
Harden off plants before moving them outside
Hardening off gradually adjusts greenhouse-grown foliage to outdoor sun, wind and temperature changes. Start in a sheltered, shaded spot for a few hours, then increase the time outside and the amount of sun over about 7–10 days; slow down if leaves wilt or scorch. Choose calmer, milder periods for the first outings when the forecast allows. Bring pots back under cover on cold nights and during severe weather, because a hardened plant is not frost-proof. Avoid putting soft shoots straight into all-day direct sun and strong wind, which can damage leaves or break stems. Keep the root ball moist, but do not leave containers standing in rain-filled trays.
Treat this as a separate staging phase: plants may go outdoors by day and return under cover at night, so the route and door access matter. Leave room to carry pots without crossing crowded benches, and keep them upright in the temporary hardening area. The Classic Aluminum Greenhouse is listed in sizes from 3.77 to 28.08 m²; compare the exact floor plan and access with the number of containers you expect to move. A footprint alone cannot show whether the path remains clear during the transition or whether you can retrieve every pot easily.

05
Plant outdoors when the garden is ready
Move dahlias to the garden only when local frost risk has passed and the bed is workable. Choose a sunny position: around six or more hours of direct light is a useful guide for many dahlias, while the cultivar’s label helps with mature height and spacing. Let the soil warm before planting; about 15°C (59°F) is a useful cue, but a warm soil reading does not cancel a frost forecast. Prepare the planting spot before carrying pots outside, water a dry pot so the root ball holds together, then set the plant without pulling on the stem and water around its roots.
For tall or large-flowered cultivars, install a stake at planting so later support is less likely to disturb roots. Keep watching for late cold nights; a potted dahlia can be moved temporarily, while a planted one needs protection appropriate to the forecast. The Lean-To Greenhouses range is listed from 3.69 to 14.34 m², but its name and footprint do not establish frost performance or fit for a particular site. If you are considering a lean-to for early staging, verify the selected model’s layout and specifications, and tie the planting decision to conditions in the garden rather than the fact that pots have been started under cover.
Troubleshoot slow or weak shoots
If shoots are slow, check conditions before digging up the tuber. A recently potted tuber may still be dormant; confirm that the mix is lightly moist, not cold and saturated, and that the tuber had a sound eye. Keep it in the moderate, frost-free range used for starting and give it time rather than adding repeated water. A sour smell, soft tissue or spreading mould points to rot, so isolate that pot and remove severely affected material. Compare potting dates and tuber condition across the batch; if all plants are slow, investigate shared light or temperature conditions before changing each pot. Record which varieties emerge first for next season.
Long, pale or leaning shoots point to insufficient light, excessive warmth or crowding. Move pots to the brightest suitable position, give foliage space and check daytime peaks as well as overnight lows. Support weak stems during handling instead of forcing them upright. If the bench fills, prioritize healthy, compact plants and move surplus pots only to another bright, frost-free area. For next season, the Limited Edition Aluminum Greenhouses page lists footprints from 3.77 to 28.08 m²; compare usable bench space, clear height and documented ventilation for the chosen configuration, not just total floor area.
Frequently asked questions
When should I start dahlia tubers in a greenhouse?
Use your local last-spring-frost date as a planning guide and count back about four to six weeks, if you can keep the pots bright and frost-free. Adjust the timing to your greenhouse’s night temperatures and the forecast; starting later is better than producing shoots you cannot safely keep.
Will an unheated greenhouse protect dahlia tubers from frost?
Not reliably. Temperatures inside can fall sharply overnight, even after a sunny day. Put a min/max thermometer beside the pots, check overnight lows and move containers to a warmer frost-free place when needed. New shoots are especially vulnerable to cold.
How deep should I pot a dahlia tuber?
Set the tuber on its side with the crown and eye uppermost, then cover the tuber with about 5–8 cm (2–3 in) of potting mix. Adjust for its shape and pot size so the eye is not buried deeply and the shoot can emerge easily.
How much should I water before shoots appear?
After potting, moisten the mix and let excess water drain. Until shoots emerge, allow the upper layer to begin drying before watering again. A dormant tuber in cold, saturated mix can rot, so check the mix rather than watering on a fixed daily schedule.
When can I move greenhouse-grown dahlias outdoors?
Harden them off gradually over about 7–10 days, then plant once local frost risk has passed and the bed is workable and warming. A soil temperature around 15°C (59°F) is a useful cue, but it does not replace checking the forecast.
Starting dahlias in a greenhouse is most useful when it produces sturdy, well-rooted plants ready for outdoor conditions. Match the potting date to local frost patterns and the greenhouse’s actual night temperatures, provide adequate light and drainage, and make room for gradual hardening off. The aim is healthy growth that you can maintain until the garden is ready, rather than the earliest possible shoots.
