
Where to Position a Greenhouse Thermostat
Greenhouse heating
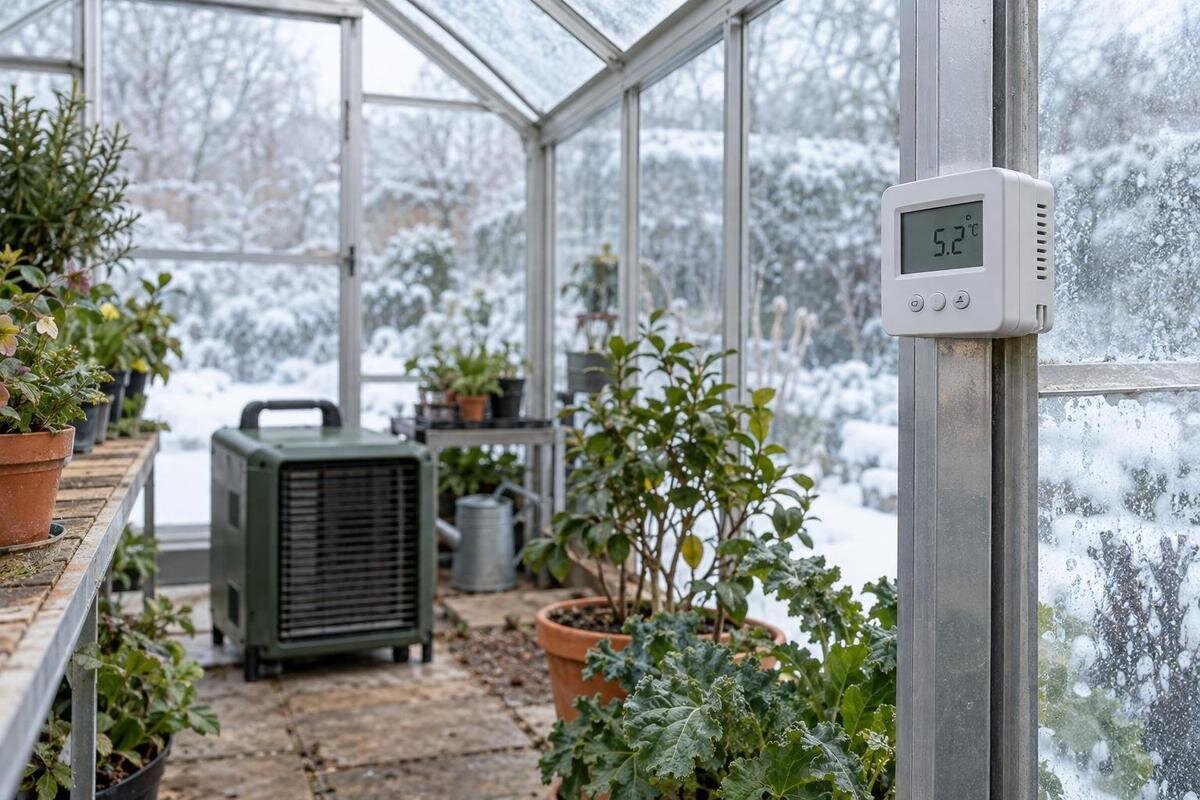
A greenhouse thermostat cannot judge every pot, bench and corner; it reacts to conditions beside its sensor. Direct sun or a heater's discharge can warm the probe and stop heating while plants remain cool. A probe in a cold draft may keep calling for heat after the main growing area has warmed. For reliable control, place it in shaded, freely moving air at the height of the plants you intend to protect, then check temperatures elsewhere.

Choose the plant zone the thermostat should represent
Decide which plants the heater is meant to protect before choosing a bracket or wall. The probe measures only the air at its own location; it does not calculate the greenhouse average or directly measure leaf, root or pot temperature. If one bench holds the plants with the narrowest safe range, use the air around that bench as the control reference. If plant groups are spread across the space or have different temperature needs, choose the zone the thermostat must protect and keep separate checks in the others. Set the target from appropriate crop-specific guidance; moving the sensor cannot make one setting suitable for every plant. A convenient reading beside the doorway or controller is not proof that a distant bench shares it.
Sketch a rough plan showing crop benches, doors, openings, the heater and the intended probe point. Use the chosen greenhouse footprint rather than a family name: the Pyramid Greenhouse listing includes versions from 5.53 m² to 18.9 m², so the same nominal centre point will not describe every version or planting layout. Put the sensor where the target plants actually grow, not automatically in the middle of the floor. For a compact greenhouse, nearby glazing or an outlet can still distort a reading; for a larger one, distant sections may need additional monitoring. Mark a position that remains accessible for checks and is unlikely to be shifted during ordinary work. Footprint guides the test plan, but does not prove temperatures are even.
Set the sensor at plant height
Mount an air-temperature probe around the height of the foliage it is meant to represent. Warm air can collect higher up, so a sensor near the roof may show warmer air than plants lower down; a sensor close to the floor may not reflect a bench canopy either. The relevant level changes as plants grow and as trays or pots move. Treat height as part of the control decision, not a cosmetic detail, and use the thermostat manufacturer's permitted orientation and mounting method. The probe measures air, not root-zone temperature; if root conditions matter, use a suitable separate measurement rather than inferring them from the thermostat. If benches sit at different heights, compare them before deciding which one should guide the control.
Hang the probe in free air beside, not touching, the representative plants. Contact with a leaf, pot, bench, soil, glazing or metal frame allows that surface to influence the measurement, while foliage pressed against the sensor can impede airflow. Do not tuck it behind a pot, inside a storage area or beneath a dense canopy just to hide the cable. When planning a model with built-in storage, the Limited-Edition Greenhouses with Storage range is listed from 5.52 m² to 28.08 m²; use the intended growing layout to choose the canopy level and sensor point, not the catalogue category. Revisit the height when the crop changes, especially if it grows substantially.
Keep direct sunlight off the sensor
Direct solar radiation can heat the sensor faster than the surrounding air. The thermostat may then conclude that the target has been reached and switch the heater off while shaded plants remain cooler. A reading can also jump as a cloud passes, creating misleading swings that do not reflect a stable change in the crop-zone air. Avoid spots that receive direct sunlight through the glazing, even if they look shaded when you first install the probe. Consider low-angle winter sun and the changing shadow of the frame as well as midday conditions. A quick check at noon can miss a beam that reaches the sensor earlier or later.
Use a ventilated radiation shield only if the sensor instructions permit one; its purpose is to block direct sun while leaving the probe exposed to moving air. A sealed box, thick wrap or improvised cover can trap heat or slow the response, creating a different error. Check the location at more than one time of day, and make sure watering, condensation or drips are not hitting the sensor. The Prestige Greenhouse listing covers versions from 3.77 m² to 28.08 m². In your chosen layout, observe where sunlight falls throughout the day to find a suitable shaded position rather than assuming one standard location works across the range.
Avoid the heater's direct airflow
Keep the sensing element out of the heater's direct discharge. A probe in a hot air stream can satisfy the thermostat almost immediately while air around plants farther away is still cool. The reverse can happen if the probe sits where heated air rarely circulates: the thermostat may keep calling for heat after the main crop zone has warmed. Neither the displayed number nor the heater outlet's temperature tells you what remote plants experience. Follow the heater and thermostat manuals on clearance, airflow and approved probe locations. Heater designs differ, so there is no reliable universal distance from the outlet that suits every setup.
With the heater operating, compare the control probe with independent thermometers at the target canopy and at the farthest or most vulnerable plants. A large difference that appears whenever heating starts is a clue that the sensor is in the hot-air stream or outside the main circulation path. The Spacious Greenhouse page lists sizes from 47 m² to 70 m². Use the selected footprint and bench arrangement to choose comparison points across the growing space. Record how those readings change while the heater runs, rather than treating a single central reading as representative of every crop zone.

Keep the sensor out of transient drafts
Cold drafts can bias a probe in the opposite direction. Avoid mounting it directly beside a frequently opened door, ventilation opening, gap or place where outdoor air regularly washes across it, unless that is the zone you deliberately need to protect. A passing gust can trigger extra heating and leave warmer parts of the greenhouse above the intended conditions. A vent-side reading may be representative while ventilation is active but not at other times, so note how openings are normally used. Do not hide a vulnerable plant-zone reading just to get a steadier number: if plants sit in a draft, check that area independently and seek suitable advice about the exposure.
The coldest corner should not automatically control the entire greenhouse. If a particular group at an edge is the priority, its surrounding air may be the right reference; if one isolated gap chills the probe, the resulting call for heat can overheat other plants. Map doors and vents on the actual footprint: the Classic Aluminum Greenhouses page lists versions from 3.77 m² to 28.08 m², so choose the point from the selected layout rather than applying a generic centre rule. Recheck after changing how openings are used or where plants stand.
Check the probe and controller instructions
Confirm whether the temperature sensor is built into the controller or connected by a separate probe. A wall-mounted thermostat with an integrated sensor may read the conditions beside the wall rather than those around the plants; a remote sensor offers more placement options only within the manufacturer's instructions. Check the specified mounting orientation, operating environment, moisture protection, cable limits and whether the probe may be shielded. Do not extend, splice, cover or relocate a sensor unless the instructions allow it. If installation requirements conflict with a convenient canopy-height position, ask the manufacturer or installer which approved arrangement applies.
Ease of access matters for inspection, but convenience should not put the probe beside the controller if that is a different air zone. In a lean-to greenhouse, a probe fixed to the supporting wall may not represent plants farther into the growing area, so check the chosen crop position rather than assuming. The Lean-To Greenhouses listing ranges from 3.69 m² to 14.34 m², but a greenhouse page does not establish compatibility with a particular heater or thermostat. Follow product documentation, and use a qualified professional for fixed electrical work or control connections you cannot verify.
Compare the control reading with plant-zone temperatures
Use an independent thermometer or logger to see whether the thermostat reading matches the air around the plants. Place the reference instrument beside the thermostat probe, at the same height, with both in shade and free air. Keep them close enough to sample the same zone without touching each other, then allow the readings to settle. Compare the values with each instrument's stated accuracy and display resolution. A difference of a fraction of a degree is not automatically proof that the thermostat is faulty, and a second thermometer is not a perfect reference just because it is separate.
After the side-by-side check, take readings at the vulnerable bench, the most distant growing point and any substantially different height or section. A minimum/maximum thermometer or data logger can reveal overnight lows and heater cycles that a quick daytime glance misses. Record each instrument's position, the time, whether the heater was running and whether sun or a door had just affected the area. If you are comparing options in the Limited Edition Aluminum Greenhouses range, listed from 3.77 m² to 28.08 m², include the selected size and bench arrangement in your record. This keeps each set of readings tied to the growing layout you actually measured.
Understand temperature differences before changing the setpoint
If the control probe says the target has been reached while a plant-zone thermometer remains cooler, changing the setpoint may hide a placement or distribution problem. First compare like with like: the same height, similar shade and the same period in the heating cycle. Look for a probe in the outlet stream, a local draft, a closed-off bench or a difference between the heater area and the crop area. A higher setpoint can make the heater run longer without correcting the gap, and may overheat plants nearer the heat source. Consider the documented heater specifications and the measured conditions rather than guessing from the thermostat display alone.
Where readings differ consistently across the space, there may be no single probe position that represents every plant group. Map the warm and cool points, decide which zone the control is intended to protect and continue independent checks elsewhere. For an irregular planned layout, test each growing area: the T-Shaped Orangery Greenhouse page lists versions from 16.52 m² to 30 m², but its name and floor-area range do not establish how evenly a chosen heater distributes warmth. Seek advice on equipment capacity or airflow changes from a qualified supplier or heating professional rather than treating sensor relocation as a cure for every gradient.

Recheck the position as conditions change
A good location can stop being representative as the greenhouse changes. Plants grow upward, benches shift, trays fill empty spaces and seasonal sunlight reaches different surfaces. Shade cloth, temporary insulation or altered ventilation can also change the path of heat and air. Review the probe after a significant layout change and when moving from bright daytime conditions to colder nights. Do not assume a point that worked in summer will behave identically during a winter heating cycle, especially if low sun reaches it or doors are used more often.
Keep a short dated record rather than relying on memory: sensor height and position, plant zone, thermostat setting, independent readings, weather conditions and when the heater ran. If readings drift only at certain times, note the trigger—sunrise, a vent opening, door traffic or heater start—before moving the probe. Change one factor at a time and compare again under similar conditions. This log helps separate a real change in greenhouse conditions from a sensor warmed, cooled or exposed to airflow locally.
Check how the thermostat switches the heater
Thermostats do not all switch on and off at precisely one displayed temperature. Operating range, sensor accuracy, response time and switching differential—the gap between switch-on and switch-off temperatures—vary by model, and some controls have settings that affect cycling. Read the manual before interpreting short on-and-off periods or a small difference between the setpoint and displayed temperature. The probe still needs to represent the plant-zone air: changing a controller setting cannot correct a sensor warmed by direct sun or the heater's airflow. Do not infer accuracy from extra decimal places on a display or from a product description alone.
During a supervised test, note the reading when the heater starts and stops, along with readings from the independent instruments. Follow all equipment instructions and do not leave the setup in a condition the manufacturer prohibits. A stable reading at the probe with persistent differences elsewhere points to a spatial gradient, not necessarily a failed thermostat. If the sensor is slow, erratic or outside its documented range, contact the manufacturer or a qualified installer. Keep wiring and fixed control changes to professionals; use your observations to explain the issue, not to improvise an electrical repair.
Frequently asked questions
How high should a greenhouse thermostat sensor be?
Place it at the height of the canopy for the plants the heater is meant to protect, in shaded, freely moving air. There is no single floor measurement that suits every crop or layout. Recheck the position as plants grow or benches move.
Can direct sunlight affect a greenhouse thermostat?
Yes. Sunlight can warm the sensor faster than the surrounding air, making the thermostat register a misleadingly high temperature and switch the heater off too soon. Check the spot at different times of day and use only a ventilated shield approved for the sensor.
Should I put the sensor near the heater?
Keep it out of the heater's direct hot-air stream. A probe warmed by the outlet may stop heating before the plants farther away reach the intended conditions. Follow the equipment instructions and compare readings at the probe and at representative plants while the heater runs.
Is one thermostat sensor enough for a greenhouse?
One sensor reports conditions only at its own location. It may work for a consistent growing zone, but check temperatures at vulnerable and distant plants, and at different heights if needed. Additional thermometers can reveal differences that a single control sensor cannot.
How can I check whether my thermostat reading is accurate?
Place an independent thermometer beside the probe, at the same height and in the same shaded air. Allow both readings to settle, compare their stated accuracy, and repeat during heating cycles. Follow the thermostat instructions before making any adjustment or applying an offset.
Reliable control comes from matching the sensor to the plants it is meant to protect, shielding it from local sun and heater airflow, and checking the wider greenhouse with independent readings. Treat the thermostat number as a measurement at one point, not a guarantee for every bench. A simple map and repeatable log show whether that position still represents the crop zone as the layout and season change.
