
Winterizing Greenhouse Water Pipes, Pumps and Tanks
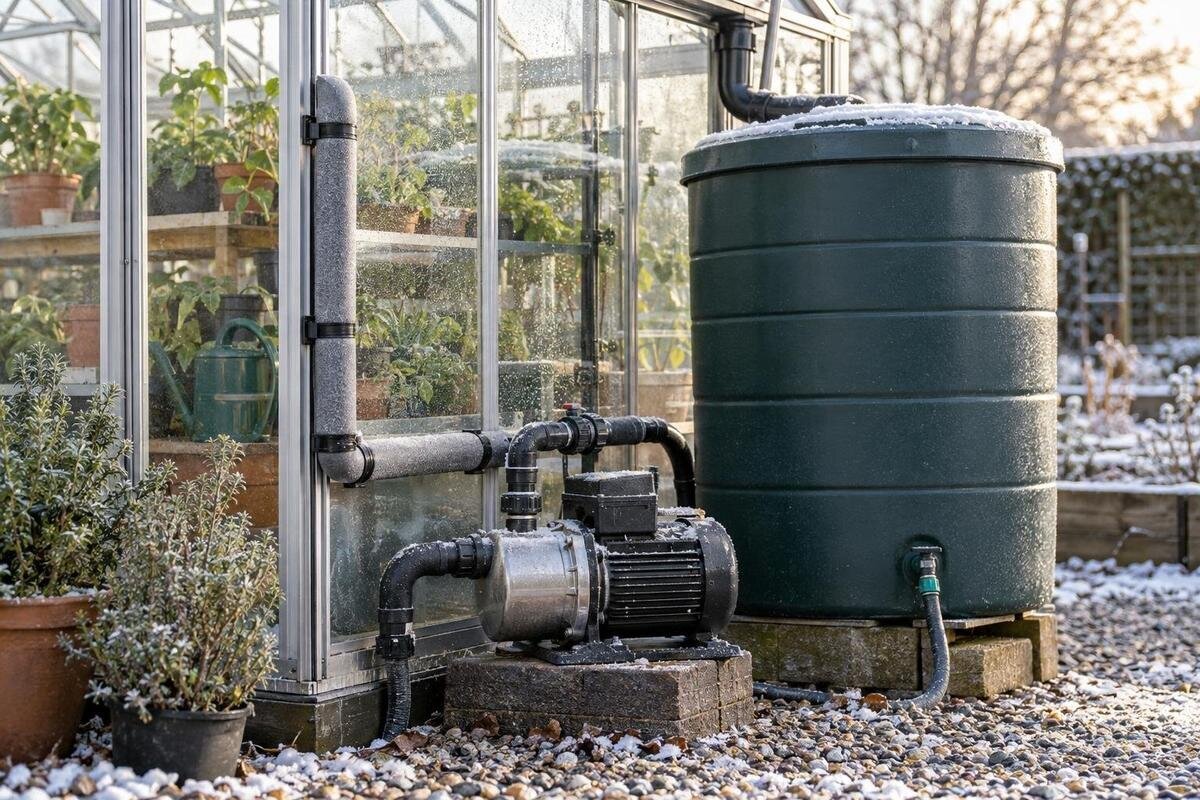
Greenhouse watering systems
Greenhouse water systems need their own freeze plan: shutting off the source does not remove water trapped in pipe sags, pump housings, filter bowls or tank outlets. Work from the source through every branch, then prepare pumps, filters, valves, hoses and tanks according to their designs. This guide focuses on water pipes, pumps and tanks, not general greenhouse winter care. Drain and storage procedures differ by model, so follow each component’s instructions rather than treating the whole setup as one pipe. If some lines must remain in use, plan that separately instead of counting a partial shutdown as a full drain.

Map every water-holding component
Before the first freeze, trace the water from its source to its last outlet: outdoor faucet or rainwater tank, shutoff, pump, filter, regulator, manifold, branches and emitters. Walk the route where possible. Mark drain plugs, removable hoses, valves, low dips, exterior runs and tubing that passes through doorways. Include bypasses, unused branches and lines hidden behind benches. Note where a branch has a low-point drain and where it relies on an outlet instead. Later additions can be easy to miss. A main pipe may look empty while a fitting, capped end or closed branch still holds water.
Draw a simple diagram showing the direction of flow, and photograph valve positions before moving anything. Record model names and keep the manuals together; mark any item “manual required” if you cannot identify an intended drain or service point. If you are planning a new layout, the Lean-To Greenhouses listing gives sizes from 3.69 to 14.34 m². Use the selected size only to scale a sketch, then confirm the actual pipe route and access points on site. Record which lines share a shutoff and where you can set a bucket or dry removable parts. Give each branch a name that matches its location, such as the left-hand bed or the rear bench, and use that name on removable parts. Leave space beside each component to record its shutdown status: drained, removed, still operating or unresolved. This turns the diagram into a working record, rather than a drawing that shows connections but leaves you guessing which tasks are complete.
Isolate the supply before draining
Close or isolate incoming water using the system’s normal shutoff, then disable automatic watering so a timer cannot restart the pump or open a valve while you work. Account for any automatic refill or alternate feed that could restore the supply. Switch the pump off and isolate its power only as its instructions describe. Do not open an electrical enclosure or disconnect hard-wired equipment as part of routine draining; ask a qualified technician if the isolation is unclear. Release residual pressure only through a designed outlet or relief point identified by the maker. Never loosen a random union to see whether a line is pressurized.
Check for a second feed, such as a rainwater tank linked by a changeover valve, and isolate it too. Closing one shutoff can leave a water-filled section between that valve and another closed valve, so identify and drain each segment through its intended point. Pressure tanks, treatment units and backflow devices may have separate instructions; opening a downstream faucet does not necessarily empty them. For a new layout, Limited Edition Aluminum Greenhouses are listed in sizes from 3.77 to 28.08 m². Use the chosen plan to locate reachable shutoffs and drains, not as evidence of supplied plumbing.
Drain each pipe branch and hose
Work through the branches one at a time rather than relying on a single drain. Open only designed drains and outlets, following the system’s sequence; some layouts need an outlet opened to admit air, while others use a different procedure. Pipes may retain water at a sag, elbow, tee, capped end or behind a check valve, so a sloped-looking run does not prove every fitting is empty. Check branch ends and tees individually. If water stops before a branch is clear, find the intended drain point or ask an irrigation professional instead of loosening an arbitrary joint or forcing water through it.
Disconnect flexible lines and garden hoses only at designed couplings. Drain them fully and store them as their makers direct, without sharp kinks or pulling on connected fittings. Check both ends, quick-connects and spray attachments; a closed nozzle can retain water. Tick each line off only after it has drained, and mark any section you cannot empty confidently. The T-Shaped Orangery Greenhouse listing gives sizes from 16.52 to 30 m²; actual door and bed locations, not area alone, determine where a practical water route can run.
Drain drip lines and small parts
Drip tubing and emitter lines need a branch-by-branch check, but small openings can be damaged by aggressive cleaning. If the system maker calls for flushing before shutdown, do it while the supply is available; then drain through the designated ends or drain points. Check each bed loop and capped end separately. Remove plugs only where the design allows. Do not push wire into emitters, force a fitting or improvise with compressed air. A clear main line does not prove that a filter bowl, closed end or short feeder tube has drained.
Clean reusable screens, end caps and detachable connectors by the approved method, then let them dry if the instructions call for dry storage. Keep matched parts together, label each branch and note brittle or cracked tubing for replacement before spring. A listed greenhouse area is only a drawing aid: the Pyramid Greenhouse range is 5.53 to 18.9 m², while emitter counts and tubing routes depend on the actual beds, containers and watering zones. Keep your sketch with the winter checklist rather than leaving it beside one removed fitting.

Prepare the pump according to its design
Pump design determines where water can remain and how the unit should be drained. Find instructions for the exact model and check the shutdown procedure for the casing, strainer, inlet and outlet, drain plugs and priming chamber. Note any connected pressure vessel separately. Do not assume that a self-priming pump empties itself or that a unit inside the greenhouse is protected from freezing. Avoid taking the housing apart unless the manual identifies that service step. If you cannot find the retained-water points, ask the manufacturer or a pump technician before dismantling anything.
A portable pump may be designed to disconnect for storage, but use its intended connections after the supply and power are isolated, then drain and store it as specified. A fixed or hard-wired pump, a submersible unit or one connected to a complex pressure system may need professional service rather than casual removal. Include suction and discharge lines: a dry pump does not mean its pipework is empty, and a drained pipe does not prove the pump casing is dry. Limited-Edition Aluminum Greenhouses with Storage are listed in sizes from 5.52 to 28.08 m²; that listing does not establish frost protection or suitable pump-storage conditions.
Empty and check the water tank
Identify whether the tank is portable or fixed, and note its material, shape, outlet and any separate drain or overflow. Follow its own emptying and cleaning directions instead of assuming a bottom outlet clears every cavity. Water can remain in an outlet fitting, standpipe, faucet, pump connection or low pocket, so assess these parts separately. If the tank has more than one feed or branch, isolate each one first. Direct drained water away from the greenhouse base and work area so it cannot pool around equipment or underfoot. Before starting, check that you can reach the drain and collect or direct the discharged water without blocking the working area. Distinguish a tank that has finished draining through its outlet from one whose connected fittings have also been checked. Record any inaccessible part by name; a note such as “outlet connection not checked” is more useful than marking the entire tank empty.
Do not leave a tank full just because it sits inside the greenhouse: temperatures can vary within the space, especially near a doorway or exterior wall. Clean, dry and store a removable tank only as its material instructions allow; a fixed tank with inaccessible pockets may need a technician’s advice. Bloomcabin Prestige Greenhouse is listed in sizes from 3.77 to 28.08 m², which can help scale a preliminary layout. Actual tank dimensions and measured access space govern placement; greenhouse area is not a tank specification.
Check filters, valves and controllers separately
Filters, regulators and small control parts can hold water behind bowls, screens and seals. Once the supply is isolated and pressure relieved, remove a serviceable cartridge or screen only as its manual describes, then drain the housing itself. Use an approved cleaning method and keep seals and small parts in a labelled bag. Avoid twisting a brittle bowl or forcing a stuck cap. A screen may look clean while its housing still holds water, so check the housing rather than the cartridge alone. Photograph the order of parts before removal and store each element as directed.
Pressure gauges, solenoid valves, check valves and timers may retain water after the main line drains. Do not guess whether a valve should be left open or closed; the right position depends on its design. Remove controller batteries only if its maker recommends it, and note cancelled schedules so automatic watering does not start unexpectedly in spring. The Spacious Greenhouse range is 47 to 70 m², but area alone does not set a system’s zone count. That depends on measured flow, pressure and the actual irrigation layout.
Include rainwater collection and exterior connections
Rainwater collection adds exposed parts upstream of the tank: inlet screens, diverters, transfer hoses, faucets and overflow connections. If your setup collects greenhouse runoff, follow the collector and tank makers’ winter directions. Drain exposed water paths and clean accessible screens without dismantling parts that are not designed to come apart. Emptying the tank does not necessarily drain its transfer hose, and a full barrel does not protect an exposed outlet. If water can switch between a rain tank and another source, include the changeover valve and both feeds in the shutdown plan.
Disconnect and drain outdoor hoses and exposed connectors before storing them, and check lines that cross an unheated threshold. Leave overflow and drain parts in the position specified for winter; a cap or closed valve in the wrong place can trap water. When planning a rainwater collection route, Aluminum Greenhouses are listed in sizes from 3.77 to 28.08 m². Those size details do not establish gutter options, connection points or compatibility with a collection system, so verify the actual structure and water equipment separately.

Choose between full shutdown and winter operation
A complete drain-down is not right for every greenhouse that still needs water through winter. Decide which zones must operate before emptying the system, then confirm that the pump, controls, tank, valves and every exposed pipe are intended for the conditions where they will sit. A warmer greenhouse interior does not protect an outside line or a pipe at a doorway. Systems relying on active protection can also be affected by a power interruption. Do not assume ordinary components are freeze-safe because watering is scheduled or the greenhouse usually feels warm.
If only part of the system will stay in service, active and drained zones need a clearly designed separation. A shutoff can leave water trapped on either side, and reopening it may connect that water to a running pump. Use the system diagram and equipment instructions to define what remains connected to the supply, what is emptied and what needs monitoring. If that boundary is unclear, have the installer or a qualified irrigation professional set the procedure. Check how an automatic controller responds to a closed or disconnected zone rather than assuming it will stop on its own. Mark the operating zones on the diagram and identify which controls serve them. Keep the status of shared components clear: a pump serving an active branch is not part of the full shutdown, even if other branches have been drained. Anyone using the system should be able to distinguish a working outlet from a winterized branch without reopening valves to find out.
Store removable parts and plan the spring restart
Label removed pumps, filters, hoses and fittings with their original location and any part that needs replacement. Store small pieces together, protect open pipe ends from dirt without sealing in residual water, and keep manuals and photos with the checklist. Separate reusable parts from damaged items awaiting replacement so they cannot be confused at reassembly. For each removed component, note which connectors, seals or caps belong with it and whether cleaning or drying is complete. If a part must be replaced, record the model identification already gathered during shutdown rather than relying on appearance alone. Keep those notes with the stored parts so the spring inspection starts with a clear account of their condition. Do not add automotive antifreeze to crop-watering lines or tanks as a shortcut; use a chemical treatment only if the equipment maker specifies a product and procedure. Otherwise, rely on the component’s approved draining, cleaning and storage instructions rather than an unverified additive.
At spring startup, inspect pipes, tank outlets, the pump housing, filter bowls and seals for cracks, distortion or leaks before routine watering resumes. Refit stored parts in the order shown in the manuals, restore the specified valve positions and prime the pump before operation if required. Bring water back in stages, watch each connection as the system fills, and stop if you see a leak or abnormal pump behaviour. Use the winter record to distinguish components that stayed connected from those that were removed, and check that each removed item has been accounted for. Pay particular attention to any location marked unresolved at shutdown rather than treating it as cleared by the passage of time. Confirm that every branch and controller schedule matches the current layout before automation restarts. Record any retained water or damage discovered during restart, including its location, so next fall’s checklist addresses the specific problem instead of repeating the same incomplete procedure.
Frequently asked questions
When should I drain greenhouse water lines?
Drain them before freezing conditions are expected where the pipes, tank and pump are located, leaving enough time to work through every branch. Conditions at an exposed connection may differ from those inside the greenhouse. Use local forecasts and equipment instructions rather than relying on a fixed calendar date.
Are pipes safe if their valves are closed?
No. A closed valve stops flow but can leave water trapped between valves, inside the valve body or beyond a dead end. Drain each isolated section through its intended points and check its branches individually; closed does not mean empty.
Does an idle pump need to be removed for winter?
That depends on the pump. Some portable models are designed to be disconnected and stored; fixed, hard-wired or submersible units may require a different procedure. Follow the exact model’s instructions for its housing and connected lines, and ask a pump technician if the drain points are unclear.
Should I leave an outdoor water tank full?
Do not assume a full tank is safe in freezing conditions. Follow the tank maker’s instructions for its material and design, and check the outlet, tap, standpipe and connected pipes as well as the main tank. A fixed tank or one with inaccessible pockets may need advice from its maker or a qualified technician.
Can I keep watering plants in the greenhouse through winter?
Only if the pump, controls, tank, valves and every exposed line are intended for the conditions where they will operate, and their instructions cover winter use. A warmer greenhouse interior does not protect an outside pipe. Plan separately for zones that stay in service and those that are drained.
A reliable winter plan accounts for every branch, fitting and component that can hold water. Keep the system map with the manuals, record what was drained or left in service, and use those notes to check the spring restart. Small trapped spaces are easy to overlook; a component-by-component record makes them less likely to be missed next time.
