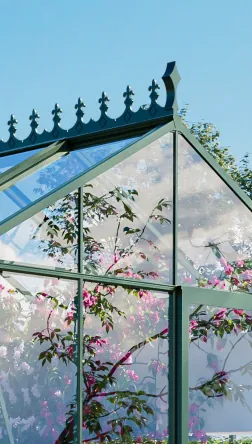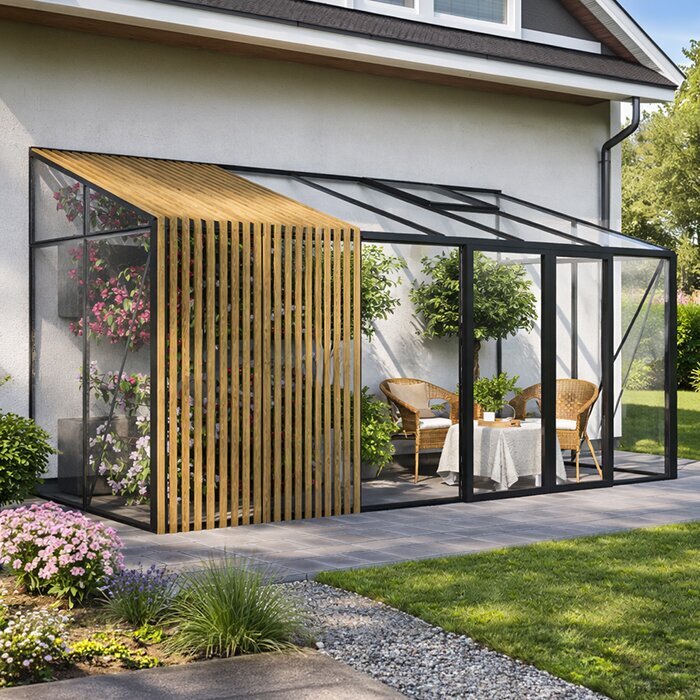





Limited Edition Accoya lean-to greenhouse
Premium growing space designed for an exterior wall
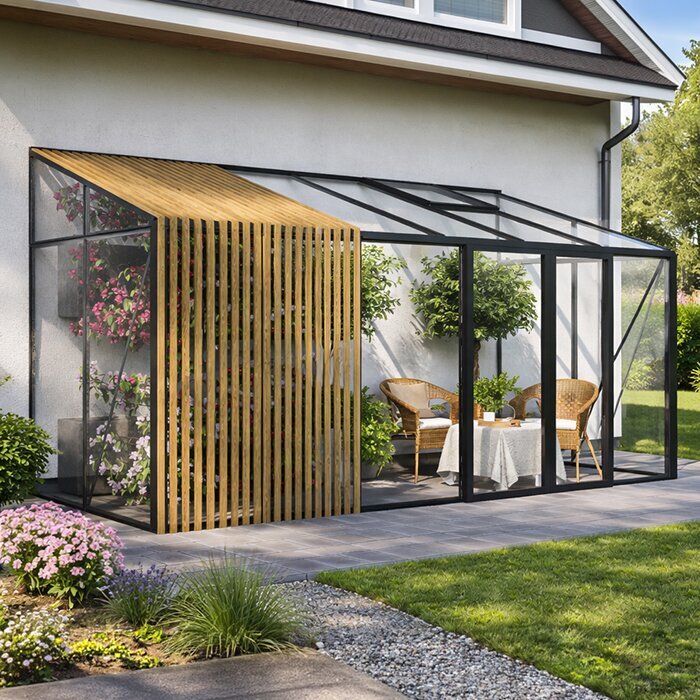
The Bloomcabin Limited Edition Accoya lean-to greenhouse pairs the compact footprint of a wall greenhouse with warm detailing inspired by natural materials. When installed on a prominent façade, the timber gives it a softer character than an all-aluminium design.
Choose from 12 sizes . Glazing may be polycarbonate or 4 mm toughened safety glass. The equipment includes opening roof panels, built-in rain channels, an aluminium base, and either a single-leaf or double-leaf sliding entrance. Where enough wall width is available, double doors can be specified from approximately 3.10 m.
Settle the supporting wall, fixings, foundations, completed floor detail, airflow and rainwater route as one plan before placing an order. Greenhouse and conservatory advice.
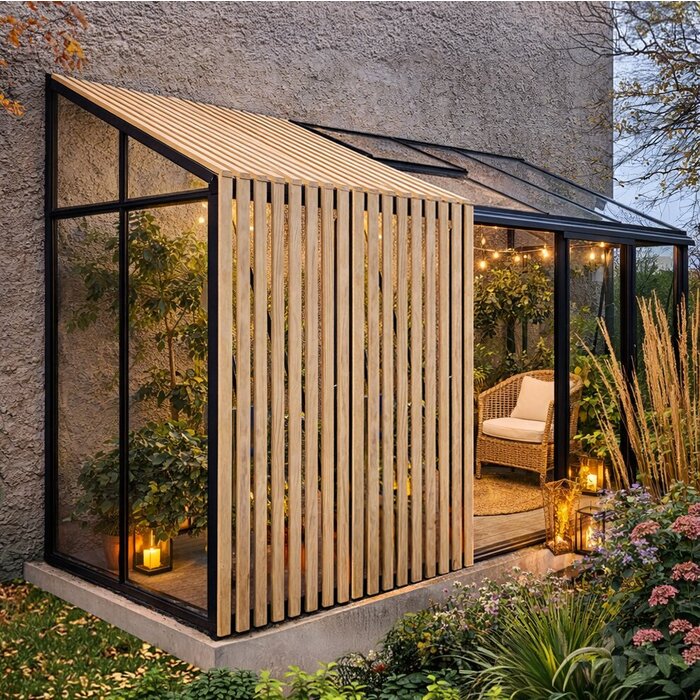
Premium lean-to design
Considered materials for contemporary homes and gardens
Created for growers who want productive space without treating materials, finish and colour as secondary considerations.
Fixing the structure to an appropriate exterior wall of a home, garage or garden boundary makes efficient use of the available ground and can place the growing area conveniently beside a patio or kitchen garden.
Accoya supplies the natural visual detail, while precisely made aluminium forms the load-carrying structure.
Accoya accents
Untreated timber introduces warmth beside the aluminium framework
Your choice of RAL finish
Relate the frame colour to nearby windows and exterior finishes
Purpose-led glazing
Select the light and transparency needed by the position and planting
Adaptable entrance
Choose a single-leaf or double-leaf slider for the available width
Why use Accoya?
Its timber character brings warmth to the aluminium greenhouse
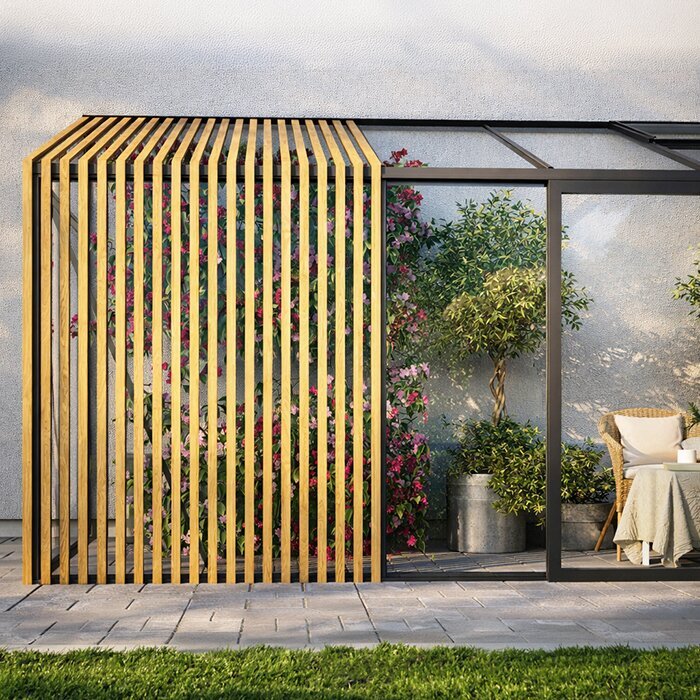
Accoya is used here for visual effect rather than structural support, which remains the role of the aluminium frame.
Without a surface treatment, its visible grain works particularly well beside a terrace and the architecture of the house.
This gives the easy-care aluminium construction a clearly visible natural detail.
Plan the wall connection first
Resolve four practical matters before selecting your greenhouse
Unlike a freestanding greenhouse, a lean-to is closely shaped by the adjoining structure, base conditions and route into the site.
01
Sound supporting wall
Confirm that the wall layers and proposed fixing positions can safely receive the frame.
02
Base and finished height
Prepare level, stable support for the integrated aluminium base.
03
Entrance planning
Place the doorway in relation to the routes leading from the home, patio and garden.
04
Manage roof water
Decide in advance whether water leaving the built-in channels will enter a planned discharge point or a collection vessel.
Equipment and specifications
Principal details for the Limited Edition lean-to model
Greenhouse format
Wall greenhouse
Aluminium greenhouse fixed to a building wall and finished with decorative Accoya components; engineered for 30 m/s wind speed and 210 kg/m² snow load
Available dimensions
12 sizes
Options suited to wall sections of varying usable length
Glazing
4 mm toughened safety glass or polycarbonate
Pick the material according to use, transparency and the preferred quality of light
Accoya
Untreated decorative Accoya pieces
Timber character set against the supporting aluminium frame
Entrances
Single-leaf or double-leaf sliding door
A double-leaf slider is possible from roughly 3.10 m where the wall permits
Airflow
Opening roof panels
Allow accumulated warm air to escape at the highest point
Rain channels and base
Built-in rain channels with an aluminium base
Include discharge positions, the base support and finished floor connection in the initial site design
The appeal of a lean-to
Using an existing wall preserves more of the garden and places the growing area beside the building
That wall establishes the location and aspect. A position close to the kitchen or patio can reduce walking distances while leaving a greater share of the garden open.
Usable length is reduced by openings, downpipes, projecting architectural details and the clearance required in front of the sliding entrance.
It is also convenient for keeping an eye on herbs, young plants and more delicate crops.
Possible uses
Grow plants while improving the space immediately beside the home
01
Edible garden
Keep culinary herbs, young plants and crops for the current season near the house.
02
Beside a patio
Accoya helps the greenhouse and adjoining outdoor seating feel visually connected.
03
Potted collections
Arrange citrus, feature containers and unusual specimens where they can be appreciated.
04
Production with style
Use a well-ordered plan to accommodate both food crops and ornamental pots.
Surveying the building wall
Take accurate measurements of the intended domestic, garage or garden wall before settling on a size. Note unobstructed width, construction type, viable anchoring positions, every projection and the travel space needed at the entrance. This early survey shows which version belongs on the site without awkward remedial changes.
Exterior finish and installation context
Brickwork, masonry, rendered walls and insulated systems need connection methods appropriate to their individual build-up. The exposed surface of external insulation cannot be presumed load-bearing. Arrange a competent review of the wall layers and proposed anchoring area before foundation work or final specification begins.
Prepare a dimensioned drawing that records doors, windows, sills, exterior lamps, sockets, ventilation grilles, pipes, cables and rainwater goods. Mark everything that needs room for operation, maintenance or eventual renewal. Drawing to scale makes it easier to see whether the eaves, doorway or framing could interfere with the building and establishes the realistic installation width.
A lean-to forms part of the immediate architectural view, so consider how it looks from paths, the patio and rooms facing the garden. Its RAL finish might relate to existing metalwork or window joinery, with Accoya providing the contrasting organic note. Paving lines, joints and surrounding beds will also affect whether the completed setting feels coherent.
Check the wall itself
The full connection line should be stable, sufficiently flat and clear of loose finishes. Identify hollows and raised areas during the survey rather than discovering them during assembly, as they may prevent a neat junction. Make sure the outside work zone remains accessible too, giving installers space to align framing accurately and form secure fixing points.
Look for cracking, flaking render, signs of moisture and patches from previous work. Behind insulation or cladding there may be several materials, each relevant to the anchoring method. Establish the location of concealed electrical cables, water pipes and other utilities before any drilling takes place. Window sashes and roller shutters must retain their full movement.
Wall and plinth defects, failed joints and an inadequate fixing surface should be corrected before the greenhouse is erected. Settle the building-junction method in advance as well. A ready mounting area supports orderly assembly and reduces later repairs in confined spaces behind the structure or planting.
Interior irrigation
Watering is simpler when the connection is nearby and no hose has to remain across the doorway. Keep the line to beds clear of the slider and passage. For cans, provide a firm set-down surface and remove avoidable trip hazards from the route.
Separate drip lines according to the water needs of each planting area. Keep pipework visible and reachable beside beds or shelves for checking and cleaning, with connectors clear of paths and door mechanisms. The arrangement should also empty readily before any lengthy break in use.
A vessel used to store rainwater should be easy to approach yet positioned so that it does not reduce doorway width. Relate its location to both the channel discharge and your usual watering path. Provide a deliberate overflow route that carries excess water clear of the building face and greenhouse base.
Aspect, temperature and fresh air
How the greenhouse behaves depends on orientation, shade, façade effects, glazing, planting density and ventilation practice. Observe the proposed Irish site through the day and across changing conditions. Seasonal shadows from trees, nearby structures or roof overhangs mean the sunniest-looking location is not automatically the most suitable.
Heat beside a sunny south wall
Strong sunshine can warm both the façade and enclosed glazing at once, causing the interior to heat more quickly than the outdoor reading might suggest. Position heat-sensitive crops outside the most intense zone along the rear. Maintaining open circulation routes and timing ventilation for the actual conditions will reduce the risk of pronounced overheating.
Use the upper vents for escaping heat and the sliding entrance for incoming air near floor level. Pots must not impede either control. Ventilation needs attention before the end of a hot day; where the greenhouse is unattended, arrange crops and operating routines to reflect that limitation.
During spells of intense sun, removable shade may ease stress on tender foliage, recently potted plants and young growth. Install it without hampering the upper openings and without creating unsafe access arrangements for the glazing. Heavy permanent shade may compromise other crops, so use an adjustable approach guided by the season, planting and observed light.
Accoya, façade and colour choices
View the aluminium, timber and glazing as part of a wider palette that includes exterior paint or render, window proportions, house rainwater goods and patio finishes. Take RAL samples outdoors to the proposed position, because changing daylight and neighbouring brick, plaster or wood can alter their appearance. The untreated Accoya contributes a separate natural note.
Continue the colour of existing window frames for a restrained result, or choose contrast to emphasise the structure. Consider its grid from adjoining interior rooms too. Subdued combinations can calm a busy paving pattern, whereas plain render or regular brick courses may accommodate a more assertive frame.
Exposure to the weather will gradually alter the look of untreated Accoya. For that reason, avoid choosing neighbouring wood solely by reference to the timber’s initial colour. The aluminium and glazing continue to define the main visual geometry.
Flooring and doorway level
Strength, levelness and easy cleaning are essential for the completed floor. Establish its height together with the integrated base and sliding entrance, avoiding a trip edge. Include planned pots, worktops and finishes in that decision, and keep every later floor build-up outside the door’s operating space.
Paving, slabs, gravel or another suitable finish should be even, slip-resistant and able to direct watering and wash-down water safely. Any fall must not tilt tables or send runoff towards the building. Plan the interior surface, threshold, patio and outside route as one joined detail at the entrance.
Set out the top of the proposed floor on the wall before construction. From that datum, align the foundation, aluminium base, threshold and neighbouring surface while allowing for all sliding-door movement. Fixing the levels early avoids later paving that restricts access or creates a place where water can collect.
Make the interior practical
Let routine tasks determine the layout: arriving, setting down equipment or harvests, tending and watering plants, operating ventilation and leaving. Maximising pot numbers alone creates a poor workspace. Preserve a clear route, reachable working areas and unobstructed openings so regular care remains practical.
Water management beside the house
Rain reaches the greenhouse roof immediately beside the building and should not be allowed to discharge randomly onto the plinth or patio. Trace its entire intended journey, beginning at each built-in channel and ending at the chosen discharge. Account for spray as well as any drainage arrangements already serving the property.
Do not hide downpipes or prevent future maintenance. Close proximity between surface gradients, house drainage and greenhouse outlets requires clearly separated routes or a properly integrated design. Keep cleaning space around discharge points so blockages can be removed without taking apart racks or moving sensitive plants.
Once installation is complete, use a rainy spell to test whether runoff reaches its intended destination. Pooling near the frame, threshold or wall calls for inspection of the falls and outlet. Exclude soil, mulch and pots from water routes so the dryness of connections remains easy to assess.
Maintaining summer airflow
Adjust summer ventilation to the weather, humidity and height of the plants. An open door may not remove heat gathered under the roof if the vents stay closed, while a shut door restricts low-level intake. Use leaf condition and condensation as guides rather than ventilating by a fixed clock.
Do not park large containers, bags or furniture beside the sliding entrance. Controls for the upper openings should remain convenient throughout the growing season. Regularly remove soil, foliage and other obstructions from tracks and moving fittings so that ventilation can be altered promptly when the weather changes.
Airflow suffers when high crops or packed shelves form a barrier from the entrance upwards. Keep tomatoes and climbers away from openings and door guides. Install trellises securely in their own position, never on vents or moving components, and cut back growth before it obstructs maintenance paths.
Allow access for care and cleaning
Before adding benches or choosing the final size, identify how every glazed face, gutter, sliding guide, frame junction and upper vent will be reached. A neighbouring wall or boundary may create the tightest point. Ensure that secure access for ongoing inspection and cleaning cannot later be blocked.
Tracks, drainage outlets and maintainable junctions must remain clear of fixed benches. Site weighty pots outside working routes and where they can stay during cleaning. Give changing propagation containers the most accessible positions, reducing the amount of lifting and shifting needed whenever greenhouse parts are checked.
Reserve permanent working space beside all components that require routine checks or cleaning, and keep empty pots and seasonal stock elsewhere. Work at high level also needs a safe, appropriate standing position. Racking, plant pots and any fixed or moving part of the greenhouse frame must not serve as a step or makeshift platform.
Daily routines through the seasons
The nearby location becomes genuinely convenient when water, compost, tools and collecting baskets each have an accessible place. Store only regularly used materials inside and move seasonal equipment elsewhere whenever possible. Plants are then easier to tend, the sliding entrance remains usable, and spills of growing medium or water can be dealt with quickly.
Convenient access to edible crops
For a greenhouse near the kitchen or patio, place frequently harvested herbs and crops towards the front. Specimens needing attention less often may occupy positions further in, provided those positions supply adequate air and light. A short distance from the house offers little practical gain if furniture, steps or abandoned garden equipment complicate the approach.
Turn a visit into a simple sequence: observe growth, test moisture, alter ventilation and gather anything ready to harvest. Developing problems can then be noticed promptly without making every inspection a lengthy job. Base irrigation on the needs of each type of plant instead of treating every pot to one fixed timetable.
The entrance and aisle must remain usable when hands are occupied by water, plants or produce. Allow furniture for when checking the true passage width, and remove hoses, low storage and projecting supports from it. A secure landing surface near the door keeps carried items away from the threshold.
Benches and racking
Use benches for sowing, potting and inspecting plants, with shelves for smaller containers. Choose a depth that keeps rear pots within comfortable reach. Leave cleaning space beneath or beside the bench, and avoid broad shelving that unnecessarily shades crops or restricts airflow along the glazing.
Set working height according to the users and the job performed most often. A sturdy low stand generally suits heavy pots better than elevated shelving. Preserve overhead clearance for lifting plants and using tools safely, and make sure additions do not prevent access to vents or adjacent panes.
A flexible seasonal arrangement is easier with portable benches and lightweight shelves. Support feet and wheels on a level, load-bearing floor, clear of the door mechanism. Keep defined spaces permanently open for walking and operating roof vents so each cultivation change involves rearrangement rather than a full refit.
Year-round sequence
Use bright surfaces for propagation and repotting in spring. During summer, manage airflow, tailor irrigation and harvest regularly. Selected sensitive pot plants can occupy released areas in autumn. Winter preparation means removing plant remains, clearing rain channels and door guides, and examining every component that can be accessed safely.
Keep only current essentials inside the greenhouse. Unused stakes, empty containers and packaging take up valuable changeover space, although a modest selection of everyday tools may stay securely in dry storage. This discipline allows furnishings to follow new tasks and plant heights while routes and ventilation remain clear.
A flexible interior starts with fixed clearances for the central route, entrance, roof vents and service areas. Seasonal tables, containers and movable racking can be rearranged within them. Any additional attachment to the building wall needs prior confirmation that its construction and the greenhouse connection suit the drilling and imposed load.
Questions to resolve ahead of ordering
Match the wall, access arrangements and glazing to the real site
Choose the version only after confirming clear wall dimensions, construction, finished floor level and sliding-door clearance. Check the delivery route and working room at both sides as well. These measurements identify a size suited to the site and installation conditions without troublesome alterations.
Do not select glazing solely for its exterior appearance. Transparent 4 mm toughened safety glass keeps the plants and internal arrangement visible, whereas polycarbonate changes the light and thermal characteristics. Account for intended crops and proximity to paths, seating or home windows, balancing cultivation, maintenance and architectural effect.
Put the building wall, proposed footprint, doorway, neighbouring paths, water movement and areas of shade onto a single site drawing. Viewing them together reveals clashes that separate option choices can hide. Include working room for washing the exterior and carrying substantial containers. Coordinating these details supports both a well-composed setting and more convenient daily use.
Four stages from survey to use
1
Record the location
Measure unobstructed wall length and note fixing positions, projections, obstacles and assembly space.
2
Specify the model
Coordinate dimensions, glazing material, RAL finish and the chosen doorway arrangement.
3
Ready the ground
Build the foundation and coordinate drainage and floor elevation with the aluminium base.
4
Organise the interior
After assembly, position aisles, irrigation, shelves and planting zones for practical use.
Common questions
Accoya Limited Edition lean-to greenhouse FAQ
Can it be fixed to an externally insulated house?
Suitability is determined by the materials behind the façade and the anchoring method. The insulation face alone should not be treated as structural support. Arrange a competent assessment of the proposed connection area before deciding the final greenhouse configuration.
What should guide the glazing decision?
Toughened safety glass leaves the planting and interior readily visible, whereas polycarbonate produces a different quality of light. Base the selection on how the greenhouse will be used, its position and the appearance wanted from outside.
How can the frame colour be selected?
Place the preferred RAL sample beside the actual exterior. The surrounding window finish, masonry or render, patio surface and untreated Accoya will all change how the combination is perceived.
Where should the sliding entrance go?
Align it with the most convenient approach from the home, patio or garden. Preserve sufficient manoeuvring room at the doorway for someone entering with a can, a harvesting basket or a substantial plant pot.
What provides airflow in warm conditions?
Upper openings let accumulated heat leave, while pulling back the sliding entrance brings replacement air into the lower part of the greenhouse. Keep their operating areas unobstructed and vary their use according to conditions and the planting.
Where can water from the built-in rain channels go?
Connect it to an appropriate planned discharge or direct it to a purpose-suited storage vessel. Design the vessel’s overflow to carry surplus water away without wetting the foundation or running back against the building.
Are the Accoya pieces structural?
No. They add visible timber warmth to the design, while the aluminium framework continues to carry the structure.
What guarantee applies? This greenhouse carries a 12-year commercial guarantee.
Bloomcabin Limited Edition
Build a specification around the wall at your property
First establish the available wall area, the feasibility of its connection and an unobstructed approach. Use those findings to select dimensions, glazing, entrance arrangement and the frame finish.
Points for your specification
✓ measure the usable wall area and map every obstruction
✓ obtain an assessment of the wall layers and anchoring positions
✓ specify glazing for the required light, purpose and visual result
✓ choose the entrance location and protect its approach
✓ align the rainwater discharge, foundation and completed floor elevation
✓ assess the preferred RAL sample beside the intended façade