




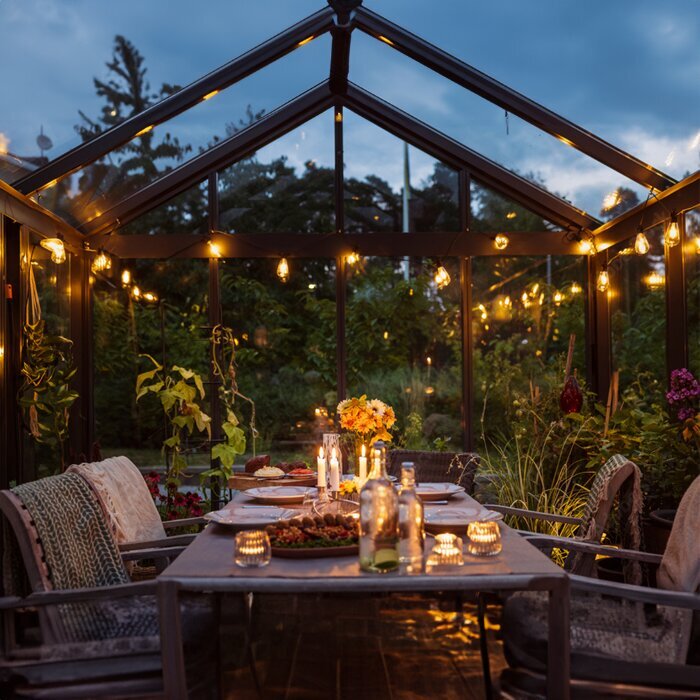





Classic greenhouse on a masonry base
Classic greenhouse on a masonry base – traditional design in clinker brick, natural stone, concrete or rendered masonry
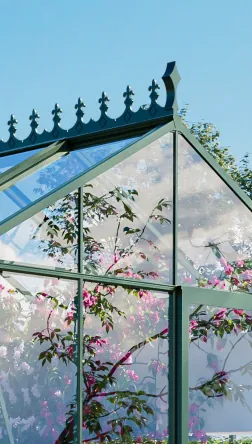
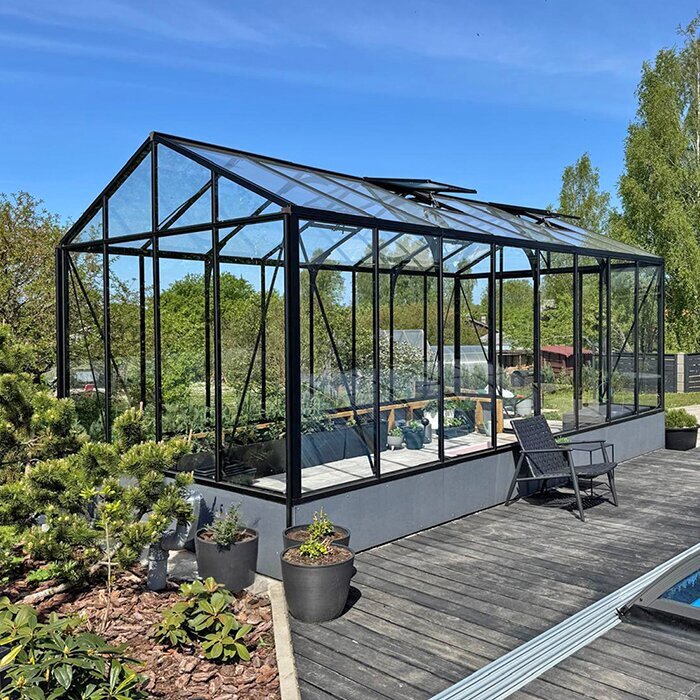
Our Bloomcabin Classic greenhouse on a masonry base brings a freestanding pitched-roof profile together with a bespoke low wall built at the site. Instead of glazing at ground level, clinker brick, natural stone, concrete or rendered masonry forms a solid lower section. The result can echo the home, paving and terrace without losing its distinct greenhouse character.
Configurations cover modest footprints through to generous designs . Choose from different widths and lengths. The masonry base is made for the selected version . Glazing choices include polycarbonate, 4 mm toughened safety glass and selected specialist types. The final greenhouse specification must be settled first so that its dimensions, base height, doorway and frame correspond. The foundation and masonry can then follow the approved measurements accurately.
This model is not a lean-to greenhouse. It stands independently, so no house façade or existing wall forms part of its support. Its frame and pitched roof bear on a dedicated masonry structure. Allow for this arrangement when selecting the position, designing the foundation, providing assembly access and organising drainage. See the masonry-base Classic greenhouse at Bloomcabin Ireland.
Classic greenhouse architecture
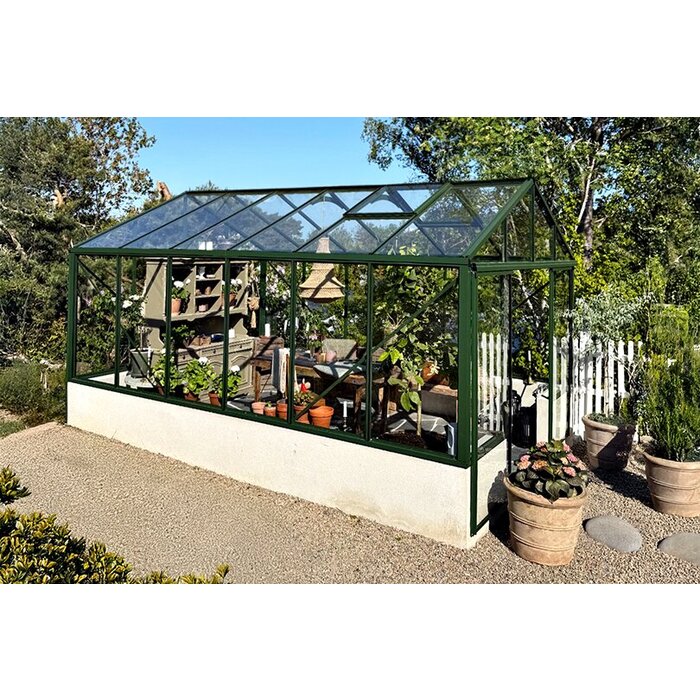
The masonry changes the base, not the classic greenhouse shape
The prepared masonry carries the aluminium frame along its upper surface. Even wall height, true corners and an accurately finished doorway give the Classic outline its intended definition. Because masonry takes the place of the lowest glazed sections, its colour and texture have considerably greater visual influence than on an all-glass version.
An enclosed lower section makes the greenhouse read as a permanent garden feature. Particular care is needed where aluminium meets masonry at each corner and beside the entrance. A restrained palette, precise edges and coordinated finishes generally produce a quieter result than combining numerous surface treatments and unrelated colours.
Raising the frame and glazing above masonry changes how the side areas can be arranged. Benches, short shelving, containers or growing beds may occupy this zone without putting tools or soil beside low panes. Leave the vents unobstructed and preserve adequate space beside the glass for maintenance, washing and inspection.
Benefits of a wall base
How a wall base affects light, working routines and perimeter space
Choose this arrangement when the lower masonry is intended to contribute visibly to the garden design. Opaque material surrounds the bottom of the greenhouse in place of transparent panels. Whether that arrangement works well will mainly reflect the specified wall height and how crops, storage and working equipment are positioned.
Individual design
Match materials, pointing and surface treatment to the garden, paths and buildings
Practical edge zone
Position benches, short shelves and containers in relation to wall height
Enclosed base zone
Keep growing medium, equipment and splashes below the glazed section
Plan the interior together
Coordinate base height, planting areas and working routes from the outset
Configure first, then build the wall base
Confirm footprint, plinth height and doorway before masonry begins
Both the supporting foundation and the low wall are completed at the property. Settle the model, length, width, masonry height and door location before either is started. Indicative outside dimensions and outline drawings are not adequate: minor errors may affect the frame seat, anchoring points or finish around the entrance.
Across the full perimeter, the completed wall top must be stable, level, square and built to the approved dimensions. Check length, width and both diagonals together. On longer models, fixed datum lines and recorded measurements help reveal errors while correction remains practical. Properly remedy level differences before installing the frame.
Entrance position determines both the approach and much of the practical layout inside. While specifying the greenhouse, decide where wheelbarrows, pots and supplies will enter. The agreed doorway and masonry arrangement can then provide the reference levels for the surrounding construction.
Classic construction
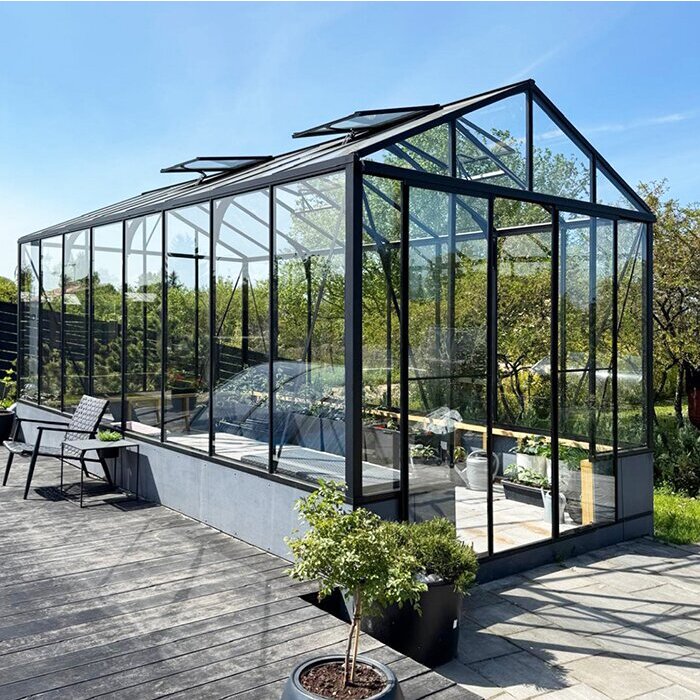
Aluminium framing and glazing made for accurately completed masonry
Area: approx. 3.8–28.1 m².
Wall base: approx. 10–50 cm, depending on configuration.
Main widths: 2.35 m and 3.10 m.
Glazing: Options comprise polycarbonate, 4 mm toughened safety glass and certain specialist glazing types.
Ventilation: Roof vents open manually; compatible versions may also take automatic openers.
Frame: Powder-coated aluminium profiles.
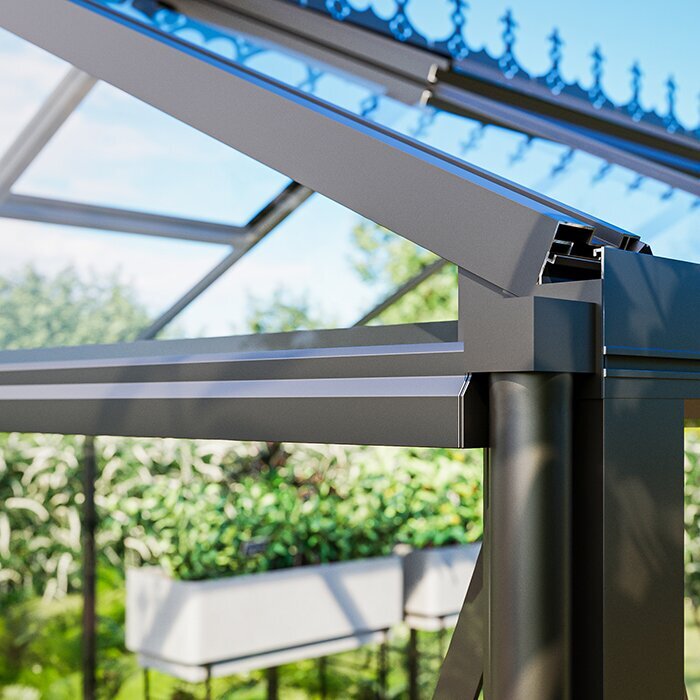
Drainage: Integrated gutters.
Doors: Chosen versions can be supplied with sliding doors.
Guarantee: The guarantee terms provide 12 years’ cover for the aluminium greenhouse structure. Its stated design ratings are 30 m/s wind speed and 210 kg/m² snow load. These ratings depend on correct assembly and an adequate load-bearing masonry base. Assess the actual site’s exposure and ground conditions as well, and follow all inspection and maintenance instructions.
Design
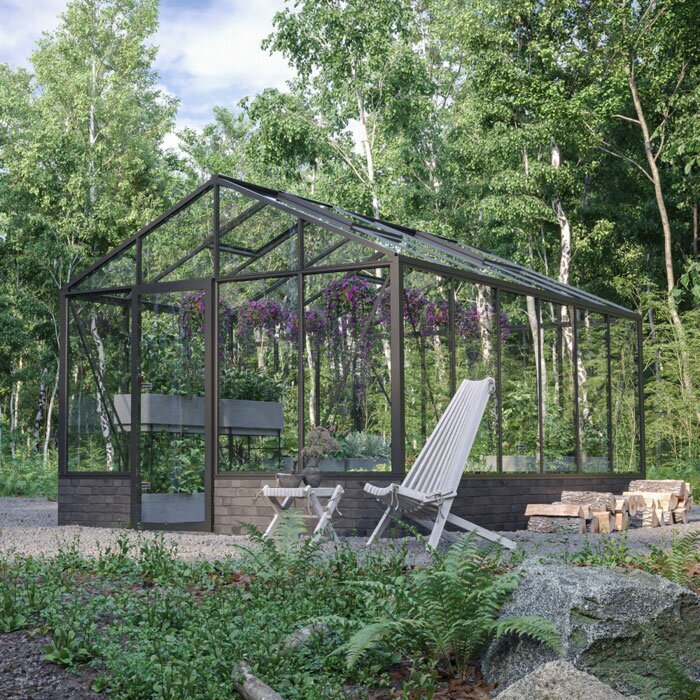
Relate the masonry finish and frame colour to their surroundings
Clinker brick that shares tones with the house can create continuity without imitating the façade. For natural stone, overall texture and the balance of colours often matter most. Rendered masonry or exposed concrete gives a quieter background and may bring the aluminium into greater focus. Appearance is only one criterion: the chosen material must also work with the proposed construction.
Pointing colour, joint size, brick bond and treatment along the wall top all shape the finished appearance. That upper edge also has to provide an accurate seat for the frame. Any coping or overhang must leave installation and fixings unobstructed. Resolve the corner and entrance details against the approved greenhouse drawings before masonry is laid.
A chosen RAL finish may sit quietly alongside the masonry or create an intentional difference in tone. View samples outside under natural light rather than relying on a colour card alone. Nearby paving, paths and vegetation should be part of the comparison, since the broader setting will strongly affect how the completed greenhouse is perceived.
Proportions
Choose base height to suit plants, views and interior fittings
Lower masonry preserves a more open relationship between the greenhouse and its surroundings. It may be preferable for short crops that benefit from lateral daylight or where a transparent appearance is important. In return, benches and beds have a smaller opaque background to contain splashes and screen stored items, which should inform the internal arrangement.
Increasing the masonry height gives the structure a more grounded appearance and conceals more of the lowest interior area. That can work well beside counters or containers placed near the perimeter. However, height is not a free choice: select only an available arrangement that corresponds with its entrance, glazing and aluminium frame.
Three questions help: what will grow beside each wall, what height is comfortable for routine tasks and how open should the view remain? Answering them while specifying the greenhouse allows masonry and fittings to be planned together, reducing the risk of awkward working heights or avoidable shade over crops.
Interior fittings
Arrange shelving and workbenches sensibly along the wall base
Shelving and benches that stand independently need firm footing and dimensions that prevent contact with panes or aluminium members. Where anything is anchored into masonry, select fixings appropriate to its build-up and avoid imposing additional forces on the greenhouse frame.
Keep regularly used pots, tools and growing media within easy reach on the bench rather than scattered at ground level. Heavier stocks belong in stable storage close to the floor. Preserve an unobstructed route for watering cans, produce baskets and containers so routine work neither impedes the entrance nor damages tender foliage.
Allow a service gap beside the glazing for airflow, washing and inspection. Shelves and plant supports beneath roof vents must remain low enough for unrestricted travel, including where automatic actuators are fitted. Drawing the interior to scale before purchasing fittings makes it easier to balance benches, growing zones and circulation space.
Planting
Keep tall plants and movable pots out of vents and walkways
Tomatoes and other vigorous upright crops require headroom and a location where foliage will not obstruct the entrance, central aisle or roof ventilation. Set trellises in response to the pitched roof and vent positions. Planned spacing makes later tying, side-shoot removal, harvesting and clearance of spent growth considerably easier.
Pots make the perimeter adaptable, since they may be repositioned for changing daylight or moved aside during cleaning. Use trays or another suitable surface so irrigation water does not repeatedly collect at one point. Large containers require stable support and placement that prevents them falling towards masonry, aluminium members or glass.
Separate activities clearly: place shorter crops where edge light is useful, keep tall growth away from vent alignments and locate portable pots without reducing aisle width. Inspect developing shoots during the growing period for contact with hinges and actuators. Guiding growth promptly is kinder to plants than substantial corrective pruning later.
Load-bearing base
Prepare foundations and ground for lasting load-bearing capacity
Design the foundation around the soil, frost exposure and size of greenhouse selected. The visible shape of the low wall does not, by itself, establish the correct substructure. If the garden contains made ground, uncertain soil or a slope, obtain competent advice on the necessary support before ordering materials or starting excavation.
Good pointing or smooth render cannot compensate for an inadequate structure beneath the wall. Any settlement or movement may be carried upwards into the aluminium and glass. Sound support, accurate levels and effective drainage therefore take precedence over surface improvements to a weak base. The masonry carries the greenhouse; it is not simply a decorative border.
Decide on outlets for rainfall and wash water before pouring concrete or laying masonry, and identify any ducts needed for services. Forming openings afterwards is disruptive and could harm finishes or water-resistant layers. Route every service so that neither the foundation’s capacity nor the designated anchoring locations are weakened.
Access
Coordinate the doorway, threshold and adjoining path levels
Form the entrance to the exact sliding-door specification and agreed masonry height. Width is only part of the setting-out task; the levels of the wall top, threshold, interior finish and outside path must also correspond. Errors may restrict travel or leave an unforeseen step, so issue identical approved measurements to every contractor involved.
Wheelbarrows, plant pots and produce crates are easier to move along a direct approach of sufficient width. Even a shallow lip becomes inconvenient under load. When completing the interior, keep its surface beneath the door mechanism and intended drainage plane. Grade the area outside the entrance so rainfall does not pond there.
Before the entrance masonry is laid, identify its centre and permanent level datums visibly. Assess the opening only after allowing for every completed finish, since render, paving and coping alter the clear final size. Record a verification before approving the work to reduce the likelihood of remedial cutting or rebuilding.
Drainage
Carry roof runoff clear of the masonry and foundation
Built-in gutters receive runoff from both roof slopes and provide defined discharge points. Position those points and their onward routes so the visible wall is not streaked and the supporting ground is not saturated. Give particular attention to the entrance, where poor drainage may leave the approach and threshold wet after rain.
Shape the surrounding ground to carry overland flow away. Water leaving a gutter should continue downslope rather than follow an adverse gradient back towards the masonry. Consider adjoining beds and paving as part of that route; adding length to a downpipe will not correct unsuitable levels in the surrounding area.
Roof runoff may be stored for subsequent irrigation where the vessel and fittings can be positioned appropriately. Give a water butt a stable footing without occupying door, gutter or service access. Provide a deliberate overflow route as well, preventing a full vessel from discharging next to the supporting masonry during intense rainfall.
Climate
Vary ventilation with crops, outside conditions and solar gain
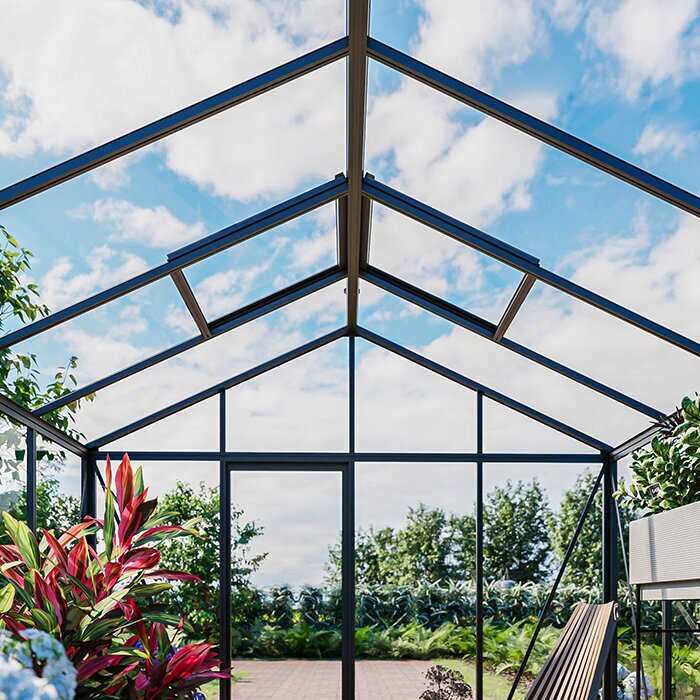
Heated air gathers beneath the pitched roof, where opened vents allow it to leave. Keep climbing plants, stored materials and training wires outside each vent’s travel. Opening the entrance can increase exchange when appropriate, but avoid exposing sensitive crops to persistent, forceful draughts.
A shut greenhouse may warm rapidly in sunshine, so introduce ventilation before foliage displays clear signs of overheating. The right response changes with crop development, irrigation, weather and planting density. Conditions in a full midsummer house differ from those in a sparsely occupied early-season space, making rigid daily schedules unhelpful.
On compatible models, temperature-responsive openers can assist with routine air exchange. They still require observation of the crops, entrance and moving hardware. Ireland’s changeable Atlantic weather makes checks worthwhile after strong winds, sudden shifts or time away, ensuring each vent travels without obstruction and closes correctly.
Material choice
Choose glazing for light effect, appearance and intended use
Toughened safety glass gives an unobstructed outlook that complements the traditional lines of the Classic. From the garden, its crops, masonry and fittings remain readily visible. Arrange shelving, tools and other rigid items to avoid impact with the panes. Use the product instructions when installing or washing each glazed element.
Compared with clear glass, polycarbonate changes the distribution of light, overall weight and thermal behaviour. Its less transparent appearance can make internal storage and fittings less prominent. Select between them according to crops, visual preference and how the space will be used, while also considering exposure and the ventilation arrangement.
Specialist glazing adds further possibilities on selected versions. Verify availability for the exact model and panel locations before committing to the masonry. Choosing the glazing, aluminium finish and wall material as a coordinated palette usually gives the strongest result. Revising those choices after construction demands much more work than settling them during design.
Interior
Create an easy-care floor and coordinate it with door height
Paving slabs, gravel and other durable finishes can continue the visual language of the masonry. Practical priorities include stable footing, straightforward sweeping and an effective fall for water. Prevent loose aggregate from reaching the sliding-door guide, and finish hard surfaces without raised edges where people work or pass between areas.
An easily swept finish is useful where compost and potting work are frequent. Open growing beds behave differently from paved circulation zones. Both can share one practical plan, provided neither the support nor the masonry is compromised. Retain sight of perimeter junctions and joints so their condition can be examined.
Establish the completed floor datum before setting out the entrance, accounting for all construction layers between subgrade and final finish. A later increase in build-up could obstruct the threshold or sliding mechanism. Include removable grilles and mats in the level assessment so they do not project into the door’s travel at the entrance.
Connections
Plan electricity, lighting and service routes early
If sockets or lights are envisaged, concealed protected routes are easier to form while the foundation, masonry and floor are being completed. Position them around benches and unobstructed passages. In Ireland, ask a Registered Electrical Contractor to determine whether the proposal is Restricted Electrical Works and which completion certification applies.
Empty conduit can support later additions when its route, termination points and weather sealing have been agreed beforehand. Keep cables off walking surfaces and clear of operating windows and doors. Exposed runs may interfere with work as well as the appearance. Retain a simple services drawing so concealed connections can be found after completion.
Where heating is proposed, decide early on its position, power source, controls and separation from vegetation. It does not remove the need for ventilation or crop planning. Operate equipment only as intended; improvised heaters and inappropriate extension leads are unsuitable as lasting arrangements for periods without supervision.
Greenhouse types
Should you choose a freestanding Classic or a Lean-To?
A Lean-To is designed beside an existing building, whose wall largely determines placement and use. The available façade area, connection detail and access from the exposed sides are integral to that approach. Choose it where a direct relationship with the building is wanted and the property can accommodate the required junction.
The masonry-base Classic instead has a pitched roof of its own and remains independent around its perimeter. No domestic wall is required, although the greenhouse needs dedicated structural support and working clearance on every side. Its garden position is consequently more flexible, subject to daylight, approach, separation distances and conditions at that location.
Base the comparison on garden area, access, available light and whether a physical relationship with the house is desired. Around a Classic, reserve working room for glazing installation, washing and gutter care. Planning a Lean-To focuses more closely on the host building and the way its façade is joined.
Care and access
Preserve room for washing, checks and routine upkeep
Keep the wall faces, glazing, roof vents, entrances and gutters reachable throughout the greenhouse’s life. A workable perimeter provides room to remove debris, wash panes and examine junctions. It also gives ladders and long-handled equipment stable positions without forcing the user into planting beds or across adjoining property.
Avoid placing dense hedging or vigorous climbing growth immediately beside the aluminium. Branches may abrade coatings or glass, while fallen foliage obstructs gutter flow. Heavy vegetation can also hide early signs of movement or damage. Prune nearby plants to maintain a practical separation from every side of the greenhouse.
The maintenance margin may remain unpaved, provided it offers stable footing and stays unobstructed. Site composters, water butts and substantial pots where components remain visible. Reserving this circulation space during layout avoids awkward workarounds later and permits inspection without first moving or dismantling other garden features.
Seasonal care
Inspect drainage and structure on either side of winter
Ahead of winter, operate each roof vent, actuator and sliding entrance, then inspect guttering and discharge points. Take away redundant supports and secure loose equipment. Debris left in inaccessible corners traps dampness and masks developing faults; orderly growing areas make changes in masonry, glass and aluminium easier to identify.
Following frost, snow or severe wind, examine the interior and exterior. Look at panes, fasteners, entrance movement, vents and visible masonry junctions. When clearing snow, avoid creating concentrated loading or closing off access routes. Arrange competent repair of damaged components or mechanisms that no longer travel smoothly before returning the greenhouse to normal use.
As a new growing period begins, clear the gutters, test mechanisms and clean the panes using appropriate materials. Examine pointing, render and exposed stonework for deterioration at the same time. Prompt attention to small faults can limit moisture entry and seized hardware. Give the maintenance directions for glazing, accessories and aluminium priority.
Long-term planning
Allow the masonry design to accommodate later garden changes
Although planting, furniture and routes may evolve, the masonry and foundation remain committed to one location. Their proportions continue to influence whether the greenhouse appears delicate or substantial. Simple detailing and restrained finishes tend to sit more comfortably with future alterations elsewhere in the garden.
Future maintenance deserves attention when materials are selected. Pointing, rendered faces and exposed stone should remain available for examination and local repair. For successful greenhouse fitting, precise workmanship and a suitable upper wall surface are more valuable than ornamental features that make anchors and junctions difficult to reach.
Reserve practical space beside the masonry for future crops and ongoing care. Subsequent paths, raised beds or large pots should not encroach on entrances, gutter discharges or washing routes. Including those margins in the first layout lets the garden change without hiding or limiting essential greenhouse parts.
Project sequence
Sequence surveying, masonry and greenhouse assembly carefully
Agree in advance who will issue approved measurements, verify them at the property and authorise the masonry for assembly. The owner, mason and greenhouse installers all need one current drawing set. Communicate any revision to the entrance location, footprint or wall height before the affected work is executed.
After the mason finishes, document the two side lengths, diagonals, elevations and completed entrance. The frame seat, copings and neighbouring surfaces should be finished and correspond with the approved greenhouse selection. Do not release assembly until discrepancies found during this inspection have been understood and corrected.
Before breaking ground, consult the relevant local authority about the site’s planning position and whether a Section 5 declaration is appropriate. Check boundary conditions, underground services and property limits for the particular plot. Product guidance cannot settle those questions; also confirm practical access for deliveries and greenhouse assembly before excavation.
Frequently asked questions
Answers about the masonry-base Classic greenhouse
Does this greenhouse rely on the house?
No. This Classic is an independent greenhouse with a dedicated supporting base and pitched roof. The house provides neither structural bracing nor a rear enclosure.
When can construction of the wall base begin?
Only after the model, size, door arrangement and base version have been selected finally and the associated dimensions confirmed. Do not build foundation and wall from provisional information.
Who builds the foundation and wall base?
The answer varies with the particular scheme. Both elements are completed at the property to the greenhouse’s approved dimensions. Engage an appropriate specialist where the soil, support, water management or proposed masonry needs technical evaluation.
Can clinker brick, natural stone, concrete and render be used?
Yes, all may be considered. Each requires an appropriate construction method, while the completed upper surface has to be strong, horizontal, square and accurately formed for installation.
Can the wall head have a coping?
Only when its detail has been checked against the approved structure and leaves the frame seat and anchoring locations unobstructed. Settle any overhang at the entrance or corners before masonry work.
Can the internal floor be raised later?
Only where the threshold and sliding mechanism retain full clearance. Determine the completed floor elevation, including every intended finish layer, before the entrance is formed.
Can water from the gutters be collected?
Yes. A properly positioned vessel may store it for irrigation, provided the vessel has secure support and leaves the entrance, gutter and service route accessible. Direct overflow safely beyond the supporting masonry.
How is this version different from the Lean-To?
A Lean-To is connected to a building and incorporates its wall into the greenhouse arrangement. The masonry-base Classic remains structurally independent, supported by its dedicated foundation and low wall rather than a façade.
Bloomcabin Classic
Independent Classic form above bespoke garden masonry
At handover, give the installers one coordinated pack containing drawings, recorded dimensions and completed-surface information. It should identify every intended frame seat, datum and route through the masonry without ambiguity at the property.
Documents and checks for construction
✓ Supply the approved model plan showing footprint and entrance
✓ Document masonry material, build-up and completed height
✓ Clearly mark height references for threshold, internal floor and external path
✓ Plot gutter discharge points and every required service sleeve
✓ Record length, width, diagonals and level before assembly
✓ Keep the delivery and assembly approach unobstructed