







Compact barrel sauna with vestibule
LC 225 – space-conscious thermowood barrel sauna with a separate lobby and capacity for as many as four people
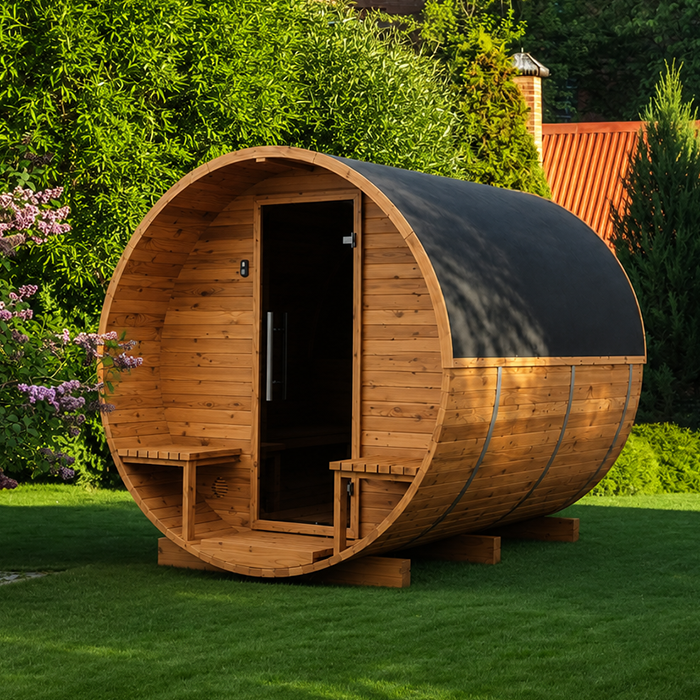
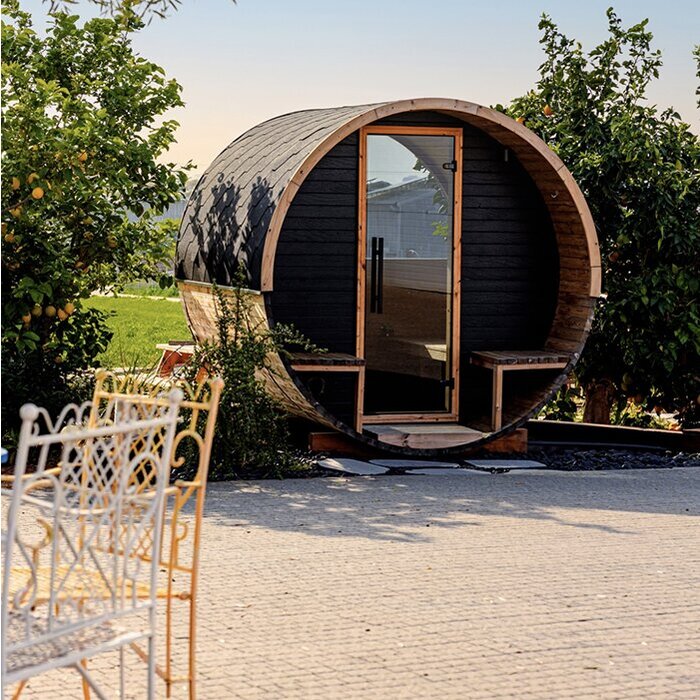
The Bloomcabin LC 225 pairs its economical barrel profile with a distinct entrance lobby and a heated room accommodating as many as four users. At approximately 227 × 194 × 204 cm externally, it can work in more compact gardens or on smaller patios. Headroom inside is about 175 cm. It is intended for buyers who would favour a sheltered arrival space over gaining the greatest heated length from a restricted footprint.
See more dimensions and structural styles in the Bloomcabin sauna range.
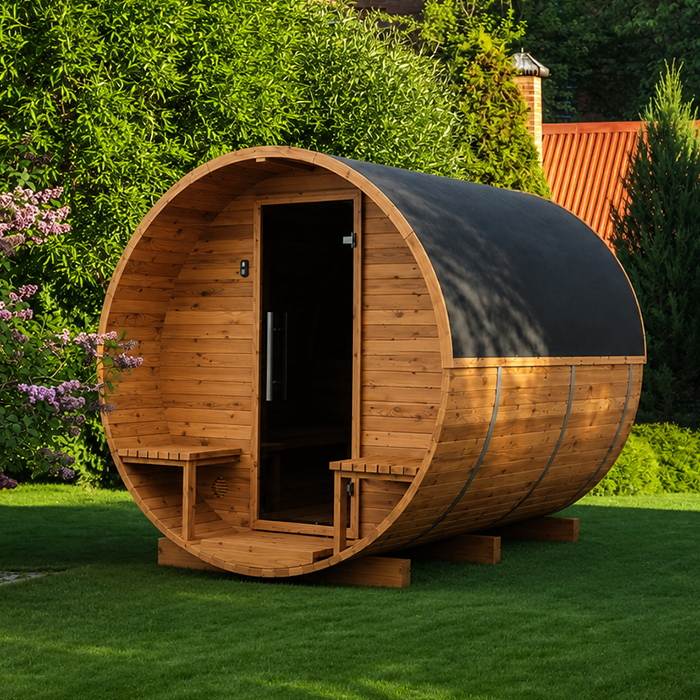
Model profile
What the entrance lobby adds to this compact LC 225
The unheated lobby occupies some of the LC 225’s modest overall length. Although this shortens the warm room, it creates a definite threshold between the outdoor setting and the sauna itself.
That division supports a tidier routine. Footwear can be left near the outer doorway, with dry towels and robes within reach, rather than using the sauna benches to hold personal belongings.
It also acts as a useful thermal pause in winter. Opening the exterior door admits the chill into this intermediate space before it can reach the warm cabin.
Essential details in brief
LC 225 at a glance
Beyond checking overall measurements, decide whether the bench arrangement, head clearance, lobby and proposed electric heat source fit your normal pattern of sauna use.
Up to 4 people
Relate this maximum capacity to the number of people likely to attend on an ordinary day.
Approx. 227 × 194 × 204 cm
Include clearance at the doorway and room to reach the sauna for upkeep in your site calculation.
Integrated vestibule
A practical feature when a covered threshold takes priority over gaining extra heated-cabin length.
Approx. 175 cm internal height
Before committing, assess the available head clearance against each user’s height and usual seated posture.
Use
What space can users expect inside the LC 225?
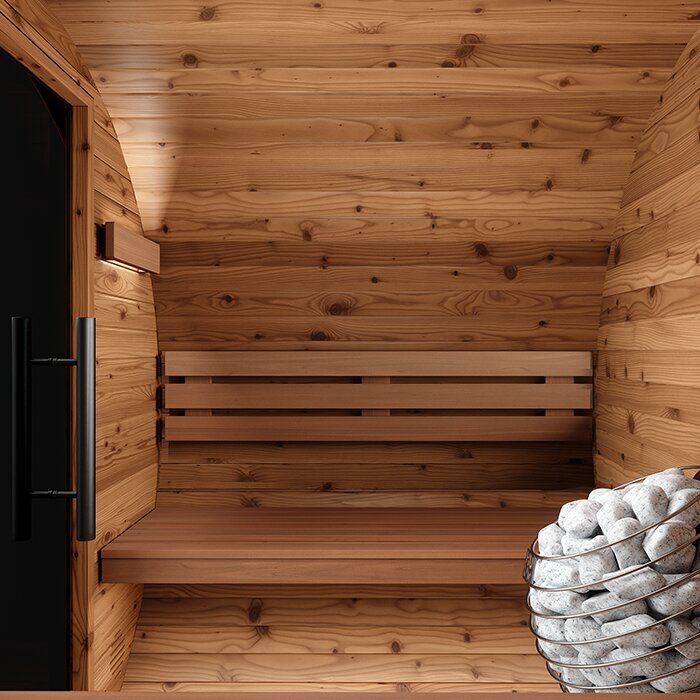
The LC 225 can accommodate as many as four users. Occupying every seat brings everyone closer, whereas a session for two leaves noticeably greater individual room.
Consequently, couples need not regard it as excessively large. They can spread out more comfortably without giving up the restrained outer profile.
For frequent sessions involving more guests, longer benches or easier movement, consider the LC 260 or one of the taller LCF configurations.
Thermowood
FSC®-certified thermowood for an outdoor barrel-style sauna
FSC®-certified timber, modified by heat, forms the LC 225. This process lowers the wood’s tendency to absorb moisture and improves dimensional steadiness.
Visible grain and a warm timber shade suit the established barrel silhouette. It sits naturally beside wooden decking, stone finishes, planted gardens or a holiday-home property.
It is still genuine timber, despite the treatment. Exposure to sunshine, rainfall and fluctuating temperatures may shift the shade or produce minor movement. Periodic inspection and care suited to thermowood are therefore still important.
Electric heater
An electric heater for conveniently planned sauna sessions
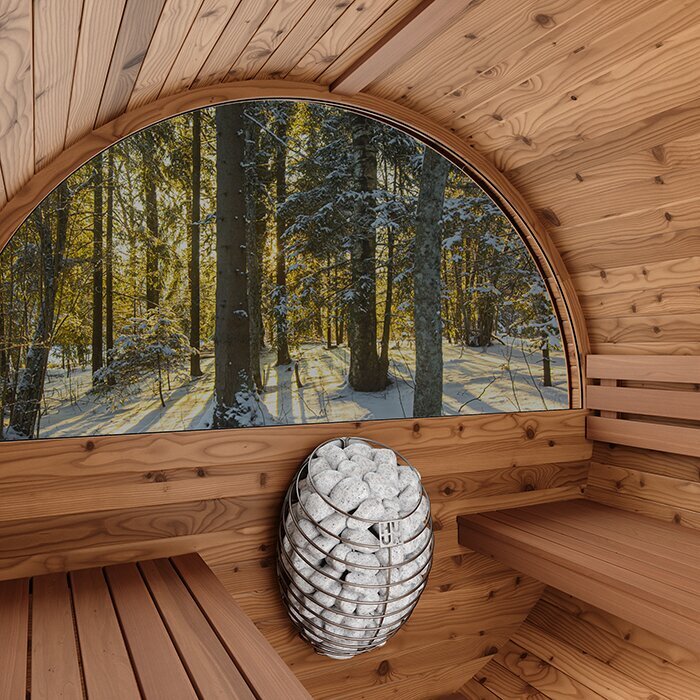
A compatible electric sauna heater is envisaged for the LC 225. This avoids having to prepare and store logs whenever you plan a session.
Choose output according to the true heated volume, amount of glazing and the equipment maker’s directions. Too little output means slower heating, while excessive output brings no inherent gain in comfort.
Have the supply, protective arrangements and final connection assessed by an Irish Registered Electrical Contractor (REC). The REC should decide whether the job is Restricted Electrical Works and what completion certification applies; provide the documents for the sauna, heater and controls.
Foundation
Level, load-ready support with effective water run-off
A small barrel sauna still calls for support that stays level and can bear its load. Site-appropriate options might include a concrete slab, correctly laid paving, suitable individual supports or a patio whose structure has been assessed. It must distribute the sauna’s weight dependably, minimise movement from frost where practicable and give even support at every specified contact point.
Set out the full outer profile on the chosen ground. Extend this plan to cover door clearance and the working room needed for construction, examination and later maintenance. Even slight variations between support heights may strain the curved structure. Misalignment can then make the door bind or prevent parts from meeting cleanly. Verify the level across the completed foundation carefully before assembly begins.
Do not allow rainfall or thawing water to linger under the unit or along its edges. The drainage arrangement should direct it clear of the timber without sending it across adjoining walkways, while preserving ventilation below the structure. If reusing a patio, investigate its strength, slope, drainage and present condition. An area that merely appears substantial cannot be assumed to support a sauna correctly.
Comparison
LC 225 or HC 225 – vestibule or maximum heated interior?
In the LC 225, the lobby claims some of the overall length. It brings better separation and organisation, in exchange for a shorter heated room.
The HC 225 has no such transition area and makes more of its available length into a heated cabin.
The covered lobby is especially useful when the sauna will be visited throughout the year. Where the aim is instead to gain the greatest possible bench length from broadly comparable outer measurements, include the HC 225 in your comparison.
Winter use
Using the LC 225 during cold, wet weather
During colder months, treat the unheated lobby as a short-stay changing point and a place to set out dry fabrics. Because temperatures there may stay low, bring damp towels and robes back into the house after each session so they can dry completely.
Plan the journey from the dwelling to the sauna for winter conditions as well. Provide good lighting and a dependable walking surface when rain or frost occurs. Check that the exterior door retains its full swing and that precipitation cannot pool immediately outside it.
Following an extended idle period, examine the sauna before heating it again. Look over the doorway, reachable connections and air openings, noting any evidence of damp. Remove accumulated leaves or other material from the vicinity of the supporting base too.
Care
Let the cabin dry, then examine timber and fittings routinely
Once a session ends, air the room fully and allow all surfaces to dry. Do not leave wet robes or towels lying on benches or stored in the lobby.
At intervals, look over the metal bands, fasteners, doorway, seals and weather protection above. Variations in heat and moisture affect timber, meaning adjustments may occasionally be needed.
Clean with products compatible with the material and a cloth that is only slightly moistened. Avoid pressure washing and harsh domestic chemicals on untreated sauna wood.
Who is it for?
Who is the LC 225 especially suitable for?
This version is well suited to people who normally use a sauna in pairs but would like scope to invite others occasionally. It also gives smaller families a shared facility without requiring the space of a sizeable sauna building.
On a holiday-home site, its traditional rounded shape, electric-heater provision and covered arrival point may be an attractive mix.
Anyone who is tall or values extra clearance overhead may prefer to examine the LCF 225, which offers about 210 cm internally.
Year-round use
Choosing a practical everyday location
Where the LC 225 sits will shape how easy it is to enjoy frequently. Being near the house can help, although access needs and any local site constraints also require attention. Test the proposed journey in the same way you might make it later, barefoot or wearing bathing shoes. Steps, loose stone, subtle changes in level and slick paving may all prove inconvenient after a hot session.
Decide where cooling breaks and post-sauna rest will happen as well. There is no need to create an extensive spa zone, but a convenient seat should be available without narrowing the walkway. Arrange any water services, drains or cabling competently, ideally ahead of setting the sauna in position and completing surrounding paths.
Review sightlines from neighbours’ land and from public approaches. Privacy screening must still permit ventilation around wooden surfaces and leave inspection points reachable. Keep planting sufficiently far back that branches cannot rub the wall and wet foliage does not remain pressed against it.
Planning notes
Details that make coordination before installation easier
One concise project sheet can align siting, arrival arrangements, base preparation and electrical tasks before construction starts.
Dimension sketch
Plot the outer measurements, doorway clearance, walking routes and service access on the proposed site.
Access photographs
Photograph the approach, drop-off point, gates, steps and restrictive bends clearly.
Base information
Record its make-up, level, water run-off and any existing support points.
Heater documentation
Retain specifications for the chosen heater and controls for use in the electrical design.
Before ordering
Clarify configuration, delivery and local requirements before purchase
Review the selected version and its stated contents before purchase. The heater, controls and sauna stones may form part of some configurations but require separate purchase with others.
Identify a suitable unloading point and trace the onward movement of every component to the prepared base. Check gates, steps and narrow corners for the clearances demanded by elongated or awkward items.
For the particular site, confirm planning status and constraints with the relevant local authority, and have an REC establish the electrical and certification requirements. Broader guidance appears under Useful information.
Ongoing commitment
Plan realistically for energy and upkeep
Future energy and maintenance expenditure deserves consideration alongside space requirements. Electricity demand for this sauna will vary with the length and regularity of sessions, weather outside and the way each household uses it. A single generic consumption estimate would therefore offer little guidance. Base your assessment instead on the likely weekly or monthly pattern and the typical number of occupants in your LC 225.
Its setting creates recurring chores too. Keep access paths clean and secure underfoot through winter, inspect drains and trim back vegetation when necessary. Build routine observation and condition-led treatment of the wooden shell into your plans. Good access matters: otherwise the hoops, supporting areas or surfaces awaiting care may become awkward to inspect or treat.
Think through a normal sauna-day routine: decide where fresh towels will wait, how users get to the cooling spot, and who will air both rooms once the last bathers leave. Over time, a well-managed sequence is more valuable than adding accessories that cannot be accommodated sensibly in this small model.
A sauna session
Prepare, sauna and dry the space properly afterwards
Clear every object from the heater zone before applying power. Towels, robes, cleaning supplies and other possessions must never sit on the appliance or immediately alongside it. Make sure each air opening is unobstructed and confirm that the doorway moves freely. Operate the heater, controller and stones as their respective makers direct, without making unauthorised changes to electrical parts.
Maintain an orderly cabin while bathing. Bring in only the fabrics required and preserve an unobstructed exit route. A responsible adult must remain in immediate supervision of any child using the sauna. Select heat, session length and recovery intervals according to personal comfort; step outside promptly if you begin to feel unwell.
When the final round is finished, take movable belongings and moist fabrics out of both spaces. Allow heat to fall safely, continuing to air the room until seating and other surfaces have dried. Consult the user manual and verify that power to the electric heater has been turned off.
Space planning for small plots
Assess the shell, entrance clearance and servicing room as one plan
On tighter sites, the sauna’s stated outer size is only part of the required area. Users need clearance beyond the entrance, and inspectors must still be able to reach the walls, roof and supporting zone. Test the layout for interference from furniture, borders, rainwater pipes or nearby planting.
Next, study the relationship between the doorway and the approach from your home. A layout may look efficient on paper yet prove inconvenient if every visit involves circling the building. Account for privacy while users arrive or depart, and favour a position that carries surface water in the opposite direction from the threshold.
Building the sauna demands a larger temporary work zone than its permanent footprint. Remove low branches, projecting masonry, furniture and stored belongings from around the prepared support. Sequence base preparation, path or patio works and the sauna build so workers can continue to reach the assembly zone freely through the final stage.
Electric sauna in everyday use
Resolve power requirements before preparing the base or landscaping
Required heater rating, control equipment and connection method vary with the LC 225 version ordered and its manufacturers’ directions. Ask a suitably qualified electrical professional to settle these matters before enclosing cable runs, finishing a patio or laying paving. Adding cabling afterwards could mean reopening soil and completed surfaces unnecessarily.
The design should cover the incoming cable’s course, appropriate protection and a sensible position for each control. Equipment installed outdoors has to match its environment and be fitted competently. Neither an extension lead nor a makeshift connection provides an acceptable permanent supply. Give the electrical contractor all available sauna, control and heater literature.
Consider future access to the electrical installation once assembly is complete. Hidden cables need protection from subsequent fixings, drilling and landscaping. Make a durable record of their position while they are still visible. At handover, obtain a clear explanation of routine start-up and shutdown, together with contact details for assistance if the system develops a problem.
Fitting out the vestibule
Furnish the compact vestibule sparingly
Treat the lobby as an entrance, not a complete dressing area. Robe hooks, a modest ledge and clear standing space are usually enough.
Bulky cupboards and accumulated belongings undermine its main purpose, which is to provide an easy threshold on the way from the garden into the hot room.
Use only fittings that preserve easy reach to the floor, corners and walls for inspection and cleaning. Remove loose possessions, particularly moisture-sensitive ones, rather than leaving them there indefinitely.
Assembly and initial inspection
Prepare installation and first commissioning carefully
Study all installation literature before opening packs and laying out the parts. Provide a clean, dry holding place where wooden pieces are protected from dirt and pooled water. Check delivered items against the order paperwork. If the role of any piece is uncertain, resolve it before cutting, altering or permanently attaching it.
As work progresses, verify repeatedly that the body remains true and that joints are formed as specified. Avoid excessive tightening of fasteners. Reliable door movement in a barrel construction depends on numerous pieces aligning accurately; minor early errors can compound as later stages are completed.
Complete a thorough review ahead of the inaugural session. Confirm unrestricted door movement, sound placement of the internal pieces, unobstructed airways and satisfactory visible exterior condition. Leave the electric heater unused until its professional connection is complete and its operation has been explained. Store the installation, maintenance and heater literature for reference during future examinations.
Safe operation
Keep ventilation open and manage moisture deliberately
Designed air movement contributes to comfort during bathing and removes moisture later. Keep every vent clear of fabrics, ornaments, added shelves and stored possessions. Avoid changing the airflow simply to improve appearance, because the ventilation arrangement, heater and pattern of room use operate as a system.
For the first several sessions, observe where dampness persists after the room has cooled. Remove visible droplets, then maintain ventilation instead of closing the cabin tightly as soon as people leave. If the same places stay damp for an unexpectedly long period, investigate both the airflow and the source of that moisture.
Extend these observations to both doorways and the junction linking the lobby with the hot room. Their reachable surfaces make early signs of damp, soiling or material movement easier to notice and address.
Questions customers often ask
FAQ – Bloomcabin LC 225
Is the lobby suitable for long-term storage?
No. This small space chiefly offers a covered threshold before entering the sauna. Robes and clean towels may wait there during a session, provided they leave enough room to move. Afterwards, take damp fabrics and vulnerable belongings back inside the house.
What additional clearance is needed beyond the stated size?
Outer measurements for the LC 225 are approximately 227 × 194 × 204 cm. The site plan must also provide doorway clearance, dependable walking room and working access for construction, inspections and timber treatment. Mark those zones on the actual ground and check site-specific requirements before preparing the base.
Will the interior height feel comfortable for a very tall user?
With roughly 175 cm of head clearance, this is a compact sauna intended primarily for sitting. Taller users should test that figure against their own comfort needs. For appreciably greater height, consider the elevated LCF 225.
How comfortable is the LC 225 at full capacity?
Capacity reaches four users, though filling all seats means sitting at closer quarters. A pair will enjoy considerably more room around each person. Judge comfort by how frequently your household genuinely expects every available position to be occupied simultaneously.
Does every version include the electric heater, controls and sauna stones?
No. Package contents vary: one version may supply the heater, controls and stones, while another offers some or all of them as separate purchases. Read the exact order specification and have the chosen items checked for compatibility.
How does thermowood change outdoors?
Outdoor exposure can gradually shift thermowood’s appearance. Heat treatment improves stability but does not stop this natural timber responding slightly to humidity and temperature. The degree of change reflects conditions at the chosen site, so periodic observation is the best way to spot developments promptly.
Can the LC 225 stand on an existing patio?
Yes, if it remains level and stable, has sufficient structural capacity and supports all specified contact positions evenly. Its slope, drainage, underfloor ventilation and overall construction must be appropriate too. Obtain a proper assessment rather than relying on how substantial the patio looks.
Can the LC 225 be connected using an extension lead?
No. Extension leads and makeshift arrangements cannot provide the permanent supply this sauna needs. Cable selection, electrical protection, control equipment and connection method must correspond to the heater ordered and be designed and completed by an appropriately qualified electrical professional.
Bloomcabin LC 225
Choose the LC 225 and prepare your order
Consider the LC 225 when you need a small-footprint thermowood barrel sauna that provides its own lobby, accepts electric heating and accommodates as many as four bathers. Before purchase, evaluate its head clearance, bench layout and closer seating at maximum occupancy against the sessions your household normally enjoys.
See more dimensions and layouts in the Bloomcabin garden and barrel sauna collection.
Order-planning checklist
✓ Site checked for doorway clearance and servicing room
✓ Expected occupancy in normal everyday use
✓ Bench seating and internal height of approximately 175 cm
✓ Preference for a lobby or a longer heated room
✓ Chosen package for heater, controls and sauna stones
✓ Level support with sufficient strength and effective drainage
✓ Package contents, access route and site-specific requirements
Discover the LC 225