










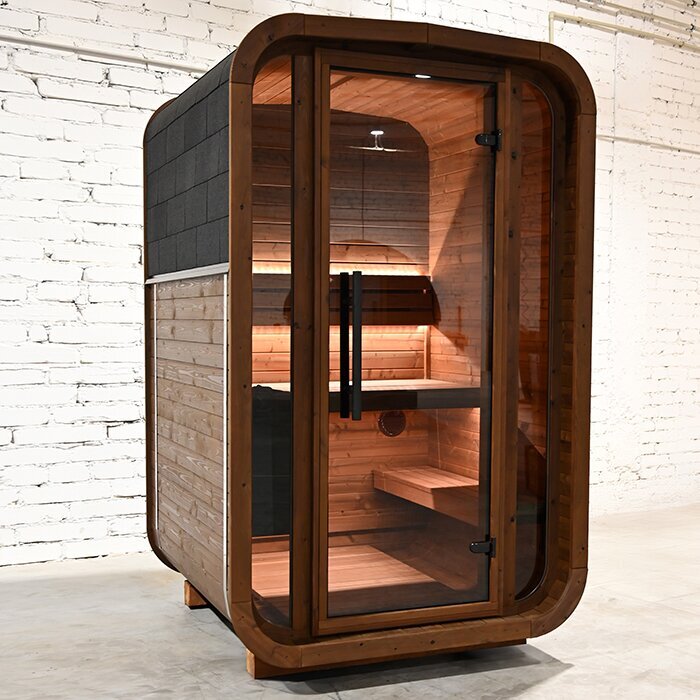






One-person sauna for compact outdoor settings
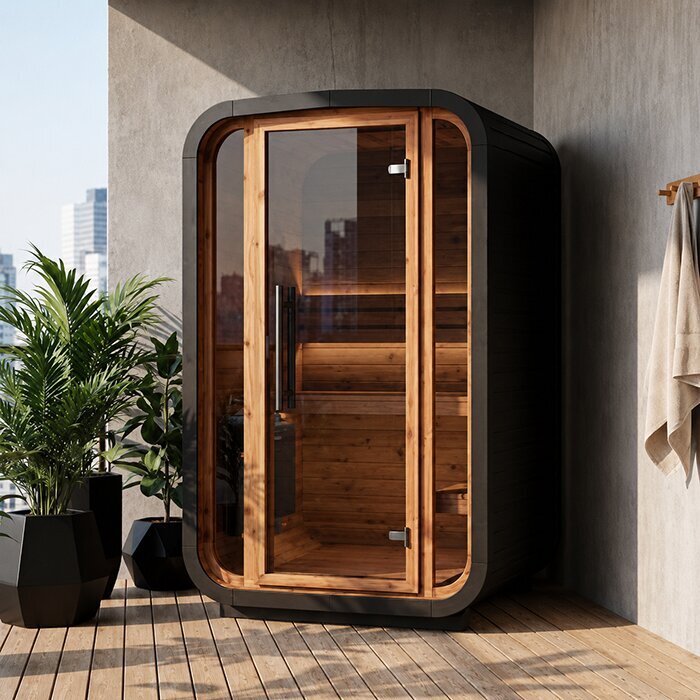
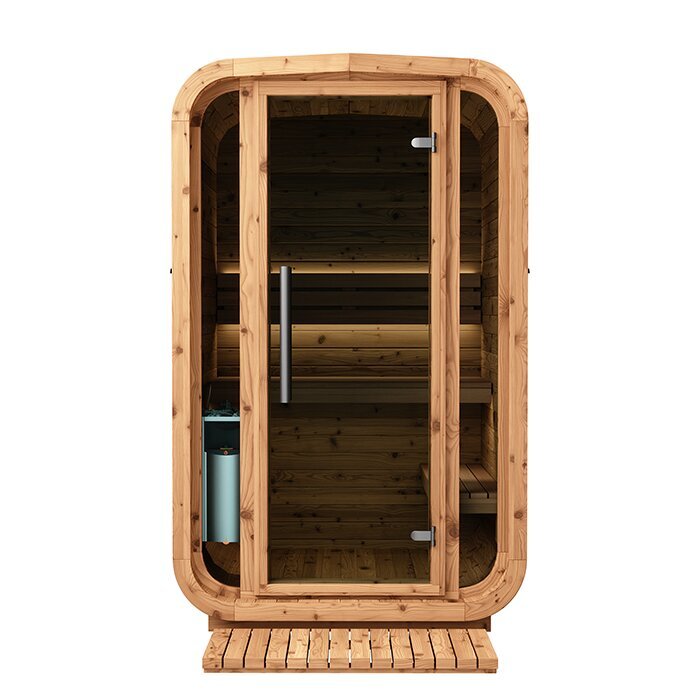
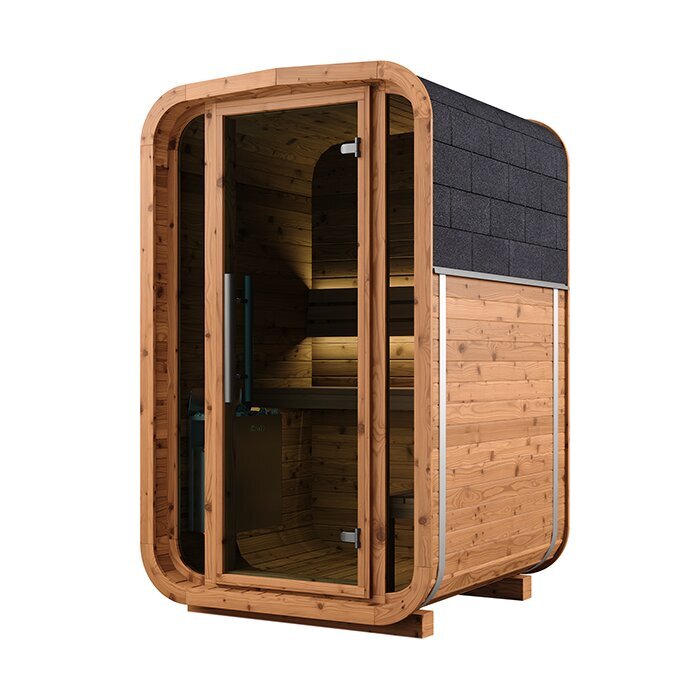
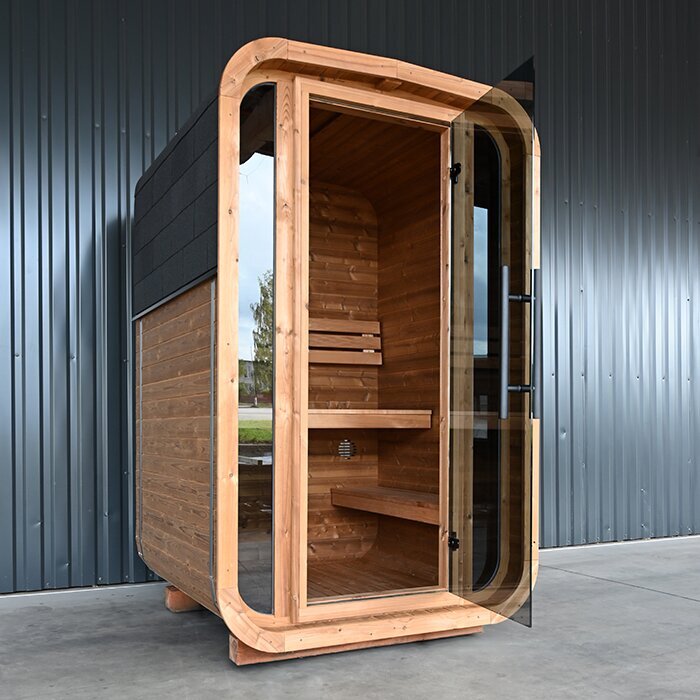
S 140 – space-saving Thermowood garden sauna, approx. 195 cm high inside
The Bloomcabin S 140 is made for gardens and patios where a standard barrel sauna would occupy too much valuable space. The cabin has been planned specifically for one person to sauna while seated, making it a practical option for urban gardens, smaller terraces and similarly confined locations. The cabin dimensions are only one part of site planning. You must also account for the opening door, working access during assembly, airflow, timber maintenance and moving the components from the delivery point to their final position.
Use this page to assess whether the dimensions, intended experience and installation needs work for your location. Other formats are available in the Bloomcabin sauna range.
Everyday use
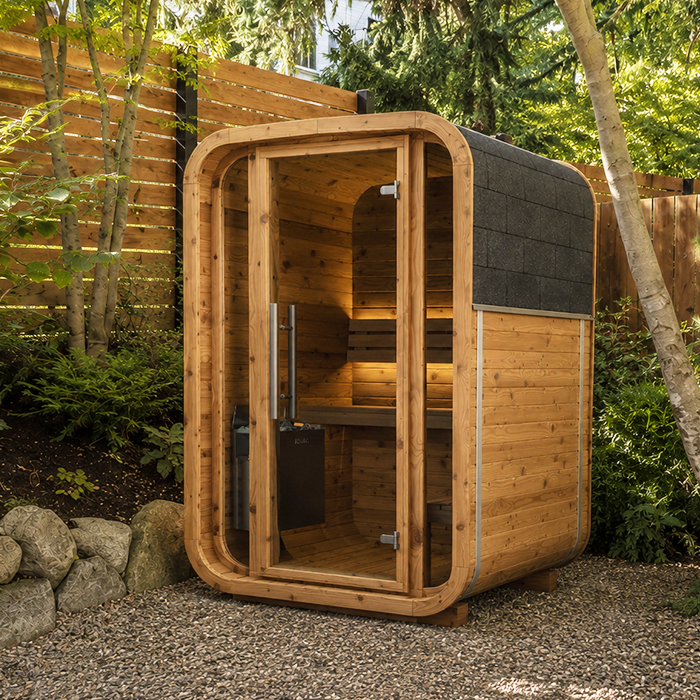
A personal outdoor sauna for gardens with limited room
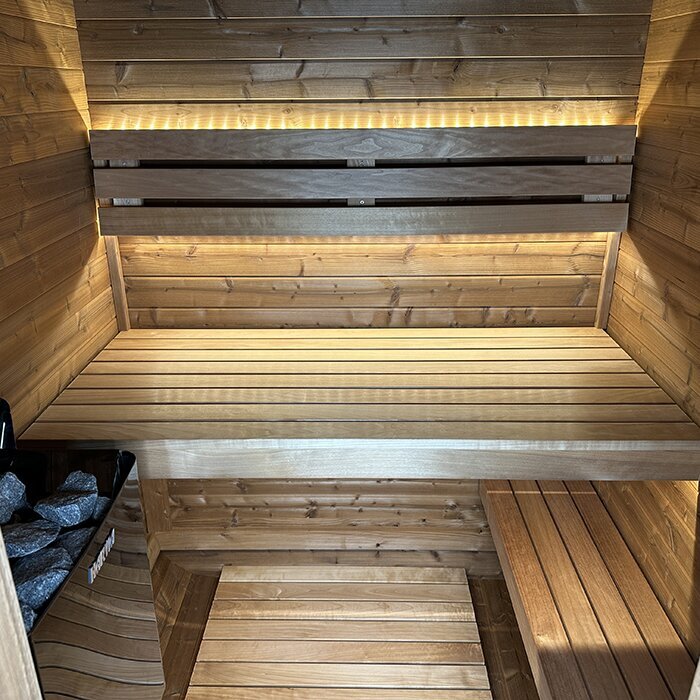
The S 140 is aimed at a mostly solo sauna routine without taking over a patio or garden. The cabin is planned around sitting rather than reclining. Its approx. 121 cm bench does not provide the stretch-out space found in a larger sauna. Choose a more generous cabin if lying down or sharing regular sessions with a second person matters to you. For someone who normally saunas alone, this defined purpose makes selection simpler because the bench and available movement space can be compared directly with personal habits before ordering.
Its modest outside width allows the S 140 to be considered for narrow terraces, compact town gardens, courtyards and strips beside a house. Avoid placing it tightly between surrounding structures. The doorway needs usable standing room, and the outer faces should remain reachable for construction and ongoing upkeep. Note any guttering, balustrades, wall projections, roof edges or plants that reduce clearance. Drawing the cabin outline, open door and permanent obstacles to scale will give a more dependable result than estimating the fit by eye.
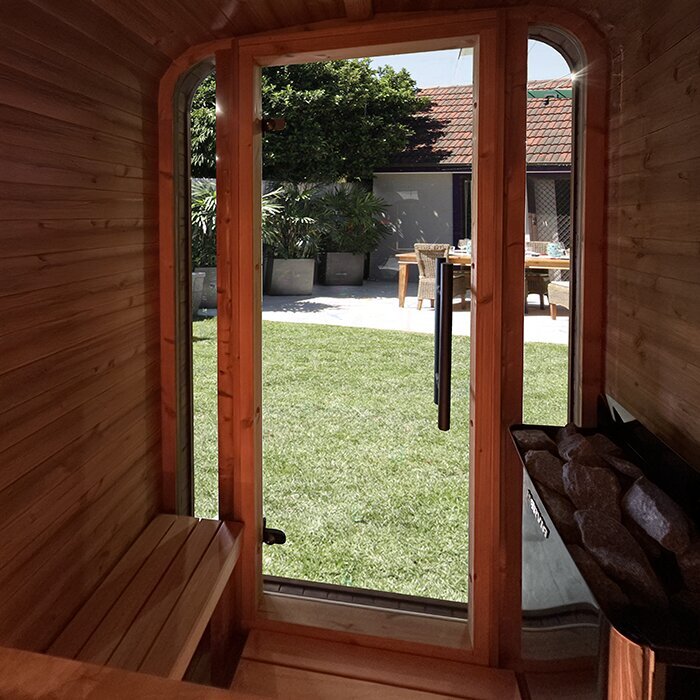
Its internal height of around 195 cm gives the cabin an upright form despite the small footprint. Body height, seating position and the planned heater layout also shape the real feeling of space. Leave sufficient clearance above the sauna for assembly and maintenance. Branches, canopies or other structures must not obstruct this area. If the S 140 will stand on a covered patio, ensure that the cabin remains accessible and air can circulate around the timber structure.
Key points at a glance
What makes this model distinctive
Size, cabin arrangement and intended use outweigh price alone.
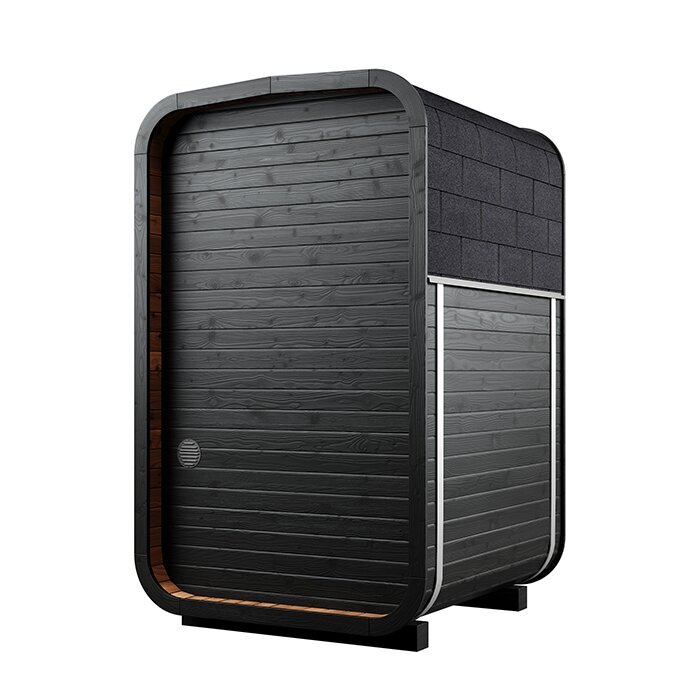
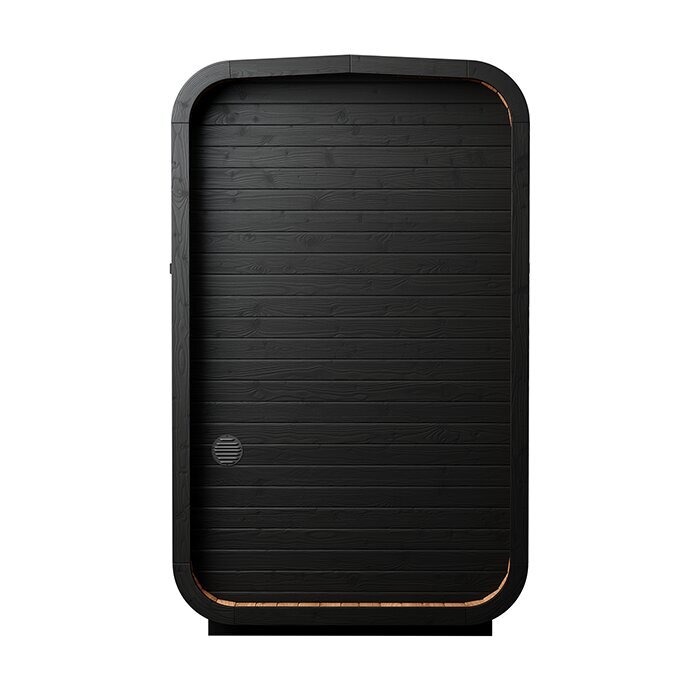
Approx. 145 × 133 × 221 cm
Together, these outside measurements cover roughly 1.93 m² of ground.
Approx. 195 cm internal height
The upright design offers a comfortable cabin height despite its small footprint.
Approx. 121 cm bench
Designed for relaxed seating and solo sauna sessions.
Approx. 5 m³ interior volume
This small volume needs a correctly matched electric sauna heater.
Materials & construction
Thermowood gives the compact S 140 natural character
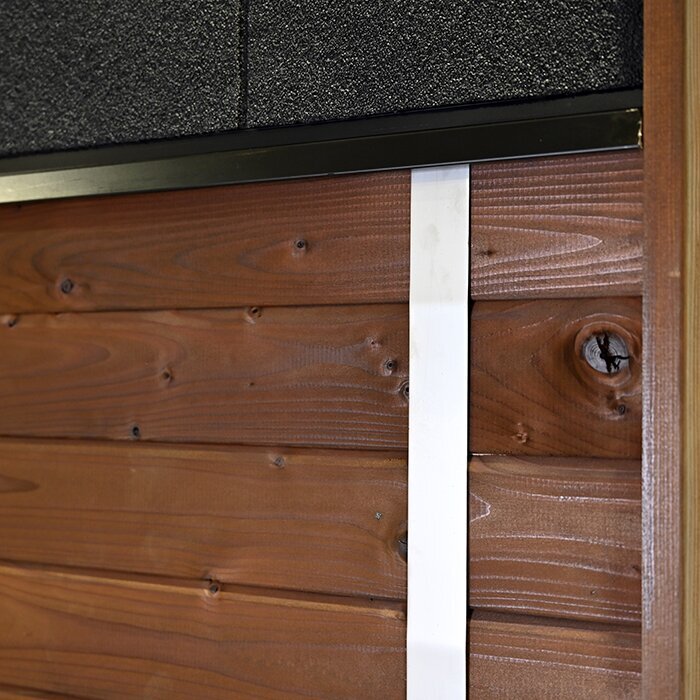
FSC®-certified heat-treated timber forms the sauna structure. The thermal process limits how readily the wood absorbs moisture and improves dimensional stability through changing weather. It does not make every board visually identical: variations in grain, shade and other minor details are normal characteristics of genuine timber. Expect a different finish from a uniformly manufactured sheet material. Supporting the cabin on a strong, freely draining base and leaving air space around the walls reduces prolonged moisture exposure.
Its warm wood colouring can complement contemporary paving, natural stone, gravel and planted gardens. Appearance should never come at the expense of working access. Keep irrigation spray and repeatedly damp foliage away from the timber, and ensure loose gravel or similar finishes cannot undermine the cabin or obstruct its entrance. If the S 140 is beside the house, arrange gutters and roof drainage so runoff misses the sauna. Thoughtful positioning can look attractive while still allowing straightforward cleaning, examination and maintenance.
Preserving the initial wood colour requires a treatment approved for Thermowood and for the surface concerned. Read its application directions and try a small amount somewhere discreet before wider use. External faces exposed to Irish weather do not have the same care needs as the internal timber encountered by bare skin in a hot, humid cabin. No coating can correct faulty site drainage, so water must continue to leave both the supporting area and the wooden construction without pooling.
Heating concept
Choosing the right electric heater for the S 140
Only an appropriate electric sauna heater should be used with the S 140; a fuel store and chimney are not part of this arrangement. Plan the electricity supply early from the specifications for the cabin, chosen heater and controller, rather than treating it as a standard outdoor socket. In Ireland, ask a Registered Electrical Contractor (REC) to determine whether the proposed circuit is Restricted Electrical Works. Where it is, only an REC may perform and certify the work. Cable routing, protection and switching should be resolved before the base or patio finish is completed.
The cabin holds approximately 5 m³, but volume alone does not determine the correct heater. Its output, permitted mounting arrangement, intended location and clearance from combustible parts must all comply with the S 140 and heater documentation. Oversizing is not an improvement, while inadequate output is equally inappropriate. Select a combination approved for the model and leave the specified heater position unchanged. Once the sauna is operating, the surrounding zone must remain empty; towels, dressing gowns and other belongings should be stored elsewhere.
Give the appointed REC the documentation for the selected heater and control system before electrical preparations begin. The contractor can then identify any mismatch between the planned supply and the equipment being delivered while changes are still manageable. Do not operate the sauna until installation, testing and commissioning have been properly completed and any applicable certification supplied. Afterwards, use the cabin, heater and controls according to their respective directions, including the instructions for setting temperature and shutting the system down.
Before assembly and installation
Prepare the compact S 140 site carefully
Trace the cabin perimeter and the full arc of the opening door at the proposed location before placing an order. This simple exercise shows whether entry and exit will be convenient rather than merely possible. Walk from the house to the marked area as well. Planters, outdoor furniture, balustrades and tight passages may make everyday access awkward even when the sauna itself fits. Design the electricity route at this stage so it neither creates a tripping risk nor crosses the space intended for cooling down.
Provide a flat, structurally sound support capable of carrying the cabin, heater and occupants over the long term. Both rainfall and cleaning water need an unobstructed escape instead of lingering below the wood. On an existing terrace, consider the surface, its build-up and the supporting frame as a single system. Yielding deck boards and settled paving are unsuitable despite the S 140's modest footprint. Where strength, anchoring or drainage cannot be confirmed, obtain a competent assessment of the proposed arrangement before scheduling work.
Survey every part of the journey between the delivery area and prepared position. Record gate and doorway openings, overhead clearance, landings, corners, gradients and anything projecting into the path. Although prefabricated panels can reach tighter gardens, handlers still need space to lift, rotate and set them down safely. Reserve a stable, clean working zone for assembly and keep the sauna parts protected from rain and dirt. If access relies on a shared drive, passage or courtyard, agree temporary arrangements with those affected beforehand.
Typical use
Where the S 140 can be especially useful
The right sauna depends on how, and by whom, it will really be used.
Town garden
The compact design suits properties with limited space.
Sauna alone
Designed for regular sauna sessions by one person.
Narrow patio
For sites with very little available width.
Holiday home
A compact option when the holiday-home sauna normally serves one user.
Model comparison
S 140 or HC150 – which interior layout suits you better?
With an internal height near 195 cm and a bench intended for personal sessions, the S 140 provides an unusually space-efficient arrangement. It deserves consideration when restricted width is the main constraint and sauna use will generally be solitary. Smaller external measurements should not settle the decision by themselves. Think about your preferred posture: this is a sitting sauna, whereas stretching out calls for a longer bench. Its reduced scale works best for buyers whose normal routine genuinely corresponds to that layout.
The HC150 has a broader cabin planned for two users, although its internal height is only about 175 cm. The choice therefore changes both the occupied area and how the interior feels. HC150 provides seating for a pair, whereas S 140 is taller, slimmer and dedicated to a single user. Whichever model you consider, reserve working clearance for construction, the complete travel of the door and future reach to the exterior timber.
Relate each measurement to the sitting posture and stature of everyone likely to use the cabin regularly. Saving ground space has value only if the bench and remaining movement area feel adequate. Where a household expects different people to use the sauna, compare their preferences for comfort and for sharing a session before ordering. Base the choice on the way the cabin will be used routinely rather than on a rare situation that may never justify the compromise.
Model-specific tip
Make the area around the S 140 practical
A shower outdoors, somewhere to sit and sheltered towel storage can make the sauna corner more useful. Decide their positions only after fixing the entrance path, electrical zone and access around the cabin. Seating across the exit would impede movement, and objects left loose may be difficult to see and become hazards after dark. A distinct wet cooling zone and dry resting or storage zone works well. It protects footwear and fabrics from spray and helps the confined setting stay orderly.
Start with essentials when furnishing a confined site, then live with the arrangement before adding anything else. Freestanding chairs and movable storage are simpler to reposition around the walking line and cooling zone than fittings installed permanently at the outset. Favour pieces that can be cleaned without difficulty and stored away between sessions. This gradual approach keeps the space adaptable if experience shows that circulation, towel storage or the resting area would work better in another location.
Outdoor sauna all year round
Plan access, cooling off and weather protection for every season
For use through every season, give the S 140 a direct, illuminated approach that remains secure underfoot in wet conditions. Position lighting to reveal changes in level, edges and the entrance without sacrificing privacy. Ireland's cool, windy winters and changeable Atlantic weather make it worth checking the surface with rain, fallen leaves and winter moisture in mind. Keep hoses, extension cables and movable objects elsewhere. Reassess the approach before a session whenever recent weather may have changed its condition.
Plans for a garden shower, immersion tub or pool should deal with incoming water, discharge and protection from freezing as one system. Runoff from cooling must be directed away from both the cabin base and electrical equipment. The change from the sauna entrance to the wet zone also needs a safe, practical surface. Specify pipes and fittings for their particular exposure and preserve access for servicing. If there is no permanent connection, establish a controlled disposal route for the water before the area is put into use.
Sheltered storage for footwear, towels and dressing gowns prevents clutter inside this small cabin. Take damp fabrics out to dry when a session ends. Covered seating may provide a comfortable recovery spot, provided it does not reduce access or airflow beside the sauna. Arrange all movable belongings so none can stray into the entrance or near the heater. Set drinks on something firm beyond the heated room, and avoid glass or other breakable vessels wherever people will walk barefoot.
Caring for Thermowood properly
Inspect and maintain Thermowood and components regularly
Heat-treated timber performs well outdoors, yet it continues to behave like wood. Exposure to sunshine, precipitation and fluctuating temperatures gradually affects its shade and visual character. Orientation also matters: timber sheltered by an eave will age differently from a wall receiving direct weather. Normal cosmetic ageing should not be confused with deterioration associated with trapped water or poor airflow. By looking over the sauna routinely, you become familiar with expected changes and are more likely to notice a developing concern promptly.
Periodically examine the wooden faces, metal bands, fasteners, entrance and seals, adding an extra check after severe exposure or other unusual strain. Watch for movement in joints, components that rub, reduced door travel and pockets where moisture lingers. Ventilate and dry the cabin after each session in the manner stated by the product and heater documents, taking wet mats and fabrics away. Electrical faults or suspicious changes are not a DIY task; stop using the equipment and have an appropriately qualified contractor investigate.
Clean internal timber with products compatible with the material, applied using a soft cloth or an appropriate brush. Work sparingly so residue is lifted without saturating the wood. Harsh chemicals, unsuitable solvents and pressure-cleaning equipment may damage, stain or raise the surface. Confirm whether a treatment is approved for hot interior timber or restricted to external faces exposed to weather. Wait until the sauna is cool and switched off, then let every cleaned area become thoroughly dry before reheating. Observe the separate manufacturer's directions for the heater and controls.
Check before ordering
Clarify delivery contents, transport and site requirements early
Order from the details attached to your chosen configuration, not from photographs alone. Make a written note of whether the package contains the electric heater, controller, sauna stones and specified protective parts. Separately record the site work you need to organise, such as constructing the support, preparing the power supply or obtaining help with assembly. Check these notes against the order confirmation. Doing so reduces the risk of discovering during installation that the delivered equipment and completed preparations do not correspond.
Before a delivery date is settled, provide the seller or proposed installers with photographs and measurements of narrow gates, steps, corners and every other difficult section. They can consider component movement while there is still time to resolve an access problem. Choose a firm, clean reception area where the delivery can be accepted and sorted safely. Clear removable obstructions and cover vulnerable paving or decking. Any remaining uncertainty about one section of the approach should be addressed before the appointment is confirmed.
Site-specific planning, separation and electrical matters also need attention. The relevant questions depend on the property, neighbouring structures and the installation you propose. Discuss planning uncertainty with the appropriate local planning authority before committing to permanent work, and use competent contractors for technical assessments. Boundary proximity, surface-water management and concealed services can all affect the final position. Store the technical documents, assembly manual and electrical-equipment information as one file for use during installation and later maintenance. Additional guidance appears under Useful information.
Use routine and interior
Keep the interior clear before and after sauna use
Make a quick inspection before starting the heater. Nothing should be on the seat or within the specified heater zone, the entrance must operate without obstruction, and visible equipment should appear undamaged. Bring only what the session itself requires into the cabin. Leave footwear, dressing gowns, spare towels and maintenance products in sheltered storage nearby. Keeping these belongings outside preserves precious movement space and reduces the chance that something will be dropped or placed too close to the heating equipment.
At the end of a session, shut the equipment down as directed in its operating documentation. Ventilate the cabin afterwards and wipe moisture from the more heavily used areas when the product guidance calls for this. A seat towel may limit perspiration reaching the timber, but it needs to be removed for drying. Because the S 140 has little spare room, a handful of items can quickly create clutter. Before an extended closure, empty the cabin, allow it to air and verify that the interior is dry.
For a holiday property or communal garden, assign responsibility for storing manuals, airing the sauna and completing routine inspections rather than assuming someone will do it. Each user should be shown how the controller operates, why the heater zone stays empty and how the cabin is ventilated afterwards. Clear responsibilities keep the same safe routine when the S 140 is shared by several people. Anyone who cannot use the equipment reliably should be supervised and prevented from reaching either an active heater or its controls alone.
Use a small footprint well
Position the S 140 sensibly in limited space
Draw several possible S 140 orientations rather than committing to the first position that fits. Include the cabin outline, opening door, building walls, plot edges and permanent features, plus downpipes, lights, taps and existing power locations. Give preference to an arrangement with a simple approach and exterior faces that can be reached. Comparing the alternatives together reveals which one integrates with current services and avoids makeshift cable runs or an awkward walking line.
Beside a dwelling, preserve normal use and maintenance of all windows, doors, shutters, drainage pipes and access panels. Look above the proposed cabin too: an eave may reduce ventilation or discharge rainfall directly over the timber. Do not sacrifice established paths or necessary reach to a property edge. Before excavation or fastening starts, identify buried utilities and confirm where any attachment to an existing structure can safely be made. A space that accepts the dimensions on a drawing may still fail these practical tests.
Where practical, watch the proposed position through changing daylight and weather. You may discover runoff moving towards the base, wet leaves collecting against one face or an approach that becomes awkward during rain. Sprinklers and water discharged from a roof can increase repeated wetting of the outer timber and should be included in the assessment. Meanwhile, the connection to sheltered storage and the cooling zone ought to remain direct and obvious. Good orientation therefore improves everyday operation as well as making efficient use of a restricted garden.
S 140 and privacy
Create privacy while keeping the sauna accessible
Because this compact model is often considered beside the home, terrace or plot edge, examine views into the proposed area before choosing its orientation. Pay particular attention to what neighbours or passers-by could see as somebody uses the entrance. Review the position from nearby windows, paths and seating areas rather than from within your own garden alone. Rotating the cabin may solve the concern without another structure. Retain a convenient connection to sheltered storage so a user is not forced along an exposed, overlooked or waterlogged path.
Views towards the entrance can be softened by a slim screen, slatted divider or carefully chosen planting. Set it far enough away to preserve the door's travel and room to examine and treat the outer walls. A solid surround pressed close to wood discourages drying and may hold dampness. When using plants, anticipate their mature size as well as falling foliage and the reach of irrigation. Freestanding screens or planters need a stable base and restraint against movement, so wind cannot push them against the cabin.
A restrained scheme can take its cues from the existing terrace materials and geometry. The essentials are an obvious approach, useful storage and screening positioned only where needed. Too many ornaments make a small setting harder to navigate, so keep the ground easy to inspect. Dirt, collected water and physical changes to the sauna are then more readily noticed. Direct exterior lights towards the walking area without glare for users or unnecessary spill into adjoining gardens.
Frequently asked questions
FAQ – Bloomcabin S 140
Can the S 140 be fitted flush into a narrow recess?
No. The available space must exceed the cabin's stated size. Reserve the full opening arc for the door and retain reach to the outside walls for construction, drying, checks and timber maintenance. Remember to assess overhead clearance too.
What indicates that my current patio can support the sauna?
Assess both the visible finish and everything supporting it. They should provide a flat, firm structure for the permanent load, with drainage that prevents pooling. Flexible boards, settled paving or an unknown build-up call for professional examination before installation proceeds.
How does the S 140 interior differ from the HC150?
S 140 provides an approx. 121 cm bench and about 195 cm of headroom for a single person sitting down. HC150 accommodates two users across a wider cabin, although its inside height is lower at approximately 175 cm.
Does every configuration contain the heater, controller and sauna stones?
No. Package contents vary between the available configurations. Before commissioning electrical work, read the exact product listing and verify separately whether the electric heater, its controller, sauna stones and the necessary protective items are supplied.
How can the original Thermowood colour be retained longer?
Choose a treatment approved for Thermowood and specifically for the internal or external face concerned. Try it discreetly before coating a visible area. Surface care does not remove the need to prevent pooled water or leaves remaining wet against the cabin.
How do I leave the S 140 unused for an extended period?
Turn the system off as its instructions specify and remove every fabric item. Ventilate the cabin until no moisture remains, then examine the seat, entrance, heater area and visible joints. Do not close it for the planned pause until the interior is dry, empty and orderly.
Which site preparations should be complete ahead of delivery?
Confirm a strong, freely draining support, adequate clearance throughout the delivery approach and an unobstructed place for assembly. Well before arrival, establish which electrical preparations the site needs and verify the components included in the configuration you ordered.
Bloomcabin S 140
Is the S 140 the right garden sauna for you?
The S 140 is a good fit if you want a particularly small electric garden sauna and you usually take seated sessions alone, with scope to provide sound support and straightforward access. The proposal must also include unrestricted door movement, dependable water drainage, electricity designed by the appropriate professional and future reach for maintenance. When the site and your normal sauna routine meet those conditions, the model creates a permanent place to sauna while occupying less of the garden than a larger cabin.
If needed, compare further Bloomcabin outdoor and barrel saunas.
Planning checklist
✓ External dimensions, door area and care access measured
✓ Confirmed that the seated sauna for one suits your habits
✓ Verified firm, even support with effective water drainage
✓ Agreed a suitable electric heater and professional connection
✓ Checked selected configuration and included components individually
✓ Clarified delivery route and site requirements in advance
View S 140