
Adding a Potting Area Without Losing Plant Space
Greenhouse planning
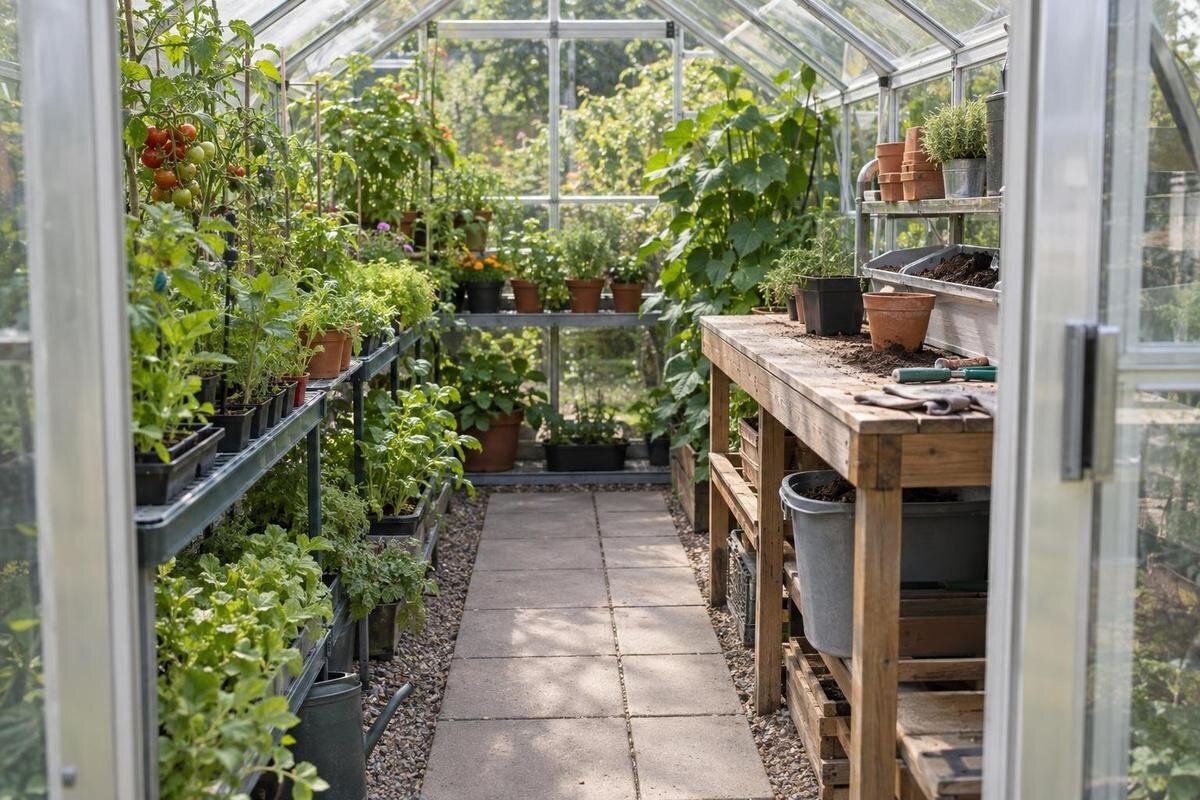
A greenhouse potting station should make sowing, potting and labelling easier without becoming a permanent obstacle to beds, pots or access. Plan the whole working footprint—not just the tabletop—including space to stand, storage and the extra trays that appear during propagation. A measured, season-aware layout helps you decide what should stay fixed and what can be temporary.

01
List the jobs the station needs to handle
List the jobs you actually do in the greenhouse: opening seed packets, filling pots, pricking out seedlings, repotting, labelling, cleaning reusable trays or keeping small hand tools close. Separate tasks that need a flat surface from those that need only a shelf or hook. Note the largest container and tray you handle, not just the smallest pot, and how many may be in progress at once. A surface for a few plug plants can be quite different from one used for larger containers. Mark occasional work, such as a seasonal batch of repotting, that could happen elsewhere. This prevents a rare task from determining the permanent size of a station that takes growing space every week.
Make an inventory of what must be within reach in a normal session and what can be brought in only for a particular job. Include empty pots, labels, a pencil, hand tools, a portion of compost, a tray being filled and a clear landing place for completed pots. Count how many seed trays need attention at the busiest point in the season, not only in a quiet week. For an initial comparison of greenhouse sizes, the Pyramid Greenhouse options are listed from 5.53 to 18.9 m². That range does not tell you the available worktop or planting area; use it only to shortlist, then plan from the dimensions of the exact size.
Set worktop depth from the tasks
Worktop depth determines how much can lie on the surface and how far items sit from the front edge. Measure the largest regular tray or container, then add the clear patch required for filling, pricking out or labelling. Think about whether you work with one tray at a time or need several items open together. Do not size the top by covering everything you own: supplies used once a month may belong in storage, not on the work surface. A deeper bench can hold more, but items at the back may be hard to reach and the surface can become permanent storage. A shallower top may be easier to keep clear but may not fit the object you use most.
For a simple arithmetic example only, an illustrative bench 120 cm wide by 60 cm deep occupies 0.72 m² before adding room for the person, access or storage. These figures are not a product size or a recommended standard; substitute measurements that suit your hands, trays and containers. The Limited Edition Aluminium Greenhouses range is listed from 3.77 to 28.08 m², but total floor area cannot settle worktop depth. The chosen model’s internal dimensions and the positions of doors or fittings still matter. Draw the proposed top as a rectangle with its front edge marked, then add the standing area separately. This shows that the station takes more than the measured footprint of the top.
02
Include space for the person at the bench
Include the space occupied by the person using the bench. Mark the working edge and stand there with the largest tray or container you normally move. Check that you can reach the back of the work surface, set down a filled pot, turn and step away without knocking neighbouring plants or another shelf. If you expect two people to pot at once, test that arrangement explicitly instead of counting one standing space twice. The space needed varies with the user’s movements and the objects in hand, so use an actual trial rather than relying on a generic clearance number. A cardboard box or taped outline can represent the top before you commit.
Test the route to the station and the entrance with the selected model’s door position in mind. A top may fit neatly on a plan but leave too little room when you carry a tray through, step aside or reach a nearby plant. Check whether access to the work area depends on moving pots first, and whether completed containers can be set down without blocking the route. A standing strip is not necessarily a circulation route for every task: moving a bulky tray needs more space than reaching for a label. Mark the two uses separately so the plan does not count the same patch of floor twice.
Separate permanent growing space from work space
Count growing space by the footprint of beds and pots, plus the room needed to reach and tend them, rather than subtracting only the tabletop from the advertised greenhouse area. A permanent station has a bench footprint, but the person standing at it, its storage and the route past it also occupy useful floor. Shelves above a bed may save floor area, yet they can shade plants or make access awkward; assess the crop and position instead of assuming the space below remains fully productive. Mark each container at the size it will occupy during the growing period, not just at the size of a bare pot.
Draw the permanent crops first, including the space needed to water, prune or move their pots, then add the workstation. Allow for plants as they grow and for any gap between rows that you already rely on; do not count a narrow strip as a new growing bed if it cannot be reached. This is a space check, not a yield estimate. When considering the Aluminium Greenhouses range, use the same crop list for each size you compare. Mark which plants would remain in their intended positions and which would need moving to accommodate the station. This makes any loss of growing space explicit, rather than hiding it within an apparently tidy arrangement of benches and pots.

03
Choose storage by how often items are used
Sort storage by frequency and bulk. Keep small items used at nearly every session—labels, a pencil, a dibber and a few pots—close to the worktop; put occasional tools elsewhere so they do not occupy the clear working surface. Consider where open bags, spare pots or trays will sit, and whether those supplies need to be inside every day. Under-bench storage can be convenient, but it may occupy the space needed for your feet, while items on a high shelf may be awkward to reach. Draw storage as its own footprint and check that a container can be removed without shifting a seed tray or plant.
If built-in storage is on your shortlist, consider the Aluminium Greenhouses with Storage – Limited Edition range. The product category identifies a storage-equipped range, but does not establish the position, dimensions or capacity of storage in a particular configuration. Confirm those details for the exact model before designing around them. Compare the usable storage with your inventory, keeping frequently used supplies separate from items brought out only occasionally. Check whether a stored pot or container can be removed while the worktop is in use. Storage that requires you to clear the bench each time would interrupt the very jobs the station is meant to make easier.
Allow for seed trays during propagation peaks
Seed sowing creates a different demand from everyday potting because several trays may need to be filled, labelled and left accessible at once. Measure the outside of the trays you actually use, including rims or handles that extend beyond the base, and count how many must be on hand at the busiest point. Add room to lift each one without brushing neighbouring plants. If a cover, label or insert stays attached, include it in the height and handling check. Avoid using a tray’s nominal base size when projecting parts make the true footprint larger; that difference can decide whether two trays fit side by side.
Decide where trays go after filling and while seedlings need attention. A clear patch of bench may be enough during a short peak; a dedicated rack, even if temporary, still has feet, shelves and an access area to fit. Sketch the ordinary setup and the peak-season setup separately, then compare them on the same plan. This shows whether trays displace plants, block the route or occupy the only landing place for completed pots. If so, plan another temporary location, reduce the number kept inside at once or use a movable surface. Do not assume seasonal overflow costs no space simply because it is not there all year.
04
Plan the route for compost, water and waste
Trace the route from the entrance to the worktop, then from the worktop to the plants. Include the widest tray or pot you carry and the place where you can pause to set it down; small hand tools do not test the same route. If compost and empty pots are stored outside, note where they enter and how many trips you expect, rather than planning only the last step. The aim is to avoid carrying a full tray over crops or moving several pots before each session. In a compact layout, this route may determine which side of a bench stays usable more than the bench’s own length.
Include the actual water and waste routine without assuming new plumbing or equipment. Note where you fill or rinse trays, collect loose compost and used labels, and leave finished pots; otherwise buckets and spare containers can spread around a compact top. Decide whether a waste container stays there permanently or appears only during potting. Keep a landing place outside the passage so moved items do not occupy the route. When considering the Wall Greenhouse range, trace this routine on the plan for your chosen size. Follow a tray from the entrance to filling, then to its growing position, checking where you would stand and set it down at each stage.
Read the selected model’s internal drawing
Before choosing a bench or fixing its position, identify the exact greenhouse size and inspect its dimensioned drawing. Distinguish internal clear width and length from the outside footprint, and check whether a measurement is taken at floor level or where your worktop would sit. Note the entrance, door opening and any features that occupy the proposed strip. A top may fit within the broad interior dimensions yet overlap a shelf, block access to a crop or narrow a route. Mark the proposed worktop depth and length directly onto the drawing, then add the person, storage and seasonal tray area in separate colours.
Model names and total area ranges can help locate options, but cannot supply those clearances. The T-Model Orangery Greenhouse listing covers sizes from 16.52 to 30 m²; that number is not an internal width or confirmation that a potting station will fit. Compare the drawing for the precise size you are considering, and ask for clarification if usable interior dimensions or the door position are not clear. If a page gives only a headline footprint, do not fill in gaps by measuring from an image. The useful comparison is the actual inside space left for the bench, the person, the route and the plants after fixed elements are accounted for.

05
Consider a temporary surface before enlarging the station
If a permanent station squeezes the growing area, reconsider what has to remain set up rather than immediately making the worktop smaller. A removable or folding surface can suit a job done occasionally, provided it gives you a workable surface when open and has a defined place when put away. Measure both states: the open support can occupy floor beyond the top, and the folded unit or its containers still need storage. For large repotting jobs done only once in a while, doing that task elsewhere may be simpler than reserving a permanent greenhouse footprint. A movable arrangement is useful only if it is practical to set up and clear.
Consider a larger footprint only if a trial shows that the current greenhouse cannot hold the crops and work area you actually use. More total area can create options, but it does not tell you where a bench fits or whether you want to maintain extra space. The Spacious Greenhouse range is listed from 47 to 70 m²; those figures are total floor areas, not a potting layout or verified internal clearances. Compare the need for a permanent workstation with the inconvenience of setting up a temporary one. If the extra working surface is needed only for occasional repotting, a removable bench may be enough; if it is used routinely, repeatedly clearing and storing it may be impractical.
Test the layout against a full growing season
Test the plan for both an ordinary week and the busiest propagation period. Draw the worktop, storage and standing zone in one colour, permanent crops and their access in another, and tray outlines where they will wait. Check both versions against the door and the route between the station and plants. A scaled plan helps, but tape on the greenhouse floor or boxes representing the bench can reveal awkward reaches and blocked movement that a rectangle on paper will miss. Try a real tray and a typical pot in the marked space. If a routine task means shifting a crop each time, revise the position before treating the layout as settled.
Write the assumptions beside the drawing: worktop dimensions, items stored, number of trays at peak and which plants or pots remain in place. If your shortlist includes the Bloomcabin Prestige Greenhouse, keep these notes with the plan for the selected size so that you can compare it with other options on the same basis. Revisit the arrangement after a busy growing period. Note whether clutter came from supplies without a storage place, trays waiting for space or a worktop too small for the task. Each calls for a different adjustment. The station is well placed when it serves the jobs, the intended plants remain accessible and the peak-season trays have a defined home—not when the bench alone looks compact.
Frequently asked questions
How deep should a greenhouse potting bench be?
There is no single depth that suits every potting area. Measure the largest tray or pot you regularly use, the clear surface needed for the task and how far back you can reach. Treat example dimensions as illustrative, not as a product size or standard, and allow space in front of the bench for working.
How much growing space will remain after adding a station?
Use the selected greenhouse’s internal plan and mark the bench, storage, standing space and route past the station. Then map the beds or pots you intend to keep, including the room needed to tend them. A headline floor-area figure alone cannot show how much usable growing space remains.
Should seed trays stay on the worktop?
They can occupy a temporary part of the worktop during a busy sowing period, but plan for their peak number and actual dimensions. Check that trays can be lifted out without disturbing nearby plants and that they do not take over the only clear space for routine potting.
Does built-in storage replace a separate potting bench?
Not necessarily. Storage may hold tools and supplies without providing a clear work surface. Check the arrangement and dimensions for the exact greenhouse size, then consider whether stored items can be reached while the bench is in use.
Can I use a folding or removable bench?
It can help when potting is occasional, provided it has a defined working position and storage place. Measure the space it needs when open and where it goes when put away; folding it does not make its footprint disappear.
An efficient potting area is more than a tabletop: its footprint includes the person using it, frequently used supplies, the access route and seasonal trays. Measure regular tasks first, keep permanent storage explicit, and distinguish the peak-season arrangement from the rest of the year. Once those pieces are on a plan for the exact greenhouse size, you can adjust the bench, storage or overflow before giving up a crop area you meant to keep. That keeps the station useful without pretending the total floor area is all available to plants—or to work.
