




Greenhouse with integrated storage and visible Accoya timber elements
Classic aluminium greenhouse for plants, garden tools and supplies
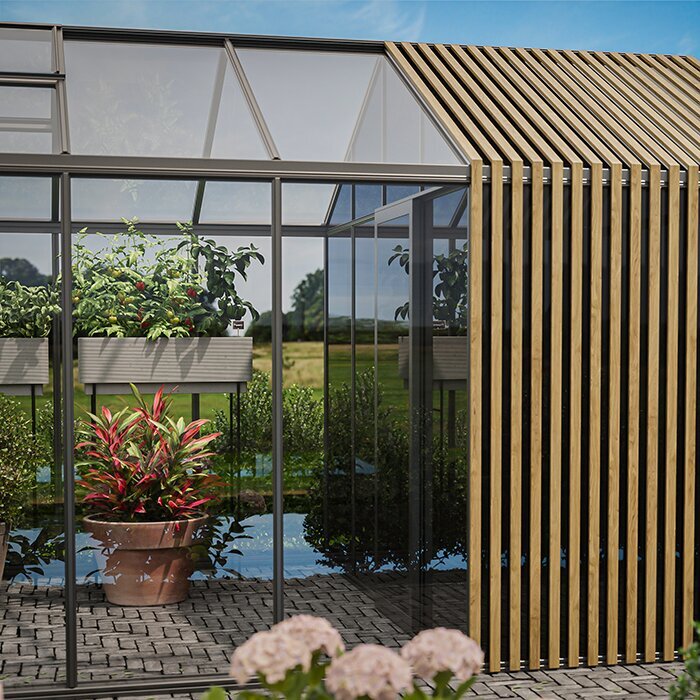
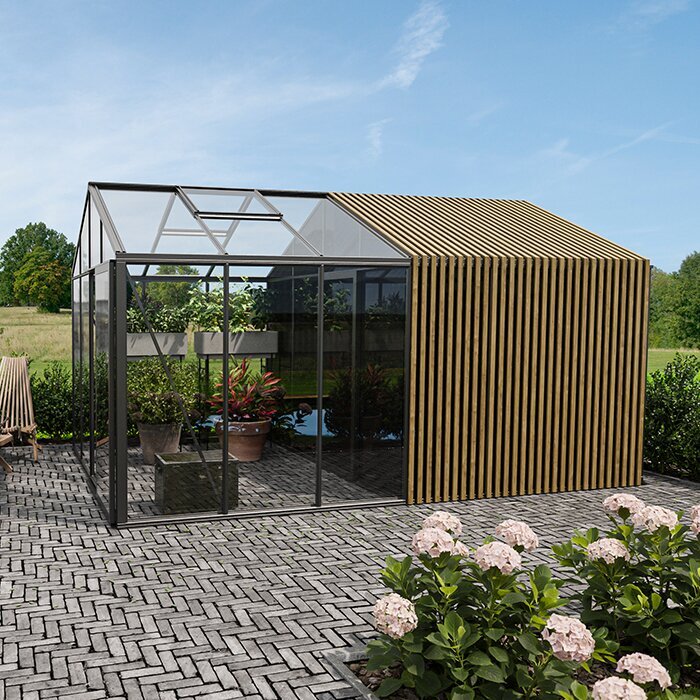
Our greenhouse with integrated storage combines a bright growing area with a separate storage room and visible elements in natural Accoya® timber. Both areas sit beneath one roof. This removes the need for a separate garden shed elsewhere, while garden tools remain readily available beside the greenhouse. The uses remain clearly divided: the light-filled area is for plants, while tools, pots and supplies are kept in the storage room.
The Accoya timber model is available in a wide choice of sizes and can be glazed with toughened safety glass or polycarbonate. The key consideration is how much space you need for crops and for tools, pots and supplies. Before configuring, list your planned plants, existing equipment and preferred interior layout. For a general overview of greenhouses with this layout, see our article Aluminium greenhouse with integrated storage.
Grow and store beneath one roof
Light for plants, with a dedicated room for tools and supplies
The integrated storage room streamlines greenhouse work. Pots, tools, growing media and watering equipment are available right where they are needed. When sowing, pricking out, repotting and caring for plants, there is no need to walk back to the house or a distant shed. Materials can be gathered before work begins, then put away again outside the growing area afterwards.
This leaves an uninterrupted area in the growing section for beds, containers and work tables. Clear routes make care and cleaning easier. Accessories that need neither light nor greenhouse conditions are better stored in the separate room. Check the storage instructions for temperature- or moisture-sensitive products to ensure this location is suitable.
For an overview of our aluminium structures, visit Aluminium greenhouses.
What makes this model special
Grow plants, store garden accessories and create a cohesive garden look
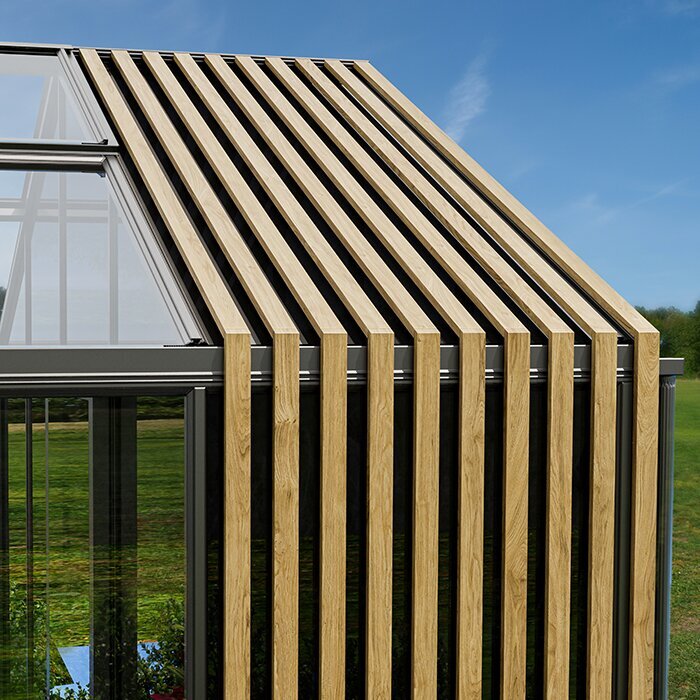
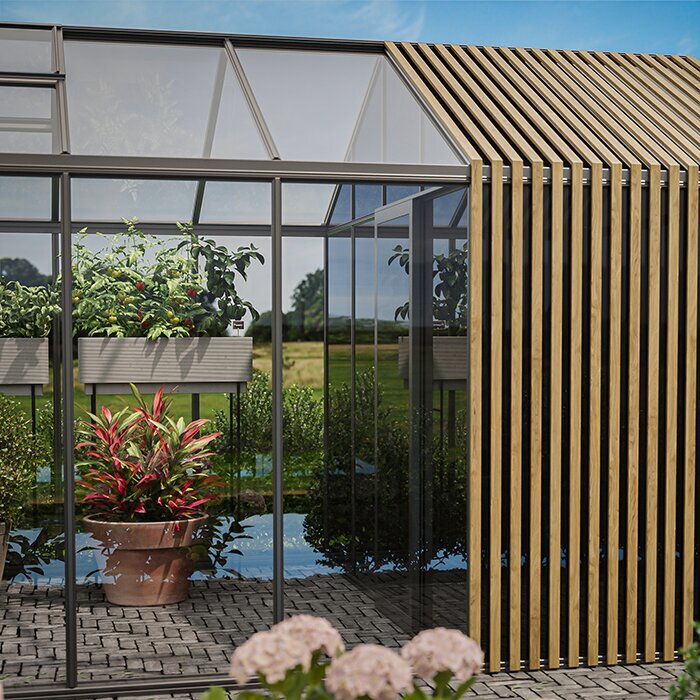
The storage room is built into the greenhouse structure, so it does not look like an added-on cupboard. Aluminium profiles and visible Accoya timber create a consistent appearance across both areas. The clean-lined metal structure gains a warmer visual character from the timber’s natural grain and individual colour variations.
Integrated storage
The separate room can accommodate shelves, holders and standing space designed specifically for garden accessories. This keeps the glazing in the growing area clear of stored items while tools and consumables remain close at hand.
Layout based on your actual space needs
Depending on the size selected, you can allocate different proportions to growing and storage. Calculate the footprint required for each area separately and transfer it to the usable floor plan. Check that there is enough room in front of shelves and work tables for taking items out, repotting and passing through.
Accoya timber as a natural contrast
Natural timber creates a deliberate contrast with the aluminium profiles and smooth glazed surfaces. Coordinate the RAL colour with your home, garden setting, visible grain and the original colour of untreated Accoya timber.
Accessible exterior areas
Leave adequate clear space around the greenhouse. This keeps glazing, gutters and outer surfaces accessible for cleaning and maintenance, and allows entrances to be used without stored items in the way.
Accoya timber in detail
Accoya: modified real wood for visible outdoor use
Accoya is made from Radiata pine and modified through acetylation all the way to its core. This process greatly reduces the timber’s ability to absorb moisture. It remains genuine wood, with natural grain and individual colour nuances. Beside precisely formed aluminium profiles, this visible material texture ensures the building does not feel like a purely technical structure.
Lower water absorption improves dimensional stability and resistance to decay. Accoya achieves durability class 1.
Bloomcabin uses untreated Accoya, leaving the grain and natural colour variations visible. When exposed to the weather, its initial colour gradually changes and can become silvery grey. Consider this natural ageing when choosing the RAL colour for the aluminium profiles. Remove dirt regularly and gently, and avoid permanently damp contact points. Use cleaners, care products or coatings only where the relevant care guidance confirms they are suitable for Accoya.
Further information is available in our Aluminium greenhouse FAQ.
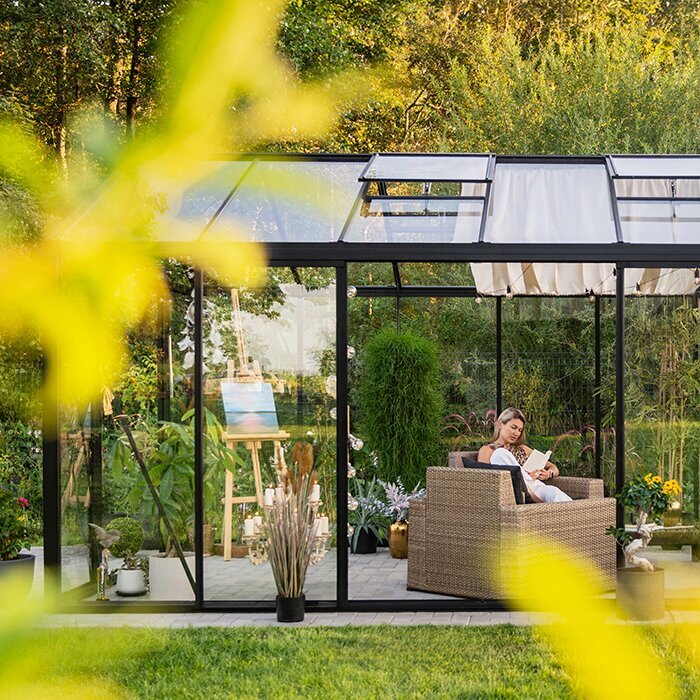
Plan growing and storage areas together
Set up both areas around your usual working routine
Think of the structure as two connected rooms with distinct functions. Start not with individual shelves or plant benches, but with future routines: opening the door, taking out materials, tending plants, removing waste and putting tools away. The routes needed for these tasks must remain clear. Doors must not strike equipment, and work surfaces should be reachable without stepping over irrigation lines, plant containers or floor edges.
Growing area
This zone is for crops and tasks that need daylight and a typical greenhouse climate. Position tall plants so they do not unnecessarily shade smaller crops. Work tables should not obstruct door movement or the operation of roof vents. Remember that plants can grow considerably larger over the season than they are at the start.
✓ Vegetable beds and plant containers
✓ Propagation and work tables
✓ Tomatoes, cucumbers and climbing plants
✓ Watering and repotting
Storage area
Store items here that do not need daylight. Before fitting it out, decide which loads will stand on the floor and which items can safely be placed on shelves or suitable holders. Liquids need stable standing surfaces. Food, flammable substances and other sensitive products should only be stored here where their individual storage instructions allow it.
✓ Hand tools and long-handled tools
✓ Pots, trays and labels
✓ Growing media, fertiliser and garden consumables
✓ Cushions and seasonal accessories
Technical data
An overview of sizes, heights, glazing and construction
The versions are divided into two model families. Alongside the external dimensions, door and ridge heights matter: they determine access, the sense of space and the options for taller plants, long-handled tools and your planned interior layout.
01. Size configurations
A total of 20 size configurations are available. Compare the usable floor plan and possible division between growing and storage, not only the free space in your garden.
02. Widths
The two model families are 235 cm or 310 cm wide. In addition to the building width, allow enough clear space at the sides for assembly, cleaning and maintenance.
03. 235 cm models
The 235 cm-wide models have a ridge height of 232 cm and a door height of 165 cm. Before choosing, measure tall equipment and furnishings that must pass through the door.
04. 310 cm models
The 310 cm-wide model family has a ridge height of 267 cm and a door height of 185 cm. Consider the larger internal volume when arranging tall crops and planning regular ventilation.
05. Glazing
Choose between polycarbonate and 4 mm toughened safety glass. Glass gives a clear view of plants and the interior. Polycarbonate changes the light effect and provides greater visual screening. Decide which level of transparency and light quality suits the growing and storage areas and your garden location.
06. Construction
The construction includes aluminium profiles, roof vents, an integrated gutter system and an aluminium base. Depending on the version, a single or double sliding door is included. The greenhouse is designed for a wind speed of 30 m/s and a snow load of 210 kg/m². Proper assembly, secure anchoring and use as intended are prerequisites. The greenhouse has a 12-year manufacturer guarantee, subject to the applicable guarantee terms.
Through the gardening season
A well-organised workspace from spring to the end of the season
In spring, propagation trays, pots and growing media take priority; in summer, watering accessories and care tools; later, harvest containers and cleaning materials. The storage room should support this seasonal change. Do not reserve every area permanently for rarely used items; instead, create sections that can be reassigned without emptying the whole room. Simple labelling helps you replenish consumables in time and remove damaged tools.
Roof vents support air exchange and help release excess heat and humidity from the growing area. They must remain accessible and be operated according to the conditions. Watch especially for prolonged dampness after watering. The integrated gutter system channels rainwater away from the roof. Plan drainage so water does not collect at the base, paths are not washed out and adjoining components stay dry.
Details of the guarantee terms are available in our guarantee information; further practical guidance is available under Useful information.
Keeping the storage room tidy
Allocate space sensibly for tools, pots and seasonal accessories
Organise the room by weight, frequency of use and cleaning needs. Before installing shelves, allow clear floor space for bulky equipment. Narrow holders are useful for tools that might otherwise fall over. Keep small parts orderly in closed, clearly labelled containers, but make sure their contents are suitable for the temperatures in the storage area.
Keep tools within easy reach
Secateurs, gloves and small care tools are quickly accessible near the transition to the growing area. Long-handled tools need secure holders so they cannot fall and their points or blades do not project into the walkway. Remove attached soil after use and let damp tools dry where possible before storing them.
Pots, growing media and small items
Stack empty pots only as high as they can be safely removed. Store growing media and fertiliser in suitable, clearly labelled packaging or containers, following the manufacturer’s instructions. A wipe-clean tray for labels, tying material and seed accessories keeps small items separate from larger supplies.
Seasonal accessories
Seasonal garden accessories can be kept in the storage area if they are suitable for its conditions. Textiles must be completely dry before storage and other items clean. The room is neither climate-controlled nor frost-proof, so sensitive products belong in a storage location that meets their own requirements.
Keep the growing area clear
A tidy growing area makes care, cleaning and checks easier. Leaves, plant debris and spilled growing media can be removed more quickly when equipment is not in the way. When crops are accessible from several sides, diseases, pest infestations and watering problems can be spotted sooner.
Arrange it ergonomically and clearly
Keep often-used items close by, with heavy items near the floor
Give every frequently used tool and accessory a fixed, easily reached place. This makes it clear at a glance what is ready for use and what needs replenishing or cleaning. Do not use the passageway as temporary storage: items left there interrupt your workflow and increase the risk of tripping.
Frequently used items are best kept near the growing area, roughly between knee and shoulder height. Rarely used, lightweight items can be placed higher up. Heavy bags or equipment belong lower down so they do not need to be lifted overhead. Leave enough room in front of shelves for removing items; sharp-edged fittings should not protrude into movement areas.
Shelves and wall holders make use of room height, but must only be fixed to components designed for them. Before drilling, check which parts can take attachments. Freestanding shelving must be stable and must not obstruct the sliding door or inspection of the base, glazing and connections.
Choosing the right size
Select the size around crops, furnishings and circulation space
Start by making two requirement lists. For the growing area, note beds, plant benches, containers and the mature height of planned crops. For storage, list large equipment, supplies and the shelf lengths required. Draw both to scale on the floor plans of the shortlisted versions. This reveals whether a size fits the garden but creates narrow routes or hard-to-reach corners in everyday use.
The narrower range supports compact planning and has lower height dimensions. The wider range offers more room to move and, depending on the version, can also include a double sliding door. Check garden access too: a larger door is only useful if the route in front of it is wide and level enough for the equipment you plan to use.
Test your layout with doors open, work tables occupied and plants at full maturity. Shelves must not hide handles or make windows harder to operate. Also allow a clear area where you can briefly set down a pot or open a bag without blocking the main route.
Order and delivery details can be found on the Shopping & delivery page.
Foundation and assembly
Prepare the location, foundation and drainage carefully
The growing and storage areas stand on one shared structure. The base must therefore be level, stable, square and built to the specified dimensions across the entire footprint. Even small deviations can affect the alignment of profiles, glazing and sliding doors. Before work begins, check the ground, water run-off and possible underground services. If in doubt, ask a qualified professional to assess the suitable foundation for your site.
Also plan the route from the delivery point to the assembly location. Measure gates, passages, bends and steps. At the site, you need a clean, orderly area for laying out profiles, timber components and glazing. Sensitive parts should not be walked on, dirtied or exposed to wind there.
The integrated aluminium base supports assembly but does not replace a suitable foundation or secure anchoring. Assemble the greenhouse according to the supplied instructions and recheck diagonals, vertical alignment and level before fitting the glazing. Changes to load-bearing or bracing parts can impair the function of the entire structure. Arrange professional assistance for any work you cannot carry out safely.
Information about the ordering process is available on the Ordering page.
Which solution suits your garden?
When the combination is more practical than two separate buildings
A Classic greenhouse without integrated storage is the right choice when almost the entire floor area is intended for plants and suitable storage already exists. Tools and supplies must then be brought from that external location into the daily workflow.
A separate garden shed can be sized independently of the greenhouse and positioned elsewhere. However, it requires a second space, its own base and extra walking routes. The position and appearance of both buildings must also be coordinated in the garden. This option can suit you if very large equipment must be stored or the two uses need to remain completely separate.
The Accoya greenhouse with storage suits gardens where short working routes and a cohesive appearance matter more than the greatest possible growing area alone. Typical greenhouse equipment remains on site without the need for another building. Before ordering, still check that the storage section is sufficient for your existing equipment. If it is planned too small, items will later end up stored in the growing area again.
Questions about the greenhouse with storage
Frequently asked questions about planning and use
How do I plan the right layout?
Draw beds, work tables, shelves, equipment and clear routes onto the floor plan. Choose the version in which both areas work without blocking doors, windows or walkways.
What is the integrated storage for?
It is intended for suitable garden tools, pots, plant accessories and consumables that should be stored separately from the bright growing area. Whether a particular product may be stored there depends on its individual storage instructions.
Why is Accoya timber used?
Accoya combines the natural grain of real wood with high dimensional stability. Acetylated Radiata pine absorbs less moisture and is therefore more resistant to moisture-related decay.
How do I care for untreated Accoya timber?
Remove dirt regularly with gentle products suitable for Accoya and avoid permanently damp contact points. If you are considering a coating, follow the applicable care guidance. The possible silvery-grey colour change is part of the natural weathering of untreated timber.
How do glass and polycarbonate differ?
Toughened safety glass provides a clear view of plants and the interior. Polycarbonate creates a different light effect and offers greater visual screening. Choose glazing according to how transparent you want the growing and storage areas to appear.
How should I use the roof vents?
Open and close the roof vents according to temperature, sunlight and humidity in the greenhouse. They must remain freely accessible. Monitor the indoor climate regularly, as ventilation needs change through the season.
Can I attach shelves and holders to the structure?
Only to components suitable for that purpose. Check the permitted fixing points before drilling. Freestanding shelving must be stable and must not conceal sliding doors, glazing, the base or connections.
Where can I find care and ordering guidance?
Guidance on gentle cleaning and checking glazing, profiles, sliding doors, roof vents, gutters and visible connections is available on the Useful information page; information about the ordering process is on the Ordering page.
Bloomcabin
Bring plants and garden tools together in one building
The Bloomcabin Classic greenhouse with integrated storage and Accoya timber is for anyone who wants to combine growing space with readily accessible garden equipment in one building. The right version depends on available space, planned crops, storage needs and your personal working routine.
Then transfer the results of your planning to the configuration and compare your selection once more with the real conditions at the site. In particular, check that the chosen version remains practical from the delivery route through to the assembly location and during later use. Further guidance for preparing your order is available on the Useful information page.
Check before configuring
✓ Carefully compare the floor plan and footprint of the suitable size
✓ Allow space for mature plants, work tables, equipment and clear walkways
✓ Choose toughened safety glass or polycarbonate for the desired light and visibility
✓ Plan stable standing surfaces plus suitable shelves and holders for storage
✓ Coordinate the RAL colour with Accoya timber’s natural colour change and the garden
✓ Prepare the foundation, anchoring, rainwater drainage and access for assembly
Configure your greenhouse with integrated storage