
Assessing a Frost Pocket Before Siting a Greenhouse
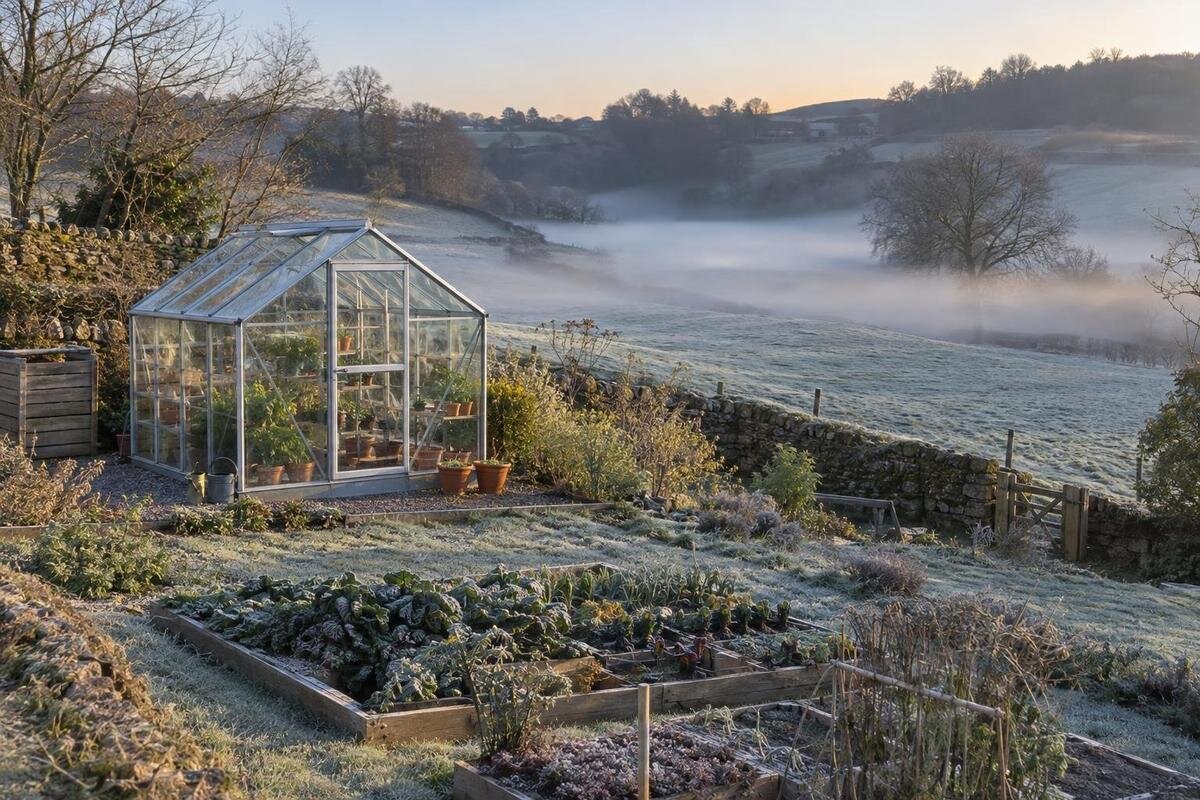
Greenhouse location
A low point is not automatically a frost pocket, and a garden-wide weather reading cannot tell you how cold one proposed greenhouse site becomes. On still nights, cooled air can drain and collect in hollows, while wind, cloud, boundaries and nearby buildings alter the pattern. Before choosing a position or deciding whether heating needs review, compare minimum temperatures at several candidate spots and record the conditions behind each reading. A simple site sketch, repeated measurements and photographs make the decision more reliable than relying on elevation or a single frosty morning.

How frost pockets form
Cold pockets often form when the ground loses heat under a clear sky after sunset. Air beside the cooled surface also cools; because cooler air is denser, it can move downhill and collect at a low point. A shallow hollow, a dip behind a bank or a level patch enclosed by boundaries may hold it when there is little mixing. This is a local process: subtle changes in slope, gaps and obstructions can matter even when the wider garden looks level. The aim is not to label every low spot as risky, but to find out whether cold air repeatedly accumulates where a greenhouse could stand. A map contour or a neighbour’s description cannot confirm that on its own.
That pattern occurs on some nights, not all. Cloud and breezes can limit ground cooling or mix the air, while a broader arrival of cold air can lower temperatures across both high and low parts of a plot. A fence, hedge or building can channel, block or shelter air, and may cast shade as well; none has one guaranteed effect. Frost on the ground is not the same measurement as air temperature at crop height. Nor does an unheated greenhouse simply inherit the outdoor reading: its enclosure changes the conditions inside. An outside minimum is evidence about the site, not a prediction of the future crop temperature. Repeated readings are more useful than one dramatic frosty morning.
Map the garden before measuring it
Draw a simple scaled plan before placing instruments. Mark high and low ground, the direction of each slope, depressions, gullies, raised banks, retaining edges, walls, fences and dense planting. Add buildings, paths, hard and soft surfaces, and any openings through which air might pass. A rough contour sketch is more useful than a polished garden plan if it shows where air could descend or be held. Label features that change seasonally, such as deciduous cover, because the winter view may differ from the leafy summer garden. A north arrow can help you relate the plan to seasonal shadow diagrams later. Use a consistent scale so readings and candidate outlines can share one drawing.
Add each possible greenhouse position as a separate outline, rather than drawing only a preferred centre point. Include a wall-adjacent and an open position if both are realistic; a wall may alter shade and airflow, but it is not automatically warmer. The Wall Greenhouse lean-to range is listed from 3.69 m² to 14.34 m², so that range does not show the outline of the particular version you might choose. Confirm the selected model’s dimensions before marking its footprint. Photograph the upper, middle and lowest parts of the garden from fixed viewpoints. Dawn photographs after a cold night can help explain differences between measurements.
Define each candidate greenhouse footprint
Decide which candidate footprints you want to compare before distributing thermometers. If two sizes occupy different parts of a slope, a reading at one centre may say little about the other. Mark the proposed centre, the lowest edge, the wall-facing side and any boundary beside a channel or hollow. Include a reference point outside the proposed footprint, in an open part of the garden that you can use consistently. It provides a basis for comparison, rather than representing the entire neighbourhood or replacing an official weather reading. Keep its position unchanged while comparing the candidate sites.
Catalogue names can cover a broad range of choices. The Limited Edition Aluminium Greenhouses listing runs from 3.77 m² to 28.08 m²; note the version you are considering instead of writing only the family name. A listed area does not show the exact footprint, orientation or where its edges fall, so confirm the selected version’s dimensions before placing candidate sensors. A long outline or a site that crosses a slope may need readings at more than one point. Give each location a short code on the sketch and repeat that code in the log. This helps distinguish a measurement at the upper edge from one at the lower edge.
Place thermometers for comparable readings
Use a minimum thermometer or a temperature logger that retains the lowest reading. Follow the device instructions and use the same type of instrument at all comparison points where possible. Keep the sensor ventilated and shielded from direct sun and rain, so exposure does not distort the air-temperature reading. Do not let it touch soil, masonry, glazing or metal, which may be at a different temperature from the surrounding air. Before placing several instruments around the plot, set them together in one spot for a short comparison. If they differ, investigate or note the discrepancy rather than attributing every difference to the terrain.
Use consistent heights and exposure at every point. Put the main sensor at a height that represents the planned growing area; a separate lower sensor can show whether air near the ground is colder, but label each level and compare like with like. When assessing a site for a T-Model Orangery Greenhouse, distinguish readings at crop height from those taken near the ground on your candidate plan. Position outdoor sensors within the proposed site, not in a sheltered spot that does not match it. Note their distance from walls, hedges and banks, and photograph each setup so you can recreate it.

Keep a consistent minimum-temperature log
Make the routine repeatable. Each morning, record the minimum in °C, the date, sensor code, height and exact location before resetting a minimum thermometer. With a logger, save the time at which the low occurred as well as the value. Note any instrument change, data gap, battery problem, movement or missed reset. Read and reset manual instruments at roughly the same point in your daily routine, following their instructions. If you have only one sensor, move it between spots on comparable nights and say so in your notes: sequential readings are less reliable than simultaneous measurements because the weather may change.
Add a short weather description to each entry: clear or cloudy, still or breezy, and whether frost or visible dew appeared nearby. Keep visual observations separate from the thermometer reading; a white patch on a leaf is a clue, not a measured air temperature. Gather readings across several cold spells in the season when you plan to use the greenhouse, including calm, clear nights and other colder conditions. A mild run does not rule out a colder event later, and a brief record cannot establish a rare extreme. If a Pyramid Greenhouse is on your shortlist, identify the candidate position in the log. If that position changes, retain the earlier entries under their original location code rather than combining readings from different spots.
Trace cold-air movement across the plot
Revisit the plot at dawn after a calm, cold night, before sunshine or a change in wind alters the visible pattern. Compare frost on grass, low plants, paving and sheltered edges, and mark where it appears first or persists longest. Look for shallow hollows, channels between buildings, gaps in fences and places where a bank or solid boundary might interrupt a downhill route. Take the same views from the upper, middle and low parts of the site, and note the time and weather. These signs can help explain sensor readings, but frost on a leaf depends on the leaf and its exposure; it cannot replace an air-temperature record.
Where possible, place sensors along a suspected route—from higher ground, through the slope, towards the low point—and read them together. A lower reading at the bottom on the same night supports a local gradient; repetition under different weather conditions shows whether it is a regular feature or a one-night effect. Walls, hedges and outbuildings may redirect air or create different pockets on either side, so avoid drawing one arrow across the whole garden from one observation. For a candidate such as the Limited Edition greenhouse with storage, keep the proposed outline and existing obstacles distinct on the sketch. Mark suspected air routes separately from routes supported by repeated readings.
Compare readings from the same nights
Compare sites on the same dates rather than averaging readings from different weather. A table can show each candidate’s nightly minimum beside the reference reading and the difference between them. Look for repeated patterns: how often a spot is colder, how large the gap tends to be, and whether its lowest readings cluster on clear, still nights. Check an isolated extreme against the instrument notes, reset history and sensor position before treating it as real. An average can summarise a season, but on its own it may conceal a handful of notably cold nights relevant to the choice. If readings are close to the instrument’s resolution, avoid treating a small difference as a firm ranking.
Transfer those differences to the sketch. If the lower edge repeatedly reads colder than the centre, a greenhouse footprint could span areas with different temperature patterns; a single sensor at the door may not represent all the growing area. When comparing a proposed Prestige Greenhouse position with alternatives, record both its relative ranking and the weather conditions associated with that ranking. Treat the result as a comparison of observed candidate spots, not a forecast that one will always be warmer by the same amount. Keep the raw readings alongside the summary so you can identify nights when the usual pattern changed and check the corresponding weather and instrument notes.
Use outdoor readings to review heating needs
Outdoor minimums tell you how parts of the garden compare; they do not predict the lowest temperature inside a greenhouse that has not been built. The enclosure and its actual operation alter indoor conditions, and a different size or position may behave differently. If an existing greenhouse is available, measure inside and outside at the same time using comparable sensors, with the indoor instrument at the planned crop level. Record its position, ventilation state and the weather. This provides evidence for that structure under those conditions only, not a guaranteed indoor minimum for another model or future season. An unheated greenhouse should not be assumed frost-proof.
Before discussing heating, state the intended use: which plants, which part of the year, and whether the aim is protection from occasional cold or a particular growing environment. Take the site map and temperature log to a qualified greenhouse or heating professional to assess the exact proposed model and its technical information. Size, glazing, ventilation and the indoor conditions you want all affect that review. The Spacious Greenhouse is listed from 47 m² to 70 m², but its family name and area range alone cannot determine heating provision. Do not choose heater capacity from an outdoor thermometer or a general rule of thumb; the professional needs the specific structure and purpose.

Compare wall-adjacent and freestanding positions
Compare wall-adjacent and freestanding positions only after the temperature pattern is clear. A wall can change shade, shelter and airflow, but it is not automatically warmer; a boundary may also block or channel air. Measure at the actual candidate positions with the same sensor setup rather than assuming a building will protect the greenhouse. Check seasonal shadow diagrams separately: daytime sunshine affects the growing environment, but a sunny patch does not prove that the location is free of cold-air pooling at night. Keep the light assessment and frost assessment on the same plan, but treat them as different evidence.
Bring the temperature comparison into the final model choice. For the Aluminium Classic Greenhouse, confirm the chosen version’s dimensions and overlay its footprint on the site sketch and cold-air map. Assess the whole outline rather than choosing a size solely because its centre falls on a favourable measuring point. Balance the observed temperature pattern with access and seasonal light, keeping each consideration identifiable in your notes. If one position offers better light but repeatedly records lower minima, record that trade-off explicitly rather than describing it as the best site overall. Neither a lean-to nor a freestanding arrangement, by itself, establishes frost protection.
Bring the evidence together before deciding
Bring the evidence into one record: a scaled site sketch, candidate footprints, sensor positions and heights, dated minimums, brief weather notes, photographs and seasonal shadow diagrams. Highlight nights that were clear and still, and locations that repeatedly recorded lower minima. State what remains uncertain—for instance, an unmonitored corner, a moved sensor or a season with few cold spells—instead of hiding it in an average. This gives you a clear reason for preferring one candidate over another and makes the assessment easy to revisit if a boundary, planting or greenhouse footprint changes before installation.
After installation, repeat the indoor and outdoor comparison during suitable cold spells, using the same outdoor reference and a clearly recorded indoor position. The new readings show how the actual enclosure behaves during the nights observed; they do not guarantee conditions in every future winter. Keep these measurements separate from the pre-installation record so that outdoor site comparisons are not confused with indoor performance. If results differ from the planning assumptions, review the crop plan, ventilation and any heating assessment with a qualified professional. The completed record should distinguish why the location was chosen from what you subsequently learn about growing conditions inside.
Frequently asked questions
How can I tell whether a low spot is a frost pocket?
Compare minimum readings at the proposed site and at a consistent reference point on the same nights. Repeatedly lower readings in the low spot, particularly under similar calm, clear conditions, suggest a local pattern. One frost patch or one night is not enough to confirm it.
How long should I record minimum temperatures?
There is no fixed number of nights that proves a site is free from frost pockets. Record across several cold spells during the season when you expect to use the greenhouse, and include different weather conditions. A short run can help compare spots, but cannot rule out a rarer cold event.
Should a thermometer sit on the ground?
No. A thermometer resting on soil or paving measures conditions at the surface, not the surrounding air. Use a ventilated shield and keep the sensor at a consistent, representative height. A separate lower sensor can help you compare near-ground air with the intended growing area.
Does a wall-mounted greenhouse avoid frost pockets?
Not automatically. A wall can alter shade and airflow, but its effect depends on the exact position and surrounding boundaries. Compare readings at the proposed wall-adjacent site with other candidate spots before deciding that it is warmer.
Can outdoor readings tell me whether heating is needed?
They help describe the outdoor conditions, but do not predict the temperature inside a greenhouse that has not been built. Heating needs depend on the exact structure and intended growing conditions. Share your site record and plans with a qualified greenhouse or heating professional.
Treat a frost pocket as a pattern to test, not a label to infer from the garden’s lowest point. Map the terrain, measure candidate positions on the same nights and connect every minimum to its sensor placement and the weather. The resulting record helps you choose a location for the exact greenhouse footprint and gives a professional a useful basis for any heating review. It also makes clear what remains uncertain, rather than promising that frost will never occur.
