
Spring Seed Trays: Calculating Greenhouse Bench Space
Greenhouse planning
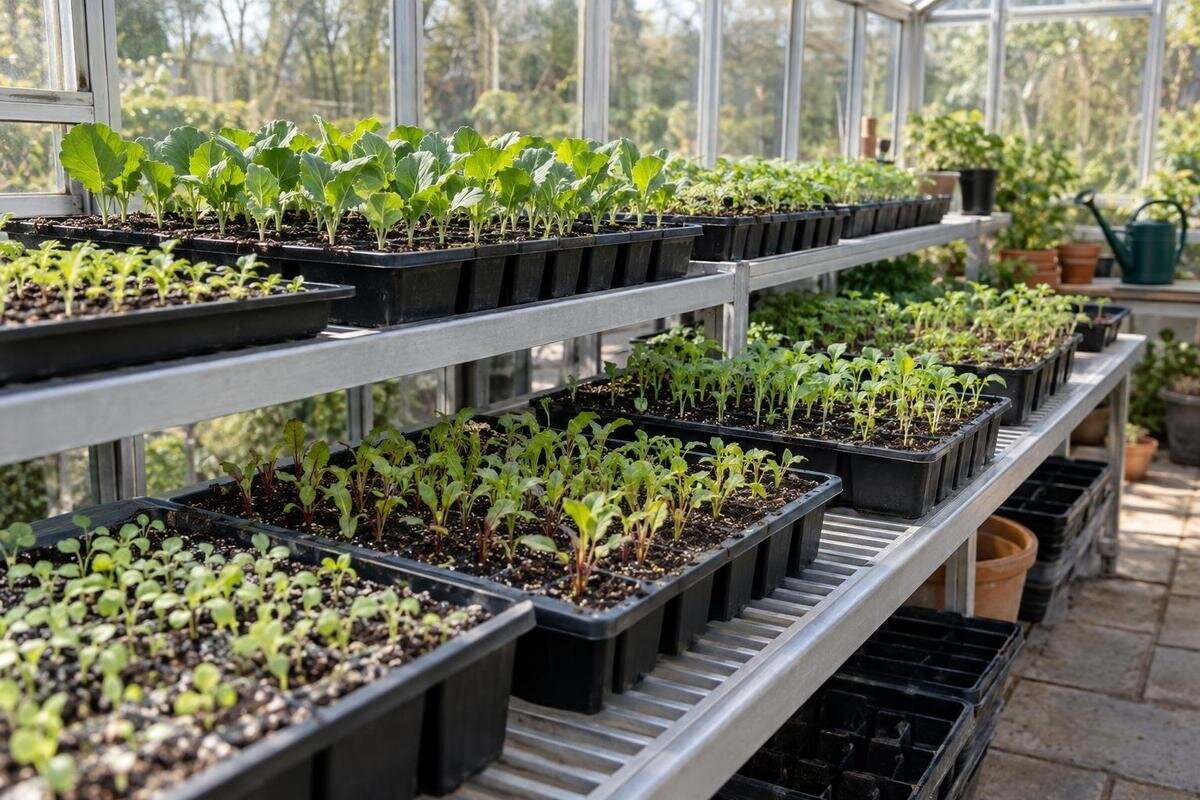
Spring sowing can look manageable on a calendar and still crowd a greenhouse bench when several batches are growing at once. The useful figure is not how many trays you will sow in total, but how many will occupy the same usable surface during the busiest week. Measure the bench, record the outside footprint of each tray format, and map when each batch is likely to move on. That turns a sowing plan into a realistic capacity check rather than a guess based on the greenhouse’s overall area.

Peak demand from overlapping sowings
Treat this as a weekly occupancy problem. A list of every sowing planned for spring can overstate the space required if early batches leave the bench before later ones arrive. Conversely, a modest number of sowings can create a high peak when slower batches remain alongside new ones. For each week, count every tray physically on the propagation bench: newly sown trays, seedlings awaiting their next move, and any batch held there until handover. Count trays rather than cells, seeds or individual seedlings, because it is the tray’s outside footprint that occupies the surface. If only part of a batch remains, record that smaller number; split the batch record if its trays move at different times. The busiest sowing week and the busiest occupancy week need not be the same.
Write a total for each week and identify the highest. Keep this demand figure separate from bench capacity, which comes from the layout. The Classic aluminium greenhouse range is listed from 3.77 m² to 28.08 m²; those figures help compare model areas, but they do not state how many trays planned benches can hold. If you use several tray sizes, retain the quantities for each format rather than relying on a single total. A week with fewer, larger trays may need more bench space than a week with many small ones.
Measure usable bench surfaces
Measure each bench as a separate surface, using its usable length and depth rather than the greenhouse’s total area. If a bench steps around a post, narrows at one end or stops short of a doorway, split it into rectangles that you can actually use. Leave out spaces reserved for access, gaps between disconnected benches and any surface too small to take a full tray. A total square-metre figure can hide a narrow strip that will not accept your tray footprint, so keep dimensions in centimetres and retain each zone’s shape instead of writing down only a combined area.
Measure between the real bench edges and count only supported surface; do not assume that trays can overhang. Sketch fixed interruptions and keep benches across an aisle separate even if their areas add up. When considering a model from the Wall Greenhouse range, listed from 3.69 m² to 14.34 m², use its dimensions to draw the proposed bench positions and access route. Record each tier or separate shelf as its own zone, excluding any that cannot take your tray format. Keep all measurements in one unit and avoid rounding them before calculating how many trays fit.
Use the tray’s outside footprint
Measure the full outside dimensions of every tray type you use, not the cell block or the planting area inside the rim. Record length and width, including a rim or projecting handles if they increase the space taken up. Trays that look alike or hold similar numbers of seedlings may have different outer footprints. If a smaller tray sits inside a carrier that remains on the bench, record the carrier’s footprint. Likewise, if a cover, insert or water-holding base is part of the unit in your setup, use the outline of the assembled unit rather than its smallest component. Keep separate entries for formats that cannot be swapped without changing the arrangement. A quick check with a sample tray can clarify whether a nominal measurement includes its rim or handles.
Give each format a short label and keep measurements in centimetres; for a rectangle, its footprint is length multiplied by width. That area helps compare tray formats, but it does not show how they fit along bench edges or beside another size. If your shortlist includes the Limited Edition aluminium greenhouse range, draw the proposed benches within the selected model’s dimensions, then test your tray formats on those surfaces. Keep a simple inventory with one line per outside footprint and any carrier-specific format listed separately. If you store empty trays nested, do not use that stack size for sown trays during the peak.
Calculate how trays fit in each bench zone
For one clear rectangular bench zone and one tray size, count whole trays along each dimension. Divide usable bench length by tray length and usable depth by tray width, rounding both results down to whole numbers; multiply those counts. Repeat with the tray rotated, because the better orientation can change the result. Calculate each separate zone on its own and add capacities afterwards. A result of 4.8 trays along an edge means four whole trays in that row, not five. Allow for any planned gaps between trays before accepting the grid count; a layout that fits edge to edge may not leave the clearance your routine needs.
For example, on a hypothetical 180 cm by 60 cm bench, 30 cm by 20 cm trays give six along the length and three across the depth, or 18 positions before any necessary clearance is included. Dividing total bench area by a tray’s area can hide unusable strips, fixed interruptions or poor fit. A leftover strip is not an extra position unless a real tray can sit there without overlapping another tray or the route. For mixed sizes, sketch rectangles to scale and test how they share each zone; do not calculate every size against the same empty bench. When comparing layouts for the T-Model Orangery Greenhouse range, listed from 16.52 m² to 30 m², apply this calculation to each proposed bench run.

Keep access and working space in the plan
A bench is not fully useful if every square centimetre is covered by trays. On your sketch, mark the route needed to reach each tray, turn and carry batches in or out. Also mark any part of the bench genuinely used for labelling, potting on or temporary staging; those tasks take space when they happen at the same time as tray occupancy. Do not apply an arbitrary gap or reserve to every greenhouse: use the space your own routine requires. If potting takes place at another table, do not subtract that table’s area from the bench plan as well. A narrow passage or working patch you rely on is not spare capacity simply because it is empty on the sowing list.
Check that each tray can be reached and lifted without moving another batch. Test awkward corners with a tray outline rather than assuming they provide full positions. If you are comparing the Pyramid Greenhouse range, draw the chosen bench runs and trace how you would carry trays between them and the entrance. Mark a temporary staging area separately if you use it during potting or sorting. It can hold peak trays only when those tasks do not need it at the same time. This check distinguishes positions you can use throughout the week from space that is available only between jobs.
Build a week-by-week occupancy calendar
Put each sowing batch on a weekly calendar with its planned sowing week, tray number and format, expected week of departure from the bench, and next destination. Use species-specific growing guidance and your own propagation records to estimate how long it will remain there; one generic duration will not suit every crop or setup. The date that matters for space is not just when seed is sown, but when that batch can realistically move off the bench. A tray that stays in place for several weeks must appear in each of those weeks’ totals. A weekly view is easier to compare than a sowing list arranged only by crop, because overlapping dates become visible.
Create a row for each week from the first sowing to the expected end of the spring programme, and enter every batch for all the weeks it remains. If one batch leaves and another arrives in the same week, check their dates: the weekly total should reflect trays present together, not simply all trays handled that week. Where timing is uncertain, note an early and a later departure estimate instead of disguising it with one precise date. If a batch is due to leave but has no realistic destination, keep it in the count until there is one. When sowing dates shift, move the batch across all affected rows so the calendar remains consistent.
Changes in tray numbers and sizes
Count transitions as changes in occupancy, not automatic clearance. A batch may start in one tray format and take up a larger footprint after it is moved into another container; if that happens before it leaves the greenhouse, update the format and count for the weeks involved. Trays being sorted, labelled or held for collection also remain in the space calculation if they are still on the bench. Keep the container count distinct from the number of plants: a hundred seedlings in one tray do not occupy the same area as a hundred pots spread over several trays. Record the stage change when its footprint changes, not only the original sowing date.
Record partial moves by quantity and date. If six trays belong to one batch but only two leave, the remaining four still need positions; the batch is not cleared. Use past records to estimate holding periods, and test the later plausible departure date where it would increase demand. When trays move to another surface, remove them from the original bench’s count and enter them against their new destination. Keep the two records aligned so a move neither makes trays disappear from the plan nor counts them twice. This helps distinguish a shortfall caused by a longer stay from one caused by a change in container size.
Include equipment and storage
Include anything else that occupies the same bench during the peak: a propagator, pots waiting to be filled, trays used for potting on, or equipment set down during routine work. Mark these as fixed or temporary footprints, or reserve a clearly named work zone. Do not count a surface once as a tray position and again as a work area. If an item is used only briefly, consider whether that task coincides with the most crowded week; count simultaneous use rather than every item in the greenhouse as if it occupied the bench at once. If a tray is lifted for a task but has nowhere else to sit, its position is still unavailable. Use different marks for permanent items and occasional work areas so you can see which space may be freed by a change in routine.
Storage needs its own line on the sketch. The Limited Edition greenhouse with built-in storage range is listed from 5.52 m² to 28.08 m², but the name alone does not show how storage is arranged or what bench surface remains. For any selected model, check its actual layout before treating an area as available for trays. If you plan to use a storage surface for trays as well, count it only if its dimensions and intended use genuinely allow trays to remain there during the peak; otherwise keep the uses separate. A clear drawing can prevent storage and equipment areas from being counted twice.

Compare peak demand with bench capacity
Compare the highest weekly tray demand with the total number of positions that fit across all planned bench zones, after routes and equipment have been excluded. Use the same tray formats on both sides of the comparison. If the peak is 29 trays and your drawing holds 24, the shortfall is five usable positions. Look at the calendar and layout to find the cause: one heavy overlap, a narrow bench, a larger tray format or a work area counted as free. Then test a relevant change, such as staggering an eligible sowing, revising the bench arrangement or planning another usable surface. The number shows what needs attention; it does not by itself say which solution suits the crop.
Use the shortfall to compare specific interior plans. For a model in the Prestige greenhouse range, listed from 3.77 m² to 28.08 m², plot the proposed bench arrangement and check whether it provides the missing positions in the required tray sizes. A change that accommodates five small trays may not solve a shortage of five larger ones. Recalculate capacity whenever bench positions or tray formats change, and recalculate demand when sowing or departure dates change. Any revised sowing dates should remain compatible with the growing schedule you are following.
Set a practical tray limit
Set a working limit below the mapped capacity if your routine needs room for late arrivals or handling. The drawing shows how many trays fit in the arrangement you have tested; it cannot guarantee that every week will run exactly to plan. Use your own observations to decide whether to reserve a few marked positions, a work area or no reserve at all, rather than adopting an arbitrary percentage. Record both the mapped capacity and your chosen operating limit. Use the practical figure when deciding how many trays may be present at once. If the limit is reached, pause or revise the next batch rather than filling the access route.
If you are considering a larger greenhouse, the Spacious Greenhouse range is listed from 47 m² to 70 m². Compare a proposed layout with your current plan to see which crowded weeks it would accommodate and how much working space would remain. Keep the occupancy calendar beside the bench drawing and revise it after each sowing round with actual arrival and departure dates. Record where the plan proved too tight as well as where positions remained unused. Those observations give you a practical basis for the next spring programme, whether you retain the existing benches or choose a different layout.
Frequently asked questions
How do I calculate how many trays fit on a bench?
For one tray size, divide the usable bench length and depth by the tray’s outside length and width, round each result down, then multiply. Try the tray in both orientations and repeat for each separate bench zone. Exclude routes and any surface the tray cannot actually occupy.
Can I use greenhouse area as a measure of bench capacity?
No. A greenhouse’s listed area does not show how its interior is divided between benches, access, storage and equipment. Measure the actual bench zones in the layout you are considering, then compare them with your tray footprints. Use the listed area as an initial comparison, not as a tray count.
How should I count overlapping sowings?
Make a weekly calendar and include each batch in every week it is still on the bench. Add the tray counts for all batches present that week, then identify the highest total. If some trays move earlier than others, record them as separate quantities so the calendar reflects what remains.
Should I leave space between trays?
Allow for the gaps and access your actual routine needs rather than assuming that every tray must touch or applying an arbitrary allowance. Mark working areas and routes on the bench plan, then count only the tray positions that remain usable. A small paper layout can reveal where a tight fit will not work in practice.
What if peak tray demand is higher than bench capacity?
Find the week and layout feature causing the shortfall. Where the crop schedule allows, you might stagger a sowing, revise the bench arrangement or plan another suitable growing surface. Do not solve the calculation by counting an access route as bench space or by assuming a batch can move before it is ready.
Bench planning becomes more dependable when the calendar and the physical layout are checked together. The weekly calendar reveals the busiest overlap; the tray-and-bench drawing shows whether those trays can fit while leaving the access and work areas you actually need. Keep the working limit visible, then update it with observed dates and tray formats as spring progresses. That gives each new sowing a clear space budget without mistaking a greenhouse’s listed area for propagation capacity.
