
Bubble Insulation in a Glass Greenhouse: What to Check
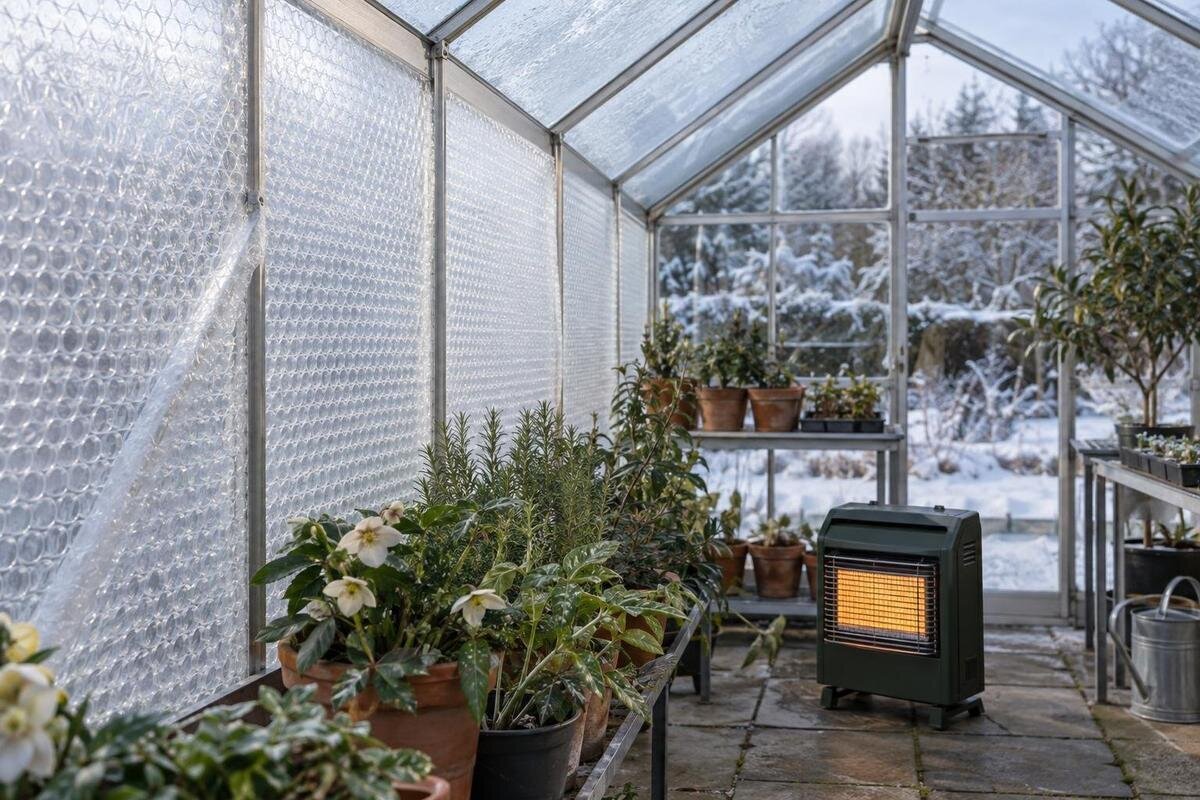
Glass greenhouse winter insulation
Bubble insulation can slow heat loss through the glazing of a glass greenhouse, but its name alone cannot tell you whether it will reduce your heating energy use. Results depend on the material, coverage, leaks, weather and heater control. The layer can also reduce daylight and change where moisture condenses. A fair decision needs comparable energy-use records, light readings at plant level, observations of condensation and fixings confirmed for the exact frame.

What bubble insulation can change
Bubble insulation adds a layer of material with air spaces over glazing. When the material is intended for greenhouse use and installed as its maker specifies, it can slow heat transfer through covered panes. The effect is limited to the surfaces treated: an uncovered roof, door, gap or exposed base still loses heat by its own route. How much the whole greenhouse benefits depends on the enclosure, weather, coverage and heater control. A measurement at one pane does not establish whole-greenhouse performance. The air cells and any air gap are part of the tested arrangement, so compression or an unplanned double layer may change how it performs. Without the actual glazing, insulation specification and covered proportion, no credible numerical saving can be assigned.
Keep two outcomes separate. With the same heat input, a greenhouse may stay warmer for longer; with the same indoor target, the heater may use less energy. Only the latter directly answers whether consumption fell, and it must be measured over comparable periods. A warmer reading alone is not proof. Bubble insulation cannot repair broken glazing or replace working ventilation, and it cannot promise frost protection or active-growing conditions. Also distinguish overnight heat retention from a warm daytime reading in sunshine: they describe different conditions. More covered area can also mean less light reaching plants, so heat and light need considering together.
Record the greenhouse before fitting anything
Before fitting anything, record the current structure: exact model and configuration if known, frame and glazing details from its paperwork, and which roof and wall areas are transparent. Note door positions, opening vents, joints, cracks, loose panes and heater or controller settings. Photograph the interior and exterior, including edges and existing fixings, and record any screens or other insulation already in place. This baseline helps separate a bubble layer’s effect from repairs, changed vent positions, existing shade or a different heating schedule. It also gives the greenhouse maker useful information for a compatibility question. A simple sketch showing pane groups and vents makes later readings and coverage plans easier to reproduce.
Do not estimate bubble-wrap quantity or heat performance from floor area alone: glazed surface area and openings are different measurements. The T-Model Orangery Greenhouse listing spans 16.52–30 m², so identify the exact size and version before relying on a model-family description. Give the maker that configuration and photographs when asking about suitable insulation and fixings. A catalogue name or floor-area range cannot confirm that a particular layer suits the glazing system or tell you how much energy it will save. Measure the actual panes for coverage rather than using the footprint.
Compare heater use on similar days
Set up the comparison before installation. Record indoor and outdoor temperatures with the same instruments and positions, together with heater settings, operating hours, vent positions and door openings. If the heater or a suitable existing meter reports energy use, record the heater’s own kWh for each period; separate it from lighting or other equipment where possible. If you have only run-time records, label them as an estimate rather than measured energy, especially where a thermostat cycles or the heater modulates. Keep the target temperature, sensor position and observation period unchanged. Compare periods of the same length and mark any interruption that changes normal use. If the meter also records fans or lights, make that clear rather than presenting the total as heating use. An overnight temperature fall can add context, but it is not an energy reading; compare it only with a similar starting temperature and outside conditions.
Choose baseline and insulated periods with broadly similar outside conditions and the same greenhouse routine. Cloud, wind, sunshine, open doors, watering and ventilation can all shift demand, so one mild night compared with a colder one tells little. Keep dated notes across several comparable periods and compare heater use while the indoor target remains the same. If you are assessing a new structure too, the Pyramid Greenhouse listing covers 5.53–18.9 m²; its size range does not predict savings. If a supplier gives a saving figure, check its glazing, coverage, weather and target assumptions before treating it as relevant to your greenhouse.
Separate insulation from repairs and other heat-loss paths
Bubble material laid over panes will not seal a loose door, a damaged gasket or a gap around a vent. Before a trial, inspect the frame, glazing edges, doors and designed ventilation points; note faults and have repairs assessed rather than using a sheet to hold a pane in place. A repaired opening can change heat loss on its own, so avoid combining a repair and an insulation change if you want to attribute results to the bubble layer. A sheet over glass is not automatically an airtight barrier, even if its edges appear covered. Treat a designed vent as a deliberate air path, not a fault to be sealed for a better reading. If you repair a fault before fitting, take a fresh baseline afterwards.
Map which areas are glass, solid panels, doors and any separate storage area, then mark exactly which surfaces the insulation would cover. A greenhouse marketed with storage, such as Aluminium Greenhouses with Storage – Limited Edition, cannot be assessed from floor area alone: the actual layout determines which glazing is exposed. Keep storage or partition details separate from the transparent surface you plan to cover, and follow the instructions for the exact version rather than assuming that one general wrap plan fits every model. If any seal or vent changes during the baseline, record it as a separate factor.

Check daylight at plant level
An insulation sheet can look transparent and still change the light reaching leaves. Material, colour, surface texture, bubble structure, cleanliness and layers can affect transmission or scatter; only the supplier’s data for the exact product can describe it. Ask what the quoted figure measures and whether it applies to the installed arrangement, including overlaps and doubled sections. A visible-light figure is not automatically a plant-light measure. Do not treat a product photograph or the word clear as evidence that there will be no loss, and do not assume generic packaging film performs like a greenhouse product.
Compare readings at plant level before and after fitting, using the same sensor, height and position, preferably at matching times under similar sky conditions. Take readings at more than one representative growing area; a spot beside the door may not reflect a shaded bench. Clouds can change readings quickly, so take measurements close together or use a logger. Keep the surfaces similarly clean and dry, since dust or droplets can alter readings. If using a basic lux meter, treat the readings as local comparisons rather than a complete measure of plant-usable light. A relative comparison shows what changed in that greenhouse, not whether every crop receives enough light. When comparing sizes in the Aluminium Greenhouses range, consider where benches would sit and which growing areas your light readings would need to represent.
Inspect condensation on both sides of the layer
Condensation forms when humid air meets a surface cool enough for moisture to collect. In a greenhouse, droplets may appear on the room-facing glazing, on the insulation, or in the narrow space between the two, depending on fit and conditions. Adding a layer does not guarantee less condensation: it can change which surface is coldest and make moisture behind the covering harder to see. Record where droplets appear, whether they persist and whether nearby pots, benches or leaves are wet. Note whether moisture is indoors or on the exterior of the glass; condensation alone does not quantify heat saved.
Keep a written or photographic record at a consistent time and note watering, wet pots, ventilation and other obvious moisture sources. Do not seal the layer in a way the maker or greenhouse manual rules out, and preserve airflow and access needed to inspect glazing. A removable fixing makes it easier to check behind the layer; if damp is trapped, the material stays wet or a frame joint cannot be checked, pause and follow the makers’ advice. Inspect again after typical watering and damp periods, since a quick dry-day check may miss later moisture. For a Wall Greenhouse, the model name alone does not establish how its particular surfaces handle moisture, so use the exact layout and ventilation instructions.
Choose fixings for the exact frame and glazing
Ask the greenhouse maker which attachment points and clips are compatible with its frame profile and pane-retaining system, and ask the insulation supplier for instructions for that setting. A fixing suited to one bar or gasket may not fit another. Do not drill into glazing, apply point pressure to a pane or assume adhesive tape is harmless: it may leave residue or affect a seal, finish or coating. Ask whether the material is intended for prolonged greenhouse use and whether there are instructions for support, tension or spacing. Its appearance alone does not establish suitability.
Check that attachments will not obstruct drainage paths, glazing joints, moving parts or places needing routine inspection. Ask whether the covering should be removable for cleaning and how its edges should be supported; do not invent a fastening detail where the manual is silent. A clip that physically grips a bar is not automatically an approved fixing. For example, the Bloomcabin Prestige Greenhouse listing identifies a model with a metal foundation, but that detail does not answer what fixings are compatible with the glazing system on your exact greenhouse. The instructions for the exact version matter; stop if an attachment puts strain on a pane or bar.
Keep vents, doors and controls clear
Before planning coverage, mark every opening and operating part that must remain usable: doors, roof or side vents where fitted, louvres, fan openings, thermostats and sensor locations. Insulation should not prevent a vent from opening fully, interfere with an operator or hide a control that needs to be read. Blocking an intended air path can alter humidity and air movement as well as heat retention. Check access from inside and outside, including the space needed to open doors or remove a panel for inspection. If doors slide or vents move on tracks or arms, make sure the proposed sheet cannot snag them. Check handles and latches again when benches, plants or stored items are in their normal positions.
Do not assume a larger greenhouse can simply be wrapped in the same way as a smaller one. The Spacious Greenhouse listing gives a 47–70 m² range, but floor area does not identify the precise glazing layout, vent positions or amount of cover needed. Use the plan and manual for the exact version, mark openings before measuring material, and keep removable sections clear of moving components. The aim is to cover only surfaces the maker allows without compromising access or normal ventilation.

What a small insulation trial can tell you
If both makers allow it, test a small, representative section with the approved attachment method before covering all panes. This can show whether the material sits securely, is easy to remove and noticeably alters light or condensation at that spot. Choose a section with similar exposure to the main growing area, while remembering that a sample gives only a local result. It does not predict whole-greenhouse energy savings: one patch may face different sun or wind, and uncovered neighbours still influence indoor readings. Treat a sample as a fit and visibility check, not a complete performance test or proof of durability over a full season. Do not risk the plants you are trying to protect just to obtain a comparison.
For a meaningful before-and-after result, use the intended coverage, keep heater settings and daily routine unchanged, and repeat measurements over comparable periods. Record energy use, indoor and outdoor temperatures, light readings and moisture observations together; do not select only the most favourable night or growing area. If your structure is from the Limited Edition Aluminium Greenhouses range, record its exact configuration when requesting instructions: the family name alone does not establish the correct fixing. Keep existing safeguards and growing conditions in place while assessing the change.
Judge savings against light and moisture
After collecting comparable heater-use readings, use your own current tariff to value any measured change in energy consumption. Apply the unit rate that covers those periods; with a time-varying rate, the relevant hours matter. A standing charge does not normally fall simply because fewer units are used, so do not count it as a saving. If heating fuel is not metered in kWh, compare the recorded quantity and actual price on a consistent basis. If a difference is small relative to meter resolution or day-to-day variation, call the result inconclusive rather than a definite saving.
Then weigh energy use against the measured daylight change, condensation, access and the work needed to remove or inspect the layer. If results are mixed, the answer may be partial coverage, another insulation product with documented light data, or no fitting at all; none is right for every crop or greenhouse. Include actual material and fixing costs before considering payback, and repeat comparisons in the conditions when you normally need heat. Lower heater consumption is not a like-for-like saving if the greenhouse failed to maintain the same target temperature. If costs are not yet known, postpone any payback claim until the full installed cost is available. A useful decision rests on the records, not a claim printed on a roll or one warmer afternoon.
Frequently asked questions
Will bubble insulation keep a glass greenhouse frost-free?
Not necessarily. It may slow heat loss through covered glazing, but minimum temperatures still depend on the rest of the enclosure, outside conditions, coverage and heater operation. Base any plant-protection plan on measured temperatures; no bubble layer alone guarantees a frost-free space.
How can I tell whether it has saved energy?
Compare the heater’s measured energy use before and after, keeping the target temperature, observation period and ventilation routine consistent and choosing similar outside conditions. Track temperature as context. A warmer reading alone does not establish an energy saving, and run-time records are only an estimate, particularly when the heater cycles or modulates.
Will it reduce the light reaching plants?
It can; the amount depends on the material and installed layers. Ask for transmission data for the actual arrangement, then compare readings at plant level with the same sensor in similar light. A clear appearance or product photograph cannot establish whether the result suits your crops.
Does condensation mean the insulation is fitted incorrectly?
Not by itself. The added layer may change which surface collects moisture, and condensation can occur on the glass or behind the insulation. Note where it forms and whether it persists, maintain designed ventilation, and inspect behind removable sections using the manufacturer’s guidance.
Can I fix ordinary packaging bubble wrap with tape?
Do not assume packaging film or adhesive tape is suitable for a greenhouse. Check that the material is intended for prolonged use there and that the fixing is approved for the actual frame and glazing. Do not drill into or press fixings against glass.
Bubble insulation is not a guaranteed winter upgrade; it changes one part of the greenhouse enclosure. Base the decision on a fair comparison at the same indoor target, then check that plants still receive suitable light, areas where moisture collects remain accessible for inspection, and vents work as intended. If those checks cannot all be satisfied, partial coverage or no covering may be more sensible than wrapping every pane.
