
Greenhouse Shading: Should It Go Inside or Out?
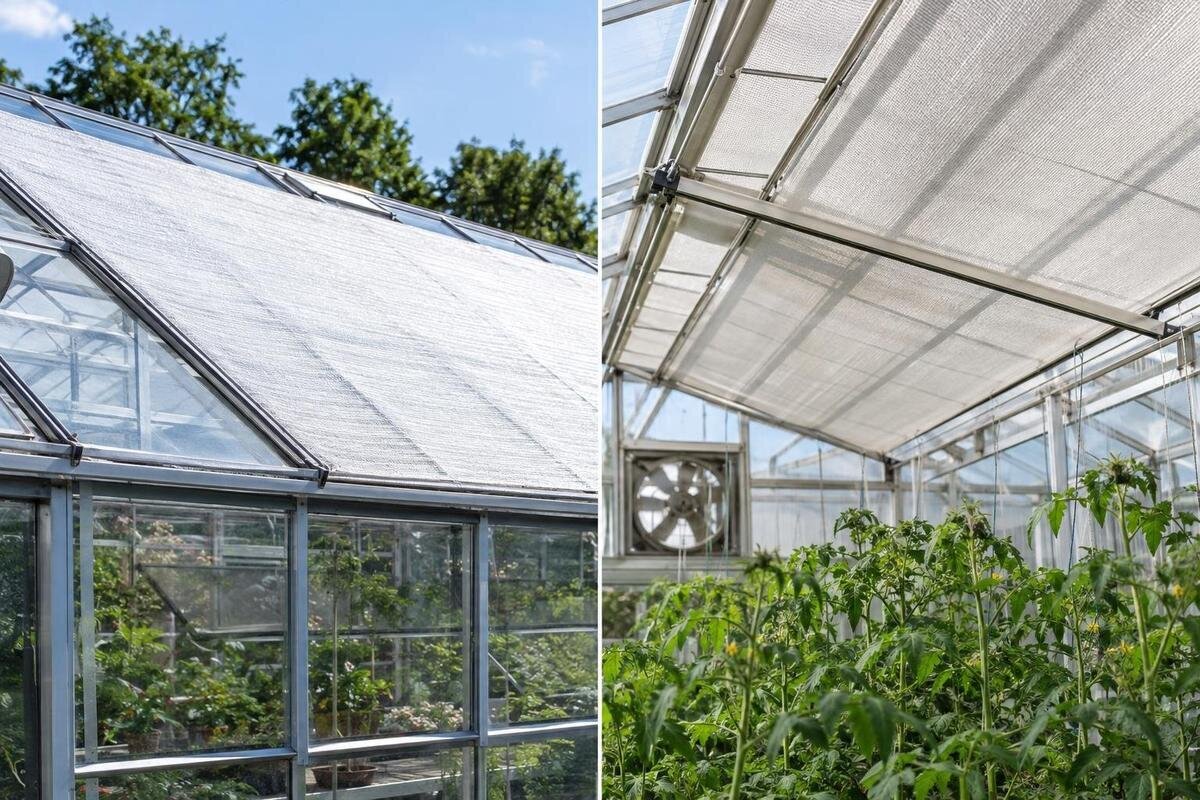
Greenhouse shade and ventilation
Internal and external greenhouse shading are not interchangeable. External shade intercepts sunlight before it passes through the glazing, while internal shade catches the light after it has entered. That changes how much solar energy is stopped outside, but it also changes access, exposure to wind and rain, and the fixing points involved. The better position depends on whether you are trying to limit heat gain, soften direct sun on plants, or address both without interfering with ventilation.

Before choosing a position 1
How the position changes heat gain
Sunlight carries energy into a greenhouse. An external screen can reflect or absorb part of it before it reaches the glazing, which is why outside shading is generally the first position to assess when the main aim is to limit solar heat gain. An internal screen intercepts some direct sunlight only after it has crossed the glazing. If the material absorbs that energy, it can warm surfaces and air inside. Internal shade can still reduce direct beams on leaves and benches, but it does not keep the same share of solar energy outside.
That distinction is about where the energy is intercepted, not a promise of a particular temperature. The result also depends on which panes are covered, the shade material, airflow around it, the sun's angle, the glazing and whether ventilation is operating. External shade that misses the sun-facing roof may make little difference; a wide internal curtain may darken areas that need light. A screen also changes how much daylight reaches plants, so reducing heat and managing light are related but not identical goals. Judge the position from comparable readings and the actual light pattern.
Define the problem before choosing a position
Name the practical problem before buying anything. If greenhouse temperature readings rise during direct sun, reducing incoming solar energy may be central. If readings remain acceptable but direct beams fall on a few plants, the aim may instead be to soften light in a defined area. Note when the issue starts, where the beam lands and whether it lasts all day or only for a few hours. A small affected patch may call for targeted coverage rather than automatically shading every pane.
Do not use catalogue floor area as a substitute for mapping the glazing. The Spacious Greenhouse, for example, is listed in a 47–70 m² area range. Use that information when comparing the space available, then assess shade coverage separately. Sketch the roof and walls, mark the panes receiving direct sun and identify the plants or work areas you want to protect. Record how the sun moves across them during the problem period. Separate the area of glazing to be shaded from the area of plants beneath it: they are not the same measurement. This gives you a clearer basis for discussing the screen's dimensions and position. It also helps you explain whether you need coverage across a whole roof section or only where sunlight reaches a particular bed or bench.
Before choosing a position 2
Log temperature, humidity and shade conditions
Take a simple temperature and humidity log before changing the shade position. Record readings at repeatable times, the greenhouse zone measured, shade state, doors and vents, and broad outdoor conditions such as cloud and wind. If the instrument is intended to measure air, place it according to its instructions and out of direct sun; a sunlit sensor may record its own heating rather than the surrounding air. Keep its position unchanged where possible. Readings near the roof, a shaded bench and the doorway can differ, so label zones rather than combining them into one number.
Compare similar conditions, not a cloudy morning with a clear afternoon. If you alter shading and vent openings at the same time, the log cannot show which change mattered. Where practical, keep other operating choices unchanged, record each adjustment and repeat the comparison on more than one suitable day. Give each trial a clear description, such as internal shade over the affected bench or external shade over the sunlit roof section. Record when the shade was moved, rather than simply marking the whole day as shaded. Keep the greenhouse's exact model identity with your notes. For an enquiry about the Prestige Greenhouse with metal foundation, include the version you own and the location you want to shade. This connects the observed problem with a specific structure and proposed position when you discuss compatibility.
External shading and solar heat gain
External shading acts before sunlight crosses the glazing, so it is usually the stronger option to investigate when the aim is to reduce solar heat entering the greenhouse. It can be relevant where direct sun reaches a large roof or wall area, but the coverage needed depends on the sun's path and the hours when the problem occurs. A screen covering the wrong side may leave the critical panes exposed. Follow the sun across the whole period of concern: a fixed panel that helps at midday may miss later sun.
Outside, the screen is exposed to wind, rain and handling, and may be less convenient to adjust from ground level. Consider how you would reach each covered area for fitting, routine adjustment, inspection and removal. A position that is accessible beside a wall may be harder to reach above the roof. Include access around the greenhouse in your comparison, rather than looking only at the surface you want to shade. When considering the Classic aluminium greenhouse, check the proposed screen and attachment against the exact model instructions. A loose sheet or improvised weight is not a substitute for a suitable fixing. Do not climb on glazing or the frame; use the access method described by the manufacturer or get suitable professional help. Establish how you will handle the screen before choosing an external arrangement.

Before choosing a position 3
Internal shading and ease of adjustment
Internal shading is protected from the weather and can be easier to reach, reposition or remove from within the greenhouse. That can suit a grower who wants to intercept direct beams over a working area or adjust shade as the season changes. It may be easier to inspect without working outside, although high-level screens still need safe access. Before choosing it, consider whether you can operate it without stepping over beds, moving pots or reaching across delicate plants. Daily convenience is part of suitability.
The limitation is that sunlight has already passed through the glazing before the internal material intercepts it. A screen can reduce direct light on crops, but energy absorbed by it remains inside the structure. Do not assume an internal curtain will reduce heat gain as much as intercepting the same sunlight outdoors. Map its position against vents, doors and crop rows, and check how its shadow moves. For a lean-to greenhouse, include the adjoining wall in that sketch so you can describe where the screen would sit and from which side you would reach it. Mark the intended shaded area as well as the screen itself. This lets you compare whether an accessible internal position actually covers the plants concerned, rather than choosing it solely because it is convenient to operate.
Access for daily use and maintenance
Think through the whole routine: fitting, opening or closing, watering, ventilation checks, cleaning and seasonal removal. An outside screen has to be reached from the exterior and may need attention after windy or wet weather; an inside screen can be reached from the aisle but may interfere with overhead work, tall plants or a window handle. Consider how you would clean the glazing with the shade in place. If operating it requires unsafe access, choose another approved arrangement rather than relying on a ladder balanced against the greenhouse.
Keep doors, paths and any built-in work or storage areas usable. If you are considering the Limited Edition greenhouse with built-in storage, include access to that storage in the shade layout. Check the space in your own setup rather than assuming the product name establishes the available clearance. Trace the route you use to carry pots, watering equipment and tools, then mark where a shade edge, support or control would sit. Consider the arrangement with the screen both extended and retracted. A control that is within reach may still be inconvenient if you have to move stored items every time you use it. Work through the routine before fixing anything, including putting equipment away afterwards. The aim is to retain usable growing and storage space while shading the intended area.
Before choosing a position 4
Check model-specific fixing points
Fixing is a model-specific question, not something to infer from a greenhouse's material or appearance. A frame profile, glazing bar, gutter, door surround or pane may look like a convenient attachment point without being approved to carry a screen or its movement. Follow the exact greenhouse manual and shade instructions; use only the fixing locations and accessories they specify. Do not drill into the frame or glazing, clamp around a member or add adhesive attachments unless the relevant instructions allow that method. Check that moving or retracting the shade also has the clearance it needs.
Before ordering, match the greenhouse name and version to the shade supplier's compatibility information. For the Limited Edition aluminium greenhouse, identify the particular version you own rather than relying on the range name alone. Describe whether you want an internal or external screen and which roof or wall section it would cover. Ask which attachment points and accessories the proposed system uses, how it clears opening parts and whether it is intended for outside use. Keep these questions together so the answer relates to one complete arrangement, not a mixture of unrelated components. If the instructions do not identify a suitable fixing, ask the manufacturer or a qualified installer about an appropriate method. Do not treat a fixing shown on a visually similar greenhouse as interchangeable.
Keep ventilation openings clear
Shade must not obstruct ventilation. An outside cover can sit over an opening or restrict its movement; an internal screen can hang across a vent, window handle or automatic opener. A screen that blocks the intended opening path can undermine the ventilation you rely on, even if it reduces direct sun. With the shade in the position you plan to use, check each door and vent through its normal opening range using the procedure in its own manual. Keep fabric, rails and controls clear of moving parts; do not force an opener past resistance.
Make a simple layout showing where each vent opens, which direction it moves and where the shade edge or control travels. For a T-Model Orangery Greenhouse, use the drawing for your particular configuration to locate the openings rather than inferring their positions from the model name. Mark any places where the proposed screen overlaps an opening on the drawing, then check the actual clearance. Assess the shade in each position you intend to use, not only when it is retracted. Include the controls as well as the fabric: a hanging cord or rail also needs to remain clear. If an automatic opener is fitted, compare the arrangement with the movement described in its instructions. Shading and ventilation address different parts of the problem, so neither should prevent the other from operating.

Before choosing a position 5
Use photographs to assess coverage
Photos can reveal coverage that a temperature reading alone cannot. Take views from inside and outside at repeatable times, including when the problem normally occurs. Record the date, time, orientation, shade position and which vents are open; include the plants or bench where direct sun is troublesome. Compare the same view before and after a trial. Use a recognisable pane, frame corner or bench edge as a reference so you can see where the shaded area begins and ends. Note whether sunlight reaches the glazing, is intercepted outside or falls on the crop after entering. Keep a wider view alongside any close-up: a photograph of one shaded plant will not show whether nearby plants remain exposed.
Use only a temporary trial that can be positioned and secured without damaging the greenhouse or creating a wind hazard; do not attach test material to glazing or climb on the structure. Compare photographs with readings taken under broadly similar conditions and change one position at a time. If you are assessing the Oasis Pyramid Greenhouse, photograph each relevant face at the site rather than relying on a single view. Label the views consistently so you can follow the same area through the comparison. Keep unsuccessful trials too: a picture showing sunlight passing beyond the screen can help explain why its position needs reconsidering. Treat photographs as a record of coverage, not a measurement of cooling. Use them alongside the temperature and humidity log to distinguish a missed patch of sunlight from a trial that covered the intended area.
Choosing between internal and external shade
If your recorded issue is too much heat during direct sun, and the greenhouse instructions allow a properly secured outside shade, external shading is usually the more logical first position to assess because it intercepts solar energy before the glazing. If the main concern is direct sun on particular plants or the ease of adjusting shade from the aisle, internal shading may be more practical, while offering a different heat effect. When both heat and light are concerns, prioritise the exposed areas and keep ventilation unobstructed; more coverage is not automatically better.
Bring the comparison together in a short record of the two options. For each position, note the glazing it would cover during the problem period, the proposed fixing, access for adjustment and any conflicts with doors or vents. Add the relevant log readings and photo references rather than relying on a general impression that one day felt cooler. If an option has not been tried, distinguish what you have observed from what you still need to establish. This makes the remaining decision clearer: perhaps coverage is suitable but access is awkward, or operation is convenient but the affected plants remain in direct sun. Choose the arrangement that addresses the recorded problem without creating a new access or ventilation difficulty.
Frequently asked questions
Is external greenhouse shading always better for cooling?
No. Outside shade intercepts solar energy before it reaches the glazing and is usually the stronger option to assess when reducing incoming heat is the main aim. The result still depends on coverage, sun direction, ventilation and the approved fixing. A screen that misses the exposed panes or obstructs an opening may not solve the problem.
Will internal shade stop a greenhouse overheating?
It can reduce direct sunlight on plants and work areas, but the sunlight has already crossed the glazing. If the screen absorbs energy, it can warm the greenhouse interior. Do not assume an internal screen will reduce air temperature as much as an external one; compare readings from your own setup.
Can I attach shade to the glazing bars?
Only if the instructions for your exact greenhouse and shade explicitly identify those points for that purpose. A bar or profile that looks sturdy is not automatically a fixing point. Do not drill, clamp or attach anything to glazing on assumption; confirm compatibility with the manufacturer.
Should I cover every roof pane?
Not automatically. Match the coverage to the glazing that receives the relevant sun and to the problem you are trying to address. Extra coverage can reduce useful light and may cause access or ventilation issues. Map the sun at the affected times before choosing how much to shade.
How do I compare a shade trial fairly?
Record temperature and humidity at the same sensor locations and times, and note the shade position, vent openings, sunlight, clouds and wind. Compare photos taken from the same viewpoints. Avoid changing shade and ventilation together, and compare readings from broadly similar days rather than drawing a conclusion from a single reading taken under different conditions.
External shade is generally the better place to intercept sun before it adds heat, while internal shade is often easier to handle and can target direct light from inside. The right choice is the one that addresses the logged problem, fits an approved attachment for the exact greenhouse, leaves vents unobstructed and remains safely accessible. If any of those checks fail, reassess the position rather than improvising a fixing.
