
Planning a Greenhouse Layout for Garden Workshops
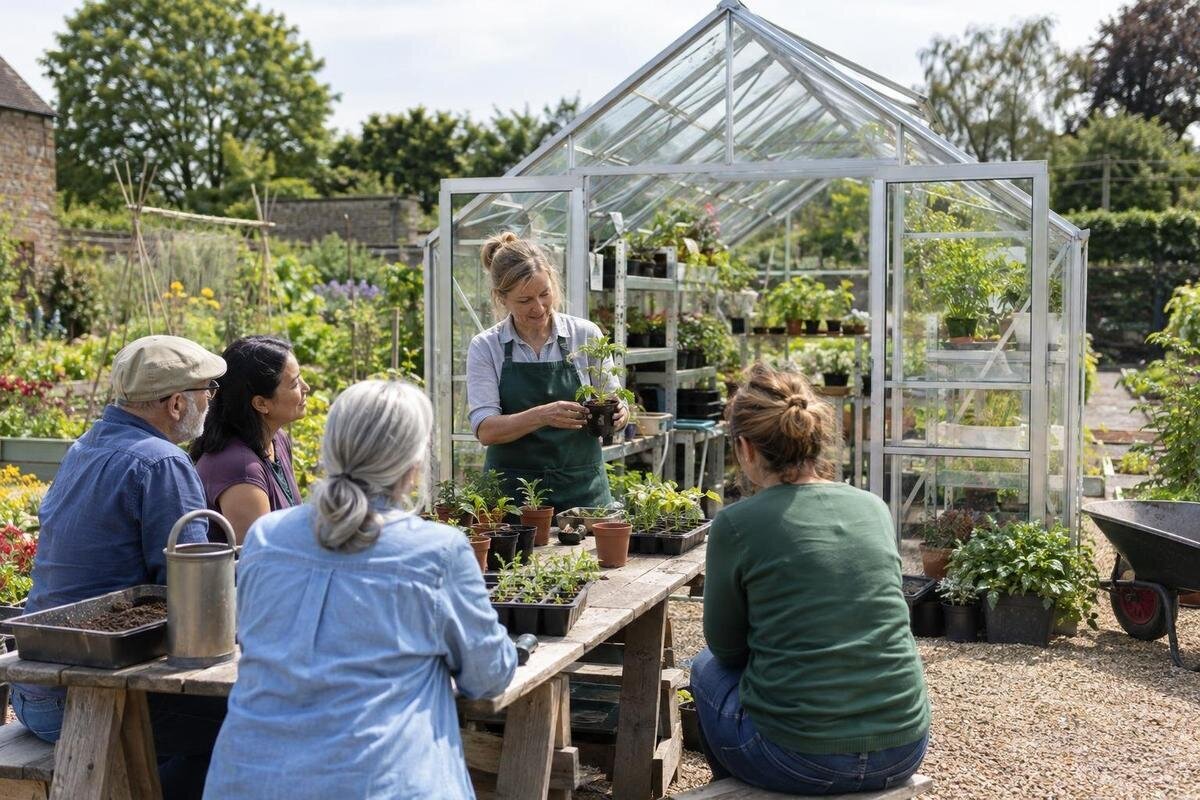
Garden workshop planning
A greenhouse used for garden workshops has to support growing while allowing a group to see, ask questions and try a task without crowding plants or one another. The layout should follow the session: where the tutor works, how participants watch, where they practise, and how tools, water and notes move through the space. A measured plan of those activities is more useful than choosing a greenhouse by area alone.

01
Define the workshop before drawing the floor plan
Begin by describing what participants will learn and do, not by selecting benches. A short talk followed by one demonstration has a different footprint from a session in which everyone sows seeds, fills pots or handles pruning tools. Write down the tasks in order, the materials needed for each, how long each stage takes and whether participants stand, sit or move between stations. Note the usual group size and the largest group you expect to host; a layout that works for six may not work for twelve. Also record whether sessions are occasional, recurring or seasonal, since the greenhouse may need to return to its growing role between classes. If beginners and experienced gardeners will share a session, note whether they need the same demonstration or separate practice tasks.
Map the session as a simple sequence: arrival, welcome, explanation, demonstration, practice, clean-up and departure. For each stage, mark who moves and what they carry. A tray of seedlings, a watering can, a notebook and a bag of compost have different handling needs; a plan that accounts only for people standing still can miss pinch points. Decide where coats, bags and personal belongings wait without taking over the demonstration area. If some participants arrive early or finish a task at different times, show where they can wait or continue without blocking the next group. This activity list becomes the brief for the greenhouse layout and for any conversation about a suitable model.
Measure usable space, not just the listed area
Use a measured plan of the proposed greenhouse and site, not a rough square-metre estimate. Request a drawing for the exact size and configuration being considered, then mark the clear internal area, openings and the positions of fixed structural elements shown on that plan. Add existing or planned beds, permanent staging, storage and service points. Separate fixed items from movable tables and trolleys, because their positions change the usable space. Mark doors in both open and closed positions, and show how much room a person needs to approach a bench. Include the approach outside too: a waiting group or delivery trolley can occupy space at the entrance. If details are missing from the drawing, ask the supplier or designer rather than assuming that the advertised area is all open teaching space.
Divide the layout into working zones: a place to introduce the session, a viewing position, hands-on work surfaces, plant-growing areas and somewhere to store or clear materials. These zones can overlap at different times, but not if two activities need the same bench or route simultaneously. Draw the circulation line from the entrance to the work areas and keep it clear on the plan. The catalogue listing for the Spacious Greenhouse gives a range from 47 to 70 m²; use listed area to compare overall scale, not as a measure of clear floor or participant capacity. Ask for the chosen variant’s plan and work out the teaching footprint after fixed elements and circulation have been placed.
02
Position the demonstration for clear sightlines
Set the tutor’s demonstration point before arranging participant seats. Choose the smallest or most intricate item that will be shown—a seed, a cutting, a label or a fine planting detail—and check whether someone at the back and at either side can follow what the tutor is doing. Stand or sit in the planned viewing places and repeat the movement, including picking up and turning the item. A participant should not have to lean into another person’s space or move into a working route simply to see. If the tutor uses a board, sample plant or camera, include it in the sightline test too; every extra stand or screen occupies space and can obscure a view.
Try more than one arrangement on paper. A shallow arc can open views towards a single bench, while rows may suit a talk; either can fail if supports, tall plants, glare or a busy doorway interrupt the view. A horseshoe can keep the tutor in contact with the group but may narrow the entrance or leave someone looking across others. These are options to test, not rules. The T-Model Orangery Greenhouse listing covers 16.52 to 30 m²; whichever footprint you examine, sketch actual seats and the focal point rather than inferring viewing space from the model name or area. Ask both a seated observer and a taller observer to test the same view.
Size workstations around the practical task
Choose the number and type of work surfaces from the activity. A shared demonstration bench may be enough for a guided session, while potting or seed-sowing by every participant calls for separate places to work, with trays and tools within reach. List what each station must hold at the same time: a pot, growing medium, plant, labels and tools, for example. Then show where prepared materials wait and where completed work goes. Do not use the number of chairs as a substitute for working capacity; people need space to handle materials as well as to sit or stand. Leave room for the tutor to reach each participant without stepping through another person’s station. If everyone needs individual guidance, plan for the tutor’s movement and waiting time rather than squeezing in more stations.
Work out whether participants will work all at once, in pairs or in rotating groups. Rotation can reduce the number of benches needed, but it creates a waiting point and a changeover route; include both on the drawing. Consider a seated version of the task as well as the standing arrangement, and let the actual group test the height and reach of a sample surface before fixing it in place. The catalogue page for the Pyramid Greenhouse lists areas from 5.53 to 18.9 m². For any shortlisted footprint, plot the intended number of workstations and the instructor’s route on the exact plan before deciding that the activity will fit.

03
Separate growing work from teaching activities
Treat cultivation and teaching as two operations that share one enclosure. Mark beds and plant displays that must remain undisturbed, then identify a teaching zone that can be cleared without moving crops or interrupting routine work. Consider when watering, potting and plant care take place relative to booked sessions; a wet or occupied bench may not be ready for a class. Decide whether the demonstration uses plants already growing in the greenhouse or materials brought in for that session. This helps prevent the teaching point from drifting into a bed or propagation area simply because it looks convenient on the day. The plan should also allow access to crops if a workshop runs longer than expected.
Keep teaching supplies distinct from crop-care materials where possible, and make their return route obvious. Soil, pots, trays, labels and hand tools need a defined place before and after use; otherwise they tend to collect on the nearest free surface and reduce the area available for the next task. The Limited Edition greenhouse with storage listing identifies a greenhouse with built-in storage, and its listed area range is 5.52 to 28.08 m². Check the plan for the selected version to see where that storage sits and whether it suits the workshop routine; do not count it as an adequate teaching store without checking what needs to fit. Note whether any materials need to be kept apart or protected from dirt.
Keep entrances and circulation clear
Plan movement from the garden path to the demonstration point and back out. A clear route should still be clear when the door is open, the tutor is carrying a tray and participants are gathered to watch. Mark the door opening, the approach space and the places where people may pause; avoid using the only route as a seat row or a place to put boxes. Consider how deliveries of compost or new plants arrive, and whether they pass through the same space as a class. If the greenhouse is reached across a narrow path or a change in level, include that connection in the site plan rather than planning only the interior. If the group waits outside, mark that gathering point so it does not narrow the route in.
Think about different ways people may use the room: standing, seated, moving with a mobility aid, or needing a companion nearby. This does not produce one universal aisle width; it means the proposed route and door openings should be checked against the actual users, furniture and requirements for the intended use. The Bloomcabin Prestige Greenhouse catalogue range is 3.77 to 28.08 m², but the figure does not show the access arrangements of the selected model. Ask for the relevant drawing, then have a qualified design professional assess access and any local requirements if sessions are public or paid. Keep waiting and coat areas outside the circulation line wherever possible.
04
Check light, ventilation and comfort at session times
Think about conditions at the time the workshop will run. Direct sun can make a small demonstration difficult to see, while glare on a screen or glossy sheet can distract participants. Note the sun’s position at the hours and seasons you expect to use the greenhouse, and test where shadows fall across the tutor’s hands and work surface. Also consider warmth, ventilation and whether the group can remain comfortable while standing or seated. If colour, small print or subtle details matter to the lesson, check them from the furthest seat. Do not rely on a photograph or product name to establish these conditions: the proposed glazing, openings, shading and orientation need to be checked for the actual site and chosen configuration.
Positioning a display board, camera or screen may solve one viewing issue but introduce another if it blocks a vent, a path or a plant-care area. Include any shade equipment or fans in the plan, and verify what is available with the supplier; a model’s listed floor area does not state its ventilation performance. The Aluminium Classic Greenhouse listing gives a range of 3.77 to 28.08 m². Use the specific product information and a site assessment to confirm how the intended setup manages light and air, particularly during scheduled classes. For sessions affected by weather, identify an alternative indoor or shaded teaching location rather than assuming the greenhouse will always be comfortable.
Plan water, power and presentation equipment
Write a utilities list from the workshop tasks. Water may be needed for growing, potting or cleaning; decide where it is used, whether participants need it during the session and where wet equipment is left afterwards. If handwashing, a sink or a particular way of handling used water is required, check how that can be provided at the site rather than assuming the greenhouse includes it. Mark service points before fixing worktops or storage, and keep hoses and other routine equipment from turning the main route into an obstacle. If water is used at several stages, mark each point of use and where used equipment waits. The right arrangement depends on the activity and the site’s existing services.
List electrical or digital needs separately: task lighting, a small display, a camera, sound equipment or charging may be useful for some demonstrations and unnecessary for others. Show where the presenter and participants will use them, how cables can be kept away from movement routes, and whether brightness or noise will interfere with teaching. For digital presentations, treat a screen as support for the demonstration, not a replacement for clear sightlines. Have permanent electrical provision assessed and installed by a qualified professional. The Wall Greenhouse listing spans 3.69 to 14.34 m²; if considering it or another format, compare the exact plan with the site’s available water and power rather than assuming services come with the greenhouse.

05
Plan storage and clearing up after sessions
Plan storage around the session rather than leaving it until last. Prepare an inventory divided into regular kit, occasional equipment and consumables. Examples include hand tools, pots, trays, labels, printed instructions, display materials and items brought in for a particular class. Decide what must be close to the teaching surface, what can be stored elsewhere and what should leave the greenhouse after each session. Keep shelves, trolleys and stored items out of routes and sightlines, and make sure doors or drawers can be opened without blocking a work position. A simple labelled inventory can help volunteers return shared equipment to the same place.
Allow time and space for clearing up as part of the class. Participants may need to collect finished pots or notes, return tools, separate reusable materials and clear work surfaces before the next growing task. Show where each action happens and where waste or temporary items go; a collection point beside the exit may make departures easier but should not block the door or passage. The Limited Edition aluminium greenhouse range covers listed areas from 3.77 to 28.08 m². Use the proposed layout to trace the route from each workstation to the storage and collection points, checking that people returning tools will not obstruct those leaving with finished pots.
Test a full-size layout before choosing a model
Before settling the design, mock up the room at full scale if the site allows. Mark the walls, door opening, beds and fixed equipment on the ground, then use boxes or temporary tables for the proposed work surfaces. Place chairs or people where the group will gather. Run through an ordinary session with the real tray, tools, notes and any screen: ask someone at the back to follow the demonstration, let participants change stations and carry materials, then repeat the exercise with the largest intended group. Ask an observer who is not teaching to note blocked views, awkward turns, bottlenecks and surfaces that become overloaded.
Use what you observe to decide what must stay fixed and what should be movable, and revise the plan before ordering a greenhouse or furniture. Ask for drawings of the exact model and configuration, including openings and any specified options relevant to the layout; photographs are not a substitute for a dimensioned plan. If the structure will host public or paid sessions, check with the relevant local authority and qualified professionals which permissions, access, fire and electrical provisions apply to that site and use. The project brief should state the activity, attendance range, services and operating routine so that every adviser is checking the same proposal.
Frequently asked questions
How many people can a workshop greenhouse hold?
There is no reliable attendance figure from listed floor area alone. It depends on whether everyone needs a seat or workstation, the size of the demonstration point, circulation, access needs, furniture and growing areas. Mock up the largest planned group and check it against the plan for the exact greenhouse.
Is a central demonstration bench always best?
No. A central bench can offer views from several sides, but it may divide the route or take space from participant workstations. A bench against the perimeter may leave more central room but limit some views. Sketch both arrangements with the real equipment and test them from the least favourable seat.
Can one greenhouse support both growing and workshops?
It can be planned for both, provided the growing routine and the class do not compete for the same bench, path or storage. Mark beds that remain in use, consider when watering and cleaning happen, and plan a teaching area that can be reset without moving plants.
Which utilities should a workshop greenhouse have?
Begin with the activities: water for plant work or cleaning, power for lighting or presentation equipment, and any provision needed for handling used water. Confirm service needs for the site and have permanent installations assessed by qualified professionals. Do not assume a greenhouse includes them.
Do public workshops need special permissions?
That depends on the site and proposed use. Before finalising the layout, ask the relevant local authority and qualified design professionals which permissions and access, fire and electrical provisions apply. A product listing alone does not establish suitability for public use.
A successful workshop layout is a working greenhouse whose demonstration point, paths, plant zones and services support the same lesson. When participants can see the detail, reach a useful work surface and move without disrupting one another, the session is easier to follow and the growing space remains manageable. Keep the final plan tied to a specific task list and attendance range, and review it if either changes.
