
Tracing Greenhouse Puddles After Watering
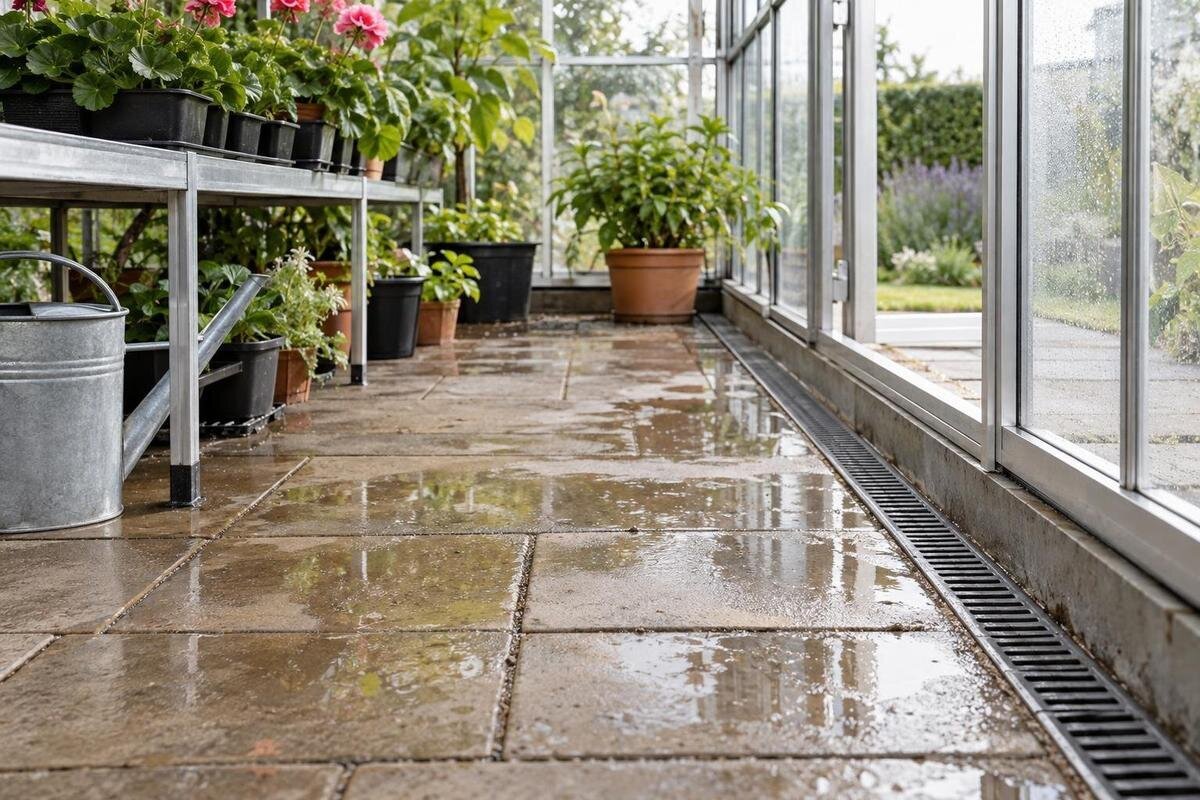
Greenhouse drainage
Water on a greenhouse floor after watering can be misleading: the puddle may be far from the spill, and a floor outlet is only one possible cause. A simple plan view and a controlled repeat of the same watering routine can show whether water is coming from a pot, travelling over the floor, stopping at an outlet or entering from outside. Record the route before changing the floor or base.

Record where the water first appears
A puddle is evidence that water has collected, not proof of a failed drain. It may be a direct spill, an overflow from a pot or tray, a leak from a hose or irrigation line, water travelling across the floor, a blocked outlet or water that entered at the perimeter. The place where it gathers may be lower than the source, so diagnosing only the deepest-looking spot can lead to the wrong repair. Record where the floor first became wet, the route you actually saw and the final outline of the pool. Note whether a small amount remained briefly or the puddle kept spreading; those are different patterns.
Record what was happening before the puddle appeared: watering can, hose, drip line, pot refill, floor wash or rain. Note whether the surface was dry to begin with and whether any other water source was running. Take a wide photograph that fixes the puddle against the door, benches or walls, then a closer one showing its edge and any nearby outlet. Include the time, watering method and any change, such as a pot being moved. A photograph without context can make different routes look alike, so add a brief note while the event is fresh. If the puddle takes time to appear or disappear, record that too rather than estimating later.
Draw a simple plan of the floor and water route
Draw a plain overhead view, not a perspective picture. Outline the inside perimeter and mark the door, beds, benches, plant pots, taps, hose or irrigation line, visible floor outlets, joints and nearest outside edge. Show relative positions rather than trying to estimate levels; the sketch is for tracing, not a construction drawing. Add fixed landmarks such as a corner post or threshold so the same wet area can be located in a later test. If a bench hides part of the floor, mark that area as hidden instead of leaving a blank space. Water can travel underneath before it appears at the edge.
Use short labels consistently: W1 for the watering point, F1 for the first wet patch, P1 for the puddle and O1 for an outlet. Draw arrows only where you observed movement: W1 → F1 → P1 → O1. If the water never reached O1, end the line at P1. Outline the pool and use a dashed arrow for a suspected but unobserved route. Label the sketch with the greenhouse model, such as the Wall Greenhouse, and keep it with the matching base drawing. This separates your observations of the installed floor from the model’s construction details.
Repeat the watering test consistently
Set up a repeatable check only after recording the original event. Begin with a dry or as-dry-as-practical floor and use one water source at a time. Apply your usual watering method to a defined area: with a watering can, use the same measured amount; with a hose, use the same setting and duration. Keep the watering point, nearby containers, trays and equipment in place. Do not flood an empty floor to force a drain test; the aim is to see the route produced by ordinary use, not to overwhelm the surface. If irrigation continues to drip after watering stops, include that in the observation.
Watch from the first splash rather than waiting for a pool. Record when and where the surface first becomes wet, which way water moves, whether it passes beneath a bench, whether it reaches an outlet and how long it remains visible. Stop adding water once the route is clear or pooling begins. Repeat on another occasion only when the starting conditions are comparable; changing a tray, moving pots and using a different hose setting at once makes the result hard to interpret. If you are considering a replacement from the Limited Edition Aluminium Greenhouses range, retain these notes alongside the proposed layout so the existing watering problem can be discussed during planning.
Separate a watering spill from floor runoff
Check whether the first wet point sits beneath a pot’s drainage holes, inside a tray, beside a hose connection or where a watering can was poured. A tray may overflow even when the floor has no drainage fault, and a loose connection can drip while the hose is running. In a planted bed, water may seep out at the edge after watering rather than flow from the nearest outlet. Dry one small area and inspect it again after watering only one source. Avoid changing every pot and line at once: isolating one source makes it easier to tell what caused the wet patch.
If the floor becomes wet at the start of watering, look for a splash over a container rim, water running from a pot or a line dripping before the puddle spreads. A delayed puddle following a visible trail points to a route across the floor, but it does not prove that the floor itself is at fault. Compare the path with your sketch and repeat the same source alone. For an installation enquiry about a T-Model Orangery Greenhouse, describe the watering source and the positions of pots, trays and hoses as well as naming the model. That gives the installer a clearer account of where the water starts and where it collects.

Inspect the drainage route and outlet
If the greenhouse has a visible floor outlet, mark each one separately on the sketch and note its purpose if you know it. Look for a grate, channel or opening, then check from above for loose leaves, soil, compost or other visible debris. Record whether the obstruction is on the surface or further along a pipe you cannot see. Remove only loose material that is readily accessible without dismantling a fixed fitting or reaching into an unknown drain. Do not force a rod through a channel or pour in a large amount of water to see whether it clears; either action can disturb a connection or make the route harder to assess.
During the controlled watering check, watch what happens as water approaches the opening. Does it pass the outlet, stop against an edge, collect around it or disappear from view? Record only what you can see, including whether a visible external end receives water. A floor outlet, a roof-water downpipe and a gap at the base are not interchangeable, so trace them separately; do not assume that an unseen pipe leads to a particular destination. If a Pyramid Greenhouse is the unit concerned, use its exact name when requesting a model-specific base drawing, and confirm the actual outlet arrangement from the site and relevant documentation.
Check the floor surface and joints
Floor material affects how quickly a wet mark appears and how visible its route is. Water may soak into unsealed ground, pass between gravel or paving joints, or remain on a less absorbent surface long enough to form a visible trail. None of those observations alone proves that drainage is adequate or inadequate. Record the actual surface—soil, gravel, slabs, poured material or another finish—and mark cracks, open joints, edging and any area that seems to hold water. Do not assume that gravel is a drain or that a solid floor must have a particular slope; the construction and intended outlet matter.
If the same puddle returns in the same place, compare its outline with joints and changes in the floor surface. Check whether water reaches the area from elsewhere before it collects there. A visible depression, loose slab or changed joint is a clue, not a foundation assessment. Mark the affected area on the plan and photograph it in both dry and wet conditions, keeping the same landmarks in view. For a Limited Edition greenhouse with storage, include the storage area in the plan and distinguish any hidden floor from the parts you can inspect. If the floor or base seems to have moved, a qualified groundworker should assess it against the correct drawing.
Check whether water is entering from outside
Include the outside edge in the investigation, especially when a puddle lies near a doorway or perimeter. On the plan, add the threshold, adjacent paving or soil, garden beds, nearby downpipes and any hose or irrigation source outside. Note when water is applied beyond the greenhouse and whether the interior becomes wet during ordinary rain. Do not deliberately flood the surrounding ground as a test: it can create a route that does not occur in normal use and may send water towards another part of the site. Observe a normal event and mark where water is first visible at the boundary.
Compare two separate records: an interior-only watering check with the surrounding ground left dry, and a later observation after rain or normal outdoor watering. If the puddle appears only in the second situation, trace the perimeter and nearby surface route before blaming an internal outlet. Timing is a clue, not proof; water can travel below a finish and emerge some distance away. Do not seal the threshold, raise the floor or redirect runoff until the source and base arrangement have been assessed. When planning a Prestige Greenhouse, mark these observed entry points alongside the proposed base outline to show where outside water needs consideration.
Look above the puddle as well as below it
A puddle that follows watering may still have fallen from above. Look at glazing, frame joints, overhead irrigation and elevated containers while water is being applied. Droplets on a surface can collect and run down before appearing on the floor, away from the original drip point. This differs from surface runoff arriving from a pot or hose. Note whether beads or drips were present before watering and whether they continue after watering stops. Check accessible points with a dry paper towel, then remove it promptly so it does not remain wet under plants. Do not treat an overhead drip as a floor-drain problem until its route has been checked.
Check containers one by one for a full or misplaced saucer, a split tray or water running from a pot onto the floor. Note whether the first wet mark forms beneath that object or arrives from the side. Avoid rearranging several containers during the test, because their positions can interrupt or redirect a surface trail. If no floor puddle develops when an overhead drip or container overflow is absent during normal care, the water source may be the issue rather than the drain. Record that as a separate observation before deciding whether any floor or outlet work is needed.

Know when a qualified site review is needed
A small amount of loose debris at a reachable outlet may be all that needs attention. Recurring pooling deserves closer review if the outlet remains clear, water emerges from a joint, a floor section feels loose or an unexplained route crosses the perimeter. Bring the plan, photographs and notes from both dry and wet conditions to a qualified installer or groundwork professional. Ask them to distinguish the floor surface, outlet route and outside ground rather than treating the puddle location as the diagnosis. If water reaches electrical equipment, do not touch the wet equipment; have the situation assessed by a qualified electrician.
Seek site-specific review before modifying a base, changing paving levels, adding an outlet or sealing a joint. A reviewer needs the exact greenhouse model and its corresponding manufacturer’s base drawing, alongside the floor sketch and visible outlet details; generic dimensions cannot establish what suits your installation. If the unit is a Spacious Greenhouse, use that product name when requesting the corresponding documentation. Ask the reviewer to explain the observed water route, identify any parts that remain hidden and distinguish work to the floor surface from changes affecting the greenhouse base.
Record the result of any correction
After addressing an identified source or clearing accessible loose debris, repeat the original watering check under comparable conditions. Keep the watering point, amount and container positions consistent so you can compare the result with the first record. Note whether the first wet point has disappeared, the puddle is smaller or water now follows a different visible route. Update the plan rather than erasing the original observations, and record exactly what changed between tests. If several changes were made together, say so: the result may show an improvement without revealing which change caused it. Persistent or unexplained pooling should remain marked for further assessment rather than being treated as resolved.
For a planned installation or replacement floor, use the diagram as a handover document. Show the base outline from the selected model’s drawing, where irrigation will run, where floor water is expected to go and how the outside edge meets the site. If you choose the Aluminium Classic Greenhouse, keep its matching base drawing with that plan. Ask the installer or groundworker to review outlet positions and maintenance access before the surface is finished. Keep the agreed layout alongside the watering records so that later observations can be compared with the intended route, rather than relying on memory once benches and plants are in place.
Frequently asked questions
Why is the puddle away from the place where I watered?
Water can travel beneath or around benches and along joints before collecting at another point. The largest or wettest area at the end may be a collection point, not the source. Watch for the first wet mark during a controlled test, then trace the visible route. If part of that route is hidden, record where it disappears and where it reappears rather than assuming it travelled in a straight line.
How can I repeat the watering test without flooding the greenhouse?
Use your usual watering method on a clearly defined area, starting with a dry or nearly dry floor. Keep the amount or hose setting, watering point and nearby containers consistent, and use one water source at a time. Stop once the route is clear or pooling begins; adding excess water may create a flow that does not occur in normal use.
Does a gravel or paved floor rule out a drainage problem?
No. Water may soak into unsealed ground, pass between gravel or paving joints, or remain visible on a less absorbent surface. None of those results alone proves that water is draining properly. Note the floor material and the location of joints or cracks, then compare them with the route seen during the test.
Can I clear a greenhouse drain myself?
You can remove loose debris that is easy to reach without dismantling a fixed fitting or reaching into an unknown drain. Avoid forcing rods through a channel or pouring in a large amount of water. If pooling continues, the blockage is out of sight or the outlet’s route is unclear, have it assessed by a qualified professional.
How can I tell if water is entering from outside?
Compare an interior-only watering check with observations after ordinary rain or outdoor watering. Note whether water first appears at the threshold or perimeter, and map nearby paving, soil, beds and downpipes. If the puddle occurs only during the outside event, that is a useful clue, but it does not by itself identify the precise route.
A useful diagnosis identifies where water starts, the path it follows and where it collects. Keep the marked plan, photographs and watering notes together, then choose a response for the pattern actually observed. If water keeps returning, follows a hidden route or appears alongside movement at the base, take those records to a qualified site professional before altering the floor. A puddle is easier to address when its origin and path are recorded rather than guessed from where it settles.
