
Grow Bags in a Greenhouse: Root Volume, Drainage and Crop Support
Greenhouse growing guide
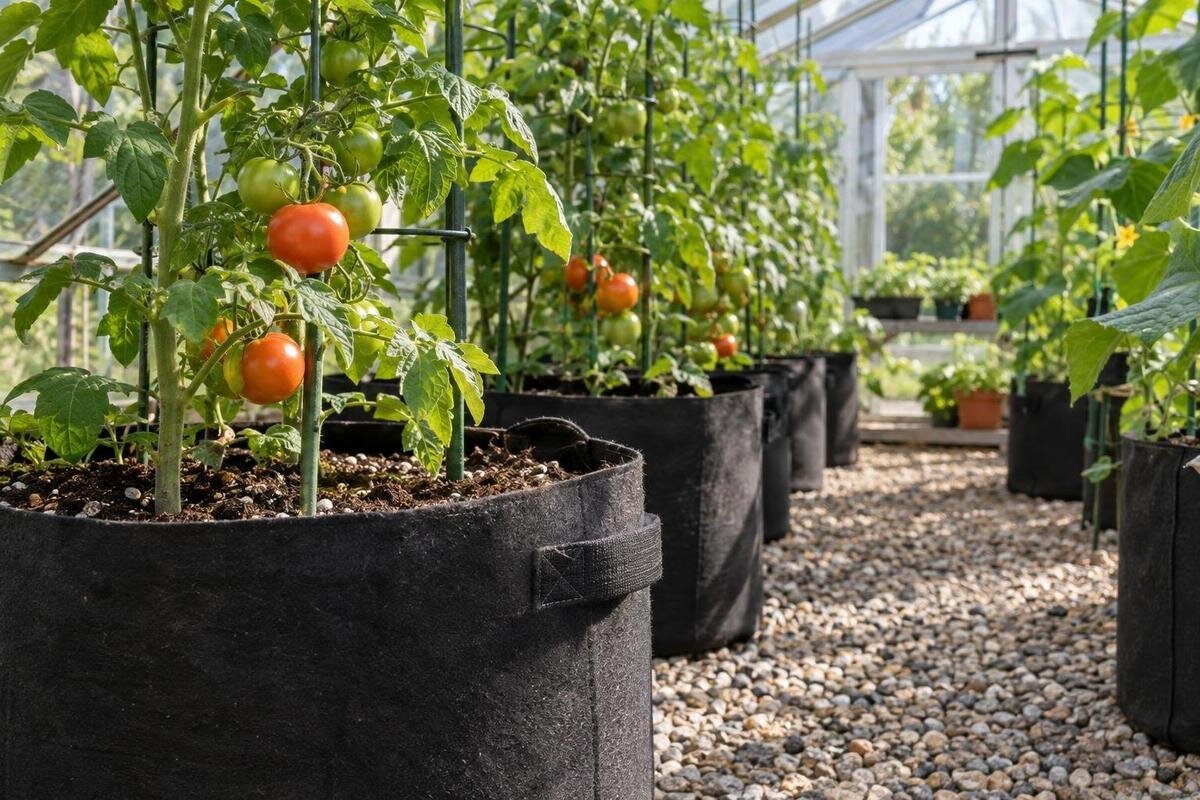
Grow bags can make a greenhouse planting plan easier to rearrange, but roots still need enough usable medium, a reliable route for excess water and support that will not pull the container over. A row of bags can occupy the same floor area as a bed without providing one continuous root zone. Compare filled volume per plant, watering access and support before settling on the greenhouse layout; headline floor area alone cannot tell you how many plants will fit.

Grow bags and beds create different root zones
A grow bag creates a bounded pocket of growing medium for one plant or a planned group. Unless roots can grow through an open base into soil beneath, the bag walls set their lateral boundary and the filled depth sets how much medium is available. This modular arrangement makes bags easier to reposition before planting and lets different crops occupy separate pockets. It also means a plant cannot draw on the rest of the greenhouse bed simply because its bag sits there. Treat every bag as its own root zone; spare space around it does not add to its root volume.
A permanent bed provides a continuous volume of soil or growing medium. Roots can spread through it where depth, moisture and structure allow, while the planting area stays in one fixed place. Continuity is not a guarantee of suitable conditions: a shallow or compacted bed may offer less usable root room than its footprint suggests. Beds suit a stable arrangement; bags can simplify separation and rearrangement but bring repeated edges and individual watering points. Compare actual usable depth and volume first, then consider the everyday work each layout creates.
Calculate usable filled volume
For a rectangular bed or bag, estimate geometric volume by multiplying its internal length by width by usable filled depth. In metres, the result is cubic metres; multiply by 1,000 to convert it to litres. In centimetres, multiply the three measurements and divide the result in cubic centimetres by 1,000. For example, 30 × 30 × 30 cm equals 27,000 cm³, or 27 litres. This is a conversion example, not a recommended size for a particular crop. Measure a bag after filling: flexible walls may bulge or taper, and empty space at the top reduces the medium roots can use. Record the filled depth alongside the volume rather than keeping only a litre figure. This makes it easier to compare the bag with crop guidance that specifies depth. If the shape is not rectangular, label the calculation as an estimate; do not treat the volume of an enclosing rectangle as an exact measure of the medium inside.
Treat a printed capacity as a starting point and check whether it refers to nominal capacity or the amount of medium the bag holds at its intended fill level. Outside measurements can overstate usable volume, particularly for a sloping or flexible shape. Greenhouse floor area is a separate figure: the Classic aluminium greenhouse range is listed from 3.77 m² to 28.08 m², but that range does not tell you the root volume available to each plant. Check the dimensions of the size you are considering before turning a floor plan into a bag count.
Match the volume to the crop and plant count
Root-volume guidance is crop-specific and may depend on the variety, intended harvest and how long the plant will remain in the bag. A short-term crop is not a reliable template for a larger plant kept for a longer season. Check the growing instructions for the crop and variety, then compare any recommended container size or root depth with the bag’s usable filled dimensions. If the guidance gives a container diameter rather than a volume, compare the shape and depth as well; two containers with the same height can hold different amounts of medium.
Count plants as well as containers. Dividing a shared bag’s usable volume by its number of plants can be a helpful first calculation, but it does not account for roots competing for space, water and nutrients, or foliage needing room above the bag. Do not assume that several plants will suit one large bag simply because the total volume looks generous. Keep a separate note of the intended plant count for each bag, especially when comparing layouts with different container sizes. Otherwise, a plan with fewer bags can appear less crowded while still containing the same number of plants. Compare both the volume per plant and the proposed planting positions before deciding whether the shared arrangement meets the crop guidance. For an overall footprint check, the lean-to greenhouse range lists sizes from 3.69 m² to 14.34 m². That helps frame the layout, but it cannot determine how many plants a particular bag will support.
Give drainage a clear route
Drainage is a route, not just an opening. Use the outlets intended by the bag’s maker, keep them clear and make sure water can move away from the base. A solid tray or a surface that blocks the outlet can prevent excess water from escaping. Avoid leaving bag bases in standing runoff unless the product is designed for that arrangement. If the bag’s drainage design is unclear, check its instructions before adding holes; a liner or other feature may affect how it is meant to work.
Plan where runoff will collect before placing a row of containers. Water can carry growing-medium particles and dissolved nutrients, so avoid letting it pool on a walkway or collect beneath bags where you cannot see it. A suitable catchment or drainage route can keep the growing area easier to manage; check and empty collected water as needed rather than letting it reach bag bases. The Limited Edition aluminium greenhouse listing gives sizes from 3.77 m² to 28.08 m². For any chosen footprint, check the model dimensions and floor arrangement before deciding where runoff can travel.

Water each bag according to its conditions
Treat each container as a separate moisture zone. A dry surface does not prove the whole root zone is dry, and a damp surface does not show whether the bottom drains well. Check the medium below the surface at more than one point and follow the crop’s guidance for moisture. Bag material and shape also affect drying: some porous fabric designs lose water through their sides as well as from the surface, while less permeable containers behave differently. Do not assume every bag needs the same watering interval.
Arrange bags so you can reach each watering point without stepping over plants or stretching across the bed. Note which containers dry first, since position, crop size and airflow can make conditions vary within one greenhouse. A watering system may reduce repeated trips, but its presence does not prove that every bag receives the same amount. The T-Model Orangery Greenhouse listings span 16.52 m² to 30 m². Use the dimensions of the selected size, rather than its headline area alone, to plan access to each bag and check its moisture.
Support tall crops without relying on the bag
If a crop needs a stake, trellis or other support, plan it before foliage fills the available path. The support should carry the plant without relying on a bag handle, thin rim or loose medium as its only anchor. A tall stem tied to a container can pull the bag over or strain its fabric as the plant grows. Keep ties adjustable so they do not constrict stems, and leave enough room to inspect both the support and the plant as the canopy develops.
A support can be independent or attached to a greenhouse element only where the maker’s instructions and the specific structure allow it. Do not assume that a frame or glazing bar can take plant loads; check the relevant instructions and consult a qualified installer if the attachment or its suitability is uncertain. The Pyramid Greenhouse listing gives a floor-area range of 5.53 m² to 18.9 m², not a support-height or load specification. Check the actual dimensions and permitted attachment points before planning a tall-crop arrangement.
Plan bag rows, paths and storage together
Measure each bag at its filled size and draw its full footprint on the greenhouse plan. Then allow for the crop as well as the container: leaves and branches can extend into a path, and flexible bag walls may spread once filled. Mark doors and the routes you need to reach plants without moving containers. Keep access space separate from the planting calculation; otherwise the drawing may suggest that more bags fit than you can tend comfortably. Give each bag a number on the sketch and mark the side from which you will water, inspect and harvest it. This can reveal an inaccessible container hidden behind an otherwise tidy row. Where possible, mark the proposed footprints on the floor before filling the bags, then walk the route with the watering equipment you intend to use.
Include supports, drainage channels and any storage area on the same sketch. The greenhouse range with storage is listed in sizes from 5.52 m² to 28.08 m², but its name alone does not show where the storage is positioned or how much floor remains clear. Check the plan for the size you are considering and mark the growing area separately from storage and access. If bags need to move between crops, make sure the route out will still be clear after plants have grown.
Worked comparison: bags and a fixed bed
Consider an illustrative planting strip measuring 2.4 m long by 0.6 m wide. Its footprint is 1.44 m². A rectangular bed in that strip with a planned rootable depth of 0.30 m has a geometric volume of 2.4 × 0.6 × 0.3 = 0.432 m³, or 432 litres. For a bag comparison, imagine two rows of eight 30 cm square bags using the same nominal footprint. If each bag has a usable filled depth of 30 cm, its geometric volume is 27 litres and the group totals 432 litres. These round figures illustrate the calculation; they are not a crop recommendation. To show access separately, draw an illustrative 0.6 m-wide aisle alongside the full 2.4 m length. The planting strip and aisle together would occupy 2.88 m², while the calculated root volume would remain 432 litres. The aisle width is an example, not a prescribed clearance. Use a width that accommodates your own access needs, and keep that allowance identical when comparing the two growing systems.
The arithmetic compares total volume, not identical root conditions. A bed provides one continuous area, whereas the bags divide the medium into separate pockets. Real bags may spread beyond a 30 cm footprint, taper or have unfilled space, so use their filled dimensions and actual usable volume to revise the layout. The example also leaves no space for paths, supports, drainage access or plant spacing; include those separately. The Prestige greenhouse listing gives sizes from 3.77 m² to 28.08 m². Compare the dimensions of the size you are considering with your drawing rather than treating floor area as a measure of root volume.

Choosing between bags and a continuous bed
Choose between the systems by considering what you need to change. Empty bags can be repositioned more easily than an established bed, which may help when the crop mix changes or you want separate growing areas. Once filled and planted, however, bags are heavy and moving them can disturb roots. They also create individual watering points and more edges to inspect. A fixed bed keeps the planting strip in one place and gives roots a continuous volume, but changing its shape or arrangement takes more work once it is established.
Think about the practical routine as well as planting day. Can you manage each bag’s moisture separately, and can you empty or refresh it without spreading old medium across the path? Would a continuous bed be easier to tend with the crops you intend to grow? Neither method automatically needs less care: the workload depends on the crops, medium and layout. Consider the end of the growing season too. For bags, identify where each container will be emptied and how the medium will be moved out. For a bed, consider how you will reach the whole strip when working on it. Include these jobs in the comparison rather than judging flexibility only by how easily empty containers can be arranged before planting. If separating crops or changing their positions matters most, bags may fit that plan. If you prefer a single, continuous root zone, a bed may be more suitable.
Choose the greenhouse footprint after drawing the layout
Trace the full usable arrangement before settling on a greenhouse size. Mark the bed or bag boundaries, the aisle, door access, drainage route and space needed to reach each row. Check the mature plant spacing separately from the bag spacing: a grid of containers may fit on paper while the foliage blocks the path. If crops need vertical support, check the selected greenhouse’s relevant dimensions and instructions as well as its floor plan. A stated area total does not show the exact shape, clearances or access points.
A larger published area is still only a starting point. The Spacious Greenhouse range is listed from 47 m² to 70 m², but the chosen plan and the space reserved for paths, supports and storage determine what remains for growing. Check the dimensions for the specific size, then test the arrangement using filled bag footprints and the spacing required by mature crops. When comparing greenhouse sizes, place the same proposed growing arrangement on each plan first. This shows whether the extra space improves access, accommodates more planting or simply sits outside the area you intend to use. Keep a bag version and a bed version of the drawing so that the choice of growing system remains visible in the comparison. If watering and access disappear from the drawing, reduce the number of bags or change the bed layout instead of treating every spare corner as plantable.
Frequently asked questions
How do I compare a grow bag with a bed?
Estimate a bag’s usable filled volume, then multiply it by the number of bags. For a rectangular bed, multiply its length by width by rootable depth. These figures compare volume, not identical growing conditions: a bed is continuous, while bags create separate root zones.
Can two plants share one grow bag?
There is no universal number that suits every crop. Check guidance for the crop and variety, then consider the bag’s usable volume, plant spacing and access for watering. A large total volume alone does not guarantee that several plants will have enough room.
Should every grow bag have drainage holes?
Use the drainage arrangement intended by the bag’s maker and keep its outlets clear. If the design or instructions are unclear, confirm before adding openings. Plan where runoff will go, and avoid leaving bag bases in standing water unless the product is designed for that arrangement.
How often should I water greenhouse grow bags?
There is no single interval for every bag. Drying depends on the crop, filled volume, bag material and greenhouse conditions. Check moisture within the root zone rather than relying on the surface alone, and adjust to the crop’s growing guidance.
How can I support a tall crop without tipping its bag?
Use a stable support that does not rely on the bag’s handle, rim or loose growing medium as its only anchor. If you plan to attach a support to the greenhouse, first check the maker’s instructions for that structure and seek qualified help if its suitability is uncertain.
The useful comparison is not simply whether bags or beds look neater. Measure the root space each system provides, then consider the drainage, watering, access and support it will need. That makes it easier to choose a layout that fits both the crops and the way you plan to tend them.
