
Tracing Greenhouse Water: Above, Below or Inside
Greenhouse repair guide
Water on a greenhouse floor can arrive through a roof joint, move in from wet ground, or form inside as condensation. The puddle's final position rarely identifies which. A useful diagnosis records the first wet point and the conditions around it, then compares observations from rainy and dry periods without forcing water into the structure or dismantling glazing.

Before requesting a replacement part 1
Record when and where water first appears
Before you mop up, note the time, whether rain is falling, how long it has been since the last rain shower, the wind direction, and any watering or washing in progress. Record which surface first looks wet: glazing, frame, wall, floor, or soil just outside. Describe whether you see separate drops, a narrow stream, a damp patch or standing water. Take one wide photograph showing the surrounding frame and one closer photograph of the mark. A fixed reference, such as a frame member or bench leg, makes it easier to compare the same spot after the next rain or watering. If you can, note whether the water is clear, dusty or mixed with soil, without touching damaged glass.
Sketch the greenhouse plan and mark the first wet point, not only the place where water gathers. Add doors, vents, benches and irrigation equipment so you can see whether a trail crosses or disappears behind an obstruction. Note when you checked and when the area dried; an old damp mark can be mistaken for a fresh one. For the first observation, leave doors, windows and vents in their usual positions rather than changing airflow before you have a baseline. Repeat the same record in a dry period as well as after rain. If water reaches electrical equipment, keep away and seek qualified help.
Read the water pattern without assuming its source
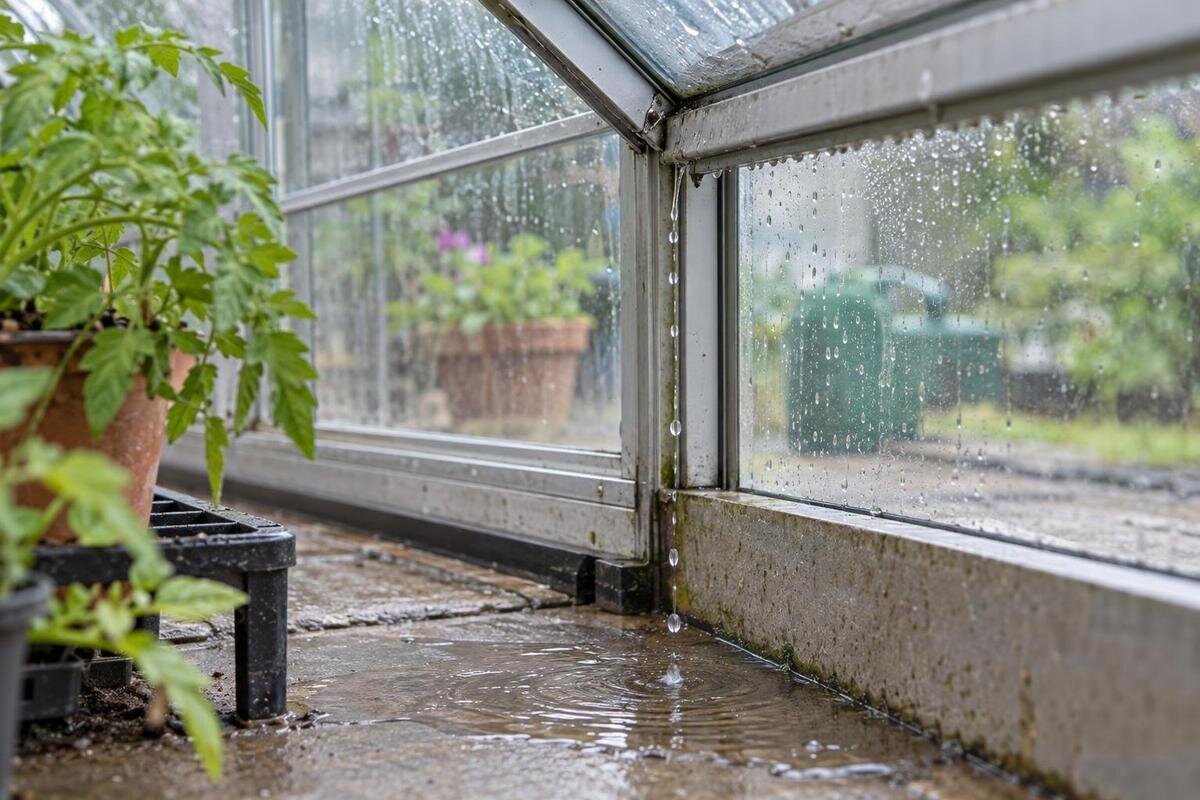
The floor's wettest point is often the end of the route, not the entry point. Water can run down a pane, along a frame or across a floor before it drips; benches, trays and stored pots may divert it further. Look upward from a new wet mark without touching the glazing, and note any visible trail, drip edge or first damp surface. A narrow track from one joint and a broad film of small drops are different patterns, but neither is conclusive on its own. Record what changed first, not just where the puddle is deepest. If the mark is under a bench, check whether its top is hiding the first drops.
Compare the inside with the corresponding outside area from a safe position. A wet sill may be runoff from above; water beside a doorway can be rain blown in, a spill or water carried along the frame. Damp ground outside with no clear internal trail raises a different possibility from drops forming on several inside panes. Use product records rather than a general catalogue picture to understand your frame: a broad label such as Aluminium Greenhouses cannot confirm the exact glazing, vents, seals or drainage detail of your unit. Product photographs are not parts diagrams, so do not identify an unfamiliar component by appearance alone.
Before requesting a replacement part 2
Look for signs of condensation on the inside
Condensation forms when moisture in the greenhouse air meets a cooler surface. One clue is fine mist or beads across more than one inward-facing pane, particularly when there is no rain, rather than one repeatable drip from a seam. Droplets may gather, join and run down a pane or frame, eventually forming a puddle at floor level. Check which face is wet from a safe position; rain can wet the outer face at the same time, so a wet pane alone does not identify the source. Look for a pattern across surfaces, not a single drop.
Keep ordinary conditions in view: the timing of watering, wet floors or trays, and whether doors or vents were open as usual. Air movement and internal moisture affect condensation, but changing every vent setting at once can make the result hard to interpret. Observe first, then compare one normal, safe change at a time, following the greenhouse manual. If drops appear across the interior in dry weather while the outside of the roof remains dry, that supports condensation as part of the explanation. It does not rule out a separate leak during rain. Wiping a pane removes evidence without changing the cause, so note whether the moisture returns in the same places.
Check whether water appears during rain
Rain is relevant when fresh water repeatedly appears during or soon after rainfall, especially at the same high point or joint. Note the delay after rain begins and whether the wind is driving it towards one side; rain entry may occur at a roof, wall, opening or frame junction, not only directly over the final puddle. A route down a frame member can move water away from the entry. Compare a rain event with a dry period and note whether new water appears in the same place. A delay does not rule out entry, since water can travel before it drips. If there is no rain but a drip appears, consider condensation, irrigation and stored water as well.
Use natural weather as the test; do not direct a hose, pressure washer or other flow at the roof, because that can force water into places it would not normally reach and blur the result. Observe from inside at floor level and from the ground outside; do not climb onto the greenhouse or handle roof glazing. If your paperwork names the Pyramid Greenhouse, give the complete recorded model details in a parts enquiry so the supplier can identify the roof component concerned. Include the position of the first drip and whether it occurs only with wind from a particular direction. If a pane is cracked or visibly displaced, keep clear and have a qualified installer assess it.

Before requesting a replacement part 3
Inspect glazing and joints without dismantling them
From ground level and safe interior positions, look for visible clues at roof edges and joints: a cracked pane, an obvious gap, a displaced component, a damaged seal or debris gathered where water could be held. Photograph the feature and its position in relation to a fixed frame member. A mark or dark line is a clue to document, not proof that a seal has failed. Do not remove glazing beads, press a pane back into place, scrape a seal or apply caulk before you know the model guidance; a temporary patch may conceal the route or complicate a proper repair. If you cannot see the joint safely, leave it for an installer.
Pay attention to where roof, side, opening and wall edges meet. If the greenhouse adjoins a wall, record whether water first appears on the wall-facing side, at the upper junction or lower down; water that shows near a wall may have travelled from elsewhere. The Wall Greenhouse product listing is not a drawing of your actual wall junction. Use the supplied manual or ask the manufacturer or installer to identify the relevant detail and approved repair procedure. If the first wet point lies outside the frame at a wall or paving joint, record that separately rather than assuming the greenhouse seal is responsible. This distinction helps explain which part of the junction needs assessment.
Check for water around the base
Inspect around the outside perimeter soon after rain and, separately, after a dry spell. Note whether soil or paving is wet before the greenhouse floor is, whether a visible flow reaches the base, and whether the dampness is local or along a longer section. Water splashing from a surface, runoff from a nearby area, an irrigation line or moisture in the ground can all leave a wet edge. Look for the sequence and direction; a puddle beside the base is not by itself evidence that water has risen through it. Record any separate wet patch outside before stepping through it or moving items.
Compare the point of entry indoors with the outside perimeter, and note any change after ordinary watering or rain. A leak from above can travel down the exterior frame and collect at the base, so a low puddle may still have an upper origin. If the area remains wet in dry weather, record that separately and arrange an assessment rather than digging, changing drainage or modifying a foundation. When seeking model-specific advice, the catalogue name Bloomcabin Prestige Greenhouse identifies a family; it does not establish what base is present in your installed greenhouse. Use original paperwork and photographs to describe what is actually there.
Before requesting a replacement part 4
Rule out irrigation and other indoor sources
Check other sources that can put water inside. If fitted, inspect irrigation hoses and joints while the system is used normally; also consider watering cans, spills, wash-down, overflowing trays and wet footwear. Note when the damp patch appears rather than assuming that an irrigation line is leaking. Where practical, compare normal watering with a period when no watering is taking place, without disconnecting or dismantling equipment. A qualified plumber or installer can assess a persistent leak from a pipe or fitting. If the floor is wet after cleaning, record that before blaming rainfall.
Storage and equipment can hide the first mark or introduce water independently of rain. Look under containers and around stored hoses, but do not move heavy or fragile items across wet flooring. If your records identify a model with built-in storage, use its full name in a manual or parts query; for example, Aluminium Greenhouses with Storage – Limited Edition is a catalogue label, not confirmation that a replacement component fits your unit. This check helps separate water brought inside from water that entered through the structure. If an item is heavy, leave it in place and photograph the surrounding floor instead.
Distinguish overlapping water sources
More than one process can be present. A rain-linked drip at one frame joint can coexist with condensation on several panes, while wet ground outside may add water at the base. Do not force all three signs into one explanation because one leak has been found. Keep separate notes for each first-wet point and condition, then look for repeatability: does the upper drip follow rain, do the interior beads appear in dry weather, and does the base become damp after watering or runoff? This separates recurring patterns from a one-off spill. A single observation that matches two conditions should remain inconclusive.
If observations conflict, repeat them without changing several things at once. Note whether rainfall, watering and condensation are occurring together; one coincidence may not distinguish them. Record which areas become wet together and which remain dry, rather than combining every damp patch into a single result. If the signs persist at an inaccessible joint, involve more than one area or return after an approved repair, ask the manufacturer or a qualified installer to inspect the route. If your model records identify the Spacious Greenhouse, include that name with a marked plan showing each affected area. Use consistent location labels in your notes and photographs so the person reviewing the enquiry can distinguish the separate observations.

Before requesting a replacement part 5
Prepare a parts enquiry from the evidence
Once there is a repeatable source, identify the part by the manufacturer's documentation rather than by an approximate colour, length or appearance. Find the greenhouse model and variant in the invoice, manual or product label if available; record the part name or exact spare-part identifier shown there. Include a clear photo of the location, a close-up taken without touching the component, and a note on whether water appears in rain, dry weather or after watering. If glass is damaged, do not measure or remove it yourself; send the details to the supplier or installer for guidance. Mention any earlier repair and whether the symptom changed.
Ask whether the identified component is specified for that exact model and whether an installer should review the surrounding frame before replacement. A family name alone is not a part number: for instance, Limited Edition Aluminium Greenhouses names a catalogue range, not a guarantee of common seals, glazing or fixings across variants. Keep the reply and original identification together, and do not fit an alternative part or make a structural alteration based on a visual resemblance. This avoids treating a wet patch as enough evidence to order a component. If the manual cannot be found, state that rather than guessing.
Know when to ask for an installer review
Get a qualified installer or manufacturer involved when the entry point cannot be reached safely, glazing is cracked or displaced, the frame looks distorted, water returns after a documented repair, or the route seems to involve the foundation or adjacent construction. These findings need more than a surface-level patch. An installer can compare the assembly with the correct manual and identify whether a glazing part, seal or another issue requires attention. Explain what was repaired previously and whether the water now appears in the same place under the same conditions. Do not drill drainage holes, alter the frame or seal over a suspected route without approved guidance.
Replacement is a separate decision from diagnosis. Before comparing a new greenhouse, record the present model, usable site dimensions, access constraints and the component affected; then have any proposed fit and specification checked against the manufacturer's information. A listing such as T-Model Orangery Greenhouse is a named catalogue product, not a retrofit part or a promise that it suits your existing base. If the existing structure may be repairable, ask about the correctly identified replacement component first; if a model change is being considered, treat it as a fresh suitability enquiry. Do not assume a replacement model will reuse old panels or seals.
Frequently asked questions
Can condensation make a greenhouse floor wet?
Yes. Small drops on the inside of cooler glazing can join and run down a pane or frame, then collect below. Look for moisture across several inside surfaces, including when it has not rained, and note watering and ventilation conditions. Condensation can coexist with a separate leak, so this pattern does not prove that all the water is condensation.
Does water appearing during rain always mean there is a roof leak?
No. Rain may enter at a roof or wall joint, an opening, or another part of the frame; it can also run down the outside and collect at the base. Record the first wet point and the delay after rain begins, then compare with a dry period. Avoid hose tests and roof access.
How can I tell if water is coming from below the greenhouse?
Note whether soil or paving outside becomes wet before the floor inside, and whether the dampness follows the perimeter. Compare what happens after rain, watering and a dry spell. These observations may point to a base-related route, but runoff or irrigation can look similar, and water from above can travel down the frame. Do not dig or alter the base; ask an installer to assess recurring water.
Is it safe to hose down the greenhouse to find a leak?
Avoid doing this. A hose or pressure washer can force water into a joint that would not admit ordinary rain and can make the source harder to identify. Use observations during natural rainfall and dry periods instead. Do not climb onto the roof, handle damaged glass or remove seals; ask an installer to assess areas you cannot inspect safely.
What information should I include in a replacement-parts enquiry?
Include the model and variant shown on your manual, invoice or product label, plus the exact spare-part identifier if available. Add photos showing the part and its position, and note whether water appears during rain, in dry weather or after watering. Mention earlier repairs. Do not identify a part by appearance alone or remove glass; ask whether the part matches your exact model.
The most useful finding is where water first appears and under which conditions it returns, not where the largest puddle forms. Keep separate records for rain-linked entry, moisture forming inside and water collecting around the base. Together with the model details, these observations give a manufacturer or installer a clearer basis for assessing the route and deciding whether a repair is needed.
