
Making a Greenhouse Central to a Kitchen Garden
Kitchen garden planning
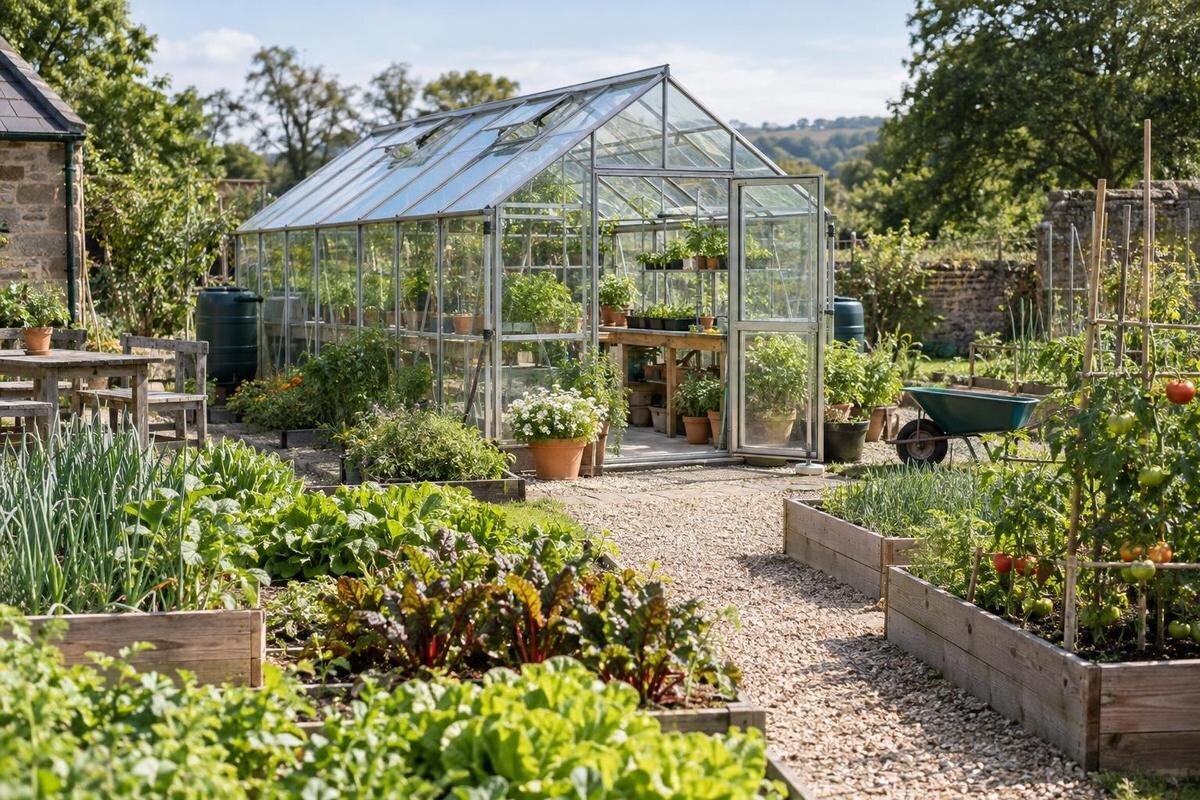
Making a greenhouse central to a kitchen garden is less about putting it in the middle of the plot than making it useful in everyday work. Outdoor beds, a water point and compost area should connect to it without forcing every task through one narrow doorway. Plan the routes people use for seedlings, tools, harvests and garden waste first; then choose a greenhouse footprint that leaves those connections clear.

What makes a greenhouse the centre of a kitchen garden?
Treat “central” as a working relationship, not a point on a map. The greenhouse may sit near the middle, but it is central when it connects indoor growing with the outdoor beds, water point and compost area. A position slightly off-centre may work better if it keeps the route from the house or garden entrance clear. Aim to shorten useful trips without making the greenhouse doorway a crossroads for every activity. Leave enough space outside it for someone to pause with trays or a harvest basket without obstructing another task. This distinction matters on an irregular plot, where the straight-line centre may not be the easiest place to reach.
List jobs before drawing the zones. Note how trays travel from the greenhouse to beds, when tools are carried, where harvested produce is sorted, and how prunings or other garden waste reach compost. Mark which journeys happen together and which are bulky, wet or likely to meet at a doorway. A greenhouse that is central only for carrying pots may be inconvenient for watering or harvest. This quick inventory shows which connections deserve the most direct paths and which can use a secondary route. Use a normal busy day as your test, and keep the focus on the outdoor garden rather than adding more work areas inside the greenhouse.
Map the plot before fixing the greenhouse position
Draw fixed elements first: plot boundaries, the house entrance, sheds, walls, mature trees, gates and existing paths. Add the greenhouse as a measured footprint, including its door and the space to approach it; mark the outdoor beds, water point and compost area as separate zones. Include anything that affects shade or traffic, such as a frequently used gate or established planting. The drawing is a working map, not a construction plan. It helps expose blocked routes, awkward crossings and corners that a bin or bed would make hard to reach. Leave uncertain positions provisional until you have traced the circuit from the entrance to each working area.
Observe light and shade on the plot at more than one time of day, and revisit the plan as seasons change if practical. A greenhouse can cast shade beyond its footprint, while trees and walls can alter the pattern too. Do not assume that one compass direction guarantees a good layout. For an initial size comparison, the Pyramid Greenhouse listing gives a range from 5.53 m² to 18.9 m². That area range does not show the exact footprint or the shade a chosen model may create, so place the selected dimensions on your own plan before settling the nearby beds and paths.
Place outdoor beds for light and regular access
Place beds according to the light and tending needs of the crops, then connect the most frequently visited ones to the greenhouse by a convenient route. Group beds with similar watering or care routines so a single trip can serve more than one task. Observe how walls, trees and the proposed greenhouse position affect light at different times; do not assume all bed edges receive the same exposure. Keep the sides accessible for sowing, weeding and picking, and avoid relying on a narrow gap between a fence and greenhouse as the only way to reach a bed. Where shade is unavoidable, plan its use around the conditions you have observed.
Before fixing bed positions, check how far you must carry a tray from the greenhouse and whether you can reach each bed with the tools and containers you use. A bed beside a wall, fence or greenhouse edge can be awkward to tend if there is no practical approach. Use a tape or temporary markers to test the gaps rather than relying on a sketch that is not to scale. The Prestige Greenhouse listing gives an area range from 3.77 m² to 28.08 m². Compare the actual option you are considering with the proposed bed spacing; the range alone is not the selected model’s exact footprint.
Plan the water point and hose route
Mark the existing tap, tank or other water point and the route for a hose or filled containers. Check how water can reach every bed and the greenhouse without a hose repeatedly crossing the main path, doorway or wheelbarrow turning area. A route that is technically reachable but must be moved each time can become a daily obstruction. Notice where water drains or collects around the proposed work areas, and avoid placing the busiest standing space where it remains wet. Include access for refilling or servicing a water source in the sketch. If the plan needs new plumbing or drainage work, have the proposed arrangement reviewed by an appropriately qualified professional.
If a wall greenhouse is one option, consider the water point and access along the wall together. The Wall Greenhouse listing gives an area range from 3.69 m² to 14.34 m². On your plan, trace the hose from the actual tap to the beds as well as to the greenhouse, noting any doorway it would cross. If you intend to add water storage or plumbing, leave access for filling and maintenance. The useful question is whether watering can take place without repeatedly moving equipment out of someone else’s way.

Keep compost accessible without blocking the garden
Treat compost as a two-way destination. Kitchen and garden scraps travel to it; finished material travels back to the beds. Choose a position where both journeys fit naturally into routes people already use, but where bins will not narrow the greenhouse entrance, block a gate or force a wheelbarrow across planted areas. Consider how you will open, turn, fill or empty the containers you actually use, and where a full load can wait. Leave room to handle loose material without occupying a path. Access to the compost matters as much as the distance shown on a plan.
The most convenient location depends on the plot and how often material moves, so there is no universal distance from a greenhouse. The Aluminium Greenhouses with Storage – Limited Edition listing identifies built-in storage and an area range from 5.52 m² to 28.08 m². Consider how trips to collect tools would fit alongside trips to the compost area, while keeping the two destinations separate. Check that you can reach and empty the compost containers without shifting stored items. Neither activity should block the greenhouse approach or interrupt the main route between the beds and garden entrance.
Design paths for people and wheelbarrows
Draw paths as connections between destinations, not as leftover strips of space. Trace journeys from the entrance to the greenhouse, from the greenhouse to beds, water and compost, and from harvest areas towards the house or sorting point. A loop can reduce dead ends where the plot allows; in a compact garden, one clear main route with short branches may be simpler. Avoid making a busy task cross another route at a narrow point. Mark junctions and turning areas as well as straight sections, so that a person carrying a basket and someone moving equipment can use the garden without blocking the greenhouse door.
Measure the wheelbarrow you actually use, including its handles and the space needed to turn or manoeuvre a load. Check gates, path corners and the approach to each bed; a route can be wide enough on paper but still awkward at a turn. Choose path dimensions for the people and equipment using the garden rather than relying on a generic measurement. The Aluminium Greenhouses listing gives the Classic range as 3.77 m² to 28.08 m². Mark the path edges beside your chosen model, including any junction near the entrance, so you can test the full turn rather than just the straight approach.
Keep planting and harvesting routes clear
Trace the growing cycle in both directions. Trays may travel from the greenhouse to beds; harvested produce goes towards a sorting point, while prunings or spent plants head towards compost. These journeys can meet in a narrow gap, particularly outside the greenhouse entrance. Keep a clear place to pause there, rather than letting pots, baskets or tools become permanent obstacles. If clean produce and compost cannot follow separate routes, check that neither journey requires carrying a full container through newly planted beds or making a difficult turn at the door.
Imagine several jobs happening in succession: carrying a tray, taking water to a bed, collecting a basket of produce and then moving plant waste. Mark where each item can be set down briefly without blocking a path or the greenhouse entrance. The Limited Edition Aluminium Greenhouses listing gives an area range from 3.77 m² to 28.08 m². When comparing an option with your plan, include these temporary stopping places in the surrounding outdoor space. A basket waiting to go to the house and trays ready for planting should not occupy the same narrow approach.
Plan places for tools and harvested produce
Keep frequently used tools near the work they serve, but choose a place that does not narrow the principal route. A small outdoor staging area for hand tools or empty trays can stop the greenhouse threshold becoming a pile of equipment. Consider where wet tools and seasonal items will go if that affects how the rest of the garden is used. Choose a harvest collection point that is reachable from the beds and convenient for the journey towards the house or sorting area. It should be possible to put down a basket briefly without blocking the compost route or a gate.
Consider storage alongside the outdoor collection points, so that putting tools away does not mean moving harvest baskets first. Built-in or separate storage may change what you carry between tasks; check the arrangement and dimensions of the option you select. If you are comparing the T-Model Orangery Greenhouse, its listed area range is 16.52 m² to 30 m². Draw the selected footprint with the tool store and harvest collection point shown separately. Keep a clear route between each of these places and the beds, rather than treating every unplanted corner as available storage space.

Allow for shared use and later changes
When several people use a kitchen garden, agree how everyday tasks fit together. Decide who tends beds, refills or checks the water point, handles compost and returns shared tools. Mark routes clearly enough that a new volunteer or household member can see where to go without cutting across a working area. If people may use the garden at the same time, walk through likely combinations of tasks and note where they could meet at a doorway, path junction or compost area. Include any access needs in the plan and have the proposed routes reviewed by an appropriate professional where necessary.
Leave some flexibility for changing beds, adding a growing area or adjusting how the garden is used. The Spacious Greenhouse listing gives an area range from 47 m² to 70 m². When considering a model in this range, show which outdoor areas would remain available for growing and which would be needed for access. Keep any proposed future beds on the drawing rather than assuming they can fit later. For a shared or managed site, consider the project’s operating requirements and confirm any relevant site approvals with the owner or appropriate authority before settling the arrangement.
Test the complete layout before choosing
Once the drawing is coherent, mark the proposed greenhouse footprint and main paths on the ground with temporary markers. Walk the routes carrying a tray or basket, and use the usual wheelbarrow to test gates, turns and approaches to beds and compost. Check whether the water route crosses a busy path and whether the entrance stays clear when someone pauses there. Look again at shade and at any places where water collects. A layout that works on a plan may feel very different at ground level, so adjust the positions before committing to permanent beds or paths.
For the selected greenhouse, confirm its exact external dimensions and door position in the relevant product information before finalising nearby routes. Do not infer these details from an area range or product name. For a larger or shared project, include the measured plan, intended uses, water arrangements, compost route and access needs in the project brief. Where permissions or site approvals may apply, check with the relevant owner or authority before committing. That gives the greenhouse enquiry a clear context and makes it easier to assess the structure as part of the whole kitchen garden.
Frequently asked questions
Does the greenhouse need to sit in the exact centre of the garden?
No. Its role is central when it connects the jobs you do indoors with outdoor beds, water and compost. A position to one side may work better if it preserves clear routes from the entrance and between working areas.
How close should outdoor beds be to the greenhouse?
There is no single ideal distance. Consider the light available, how often you will tend each bed and how you will carry trays, tools and water. Mark the proposed positions on the ground and check that you can reach the bed edges comfortably.
Where should the compost area go?
Choose a spot that works for both journeys: carrying garden or kitchen scraps to the compost, and moving finished material back to beds. Keep access clear for the containers and wheelbarrow, without blocking the greenhouse entrance or a main path.
How should I plan a water point?
Mark the actual tap, tank or other water source, then check the route to all beds and the greenhouse. Avoid hose runs that regularly cross a doorway or busy path. Ask a qualified professional to review any new plumbing or drainage work.
What should I prepare before choosing a greenhouse?
Make a measured sketch showing the entrance, proposed greenhouse footprint, beds, paths, water point, compost area and gate. Check the selected model’s exact dimensions and walk the routes with your usual wheelbarrow or other equipment.
A greenhouse works as the kitchen garden’s hub when its connections work in practice: beds are reachable, watering does not create awkward crossings, the compost area is accessible, and a wheelbarrow can reach the places it is needed. Check those relationships on the ground, not just on a neat sketch. The right position is the one that supports the garden’s everyday work while leaving the outdoor growing areas usable.
