
Lean-To or Freestanding Greenhouse: Plan Your Site
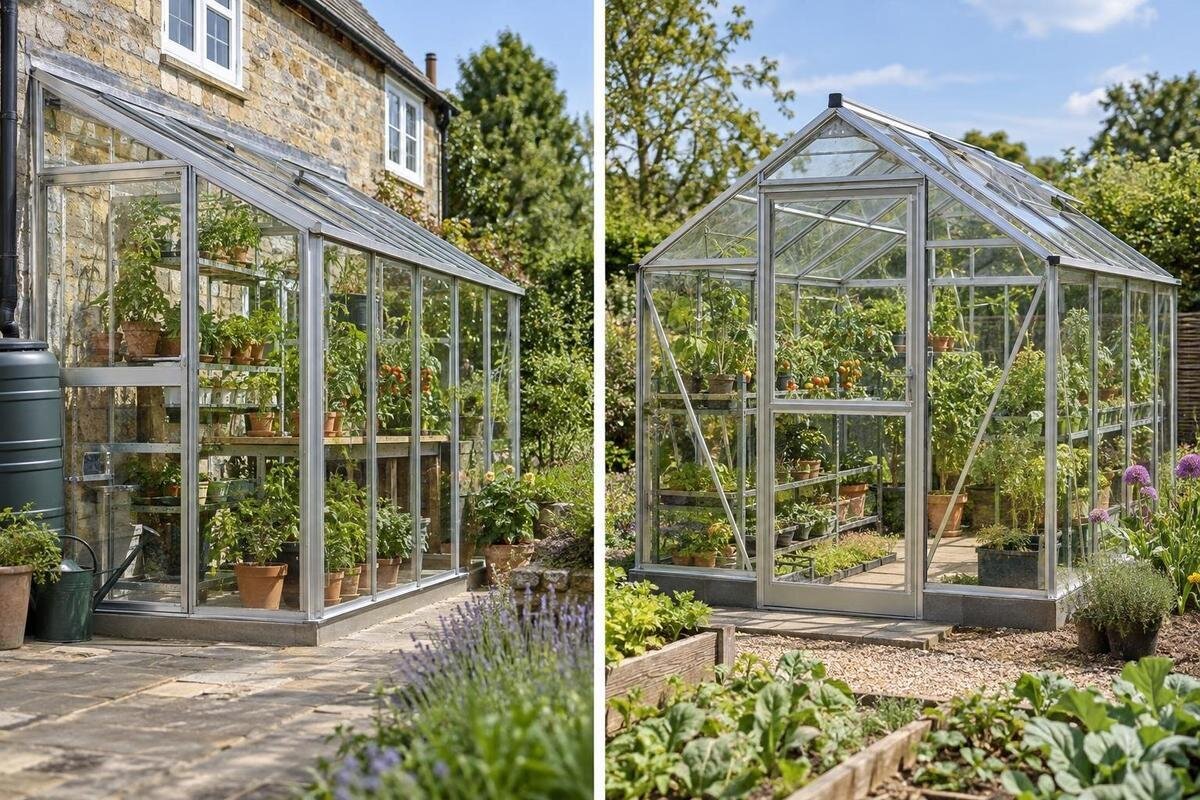
Greenhouse siting in Malta
A lean-to and a freestanding greenhouse can both suit a Maltese garden, but they use the plot differently. One shares an edge with a wall; the other occupies a separate area of ground and may need access around more of its perimeter. Comparing catalogue area alone misses practical trade-offs: where the entrance opens, how you reach plants, what is shaded and whether the wall and ground can accommodate the chosen model. Put both options on the same measured plan, using exact configuration drawings. Then judge the growing space left over, rather than assuming a wall-mounted design is automatically smaller or a freestanding one automatically easier to use.

Use one measured plan for both options
Begin with a measured plan of the whole plot, not a greenhouse dropped into a blank rectangle. Record boundaries, gates, steps, existing paths, drains, taps, trees, sheds and nearby building openings. Mark the routes you need to keep usable, including the space a gate or house door needs to open. Note changes in level and fixed features that cannot be moved. If a lean-to is under consideration, add the length and orientation of the possible wall. The plan need not be a survey, but consistent measurements will show where the two options compete with planting beds, circulation and everyday garden use.
Make one copy of this plan for a lean-to and one for a freestanding option, keeping the scale and entrance route consistent. On each, draw the selected model’s full footprint, door position, intended interior path and any work surface or bed. Add the outside approach and the space needed to stand while opening the door. Use separate outlines for the structure, planting areas and routes so you can see where they overlap. Mark any measurements you still need to confirm rather than treating an estimated line as settled. A footprint shown in a catalogue is only part of the layout: the greenhouse must still fit beside gates, paths and existing features. If you have not settled on a size, test the actual configurations you are considering rather than drawing a generic silhouette.
Check the wall before choosing a lean-to
A lean-to uses a wall as one boundary of the greenhouse, so the wall is a site requirement, not simply a convenient backdrop. Measure its usable length and height, and note windows, vents, downpipes, ledges, service pipes and uneven sections. Check the selected model’s installation information for how it connects to the wall and what supporting surface or fixings it requires. Do not assume that a nearby boundary wall or façade is suitable just because the footprint looks neat. If the wall or fixing method is uncertain, ask the supplier and a qualified installer to assess compatibility.
Consider access to the wall after installation, too. If maintenance, drainage inspection or access to a window would be blocked, decide how that work could still be done. Where a wall is shared or belongs to someone else, resolve permission with the relevant owner before planning an attachment. A lean-to can use a plot edge efficiently, but it may leave one long side inaccessible and restrict where the entrance can go. The Wall Greenhouse range is a wall-mounted format to review; compare the chosen configuration drawing and installation guidance with your actual wall. Its listed area range is 3.69 to 14.34 m², but area alone does not show wall length or fixing requirements.
Entrance position and approach routes
Trace how you will reach the greenhouse from the garden gate, house or usual work area. Imagine carrying a tray, watering can, compost bag or harvested crop, and mark tight turns, steps, uneven paving and doors that cross the route. For a lean-to, an end entrance can become awkward if it faces a fence, a return wall or a busy doorway. With a freestanding model, access on several sides is possible only if those sides have usable clearance; a structure placed between a bed and a boundary may be no easier to service than one against a wall.
Inside, sketch where you will stand while watering, harvesting or moving a tray. Check the selected drawing for the door position and, where shown, its hinge side and opening direction. A bench or row of containers can interfere with entry even when the entrance itself is unobstructed. The Classic Aluminium Greenhouse range is listed from 3.77 to 28.08 m², so its options cover a broad spread of stated areas. That figure does not tell you how much room your route, door opening or furniture will need. Compare the specific configuration plan with the paths and turning space you have measured.
Usable planting space and working room
Total floor area is not the same as usable planting area. Reserve room for a clear working route, then sketch beds, benches, floor pots and seed trays in the places you can actually reach. A narrow layout may give you a useful run of planting but little turning space; a wider one may offer more ways to arrange tables yet still use floor area for an aisle. With a lean-to, consider whether you can tend plants beside the wall from the internal path. For either type, judge access from where you will actually stand inside, not from a clear strip outside the glazing. Draw the planting zones separately from the route, then check the far edge of each bed or bench. If reaching it would mean moving several pots or stepping into another planting area, revise the arrangement before counting that space as usable.
Plan for the tasks you expect to do, rather than filling every spare space on paper. Leave room to turn with a tray, set down tools and reach the plants you intend to tend. If you want storage or a work surface, include it in the drawing before judging capacity. The Limited Edition Aluminium Greenhouse options are another set of configurations to compare: use the chosen plan to place your benches and containers, rather than assuming a model name or area figure tells you how much space will remain plantable.

Map sun and shade across the day
Look at light where the plants and work area will sit, not just at the direction the greenhouse front faces. Observe shade at different times of day and on different dates, including shade from nearby buildings, boundary walls and trees. A single midday observation can miss a darker morning entrance or a late-afternoon shadow. Put these observations on the same site plan used for both options, and mark which proposed growing zones receive direct light and which are shaded. This keeps the comparison tied to your plot rather than to a compass label alone.
For a site in Malta, consider direct sun as well as shade, but do not assume that the most exposed position is automatically best. A wall may shade one side at certain hours; a freestanding greenhouse may have a different light pattern and can shade its own edges. Do not infer a temperature advantage from the wall alone. The T-Model Orangery Greenhouse range is listed from 16.52 to 30 m². If you are considering it, map the exact selected footprint against your observations: the area range does not reveal the orientation or light exposure of a particular layout.
Ventilation openings and surrounding obstructions
Air movement depends on the greenhouse’s openings, the wind and nearby obstructions, so an exposed freestanding position does not prove that ventilation will be better. A wall can interrupt airflow on one side, but the outcome also depends on the structure and surrounding buildings. Locate any openings shown on the model drawing and check that they will not be directly obstructed by a fence, eaves, shed or awkward boundary. If the product information does not make opening positions or clearance needs clear, ask before choosing a configuration.
Consider whether you will be able to reach and operate the openings as intended, and whether a neighbouring structure could restrict that access. Mark their positions on the interior layout as well as the site plan: a bench or tall row of plants should not leave a control out of reach. Where an opening needs clearance to move, show that space separately rather than counting it as permanent storage room. For a lean-to, pay particular attention to the relationship between the openings and the wall; for a freestanding option, check each relevant side against its surroundings. The Pyramid Greenhouse range is one distinct model type to review. Use the selected configuration’s opening details to make this comparison rather than inferring ventilation or ease of operation from its name or roof outline.
Plan for water, drainage and storage
Mark the nearest usable water source and trace the route you would take to water plants, keeping it clear of the main walking path where possible. Consider where water from existing roofs and the greenhouse roof may go. Note downpipes, drains, low spots, paving edges and areas where runoff cannot easily pass. Do not rely on a wall junction or greenhouse perimeter to solve drainage: check the site and model instructions, and seek qualified advice if levels or drainage are complex. A well-placed structure should not make an existing route for water or maintenance harder to manage.
If you want tools, pots or growing materials close at hand, include their storage space and access in the plan. Separate items you use while tending plants from those you only need occasionally, then mark where you would collect and return them. Compare both layouts using the same storage needs; otherwise, one may appear to offer more growing room simply because you have left its tools elsewhere. A listing such as Aluminium Greenhouses with Storage – Limited Edition identifies an option with storage, but the selected drawing is needed to show how the space is divided and accessed. Count that storage within the overall footprint rather than treating it as extra planting capacity. Check that collecting a pot or putting away a tool will not require you to clear the entrance or move containers from the working route.
Exposure, ground and installation requirements
Record changes in level, surface, drainage and conditions around the proposed perimeter. A freestanding greenhouse does not rely on a building wall, but that does not mean it is suitable for every surface or exposure. Base and anchoring requirements depend on the selected model and site. For a lean-to, consider both the ground support and the wall connection. Do not improvise a fixing plan or assume an off-the-shelf base suits a sloping, paved or otherwise unusual surface. Confirm the relevant specification with the supplier and a qualified installer.
Look at how open or sheltered each proposed position is, including the effect of nearby walls and buildings. A wall may alter exposure, but it does not guarantee shelter, and the more open position is not automatically the better one. Keep this assessment separate from assumptions about structural performance; a qualified professional can advise on site-specific installation requirements. If the Prestige Greenhouse with metal foundation is among your candidates, check its foundation information against the selected site. The model name identifies a foundation option, not universal compatibility.

Comparing specific greenhouse configurations
Once you understand the plot, compare selected configurations on a like-for-like basis. Check the stated outer measurements, footprint, entrance position and installation requirements in the product information. Put each chosen outline on the same plan and record what changes: wall use, clear approach, usable planting zones, shade and access for maintenance. A model category does not tell you the exact layout of every size or configuration. If a dimension or opening is unclear, ask for the relevant drawing before deciding that the greenhouse will fit.
Area ranges help you identify possible sizes, but they are not a substitute for a selected plan. The Spacious Greenhouse (Orangerie) is listed from 47 to 70 m²; that range alone does not show the exact footprint, entrance or attachment arrangement of an option. When comparing it with another candidate, keep your proposed beds, work surface and storage requirements consistent. Note separately any additional growing space and any extra ground occupied by routes or other uses. This makes it easier to distinguish capacity you want from space you have simply filled because it is available. A like-for-like comparison need not mean choosing identical stated areas: it means showing how each configuration accommodates the same tasks and what garden space remains outside it. Use the selected layout, rather than the model name, to resolve those differences.
Test both layouts at full size
Before settling on a position, mark each proposed footprint on the ground using a method suitable for the surface, such as string or removable markers. Walk the approach route with something you would normally carry. Check the entrance, space to stand outside it, access to the wall and the sides you would need to maintain. Inside the outline, place temporary markers for a path, bench and planting rows. Try the two arrangements separately so their boundaries do not become confused. Include the garden movements that will continue after installation: passing the entrance, reaching a tap or taking tools to another bed. If one layout requires a detour, walk it rather than judging it only on paper. This simple trial can reveal a blocked turn or an awkward reach that is easy to overlook on a screen or small plan.
Record what worked and what needed changing in each trial. Keep practical constraints, such as a blocked doorway or inaccessible planting row, separate from preferences about appearance or where you would enjoy working. Revise the affected layout and test it again rather than accepting an awkward route because the outline fits. If both options work, compare the trade-offs you observed: the garden area left clear, the convenience of the approach and the arrangement of your growing zones. If neither leaves a workable route or planting area, reconsider the position or selected size. Keep these notes with the corresponding configuration drawing so the reasons for your choice remain clear when you review the options.
Frequently asked questions
Does a lean-to greenhouse always take up less garden space?
No. It can use a plot edge, but it still projects into the garden and needs room for its entrance and day-to-day access. Compare its full footprint and approach route with a freestanding option on the same measured plan.
Will a wall make a lean-to greenhouse warmer?
Not automatically. A wall can change shade and exposure, but it does not establish a reliable temperature advantage. The site, greenhouse design and ventilation all matter, so do not choose on an assumed heat-storage benefit.
Which type gives more usable growing space?
Neither type guarantees more planting room. Compare the selected configuration’s interior layout, door position, working route, benches and reachable planting zones. An area figure alone does not show how much space you can use comfortably.
Can I put a garden greenhouse on a roof or balcony?
Do not assume that a greenhouse intended for a garden is suitable for a roof or balcony. Check that the specific model is explicitly rated for the proposed location, and have a qualified professional assess the structure, fixing and site requirements.
Is a freestanding greenhouse always sunnier?
No. Nearby buildings, walls, trees and the greenhouse itself can all cast shade. Map light at different times on your plot; a freestanding position may be more open, but that depends on its surroundings and orientation.
On the same plot, a lean-to earns its place when a suitable wall is available, the attachment can be verified and the remaining access still works for your plants and day-to-day tasks. A freestanding greenhouse earns its place when an independent position offers a workable entrance, circulation and light pattern. Neither wins by label. Choose the exact configuration that fits its wall or ground conditions, preserves access for maintenance and leaves a growing layout you can actually use.
