
One Garden Plan for a Greenhouse and Pergola
Garden planning
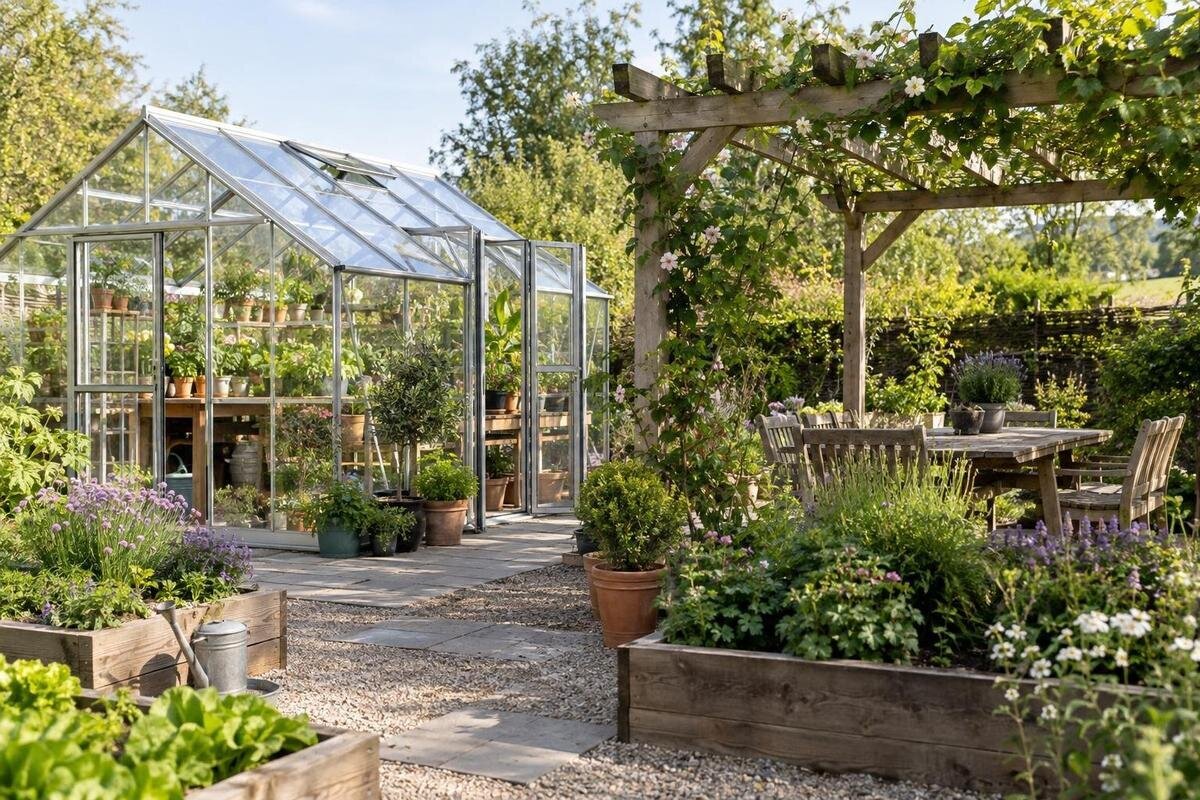
Putting a greenhouse and a pergola in one garden works best when each has a distinct purpose and the space between them is planned too. The greenhouse needs a location judged for growing, access and daily tasks; the pergola needs shade where people will actually sit. A scaled plan lets you test sunlight, movement and shared service routes before you commit to either footprint.

Give each structure a clear purpose
Start by naming the job of each structure, rather than choosing two attractive positions and trying to make them work. A greenhouse might be used for seed raising, pot-grown plants or regular cultivation; a pergola might be a shaded place for meals, reading or conversation. These are possible uses, not guaranteed features of either structure. Write down the main activity and who will use each space. If the greenhouse will be visited several times a day, a convenient working route matters. If the pergola is for meals, include room to sit and move chairs.
List secondary activities as well. If growing involves potting, storing tools or staging trays, decide where those tasks belong before they spill into the path or seating area. Separate activities that need a permanent place from those that only happen occasionally: a potting bench needs an allocated position, whereas moving a few trays may only require a clear working area. If people will gather under the pergola while someone tends plants, keep the greenhouse work route clear of chairs and stored items. Consider who uses each space and when: a layout that works for a quick watering visit may be awkward when several people are sitting outside. Where two activities compete for space, decide which takes priority rather than counting the same area twice. The aim is to give each structure a recognisable role and connect them without interrupting either activity.
Draw the whole site, including working space
Measure the site and draw it to scale, including house walls, boundaries, gates, existing sheds, trees, fixed beds and the usual route from the house. Mark north, but do not rely on a compass direction alone: walls and mature trees may block light differently from one part of the garden to another. Note changes in level and places where water tends to collect, as these can affect paths and may call for site-specific advice. A plan showing only two rectangles can look workable while leaving no room to reach a door, carry a tray or tend nearby planting.
Draw each structure’s full proposed outline, not just its usable floor area. Include entrances and the room needed to open them, then mark any clearances specified in the selected model’s documentation. For an initial catalogue reference, the Limited Edition greenhouse with storage is listed in area options from 5.52 m² to 28.08 m². Use the chosen option’s confirmed external measurements and opening positions for the plan. Label storage and working areas separately so you can see what is inside the structure and what still needs garden space. Keep the outlines of the buildings distinct from the surrounding access areas, using different pencil lines or colours. This makes it easier to spot a path that appears clear on paper but overlaps a doorway or the place where you intend to stand while working.
Record how sun and shade change
For a garden in Malta, record the conditions on the actual plot rather than relying on a broad compass rule. The house, neighbouring buildings, boundary walls and trees can all change where sunlight reaches the ground. Shade also shifts during the day and across the year, so a single observation may give a misleading picture. Pay particular attention to the places where you might put the greenhouse and pergola, as well as the route between them.
Make a simple shade record from a few fixed viewpoints. At different times of day, mark the edge of the main shadows on a sketch or take photographs from the same position, noting the date and time. Repeat the observation on other dates if possible, so the plan is not based on one day’s conditions. Record the proposed seating area as well as the greenhouse position: the useful comparison is where light and shade fall during the hours each space will be used. The Bloomcabin Prestige Greenhouse is listed with area options from 3.77 m² to 28.08 m². Mark the selected size on the shade plan and note which parts of its outline fall within observed shadows. Keep observations separate from estimates about other seasons, so you can recognise what still needs checking.
Place the greenhouse for its growing role
Use the shade record to identify a position that suits the plants and tasks you have in mind. Different plants and growing plans may call for different amounts of light, so avoid assuming that one position will suit every crop or season. Check the growing requirements for your intended use and compare them with the light available on the plot. Also consider whether you can reach the greenhouse easily for watering, tending and moving plants without cutting across the pergola’s main seating area.
Then add the pergola to the plan and check where its shadow is likely to fall in relation to the greenhouse. Do not assume that partial shade will remain in one place or provide dependable growing conditions. Compare possible positions for the pergola before treating the greenhouse location as fixed; moving the seating area may resolve a conflict without sacrificing the growing space you want. For scale comparison, the Spacious Greenhouse is listed with area options from 47 to 70 m². A proposal at this scale needs to show how much room remains for the pergola and the space between them, as well as the greenhouse itself. Use both structures’ dimensions and heights with the site’s sun record to assess their relationship. The greenhouse’s listed floor area alone does not describe its outline or the shade around it.

Position the pergola around its intended use
Choose the pergola’s position by considering where people will actually sit and at what times. A spot that is convenient to reach may not receive the shade you want during the hours when it will be used. Mark the intended table or seating area, including room to pull chairs out and move around them, then compare that area with the observed sun and shade. The amount and pattern of shade depend on the pergola’s design and any covering, so confirm what the chosen structure provides rather than assuming its outline represents a fully shaded area.
Keep access to the pergola and the paths around it clear of house doors, garden gates and the greenhouse working route. Draw the furniture in its occupied position, with chairs pulled out, rather than tucked neatly beneath a table. This shows whether someone can pass while others are seated and whether the route to the greenhouse cuts through the gathering space. The Aluminium Classic Greenhouse is listed in area options from 3.77 m² to 28.08 m². Place the size under consideration on the same drawing and test the seating arrangement beside it. If the two uses overlap, compare moving the furniture, repositioning the pergola or choosing a different greenhouse size. Keep enough room for the activities you identified at the outset, rather than preserving an arrangement simply because its empty outlines fit.
Plan the route between the structures
Draw a direct, practical route between the house, greenhouse and pergola. Think about what will travel along it: a watering can, a tray of plants, tools, or food being carried to the seating area. A path that crosses the main pergola seating space or forces people to pass through a greenhouse work area can make the garden feel cramped even when both structures fit. Include gates and turns in the drawing, and consider whether the route remains usable when chairs are occupied or plants are being moved.
Note any steps, changes in level or places where hoses might cross a busy path. Check the route in both directions, including the approach to each door and any turn around the pergola’s furniture. Carrying something should not depend on another person moving a chair or clearing stored equipment first. If the garden needs a step-free route or will be used by someone with mobility requirements, ask a qualified accessibility professional to review it rather than judging it from a sketch alone. The Wall Greenhouse is listed with area options from 3.69 m² to 14.34 m². Show its entrance on the plan and trace the approach from the house and pergola separately. A position beside a wall still needs a usable approach; it does not automatically resolve the circulation between the two structures.
Map water, drainage and any power needs
Mark existing water points, drainage routes and any electrical supply you may need, even if you have not yet chosen where connections will go. Note whether water is needed near the greenhouse for growing tasks or whether the pergola has a separate requirement. Draw possible routes on the same plan as the paths, and avoid leaving a hose or service route to be worked out after the garden layout is fixed. Also note where water tends to collect or flow across the site, so the proposed positions can be reviewed in that context.
A shared drawing makes it easier to discuss services, but it does not establish that one supply can serve both structures or determine how a connection should be made. Label each requirement by purpose, such as greenhouse watering or a proposed power point, so a professional can distinguish an existing provision from something you would like to add. Have a qualified professional confirm what is suitable for the property and how any work should be carried out. The Limited Edition Aluminium Greenhouse is listed with area options from 3.77 m² to 28.08 m². Mark the particular size and position before estimating distances to services. Keep alternative routes visible until their suitability has been assessed, and show where they would meet paths or seating areas. This allows service planning and the garden layout to be considered together without treating a sketched line as an installation design.
Compare greenhouse footprints with usable space
Once the garden plan shows the usable area, compare it with the actual dimensions of the greenhouse models you are considering. Check more than the area figure: the outline, height, entrance and opening positions can affect access and the relationship with the pergola. Add any work area or storage you expect to use outside the greenhouse, along with the path needed to reach it. This gives a more realistic picture than measuring an empty patch and leaving the practical details until later.
A product’s listed area can help narrow the options, but the selected size and its drawing must be checked against the garden. For example, the T-Model Orangery Greenhouse is listed with area options from 16.52 m² to 30 m². Use its confirmed outline rather than representing that area as a convenient rectangle. Compare two or three arrangements on copies of the same site plan, keeping the pergola furniture and required routes at the same scale in each version. This makes the trade-offs visible: one arrangement may leave more growing space but put a doorway too close to the seating, while another may preserve a clearer route. Compare the usable space left around each option, not just the greenhouse area gained. Retain the layout that accommodates the intended activities without relying on furniture or equipment being moved every time.

Consider views and future changes
Check the layout from the places where you spend time, not only from above. Look from the house towards the garden and from the pergola towards the greenhouse. Consider whether either structure would block a useful view, make a doorway feel crowded or place the greenhouse entrance directly into the main seating area. These checks are about how the garden will be experienced as well as whether the footprints fit. The chosen pergola design and greenhouse model may affect their visual scale, so review their actual drawings rather than relying on generic symbols.
Think about how the garden could change: a tree may grow, planting may spread, or your use of the greenhouse may involve more equipment later. Identify the places you want to keep available for access or planting instead of filling every corner from the start. Distinguish a genuine future need from a vague reserve of space: mark where extra equipment might stand and check whether it would obstruct a view or route. For another footprint comparison, the Pyramid Greenhouse is listed with area options from 5.53 m² to 18.9 m². Use the selected model’s confirmed outline and height when checking sightlines and possible shade. View it in relation to the pergola’s occupied seating area as well as from the house, so the assessment reflects how both spaces will actually be used.
Test the plan before committing
Review the drawing as a working garden, not simply as a finished arrangement. Trace the route from the house to the greenhouse with a tray or watering can, then imagine carrying a meal to the pergola while someone is tending plants. Check where doors open, whether chairs obstruct the main path and whether a service route would cross a busy area. If you can mark the proposed outlines temporarily on the ground, use that as a visual check, while remembering that the model drawings determine the actual dimensions. Mark the furniture and door openings too, rather than only the outer edges of the structures. Walk through the everyday tasks you listed at the beginning and note any point where one use interrupts another. Revise those conflicts on the drawing before settling on the arrangement.
Before ordering or building, gather the site measurements, shade observations, selected product dimensions, entrances, paths and possible service routes in one place. Ask suppliers or project professionals to clarify any missing model or installation details, especially where the available clearance or base arrangements are uncertain. If the garden is shared, commercial or intended for public use, confirm the project’s operating needs and any permissions with the relevant local authority and qualified professionals. Requirements depend on the actual site and use, so a residential sketch should not be treated as universal approval.
Frequently asked questions
How much space should there be between a greenhouse and a pergola?
There is no single distance that suits every garden. Allow for the greenhouse entrance, the pergola’s posts and usable area, a clear route between them, and any space needed for access or maintenance. Check the proposed gap against the shade pattern and the selected models’ drawings.
Can a pergola provide shade for a greenhouse?
It can cast shade, but the position and shape of that shade change with the sun, season and pergola design. Do not treat it as predictable greenhouse shading. Check the light needs of the plants you plan to grow and follow the greenhouse manufacturer’s guidance.
Should the greenhouse be closest to the house?
Not necessarily. A short route to water or regular household access may be helpful, but the greenhouse also needs a position that suits its growing use and avoids unwanted shade. Compare those needs with the pergola’s location and the existing paths before deciding.
Can the two structures share water or electricity routes?
You can show both requirements on one site plan, which may help when discussing the work. Whether a supply can serve both structures, and how connections should be made, depends on the site and equipment. Ask a qualified professional to confirm the route and requirements.
What should I check before choosing a greenhouse size?
Compare the selected model’s external dimensions with the available space, including its entrance, opening positions, height and access for maintenance. Add the pergola, paths, furniture and service routes to the same plan. A listed area is a useful first filter, not a complete layout.
A successful combined layout is more than two structures that fit on a drawing. It gives the greenhouse a position suited to its growing role, places the pergola where its shade and seating will be useful, and connects them with routes that do not obstruct either activity. A plan that accounts for seasonal shade, actual model dimensions and everyday movement allows the garden to work as one space while giving each structure its own purpose.
