
Diagnosing Plant Scorch Along One Greenhouse Side
Greenhouse troubleshooting
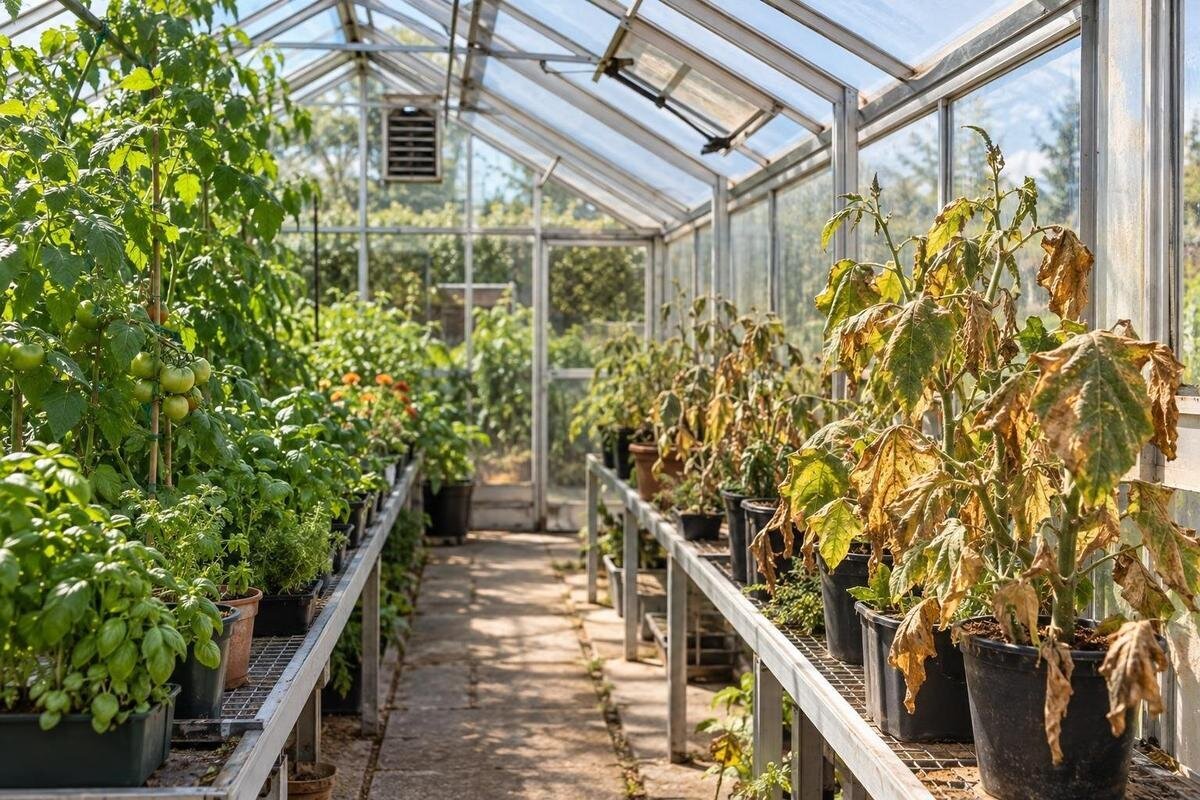
When scorching is confined to one greenhouse wall, bench or row, the pattern is a clue: investigate that zone before changing conditions everywhere. Direct sun, reflected heat, uneven airflow, dry roots and recent sprays can leave similar marks. Compare damaged plants with healthy ones at the same time of day, then use a map, simple readings and one controlled change to identify the likely cause.

Map which plants and leaves are affected
Begin by separating the location of the damaged leaves from the location of the plants. Note whether pale or brown patches appear on the same side of several plants, only on leaves nearest the glazing, or on every plant along one bench. That distinction matters: marks on the sun-facing side suggest a different exposure from a whole row with dry roots or restricted air movement. Scorch can look bleached, tan or crisp, but appearance alone cannot confirm the cause. Photograph the whole plant and both sides of a representative leaf before moving it; a repeated pattern is more informative than one dramatic mark.
Draw a simple plan rather than relying on memory. Mark the walls, roof panels, doors, vents, benches, nearby paving or walls, and the exact places where damage begins and ends. Add the crop, variety, age, pot or bed position, and the direction each plant faces if they are not all arranged alike. Compare damaged plants with healthy ones of the same crop and at a similar stage. Damage limited to the exposed face points towards a local light or heat load; drooping that affects whole plants across the row makes root moisture or wider conditions important to check. Keep these possibilities open until you have observations from more than one day.
Follow the sun across the affected area
Observe the affected area at different times, especially around the period when symptoms first appear or plants wilt. Follow where sunlight reaches the same wall, bench and leaves; include the time and weather in your notes. A brief exposure at a changing angle can be missed during a single midday visit. Repeat the observation on comparable bright days and record cloud cover and wind, since both can alter the pattern you see. Photograph shadows on the greenhouse and nearby surfaces from a fixed viewpoint instead of relying on memory. Sun angle changes with the season, and growing plants can cast new shadows, so a one-off inspection may not explain recurring damage.
Check outside the affected panel as well. A fence, roof edge, neighbouring building or tree can make a sharp shade line, while a gap in the shade can expose one row earlier than the rest. With a lean-to such as the Bloomcabin Wall Greenhouse, include the supporting wall’s colour, finish, projections and orientation in your observations. Record which plants are shaded by the wall and which remain exposed as the sun moves. Note whether the injury coincides with direct sun, a bright patch of reflected light or the moment a shadow moves away. This gives you a site-specific pattern to compare with the damaged row.
Look for reflected heat and light
Not all extra heat comes from sunlight passing straight through the greenhouse. Look for bright light bouncing from glazing, pale walls, metal surfaces or water, and for paving or masonry that absorbs sunlight and warms nearby air. A plant beside a sunlit surface may receive light from a direction you did not expect; a warmed surface can also continue releasing heat after it falls into shade. These effects can overlap, and visual brightness alone does not tell you how hot a leaf becomes. Do not touch a surface to estimate its temperature or use a hand test as proof. Note what is immediately outside and inside the affected zone, including items moved or added recently.
Compare the marked leaves with the greenhouse panels and their orientation. A photograph taken from the plant’s position can reveal a concentrated reflection that is hard to notice from the path. If you are considering a different form, such as the Pyramid Greenhouse, compare its drawings with the directions of light you have recorded at crop level. Keep nearby reflective surfaces on the site plan rather than considering the structure in isolation. Also note whether the hot patch persists after direct sunlight moves away. If it does, nearby warmed materials, restricted air movement or dry roots may be contributing alongside sunlight.
Compare local temperature and humidity readings
To compare a hot-looking corner with a healthier one, use two matching data loggers at leaf height. Keep their sensing points out of direct rays but open to the surrounding air, and clear of glass, metal framing and vent outlets. Record temperature and relative humidity in both places over the same period; note the time, weather, and whether doors and vents were open. A sensor struck by sunlight may report its own heating rather than the surrounding air, while a sensor beside a vent may miss a still pocket. If you have only one device, take readings at each location in turn under similar conditions, then repeat the comparison.
Before drawing a conclusion, place the instruments together in the shade and check whether their readings agree. Use the record to compare patterns, not to chase a single peak or apply a universal threshold: crops differ in tolerance, and leaves in direct sun can be warmer than the measured air. Humidity describes part of the local environment, but it does not show whether a particular root ball is dry. Across a larger growing area, such as the 47 to 70 m² range listed for the Spacious Greenhouse, compare individual benches and corners rather than relying on one central reading. Keep the affected and healthy zones clearly labelled in your records.

Check for uneven air movement
Look for anything that could interrupt air movement near the affected area: a wall, tall crop, shelf, stored item or dense foliage. Compare how leaves move on both sides when vents are in the same position, and note whether the pattern changes as the outdoor wind shifts. A partly blocked opening or a closed door at one end can alter the local path, but stronger air movement is not automatically better for every crop. Inspect visible openings and automatic controls without forcing them, and use the greenhouse manual for normal operation. A warm reading near a sunlit pane, on its own, does not prove that ventilation is the cause.
If scorching occurs with unusually fast drying in one zone, check whether air is moving through that space or bypassing it. If leaves face a constant stream, consider whether the pattern follows that airflow instead. Compare readings and plant response before adding a fan or changing an opener. For powered equipment or structural alterations, follow the maker’s documentation and have installation questions assessed by a qualified professional. When considering the Bloomcabin Prestige Greenhouse, check the opening layout and compatible controls for the configuration you intend to buy. Compare those positions with your planned benches and tall crops, keeping the affected zone’s obstructions in mind.
Compare plant position, root moisture and recent care
Make sure comparison plants have the same variety, pot size or bed position, age and recent care. Check root-zone moisture at a similar depth in both locations rather than judging by the surface: plants facing more sun can use water faster, while a blocked line or uneven hand-watering can leave one bench drier. Confirm that watering is reaching the affected area as intended, but avoid soaking the whole greenhouse to compensate for a suspected hot side. If the root zone is already moist, extra water may not address the cause. Record feeding, transplanting and pruning too, since recently stressed plants may show injury first where exposure is greatest.
Look under leaves for pests, check whether marks spread in a pattern unrelated to sunlight, and note recent foliar feeds, soaps, cleaners or crop-protection products. One-sided marks can follow the side reached by a spray or contact with a surface; follow the relevant product label and do not repeat an application just to test a theory. If shelving or stored equipment has reduced the available bench space, include it in your map. When considering the Aluminium Greenhouses with Storage – Limited Edition, use the layout plan to assess storage and growing space together. Mark proposed bench positions and check whether plants would sit beside the same kind of hot or obstructed edge you are investigating.
Decide whether the fixed layout is part of the problem
After comparing sunlight, reflections, watering and air movement, ask whether the hot patch follows a permanent part of the structure. Mark the distances from plants to glazing, walls, roof edges, openings and bench ends, then compare them with the healthier zone. A fixed bench beside a warm boundary can repeatedly place the same crop in the exposure, even if the average greenhouse reading is unremarkable. If the bench can be moved without blocking a door or vent, a temporary rearrangement can test that explanation. If the structure leaves no alternative growing position, the constraint may be the layout rather than the greenhouse climate as a whole.
If you are considering a new layout, compare a floor plan with the site’s sun observations, wall relationship, access and intended bed positions. Product area is only one input; it does not show where openings or beds will sit in a specific configuration. The T-Model Orangery Greenhouse listing gives a size range of 16.52 to 30 m², but those figures alone cannot show whether a particular crop row will avoid a hot edge. Check detailed drawings and the manufacturer’s information for the exact model and configuration. Do not assume a different shape or larger floor area will remove a local exposure without mapping the site again.
Run a small, controlled trial
Before making a permanent change, choose one reversible test. You might move a few comparable pots away from the exposed side or provide a small patch of temporary shade intended for greenhouse use, while leaving similar plants unchanged as controls. Do not alter shade, watering and vent position throughout the structure at once; otherwise, you will not know which change mattered. Keep any screen clear of leaves and vents, and use it only in a position approved for the greenhouse. Do not attach improvised material to the roof or frame. Take a photograph before the trial so you have a record of the starting condition.
Judge the test by new marks and new leaves, not by whether old brown tissue becomes green; damaged areas do not recover. Compare the treated and untreated plants during similar light and weather, and note whether moving a plant changes its exposure as well as its airflow. If the current layout leaves no cooler place for a comparison group, mark possible bench arrangements on a floor plan before considering a different footprint. For the Aluminium Greenhouses range, listed at 3.77 to 28.08 m², use the drawing for the exact size under consideration. Add the trial row, comparison plants and access routes to assess the usable arrangement rather than nominal area alone.

Match any lasting change to the cause
Where direct sunlight is the trigger, targeted, greenhouse-compatible shading may be more appropriate than darkening every wall or the whole roof. Match its position to the times the affected patch receives direct or reflected light, and consider the crop’s light needs before extending coverage. If a nearby surface is the main source, changing that reflection or creating a buffer may address the cause more directly than covering the whole greenhouse. Do not choose a fabric, coating or shade percentage on appearance alone. Check the greenhouse and shade-product documentation for compatibility and approved placement.
Where the evidence points to uneven air movement, first check that existing vents and controls operate as their manuals describe and that plants or shelving are not obstructing openings. A new fan or altered opening is not a substitute for finding the cause; powered or structural changes may need professional advice. If your buying comparison includes the Limited Edition Aluminium Greenhouses, check the selected configuration’s current specifications and approved accessories against the change you need. For a screen, vent or fixing, establish compatibility before purchase. Keep the proposed change specific to the affected area rather than treating a replacement structure as a cure for unexplained scorch.
Monitor new growth and repeat the comparison
After any change, keep the original map and compare the same plants, or equivalent plants, under similar conditions. Mark the date, weather, vent position, watering and any shade used. Existing dry patches record past injury; they are not a live measure of current conditions. Look instead for fresh pale areas, new edge damage or healthy new growth. Take photographs from the same angle and include an unaffected comparison plant where possible. A response observed during one unusual spell may be coincidence, so repeat the observation when the same exposure pattern returns.
If new damage continues despite reducing direct exposure in a controlled way, broaden the checks rather than adding more shade by default. Revisit root moisture, recent products, pests, spreading marks, contact with surfaces and ventilation readings. If the pattern remains unclear or spreads through the crop, consult a qualified horticultural adviser or plant-health service; dates, photographs and a layout sketch will help explain what you have observed. As sun paths and plant height change, recheck the affected side through the growing season. A short, consistent record can show whether the cause is a persistent hotspot or a temporary care issue.
Frequently asked questions
Can one side be too hot if the central thermometer looks normal?
Yes. A thermometer represents the air where it sits, while sunlight can heat leaves and nearby surfaces locally. Poor air movement can also create a warmer pocket. Compare readings from matching sensors near affected and healthy plants, with the sensors shaded from direct sun. A normal central reading does not rule out a local hotspot.
Will opening all the vents stop one-sided scorch?
Not necessarily. Better air movement may help if a still pocket is part of the cause, but it will not remove direct or reflected sunlight. Check whether the affected area follows a ventilation pattern and whether the openings operate as intended before changing the whole greenhouse. Follow the greenhouse manual for normal operation.
Does leaf scorch always mean too much sun?
No. Uneven root moisture, pests, contact damage and recent sprays or cleaning products can cause similar marks. Compare the affected plants with healthy ones, check root-zone moisture and note recent treatments. Look for signs such as pests or a spreading pattern. Treat the appearance as a clue, not a diagnosis.
What should I look for in a shade trial?
Look for less new damage on comparable plants in the shaded area than on untreated controls during similar bright conditions. Existing brown tissue will not turn green, so judge fresh marks and new growth. Repeat the comparison rather than drawing a conclusion from one cloudy day.
Can I shade only the affected side or row?
A small, targeted trial can be useful if the shade is intended for greenhouse use and placed as its manufacturer specifies. Keep vents clear and do not attach improvised material to the roof or frame. Before making the change permanent, consider the crop’s light needs as well as the reduction in scorch.
The most useful diagnosis comes from matching the scorch pattern to what happens in that exact part of the greenhouse. Map affected leaves, follow the sun, compare local readings and check plants, roots and airflow against a healthy control. Then test one change at a time and watch for new damage. That approach helps distinguish a local hotspot from a problem that needs attention throughout the greenhouse.
