
Planning Greenhouse Clearance from Trees and Hedges
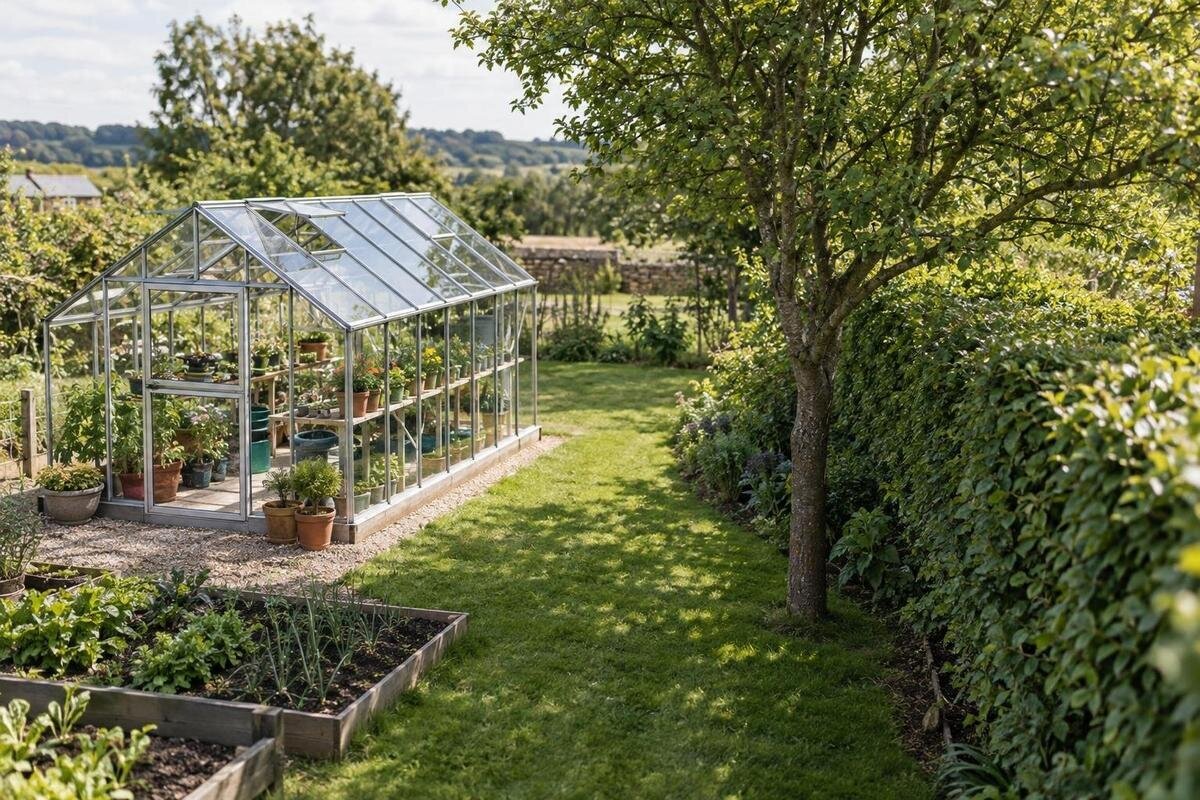
Greenhouse siting
How far should a greenhouse stand from a tree or hedge? The answer depends on how the planting will grow and how you will use and maintain the space around it. A gap that looks generous beside a young tree or freshly trimmed hedge may become restrictive later. Use a scaled sketch to assess future growth, seasonal shade, debris, roots and access alongside the greenhouse’s actual outside dimensions. This gives you a practical basis for comparing positions, with site-specific advice where roots or ground preparation are involved.

01
Why one clearance distance is not enough
There is no single clearance figure that suits every garden. A trunk-to-frame measurement says little about a tree’s eventual crown, a hedge’s maintained width, seasonal shade, debris, roots or the room needed to reach the structure. A young tree and a mature tree with the same present gap do not create the same future conditions; a recently trimmed hedge may also widen between cuts. These are separate constraints, even when they affect the same patch of ground. A greenhouse can fit physically yet be awkward to maintain or receive a changing pattern of shade. A generic distance cannot account for the planting and layout at your particular site.
Treat clearance as a set of measurements rather than one gap. Plot each tree’s trunk centre and note its diameter; also measure the shortest present distance from the trunk bark to the greenhouse’s nearest outside edge. For a hedge, measure from its current outer face and note the strip’s depth along its length. Keep these readings separate from projected branch spread, seasonal shade, possible root constraints and working space. They are planning references, not prescribed boundaries. Use the same measuring convention for every plant, and record tree and hedge measurements in separate fields so you can compare locations consistently.
Draw the greenhouse and planting on one plan
Use graph paper or a simple digital plan at a stated scale. Mark a north arrow, the proposed greenhouse footprint, nearby paths and any fixed features that affect access. Show each tree trunk and its visible crown; draw a hedge as a band, including its current face and widest point. Add the route from the garden entrance and mark the intended door position. Use the chosen model’s plan for the outside dimensions, including projections such as eaves or gutters where shown. If you are comparing orientations or footprints, draw each as a separate outline. A marketing image or floor-area figure is not a reliable substitute for a dimensioned plan.
Take photographs at ground level from each proposed greenhouse corner towards the plants, and from the plants back towards the site. Note the date and whether a deciduous tree has leaves; a photograph of a canopy alone can obscure where its trunk stands. Keep measurements and photos together so you can check a later change of size or orientation against the same site record. For example, the T-Model Orangery Greenhouse is listed in a range from 16.52 m² to 30 m², but that area range does not give the exact outside dimensions or the space needed around a selected version. Use its specific plan.
02
Allow for the tree’s mature canopy
Identify each tree before estimating the space it may need. A young tree can have a small crown today and a much wider one later; species, age, growing conditions and past management all affect its form. Find a reliable mature-spread reference for the identified tree, or ask an arborist if the species is unclear or the tree is important to the garden. Do not judge its final width from the current branch tips alone, and do not assume routine pruning will keep it within a narrow outline. Put the visible crown and a plausible mature canopy envelope on separate layers of the sketch. The envelope is a planning estimate, not a promise of an exact future shape.
Look at the crown from more than one side. A branch may extend towards the greenhouse even when the rest of the tree grows in another direction, and an established tree may not match a neat, circular outline. Note branches that already reach above the proposed roof or into the future access route. If the layout would depend on removing large limbs or substantially reshaping a tree, get qualified arboricultural advice before treating the position as workable. The point is not to add an arbitrary allowance to the trunk gap; it is to record where likely growth could affect the greenhouse, shade or access.
Map shade through the seasons
Map shade by season and time of day. Mark the greenhouse’s planned orientation and footprint, then observe how tree or hedge shadows cross that area at several points in the day and on more than one date. Repeat the observations when a deciduous tree is in leaf and when it is bare, if both conditions occur at the site; an evergreen hedge follows a different seasonal pattern. Note the date and observation time with each sketch or photograph. One visit cannot show the whole year, and a clear patch of ground in a current photograph does not show where a shadow will fall as the sun’s angle changes.
Record whether shade reaches the proposed roof, a particular side or the access area, rather than describing the position only as sunny or shady. Compare the pattern with the light needs of the crops you intend to grow, using dependable growing guidance for those plants. If the Pyramid Greenhouse is on your shortlist, draw the selected size in each possible orientation on your seasonal shade plan. This lets you compare which parts of the growing space would be shaded. If your observations miss part of the year, mark that period as unknown instead of treating one day’s result as typical.

03
Plan for leaves, branches and other debris
Make a debris inventory for each tree and hedge. Depending on the planting, this can include leaves, small twigs, blossom, seeds, fruit or hedge clippings. Note when material falls and where it lands after normal shedding or windy days at the site; the plant’s trunk distance alone cannot show where debris will go. Overhanging growth may drop material directly onto the roof, door area or surrounding path. If the chosen design has roof channels, vents or other openings, check whether nearby debris could collect there. Treat possible branch contact as a separate issue, not something that a large gap on paper automatically resolves.
Allow for the work created by that material: reaching the roof edge, clearing a path, collecting clippings and moving waste out of the growing area. Do not count on a convenient gap if a hedge or the greenhouse’s access route blocks it. Where a model includes an added section, plot the whole arrangement: the Aluminium Greenhouses with Storage – Limited Edition listing identifies built-in storage, so check the exact drawing and any entrance position shown before planning a cleaning route past it. The product name does not reveal the layout of a chosen variant. If a branch appears damaged or would need substantial cutting, have a qualified arborist assess it rather than building a pruning assumption into the sketch.
Treat roots as a separate site constraint
Roots are a separate uncertainty from the visible canopy. A crown edge is useful when sketching shade and branch spread, but it is not a dependable boundary for roots: roots may extend beyond it, and their distribution depends on the tree and the ground. Mark exposed roots and obvious constraints, but do not assume unseen ground is clear. Proposed excavation or foundation preparation near substantial roots can affect the work, and damaging roots may harm the tree. A tape measure cannot map that risk, so do not treat a trunk-to-greenhouse distance as proof that the ground is clear or that a particular foundation arrangement will be suitable.
If the greenhouse position would require digging among significant roots or close to an established tree, pause before choosing a foundation arrangement. Ask an arborist to assess the tree and roots, and have the greenhouse installer or a suitably qualified groundworks professional advise on the proposed site preparation. The Bloomcabin Prestige Greenhouse listing describes a model with a metal foundation, but that description alone does not establish suitability for a particular root zone or site. If the answers remain uncertain, compare a different position before changing the ground or roots.
04
Allow space for greenhouse maintenance
Measure working space beyond the greenhouse outline. You may need to reach a door, clean the outside, remove fallen leaves, trim nearby growth, carry tools or move garden waste through the area. Mark each regular task on the plan and identify the side from which it must be done. A narrow strip that admits a person may still be difficult if you need to turn with tools or carry clippings out. The necessary width depends on the task, chosen structure and how you work, so avoid copying a standard walkway measurement without testing it on site. Account for the actual door position and opening shown in the model plan.
Test the drawing on the ground with removable markers or string. Walk from the garden entrance to the proposed door, stand where you would clean or trim, and check whether branches or hedge growth block those positions. Rehearse the route with the tools you actually use, and include space to gather and carry clippings away. When comparing the Spacious Greenhouse options, listed from 47 to 70 m², mark out the selected size together with its surrounding working space rather than the footprint alone. If high-level cleaning would involve awkward access among branches, ask an appropriate professional how it can be done safely rather than assuming the task will be simple.
Measure hedge height, depth and trimming space
Treat a hedge as a strip with changing width, not as a line on the site plan. Measure its current height and depth at several points, because a long run may be wider at one end or bulge between cuts. Establish its intended maintained profile and how quickly it grows back; plan around its widest likely outline between cuts, not only the sharp line left after trimming. If the hedge is evergreen, leafy cover may remain through the year; a deciduous hedge can change the shade pattern when bare. Record the conditions that apply to the actual planting instead of assuming every hedge casts the same shadow or needs the same clearance.
Plan where trimming will happen and where the cuttings will go. If the hedge can only be reached from one side, confirm that this is a realistic and agreed maintenance route before locating the greenhouse on the other side; do not assume access across another person’s land. Compare the hedge’s expected width between cuts and the space needed for trimming with the chosen greenhouse drawing. For a candidate such as the Aluminium Classic Greenhouse, mark the door approach and the strip needed to clean the side nearest the hedge. Check whether both remain accessible as the hedge grows back, rather than judging the gap immediately after trimming.

05
Freestanding and lean-to layouts near planting
Compare freestanding and wall-attached layouts alongside the plant clearances on your sketch. A freestanding plan may need access around all the sides that require inspection or cleaning. A lean-to arrangement places one side against a wall, but it does not remove the need to consider tree shade, hedge growth, roof debris or access to the exposed sides. A tree or hedge near either end of the greenhouse can still affect the approach or shade the growing space. Mark the actual wall, greenhouse, tree and hedge together; do not assume that a different greenhouse type makes a planting conflict disappear.
The Wall Greenhouse product page identifies an aluminium lean-to greenhouse; use its exact plan to assess the space beside trees or a hedge and the route for maintenance. For any wall-attached candidate, ask the supplier or qualified installer what must be checked about the wall, support and access arrangements, following the installation guidance for the chosen model. If plant growth blocks a side that needs regular attention, the layout still needs to change. Placing one side against a wall does not resolve restricted access elsewhere.
Use the worksheet to compare possible positions
If the garden allows, compare at least two greenhouse positions. Make a row for each tree or hedge and record its identification, present measured gap, expected mature canopy or maintained hedge width, seasonal shade, likely debris, visible roots or unknown ground, and the maintenance route. For each proposed position, note which points are supported by observation, which are acceptable for your intended use and which still need advice. Do not average a serious uncertainty against several easy checks. A position is not ready just because the footprint fits. If it depends on unverified growth assumptions, difficult access or digging close to roots, change the layout or get the relevant professional assessment before settling on a model.
Only then compare exact greenhouse dimensions and details, rather than choosing by a range name or its area figure. The Limited Edition Aluminium Greenhouses listing spans 3.77 to 28.08 m², but that range does not tell you the outside width of a particular option or the distance needed for maintenance. Overlay the chosen drawing, including shown projections and access points, on the same scaled site plan. If none of the possible positions offers acceptable light, room to work and a manageable root or branch situation, reconsider the location instead of assuming that more trimming will solve it.
Frequently asked questions
Is there a minimum distance that works for every greenhouse?
No. The useful gap depends on the particular tree or hedge, its expected growth, shade, debris, roots and the access you need. Use a site sketch and the selected greenhouse plan rather than applying one general distance. Any model-specific installation guidance and site-specific professional advice should also be taken into account.
Does a tree’s canopy edge show where its roots end?
No. The canopy edge helps you map shade and branch spread, but it is not a reliable boundary for roots. Roots may extend beyond the visible crown, and their distribution varies. If the proposed position involves digging near an established tree, ask a qualified arborist to assess the site.
Can regular hedge trimming make a narrow gap workable?
Not necessarily. Trimming does not resolve shade, root constraints or the need to reach the greenhouse and maintain the hedge. Base the plan on a realistic maintained width and make sure the trimming route can actually be used. Do not rely on repeated cutting as a substitute for enough working space.
Does a greenhouse need to be free of shade all day?
Not as a universal rule. The important question is how the shade falls through the year and whether that pattern suits the plants you intend to grow. Record the changing shade at the proposed footprint, then compare it with reliable growing guidance for those plants.
How should I plan around a newly planted tree or hedge?
Do not use its current size as the final boundary. Identify the planting and look up its expected mature form using a reliable horticultural reference; ask an arborist if the tree is hard to identify or important to the site. Record your assumptions and revisit the plan as the planting grows.
A useful clearance allows for growth while leaving room to use and maintain the greenhouse. Measure today’s gap, then map future growth, seasonal shade, debris, roots and maintenance as separate parts of the same plan. That makes it easier to compare positions without mistaking a footprint that fits today for a site that will remain practical. Where a decision depends on root work or substantial pruning, get the appropriate site-specific advice before relying on that position.
