
How to Plan a Greenhouse Move Across the Garden
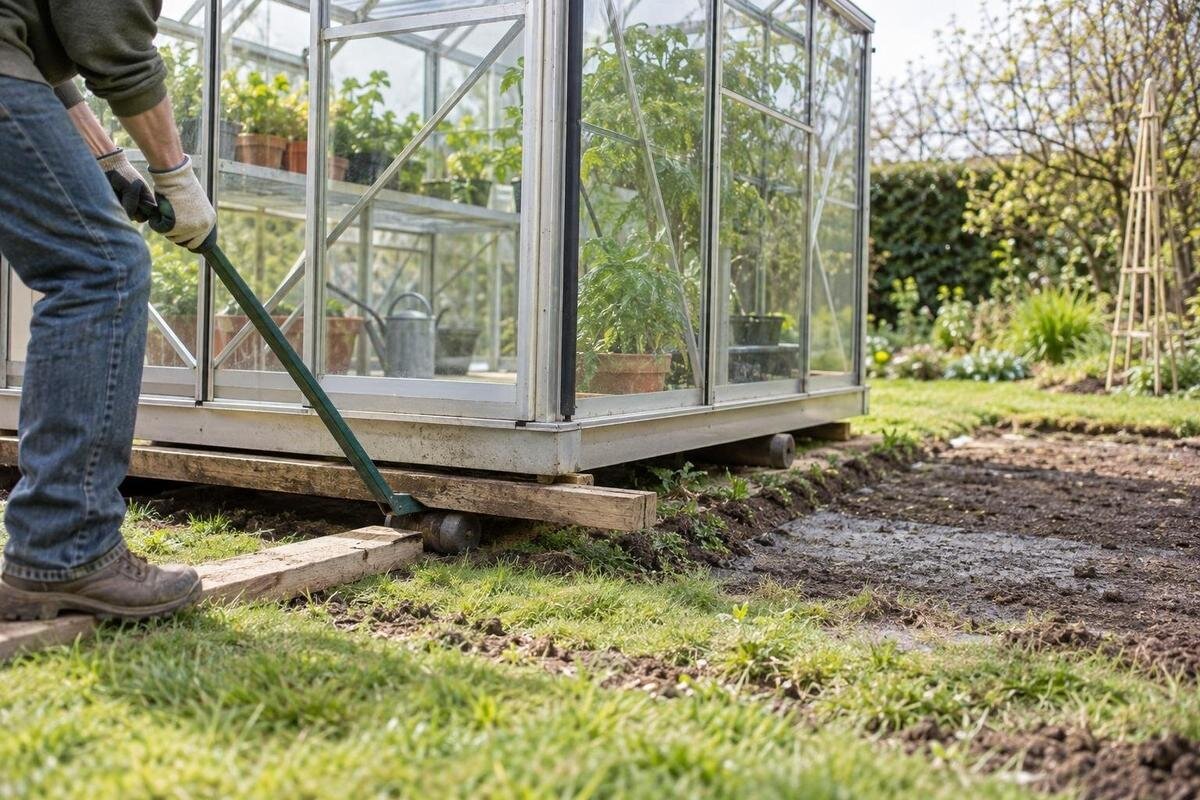
Greenhouse relocation
Moving a greenhouse to another part of the garden is a dismantling and rebuilding project, not simply a lift across the lawn. Before work starts, identify the exact model, photograph its condition, locate the manufacturer’s instructions and ask a qualified installer to assess both the existing structure and the proposed site. The new position and its base need reviewing before the greenhouse is taken apart; otherwise, the footprint, fixings or access route may not suit the plan. A clear record also helps the installer decide which parts can be reused and which need an exact replacement.

Decide whether relocation is worthwhile
Begin with the reason for moving and the purpose of the destination. Perhaps the current position is shaded, blocks a path or no longer fits the way you use the garden. Write down what should change and what must stay the same: growing area, access through the door, ventilation openings, shelving or a connection to water or power. Be clear about what must not be sacrificed, such as a direct route to garden beds or room to bring in pots; a move that fixes one inconvenience can create another. If a new greenhouse is a realistic alternative, compare it with the cost and disruption of dismantling, transport, base preparation and rebuilding. You can include the Classic aluminium greenhouse range in that comparison, assessing a replacement separately from the work needed to relocate your existing structure.
Include condition and parts availability in the decision. Record visible damage, missing fittings, previous repairs and any glazing problems without pressing, lifting or testing components. Ask a qualified installer to assess whether the frame and the parts it relies on are suitable for dismantling and reassembly. Compare like with like: a move may involve labour, replacement parts and work at the new site, while a replacement has its own product and foundation requirements. There is no useful universal rule that a particular age or repair makes relocation uneconomic. Decide after reviewing the actual model, its condition and the new location, before anyone starts loosening it.
Record the greenhouse before anything is loosened
Take dated photographs of the greenhouse from each accessible side and from inside, including the door, vents, roof and any visible damage. Sketch its position in the garden and mark which way the door faces, where panels and openings sit, and how the frame meets the base or a nearby wall. If you note dimensions, use the manufacturer’s drawings or measure only from safe, accessible positions; do not climb onto the frame or handle glazing to get a reading. Take close-up photographs of accessories where they meet the frame, without removing them.
Record whether the greenhouse stands independently or is attached to a wall, and list features added since installation, such as shelves, benches, shade cloth or automatic equipment. These may need separate removal or reconnection and should be included in the installer’s scope. For a wall-mounted design, note its relationship to the wall without trying to identify or undo fixings yourself. If you are considering replacing it with a Lean-to wall greenhouse, keep that enquiry separate from identifying the existing structure. A similar appearance does not establish the model or its attachment details. Use the original label, order paperwork and manual. Keep the images and sketch together, captioned with the date and viewpoint.
Locate the manual and match replacement parts
Search existing paperwork for the manufacturer, exact model name or code, purchase record, serial or batch label if present, and assembly instructions. Save the version that corresponds to the greenhouse rather than relying on a diagram for a similar-looking range. The manual may show the assembly sequence, profile and connector names, and how openings or glazing are retained; use only instructions intended for that model. Compare the original order with what is actually fitted, as options or changes made later may not appear in the paperwork. If a document is missing, ask the manufacturer or seller what information they need to identify it, and keep their reply with the relocation record.
Make a parts list from the manual and photographs, noting which pieces are present, visibly damaged or not accounted for. Ask for exact spare-part identifiers and confirm any proposed replacement against the model before ordering; a generic description such as clip, bolt or seal can cover parts that do not match. If uncertain parts availability prompts you to compare a new Limited Edition aluminium greenhouse, distinguish that purchase enquiry from your request for components for the existing model. If exact parts cannot be established, pause the dismantling plan until the installer or supplier has reviewed the details. Record quantities and descriptions in writing so that later enquiries do not depend on memory.
Choose a new position that suits the greenhouse
Walk the proposed location at different times and note how shade from buildings, fences or trees changes, where water collects after rain, and how exposed the spot feels to wind. A sheltered feeling does not by itself establish structural suitability; have the installer assess the position against the greenhouse instructions. Check nearby branches, roots and boundaries, and whether the site allows routine access for planting, cleaning and maintenance. Consider the route people will use to carry trays or pots, and leave room to work without stepping through planted beds. A sketch showing the greenhouse outline, nearby features and paths is more useful than a note saying it will go in the far corner.
Measure the destination against the greenhouse’s documented footprint, not a rough estimate from photographs. Allow clear space for the door and windows to operate, for the installer to reach the frame, and for everyday access around it; use the maker’s drawings to account for projections or overhangs where relevant. If the move prompts you to consider a different design, compare the T-Model Orangery greenhouse using its own dimensions and layout information rather than the outline of your existing greenhouse. Mark the intended outline on the ground and ask the installer to confirm that the position provides the necessary space before dismantling begins.

Have the new base assessed before dismantling
Record what supports the greenhouse now and what is proposed at the destination: material, outline, visible condition, changes in level, drainage and the way the frame is secured, if known. Do not assume that the greenhouse can simply be placed on the new surface or that its old base can be moved with it. Have a qualified installer compare both arrangements with the manufacturer’s instructions and identify any work required before the structure arrives. The review should include where the frame meets the base, not just the centre of the proposed footprint. This matters if the new position has a different shape, slope or surface.
Agree whether the existing base will remain, be removed or be replaced, and who is responsible for preparing it. The greenhouse should not be dismantled until the installer has confirmed that the destination can accept the model’s base and fixing arrangement, or has identified an approved alternative. Do not enlarge, drill or modify a foundation or frame to make components fit without model-specific approval. If you are also considering the Prestige greenhouse with metal foundation, assess its base requirements separately from those of the greenhouse you already own. Ask the installer to note any requirements that must be met before the move is booked, so base preparation is included in the agreed scope.
Plan access, timing and temporary storage
Walk the route from the existing position to the destination with the installer. Note gates, narrow turns, steps, soft ground, overhead obstructions and places where plants or other garden structures restrict movement. Record these limits so the installer can plan how tools and dismantled components will reach the new site; do not assume a short distance means a straightforward route for a long or fragile part. Check whether there is space to work at both ends of the move, not only room for the finished greenhouse. If water, electrical or other services are present, identify them in advance and arrange any disconnection or reconnection through an appropriately qualified person.
Plan the sequence around the plants, the installer’s availability and the readiness of the base. Decide what happens to crops, pots and movable equipment while the greenhouse is out of use, and agree a secure, protected place for components only if the installer approves it. Confirm whether parts can remain on site overnight or need to be taken away, and allow time for a site review, exact replacement components and unexpected delays. These details affect when dismantling can safely begin, even when the new position is only a short walk away.
Leave dismantling and glazing to a qualified installer
Ask the installer to explain the planned dismantling sequence and how it follows the manufacturer’s instructions. Do not treat the greenhouse as a unit to lift by its frame or glazing unless the manufacturer provides a method for that exact model and the installer approves it for the structure and route. Do not loosen structural members, prise out panes, force seized fittings or cut profiles as a DIY shortcut. Glazing can be hazardous to handle, and its removal and packing require an appropriate model-specific method and competent handling. If damage or a missing part is found during the work, pause and agree the next step rather than improvising a substitute.
Set out the qualified installer’s scope in writing: inspection before work, responsibility for dismantling and glazing, labelling, transport, protection of the garden, reassembly and a final check. Ask what must be supplied in advance and how broken or unsuitable parts will be identified and documented. Make clear who decides whether a damaged piece is discarded, replaced or held for review, and who obtains the exact part. If reuse is not appropriate and your requirements now include storage, you can evaluate the Limited Edition greenhouse with built-in storage as a separate replacement option rather than adapting the old frame.
Keep components organised during transport
Before transport, make an inventory with the installer and link every labelled container or bundle to its location in the photographs and assembly notes. Keep unlike fittings separate according to the manufacturer’s sequence if instructed, but let the installer decide what can safely be packed together. Mark parts that are damaged, missing or unsuitable for reuse so they are not mistaken for serviceable pieces later. Do not write on panes or attach labels to glazing; use a method the installer approves for identifying glass and delicate components. Record the quantity, condition and location of each section so an item can be checked at the destination.
Agree who is responsible for moving and storing components, where they will be kept, and how they will be protected from impact, moisture, dust or loss between dismantling and rebuilding. Keep the manual, drawings, spare-part records, photographs and installer’s notes together, and name one person to maintain the inventory. Have the installer confirm that all parts have arrived before reassembly begins. If something is missing, identify it from the model-specific records rather than buying a visually similar item at random.

Reassemble to the manufacturer’s instructions
Wait until the base is completed and accepted by the installer before bringing the greenhouse frame into position. Reassembly should follow the manufacturer’s sequence for the exact model, using components confirmed for it. Do not mix parts from another greenhouse because they appear to fit, or drill, cut, bend or brace the frame to overcome a mismatch without manufacturer approval. A different model needs its own instructions; if a Pyramid greenhouse is chosen instead, its assembly plan must be reviewed separately rather than adapted from the original greenhouse.
Ask the installer to list what has been reused, replaced or left out, and to record any departure from the original configuration. If the new position changes orientation, access, connections or nearby features, ask the installer to confirm that the change is covered by the maker’s instructions and professional review. Do not add improvised braces, move fixings or attach extra equipment during the rebuild without approval. A clear handover explains the finished arrangement and gives you a useful record for future parts enquiries. Have any outstanding issue and its agreed resolution recorded before the work is signed off.
Inspect the greenhouse after reassembly
Before the installer leaves, ask for a final review of the frame, glazing, openings, doors and fittings against the manufacturer’s instructions. Have the installer demonstrate normal operation of the doors and vents and point out anything that needs monitoring or a later part replacement. Compare the finished assembly with the initial photographs so missing or changed items can be resolved while the work is fresh. Keep the final parts list, product identification, manuals, installer notes and images together. Do not use the greenhouse until the installer confirms that reassembly is complete and outstanding issues have been addressed.
After reassembly, assess whether the new position meets the purpose you wrote down: access, available space, light and everyday use. Note any issue that appears during normal use and ask the installer how to handle it rather than changing a fitting yourself. If the existing greenhouse cannot be reassembled with suitable parts, or its base and layout no longer suit it, treat replacement as a separate choice rather than forcing a mismatch. When comparing an alternative such as the Bloomcabin Orangerie, return to your site measurements and access requirements and assess the product using its own details.
Frequently asked questions
Can a greenhouse be moved without dismantling it?
Not by default. Moving it intact is only an option if the manufacturer provides a method for that exact model and a qualified installer confirms it suits the structure and route. Otherwise, plan a controlled dismantling and rebuild. Do not lift or pull the greenhouse by its glazing or frame on the assumption that these parts can take the load.
Should I prepare the new base before the greenhouse is dismantled?
Yes. Have the destination and base checked first, including the intended footprint and fixing arrangement. Ask the installer to confirm that the base follows the greenhouse’s instructions and is ready for the structure. Agree who is responsible for preparing it and when; otherwise, the dismantled greenhouse may be left waiting while site work is completed.
Can I reuse the existing glass and fittings?
Possibly, but the installer must confirm this for the exact model after reviewing the condition and the manufacturer’s parts guidance. Do not assume that a pane, bolt, seal or connector is interchangeable because it looks similar. Record any damage and obtain confirmation of the exact part before buying or fitting a replacement.
What information should I give the installer?
Share the model name or code, photographs of any labels, the manual and purchase records if available, plus overall photographs of the greenhouse. Include details of the existing and proposed base, the route between the two sites, and any missing or damaged parts. Mention attachments, additions and connected services so the installer can assess the whole job.
When should I consider replacing the greenhouse instead?
Consider replacement if the frame or glazing is unsuitable for reuse, exact parts cannot be identified or sourced, or the new site and base do not suit the original model. Ask the installer to explain the risks and compare a separately specified replacement. There is no single age or number of repairs that decides whether relocation is worthwhile.
Good relocation planning is mostly done before dismantling: capture the model and its condition, secure the right instructions and spare-part identifiers, confirm the destination and base, then agree a professional work plan. Those checks preserve the option to reuse what is genuinely suitable without assuming the old base, fittings or glazing will transfer. If the installer identifies a problem, decide on an exact repair or a separately specified replacement before work resumes. The aim is not merely to put the greenhouse somewhere else, but to have a documented, properly assessed rebuild that suits its new position.
