
How Many Tomato Plants Will Fit Your Greenhouse?
Greenhouse growing guide
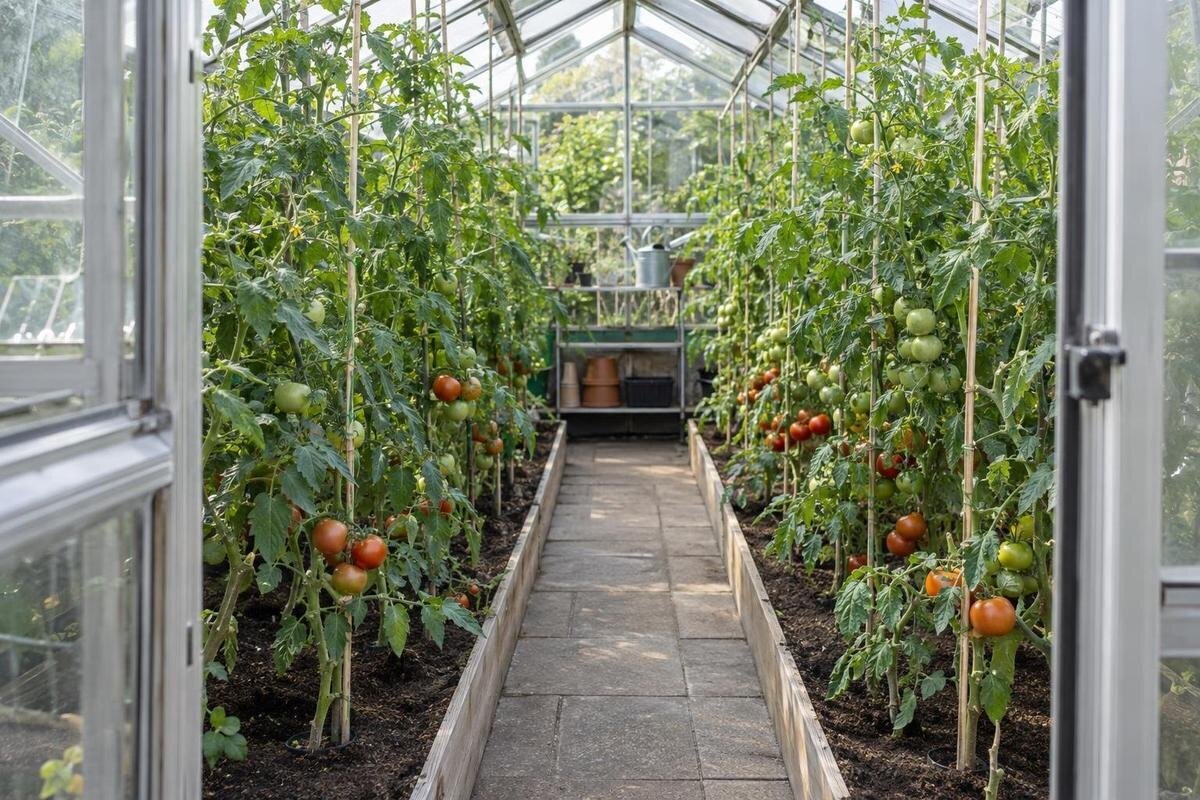
To estimate how many tomato plants will fit, work from the greenhouse’s usable internal measurements, then draw the beds and the route you need for tending them. The number changes with row length, the spacing recommended for your cultivar and whether you train tomatoes as cordons or let them grow more broadly. Floor area alone cannot show how many planting lines fit or whether every plant is reachable. A short calculation can give a sensible capacity, provided you state the layout and spacing assumptions behind it.

01
Why greenhouse floor area is not a plant count
Greenhouse floor area is a useful first comparison, but it is not a tomato capacity figure. A workable layout has to allow for beds or growing containers, a route through the greenhouse, clear space at the entrance and any bench, shelf or equipment that will remain inside. A tomato occupies more than the spot where its stem enters the soil: its foliage spreads, and you need to reach it for tying, watering, pruning and picking. Dividing the whole floor area by an assumed area per plant counts the aisle and work space as crop area, so it can overstate the number you can manage. A count that fills every corner may also leave the end plants awkward to reach.
Shape also changes the count. Two greenhouses with equal area can provide different lengths of planting row and different widths for beds plus a clear route. A long, narrow interior may suit two continuous rows, while a broader plan might allow another row but require an additional access path. The useful starting question is not how many square metres each tomato gets; it is how many planting lines fit in the clear footprint and how many plant centres fit along each line at the spacing your variety needs. A non-rectangular outline can contain floor area that does not form a usable straight row, so counting row by row shows whether width or length is the real limit.
Measure the usable space inside
Measure the greenhouse’s clear internal length and width at the level where beds or containers will sit. Use the inside boundaries that limit growing space, rather than the external footprint or a stated floor-area figure. Note posts, door frames and fixed features that interrupt a straight bed line. Record the entrance position and, if a door opens into the growing area, mark the space its movement must keep clear. For an irregular footprint, measure each usable run separately rather than forcing the outline into a rectangle. Where the interior narrows, note the narrowest usable width along a planned bed. Keep units consistent and label measurements as internal so they are not confused with a supplier’s outside dimensions.
Product area figures can help you shortlist sizes but cannot replace those measurements. The listed areas for the Limited Edition greenhouse with built-in storage range from 5.52 to 28.08 m²; that range does not tell you the clear inside length and width of the particular size you are considering. Mark built-in storage by its actual footprint on the chosen model’s plan, because that floor area is not available for tomato rows. If a dimensioned drawing is supplied, distinguish internal clear dimensions from overall dimensions; if the detail you need is not shown, ask for it rather than guessing wall thickness or subtracting an arbitrary allowance.
02
Reserve beds, paths and door clearance
Before adding tomatoes to a sketch, decide where the beds and the route through them will go. Draw a path from the entrance to each working area, including room to stand while tying vines and to reach the rear of the greenhouse. A route that ends before the final bed may leave the last plants awkward to tend, even if the floor space appears full of rows. Choose a clear width based on how you will move and work, rather than copying a universal aisle measurement. Mark a potting bench, shelf, storage or water container if it will stay in place during the growing season; each takes space from a bed or route. Also show where you can set down a harvest container without blocking access.
Draw the plan to scale using the internal measurements, then try a few bed positions on paper before committing to one. A grid or scaled sketch helps keep the path and beds in proportion. Keep each plant line within reach from the path; a bed against a boundary cannot be treated as if it can be accessed from both sides. When considering the Bloomcabin Prestige Greenhouse, use the drawing for your chosen size to locate the entrance and any fixed features. Compare your proposed aisle and bed widths with the clear internal dimensions. This turns a rough sketch into a capacity plan that you can adjust before buying.
Choose a tomato training system
Your training system affects how much room each tomato occupies and how it is supported. Many indeterminate tomatoes are trained as cordons, with a main stem guided upwards and side shoots removed where the variety and growing method call for it. This concentrates growth along a planting line, but does not justify placing stems as close as possible: foliage still fills space, and you need access to tie, inspect and pick each plant. Tall cordon plants also need more headroom than low-growing bush plants, so consider the greenhouse’s clear height as well as its floor plan before choosing a tall variety. The spacing instructions for that cultivar remain the starting point.
Many bush or determinate tomatoes spread over a broader area and may use a different support and pruning approach, so they can need more room along a row. Exact habits vary by cultivar; check the seed packet or supplier’s growing instructions for mature size and spacing rather than applying a single cordon figure to every plant. If you want several varieties, make separate rows or sections in the calculation, because their recommended spacing and growth habits may differ. Write each variety beside its row on the sketch so you can apply the right guidance. The Spacious Greenhouse is listed from 47 to 70 m², but a large stated area does not by itself settle which training system or plant count will work.

03
Count planting positions along each row
Count planting positions along each row from centre to centre, not from the edges of leaves. Let L be the usable length of a straight row, E the clearance between each row end and the nearest planting centre, and S the centre-to-centre spacing recommended for the cultivar. If L is at least 2E, a simple estimate is floor((L − 2E) ÷ S) + 1, where floor means round down to a whole number. If L is less than 2E, no position fits with those clearances. The formula assumes evenly spaced plants and a continuous planting line; the first centre sits E from one end and the last must stay at least E from the other. Use the same units throughout. Split a row interrupted by a door, support or fixed object into separate runs.
Calculate beds with different lengths or spacings separately, then add the whole positions; do not round a fraction up to fill a gap. Use spacing for the exact cultivar, not a number borrowed from a general online example, and let end clearance reflect a cross-aisle or access need. For a model in the Aluminium Greenhouses range, take L from the clear internal length on the selected size’s dimensioned plan, not from its advertised floor area. Repeat the calculation for every uninterrupted planting line. Identical rows can share one calculation, then be multiplied by their number.
Use greenhouse width to work out the rows
Use the internal width to work out how many rows fit only after reserving the aisle and fixed items. Subtract the path and any bench or storage footprint from the clear width, then see what bed widths remain. A bed’s width is not automatically enough for two rows: count the distance between row centres and consider whether plants can be reached from the aisle or from both sides. A single row in a bed may make tending simpler where one edge is against a boundary. Two lines might fit in a wider, accessible bed, but both the cultivar spacing and mature canopy need to fit without blocking the route. Keep spacing between two rows separate from spacing between plants within a row.
Sketch widths rather than deciding from the floor-area total. The Wall Greenhouse is listed from 3.69 to 14.34 m², but an area figure cannot show the clear width for a bed or tell you whether an extra row remains accessible. For any narrow or irregular interior, draw the path first and measure each remaining bed strip at floor level; a wall or angled boundary may reduce the usable strip. If you want two rows in one bed, check how you will reach both rows and account for full mature foliage, not just the stems at planting time. A row that cannot be reached is not a practical extra row.
04
Allow for the mature canopy
Tomato plants change size as they grow, so the spacing calculation must describe the mature arrangement, not only the small transplants. Leaves can project over the bed edge and stems may need room to be tied and inspected. If foliage closes over the access route, watering, pruning and harvesting become awkward; if neighbouring canopies overlap heavily, air movement through the crop may be restricted and foliage can stay damp longer, increasing disease risk. The point is not to leave arbitrary empty strips, but to use the cultivar’s spacing and training guidance and keep a reachable route alongside the mature row. Sketch the expected canopy as well as the planting centres.
Check the mature width specified for the variety and compare it with the bed and walkway on the plan. Where no width is provided, use spacing guidance from a seed or plant supplier rather than assuming every greenhouse tomato can be trained to the same narrow form. If the guidance gives both within-row and between-row spacing, allow for both. When comparing sizes in the Limited Edition Aluminium Greenhouses range, show the expected canopy on each proposed layout to see how much working clearance remains. A slightly lower count may leave each row easier to manage than planting every available strip.
Check headroom and plant-support arrangements
Floor space is only one limit: check the vertical space above every intended row. Measure from the top of the bed or container to the roof or any fittings that restrict plant growth. A tall cordon may reach the sloping roof near the eaves before the end of its growing period, while a shorter variety may suit a lower section. Use mature-height information for the cultivar rather than assuming that clearance at the centre of the greenhouse is available at the sides too. Also allow access to tie the upper growth and pick fruit without stretching into a position you cannot manage comfortably. Recheck height where roof lines or internal fittings vary.
Plan the support as well as plant spacing. Do not assume the greenhouse frame is intended to carry suspended tomato strings or crop weight; follow the manufacturer’s instructions for approved attachment points, and ask the manufacturer or a qualified installer if the intended arrangement is unclear. The T-Model Orangery Greenhouse is listed across areas from 16.52 to 30 m², but floor area cannot establish headroom or support capacity for any selected size. Use the relevant model drawing and manufacturer’s guidance before settling on a tall training system. A plant-count formula cannot resolve an uncertain support arrangement.

05
Worked example: a two-row tomato layout
Here is a purely illustrative calculation, not a product size: imagine an internal clear plan 3.6 m long by 2.4 m wide. Suppose the drawn layout has two 0.6 m side beds and a 1.2 m central aisle, with no bench or storage in the planting area. The widths add to 2.4 m, and the example assumes one straight planting line in each bed. Those measurements are arithmetic assumptions only; they do not set an ideal bed or aisle width. A real greenhouse may have different internal measurements, openings or usable bed shapes, and the path should be sized for the work and access you actually need.
Assume, for this example alone, that each row is 3.6 m long, leave 0.3 m from each end to the nearest plant centre, and use an illustrative centre-to-centre spacing of 0.6 m for a cordon cultivar. The distance between the end positions is 3.0 m, which holds five intervals of 0.6 m and therefore six plant positions per row. Two rows give an estimated total of 12. At 0.75 m spacing, the same end clearances would allow five positions per row, or 10 in all. These dimensions and spacings are illustrative only, not a universal planting recommendation or an available greenhouse size. The Pyramid Greenhouse is listed from 5.53 to 18.9 m²; test a selected model’s usable dimensions rather than assuming this layout fits.
Set a practical final number
Treat the total from the sketch as a practical upper estimate for that layout, not a target that has to be filled. Test each plant position against likely work: can you reach the stem from the path, tie it in and pick around the full canopy? Does the door remain clear, and can you still reach the furthest row? If any answer is no, remove a position, widen or relocate the route, or revise the bed plan before planting. If a bench or containers are seasonal, make a separate plan for the months when they are present rather than relying on an empty-floor drawing. You can mark proposed centres with pots or simple markers before settling on the final number.
Keep the plant count separate from a harvest forecast. The number of tomatoes you pick depends on cultivar and growing conditions as well as plant count, so a full floor plan does not guarantee a particular crop. If you grow more than one type, label the rows and record their spacing and training method; after the season, note where the canopy crowded paths or where a row stayed easy to tend. That record lets you adjust next year’s planting plan using real experience in your greenhouse, instead of repeating a maximum based on gross area. It is especially useful when changing from cordon plants to broader bush varieties.
Frequently asked questions
Is there a standard number of tomato plants per square metre?
No single figure works for every greenhouse. The same floor area can have different bed widths, paths, door clearances and row lengths. Use the clear internal measurements and the spacing recommended for your cultivar, then count the actual positions in each row. A per-square-metre figure is context, not a substitute for your own layout.
What spacing should I use between greenhouse tomatoes?
Follow the growing instructions for the cultivar and its training system, using the distance between plant centres. Cordon and bush plants can develop different canopy widths, so do not automatically apply one variety’s spacing to another. Include end clearance and access in your calculation; plant spacing is not the distance between leaf edges.
Can I grow two rows in one bed?
Possibly, if the bed width, row spacing and access make both lines manageable as the plants grow. Work out the distance between the two row centres, not just whether two stems can be planted in the soil. If the bed is reached from one side only, or foliage would close over the aisle, one row may be more practical.
Do cordon tomatoes let me fit more plants?
Not automatically. A cordon tomato is trained upwards on a support, but it still needs the cultivar’s recommended spacing, vertical clearance and room for mature foliage and fruit. Count along the row using the variety’s growing guidance; do not increase the number simply because the stems are trained upright. Bush varieties need a separate plan.
Do I count pots and grow bags differently?
Count each plant position, not each container. A container may hold one or more plants depending on its instructions and the growing method, so check the relevant guidance. Include the full container footprint in your layout and leave access around the foliage: growing in pots does not remove the need for spacing or a clear path.
An accurate answer is a count of plant positions in a layout you can actually use. Take the chosen greenhouse’s clear internal dimensions, reserve beds and routes, select each tomato’s training method and spacing, then total the whole positions row by row. Keep the final number within what you can reach and support appropriately; that will be more useful than a larger figure derived from floor area alone.
