
A Practical Start for No-Dig Greenhouse Beds
Greenhouse growing guide
Permanent no-dig beds can make greenhouse growing simpler, but a roof changes how you manage the soil: rain cannot water the bed, and access needs to follow fixed paths. A practical system starts by mapping beds and access, inspecting the soil already there and adding suitable organic matter at the surface in measured amounts. Regular moisture checks help you adjust watering as the crops grow.

01
What no-dig means under a greenhouse roof
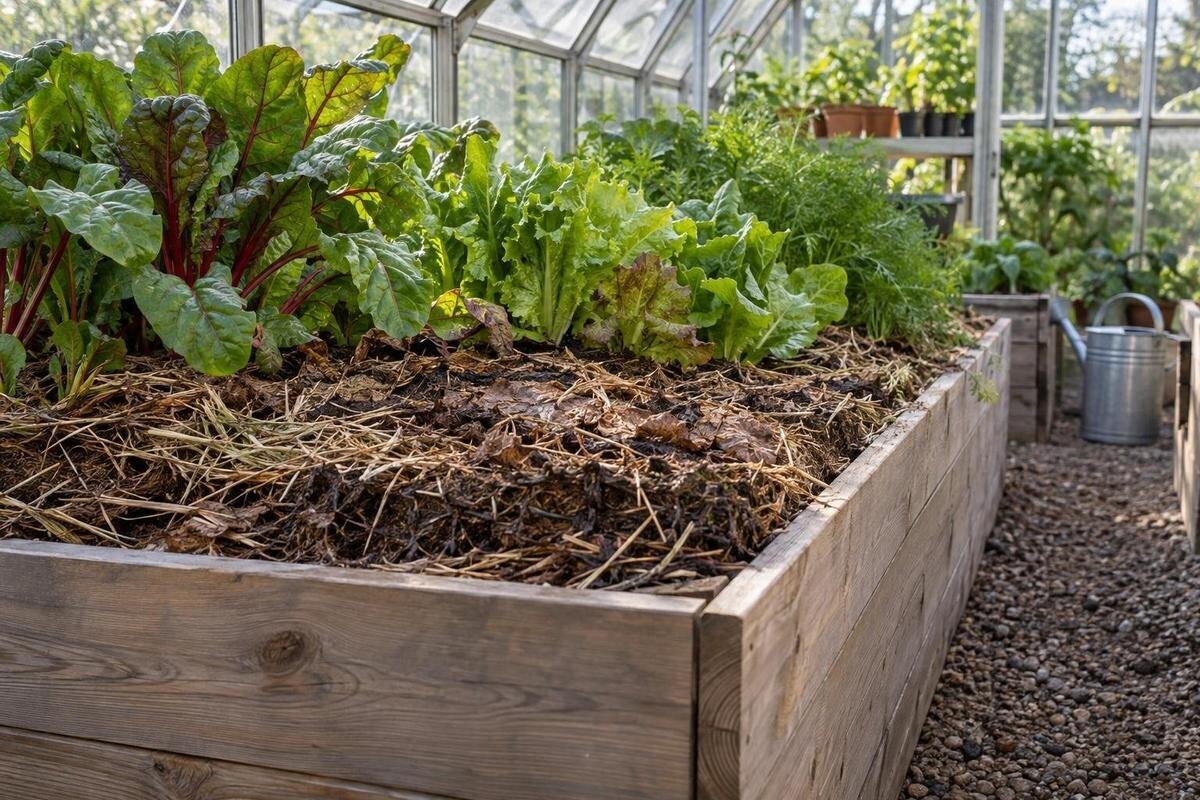
A no-dig bed is a permanent growing area where the soil is disturbed as little as practical. Rather than turning the whole bed each season or digging every new layer in, suitable organic matter is placed on the surface. Roots and soil organisms help break down and move some material into the upper soil over time. Sowing, transplanting, removing weeds and lifting a problem root still disturb small patches, so “no-dig” is a low-disturbance routine, not a claim that soil is never touched. It also does not mean a surface layer will solve every drainage or compaction problem.
Inside a greenhouse, this system works best when bed and path positions stay consistent. Repeated steps can compact growing soil much more than an occasional planting hole, so treat the walkway and bed as separate zones from the outset. A roof also stops rainfall from naturally moistening the soil; surface additions do not replace a watering plan. Decide whether you are creating an in-ground bed or filling a raised bed, since their starting conditions and material needs differ. This guide focuses on low-disturbance soil beds, rather than pots or bags of growing medium.
Plan permanent beds and paths around access
Start from clearances and reach, not from a sketch that fills every spare patch. Mark the door opening, fixed supports, access to vents or tools, and the route people will use to enter and turn. Draw bed and path edges on the ground with string or removable markers before bringing in any material. Stand on the proposed paths and reach the centre of each bed without stepping on the soil. If that is awkward, split the bed into narrower strips or make it accessible from both sides. A comfortable reach depends on your body and the layout, so test it rather than relying on a standard bed width.
Keep paths distinct from the growing area so you can tend the beds without standing on the soil. Leave room to carry a watering can or basket and to work at the plants without trapping yourself behind a row. Test the route in both directions, including the turn back towards the door, rather than checking only whether you can enter. When comparing the Limited Edition greenhouse with storage, check the chosen model’s internal dimensions and allow separately for beds, paths and stored equipment. Mark where tools or containers will stand while you work, not just where they will be put away afterwards. A layout that works when empty may become awkward once these items occupy the path. Adjust the drawing before marking permanent bed edges, and make sure there is a route to every bed.
02
Measure bed area before ordering material
Measure only the soil surface that will be planted. For a rectangular bed, multiply its length by its width; for an irregular outline, split it into simple shapes and add their areas. Leave paths, door clearances, fixed obstructions and non-growing work areas out of the total. To estimate a surface layer, multiply bed area by the chosen layer depth, keeping units consistent before converting the result to litres or bag quantities. Write down the depth alongside the area: an area measurement alone does not tell you how much material to order. Calculate separate beds individually if they will receive different amounts, then add only the quantities needed for the same material. This avoids treating every bed as though it needs an identical dressing. Keep the figures beside your layout so later additions can be compared with what is already there.
The Bloomcabin Prestige Greenhouse is listed in area options from 3.77 to 28.08 m², but overall greenhouse area is not the same as bed area. Check the dimensions for the model you are considering, then calculate the usable growing surface from your own paths and bed edges. If the outline changes, update the estimate before ordering. Too much material can encourage an unnecessarily thick layer or leave unused bags; a measured amount makes it easier to apply evenly and record what went into each bed.
Assess the soil and its growing history
Before covering or top-dressing anything, note what is already there. Look for water that remains after normal watering, a compacted surface, rubble, buried weed roots and differences between one part of the proposed bed and another. A handful of moist soil can help you notice whether it crumbles, smears or stays cloddy, but a quick touch test is only a first impression, not a diagnosis. Review crop history too: previous plant performance and past inputs may help explain where to take a soil sample or which area needs attention. Do not assume poor growth automatically means the whole bed should be removed.
Where pH or nutrient levels could affect a planned crop, use an appropriate soil test and interpret it for that crop rather than adding a general fertiliser by guesswork. If water remains in the bed, the ground is severely compacted, or past use raises a contamination concern, pause before laying a new surface on top; identify the cause or seek a suitable local soil-testing service. Adding organic matter can improve a surface but will not correct every underlying problem. When planning beds for the Spacious Greenhouse, listed in sizes from 47 to 70 m², record observations against each proposed bed on your layout. This keeps a concern in one area from becoming a reason to treat the whole greenhouse footprint in the same way.

03
Clear weeds without turning the whole bed
Remove loose rubbish, old labels and unwanted roots from the bed area first. Pull or cut small annual weeds before they set seed; deal with persistent weeds carefully, removing as much of the root or rhizome as practical rather than burying it under a thin dressing. A shallow layer can hide foliage without stopping a persistent weed from returning. If perennial weeds have spread through the proposed bed, spend time clearing them before planting instead of expecting the no-dig method to smother them. Avoid turning the entire bed while doing this: disturb only the patches needed to lift roots or remove debris.
Cardboard is optional, not a required ingredient in every no-dig bed. It may be used temporarily to suppress grass or dense annual growth under a new bed, but it is unnecessary on already clear soil and can make direct sowing harder until it breaks down. If using it, choose plain, uncoated corrugated board, remove tape and staples, overlap gaps, and wet it thoroughly because a covered greenhouse will not receive rain to soften it. Keep it off areas you need to sow immediately. When planning beds for the Classic aluminium greenhouse, mark the growing areas and paths on the chosen model’s layout first, so weed clearance is focused on the intended beds.
Add a suitable surface layer
Choose a clean, mature, suitable organic material for the crops and the soil condition, rather than assuming every compost, manure or mulch is interchangeable. Product labels, supplier information and soil-test results can help determine whether an input suits the intended use and whether it contributes nutrients as well as cover. Spread it at the surface; routine incorporation defeats the low-disturbance purpose. Keep it away from plant crowns and stems, and leave the intended sowing line or transplant spot clear when a coarse mulch would prevent good contact. A new layer should cover the soil evenly, not bury a living plant or obscure the bed edge.
No single top-up depth suits every bed. Base the amount on the current soil surface, the selected material and what the next crop needs; a layer that is too deep or nutrient-rich can be a poor match for seedlings even if the bed looks tidy. For a Wall Greenhouse, as for any greenhouse, the quantity depends on the measured soil-bed area, not the full footprint. Use the bed measurements to divide the planned quantity between the growing areas before spreading it. This makes it easier to see whether one end has received more than intended without adding extra material to make the rest match. Keep a note of the material and amount, and reassess before repeating the same addition next season.
04
Sow and transplant through the surface
Direct-sown seeds need a fine, reasonably even strip of soil with good contact around each seed. Move coarse surface mulch aside from the sowing line rather than placing small seeds into loose, chunky material; return a light cover later only if it will not obstruct emergence. Follow the seed packet’s depth and spacing for the crop, since no-dig care does not change those requirements. If the surface is lumpy, crumble only the sowing strip by hand instead of raking or digging the whole bed. Label the rows so repeated watering does not obscure your plan.
For transplants, part the surface layer, make a hole large enough for the root ball, set the plant at the depth appropriate to that crop and close the soil around it. Avoid packing mulch against the stem. Keep the access route open so transplanting and later picking do not involve stepping on beds. When considering Limited Edition Aluminium Greenhouses, use the chosen model’s dimensions to draw planting rows as well as bed edges. Check the crop’s spacing guidance, then mark the planting positions on the plan. This lets you assess whether each row can be reached from a path, rather than judging the layout by the amount of bare soil alone.
Water greenhouse beds without relying on rain
Under a permanent roof, rainfall is not part of the irrigation plan. A bed may dry at different rates along its length or beside an opening, so check more than the surface: feel the soil around the active root zone at a few points and note whether it is evenly moist, dry or waterlogged. The surface can look dry while lower soil remains moist, or look dark after a small splash without enough water reaching the roots. Adjust to the crop, its stage of growth, conditions inside the greenhouse and the soil texture, rather than following a fixed weekday schedule.
Apply water gently enough to soak the bed rather than run down a path or leave one corner saturated. A watering can, hose or irrigation line can all be used; whichever method you choose, check what reaches the soil and whether it is spread across the bed. Compare the soil near the watering point with the far end, rather than assuming both have received the same amount. Avoid repeated light wetting that only dampens the top, and avoid keeping soil constantly saturated. When planning a watering route for the T-Model Orangery Greenhouse, listed in area options from 16.52 to 30 m², draw it onto the bed-and-path plan. Include where you will stand and how you will reach the last row without crossing planted soil. The overall area alone does not show whether a watering arrangement will serve every bed.

05
Keep permanent beds productive between crops
Keep the bed in the same place, but rotate crops where your space allows instead of growing the same crop family in exactly the same patch year after year. Record what was planted and where; in a small greenhouse, swapping rows or rotating groups between beds may be more practical than a large field-style rotation. A permanent bed means the soil structure stays in place, not that one crop must stay fixed. To plan a simple crop map for a Pyramid Greenhouse, use the chosen model’s actual dimensions and mark both beds and paths before deciding where crops will go.
At harvest, healthy crop residues can often be cut at soil level, leaving roots to decay without pulling through the bed. Remove diseased foliage or pest-affected material from the growing area rather than spreading it across the surface. Clear spilled leaves and weeds from paths, and remove weeds from bed edges before they become difficult to lift. Check those edges periodically: top-dressing can drift into a walkway, while path material can be pressed into the bed. Small, regular maintenance keeps the division between growing soil and access space clear.
Review the bed and correct specific problems
After a crop cycle, compare what you observed rather than adding material automatically. Note where the soil dried first, whether water reached the full bed, how the crop grew and whether the surface layer has broken down. Use the same bed names or numbers on your crop map, watering notes and record of additions so the observations remain easy to compare. Record quantities as well as material names; “compost added” is less useful next season than a note of how much went onto a particular bed. Distinguish an observation, such as one row drying sooner, from an assumed cause that you have not yet investigated. This helps you respond to a repeated issue rather than to one poor plant. The surface may settle as organic matter decomposes; that alone is not a reason to add a thick layer. Recheck the soil and planned crop before choosing the next addition.
If water repeatedly remains on the surface, roots encounter a hard layer or crops struggle in the same spot, identify the cause before digging or adding more. A targeted soil test or limited loosening may be appropriate; low disturbance is a method, not a reason to ignore evidence. Where a serious drainage or contamination concern remains, seek advice from a suitable soil professional. Keep interventions focused, then observe the result through the next crop cycle. That approach preserves the useful parts of a permanent bed while allowing specific problems to be addressed.
Frequently asked questions
Does no-dig mean I must never loosen the soil?
No. Planting holes, careful weed removal and small repairs are compatible with low-disturbance care. The aim is to avoid routine turning of the whole bed. If soil is persistently compacted, investigate the cause and address the affected area rather than digging everything by default.
Should I cover every new bed with cardboard?
No. Cardboard is an optional, temporary way to suppress some existing growth, not a standard layer for clean soil. Use plain corrugated board if it is needed, remove tape and staples, wet it well under cover and leave direct-sowing areas uncovered.
How much organic matter should I add when starting?
There is no single amount for every bed. Measure the growing area, choose material suited to the soil and planned crops, and use relevant supplier information or soil-test results. Avoid adding a thick layer simply to raise the bed surface.
Can I sow seeds straight into a no-dig bed?
Yes, if the sowing strip is fine enough for the seed to make good contact with soil. Move coarse mulch aside, follow the crop’s sowing instructions and crumble only the row by hand if needed. Transplants can be planted through a small opening in the surface layer.
How often should I water beds under a greenhouse roof?
Use the moisture around the crop’s roots as your guide, not a fixed weekly schedule. Rain will not reach the bed through the roof, and drying rates can vary across the greenhouse. Water evenly, then check that the soil is moist without remaining saturated.
A useful no-dig greenhouse bed is built around steady access, a clear understanding of the soil already present and measured surface additions suited to the next crop. Keep the beds permanent, reserve paths for walking and check moisture below the surface because rain cannot reach the growing area. With notes on watering, crops and materials, you can make small adjustments over time instead of routinely turning or replacing the soil.
