
Hardening Off Greenhouse Seedlings: A Weather-Led Plan
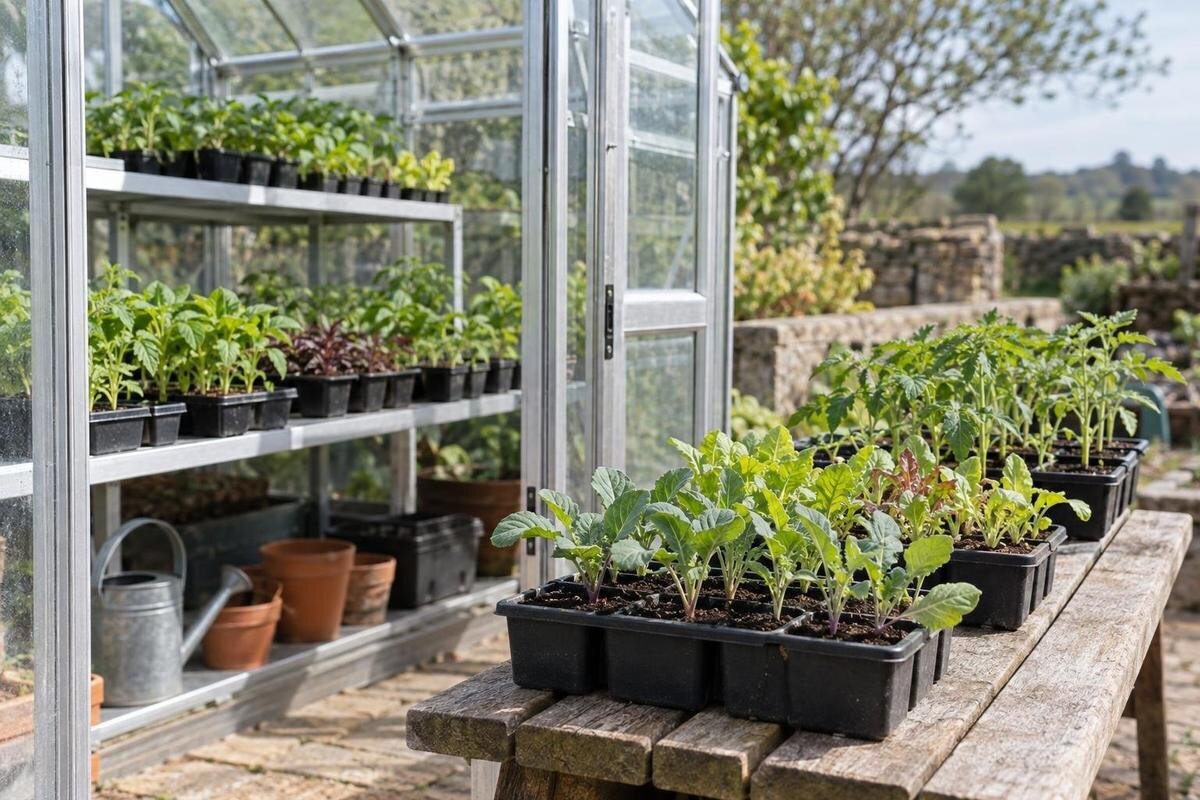
Greenhouse growing guide
Greenhouse-raised seedlings have usually grown with less direct sun, moving air and temperature variation than they will meet outdoors. Moving them straight into a bed can expose them to several stresses at once, even when the day feels mild. A sound hardening-off plan is not a countdown: it responds to the crop, each plant’s condition and the forecast for the next exposure. Increase their exposure to outdoor conditions in stages, and plant out only when both seedlings and weather are ready.

Why greenhouse seedlings need hardening off
Hardening off is the gradual acclimatisation of seedlings to outdoor light, wind and temperature changes before planting out. A greenhouse or another protected growing space usually reduces exposure to some of these conditions; outside, stronger sun can heat leaves, moving air can increase water loss, and a cool night can follow a warm day. A seedling that looks sturdy indoors is not automatically prepared for all three. The purpose is to make the change less abrupt and let you assess the response while each tray can still be moved back under shelter. It is a transition, not a treatment for poor growth.
Treat each outing as a small test rather than an endurance exercise. The plant is adjusting to a particular combination of conditions, not becoming resistant to every kind of weather. A seedling that handled a bright, calm morning may still need protection from a gusty afternoon or a colder night. Hardening off also does not change a crop’s basic cold tolerance: tender plants remain tender. Use the crop’s sowing or transplant guidance to understand its limits, then compare them with the intended planting place. This is why a weather-led routine is more reliable than applying the same number of days to every crop, batch or season.
Check seedling health before starting
Check the plants before checking the calendar. A suitable seedling is usually actively growing, has true leaves as well as seed leaves, and has a stem that supports its foliage without leaning or collapsing. Its roots should hold the growing medium together when you lift the plug, but should not be packed into a dense, circling mass. Look at both sides of the leaves and at the growing tips for pests or unusual spots. These signs do not certify a plant as problem-free, but they help you distinguish normal adjustment from a seedling that already needs attention. Hardening off is not a remedy for disease, poor roots or stunted growth.
Do not begin while trays are bone-dry, waterlogged, freshly divided or still recovering from repotting. Keep the medium evenly moist, let excess water drain, and label mixed trays so you can judge the needs of each crop separately. Check the seed packet or a reliable crop-specific growing guide for special transplant requirements, especially for crops that dislike root disturbance or cool conditions. If you are planning a greenhouse propagation area, sketch your actual tray sizes and a route to reach them before comparing floor area: Bloomcabin Oasis Pyramid Greenhouse is listed from 5.53 to 18.9 m², but that figure does not tell you how many trays or benches will fit.
Let the forecast set each exposure
Check the forecast before each planned exposure, not just the season or one daytime maximum. Consider the hours of strong sun or cloud, wind and gusts, rain, and the overnight minimum as separate factors. A morning can be calm while the afternoon turns windy; a mild daytime reading says little about the night that follows. Conditions at a sheltered corner of the garden may also differ from the nearest weather station. Recheck before taking trays out, and avoid beginning during a spell of extreme heat, strong wind, heavy rain or a cold snap.
Choose a reasonably settled spell so you can repeat gentle exposure and increase it only when the seedlings cope. Perfect weather is not required: a cloudy, calm period can be a useful first test, but cloud does not cancel wind or low temperatures. If the next day looks much harsher, hold at the current stage or keep trays sheltered rather than adding a new challenge. Keep brief notes of conditions and plant response. If you are comparing Aluminium Greenhouses with Storage – Limited Edition, consider how the storage layout would fit this routine. Plan where supplies would go and where trays would stand, keeping the route between their protected position and the outdoor staging area clear.
Begin in a sheltered, bright place
Begin outdoors in bright shade or gentle, filtered light, away from a gusty passage and from surfaces that become noticeably hot in sunshine. Choose a place where you can watch the tray and move it easily; a covered porch or sheltered corner may work if it still receives open air rather than remaining indoors. Start with a short spell whose length reflects the day: brighter, warmer and breezier weather calls for less exposure than calm, overcast conditions. Do not leave the first outing unattended through a sudden change in weather, and check that the tray is not sitting in pooled water.
If foliage remains upright and looks normal afterwards, make the next outing a little longer or slightly brighter, rather than changing every condition at once. Gradually extend the part of the day outdoors, then introduce more direct light and air movement according to the forecast and crop. Returning seedlings to their usual protected place between outings is sensible when the weather shifts; it does not undo progress. Measure the route from the greenhouse to the outdoor staging point before settling a growing-space layout. For a model comparison, Bloomcabin Prestige Greenhouse is listed from 3.77 to 28.08 m², but check the exact configuration and access dimensions against your trays.

Increase direct sun gradually
Bright outdoor light can be much stronger than light filtered through a greenhouse, even if the air does not feel hot. Begin in bright shade or with gentle early or late sun, then let the plants receive stronger direct light in small increases. Avoid making the first long exposure at the brightest part of the day, particularly when the forecast is clear and leaves are not used to full sun. Shade from a tree or building can help, but observe how its position changes; shade at one time may disappear later. Keep trays where they can be shifted rather than relying on one fixed spot.
Look for pale or bleached patches, dry-looking areas on the leaves most exposed to sun, or a sudden loss of firmness. These can indicate excessive exposure, though wilting can also follow a dry plug, heat or root problems. Check the medium and the timing before deciding what happened. Return a sun-stressed tray to bright shade, keep it properly watered if the mix is dry, and wait for it to recover before increasing light again. A greenhouse footprint cannot tell you where outdoor shade falls; if comparing a larger structure, Bloomcabin Orangerie Spacious Greenhouse is listed from 47 to 70 m², so mark the intended footprint and map the nearby planting-out area’s sun separately.
Account for wind and rain
Wind adds a different challenge from sunlight. It moves leaves and stems, can damage tender growth, and dries small cells and pots faster than still air. Start in a sheltered place with light air movement, not in a narrow gap that channels gusts, and check that trays cannot tip. Once seedlings stand well and the medium stays moist through an outing, increase exposure to ordinary garden breezes gradually. Do not use one windy day as a test of readiness; a stronger gust can cause damage without helping the plants adjust.
Rain needs judgement too. Gentle showers may simply wet the medium, while heavy rain can saturate small containers, flatten foliage or wash growing mix from plugs. Check drainage after rain and lift trays out of standing water; if a downpour or squall is forecast, keep them under shelter and resume later. A cover should not turn a fresh-air outing into a sealed, overheated space. Include the outdoor staging place when planning a greenhouse layout, so you can assess its exposure to wind and rain separately. Aluminium Classic Greenhouse models are listed from 3.77 to 28.08 m²; compare the available sizes alongside the space you need for handling trays and moving them back under shelter.
Treat cool nights separately
Do not treat night exposure as a minor extension of a warm day. Temperatures can fall after sunset, and different crops have very different limits: hardy salad plants may accept cooler conditions than tender summer crops. Use species-specific sowing and transplant advice to judge the minimum the seedlings can tolerate; there is no single night temperature that suits every tray. A greenhouse may alter the conditions around plants, but it does not guarantee a particular minimum. If the forecast drops below the crop’s guidance, keep seedlings protected rather than leaving them outside to complete a timetable.
Introduce nights outdoors only after the plants have handled their daytime conditions and the forecast is within the range recommended for that crop. If night temperatures are uncertain, a thermometer placed at seedling height can help you record what happens in the protected growing area, though the reading is useful only for that location. If you are comparing a model such as Bloomcabin Wall Greenhouse, include temperature monitoring in your plans for the growing space. Neither the model name nor its listed area establishes a night-time minimum. Use the conditions you record alongside the forecast and crop guidance to decide whether seedlings should remain protected overnight.
Keep watering steady as exposure rises
As outdoor exposure increases, pots often lose water faster in sun and wind, while reduced light or cooler weather slows drying. Check the growing mix rather than watering by habit: feel the surface and, where possible, the weight of a cell or pot, because a dry surface can conceal moisture below and a damp surface can mask a dry root ball. Aim for evenly moist mix and good drainage, not a permanently saturated tray. Small plugs have little reserve, so inspect them more often on warm or breezy days and before a longer outing.
Water a dry tray before it goes out, giving excess a chance to drain; do not deliberately let seedlings wilt to make them tougher. Avoid changing fertiliser, repotting and making a major jump in exposure at the same time, since several changes make the cause of a reaction harder to identify. For greenhouse planning, sketch how you will reach each tray with water and remove drained water without taking an awkward route between pots. When comparing Limited Edition Aluminium Greenhouses, check the exact configuration against your intended bench arrangement. Consider access to trays at the back as well as those nearest the aisle, since all will need regular moisture checks.

Pause when seedlings show stress
Read the whole plant and the timing, not one leaf in isolation. Temporary drooping after a warm spell may point to heat or a thirsty plug; bleached or papery patches on the sun-facing side suggest excessive light; bent stems or damaged leaves after a gust point to wind stress. Persistent wilting, spreading spots, or a plant that fails to recover after conditions improve deserves a closer check for root, water or disease problems. These patterns are clues, not a certain diagnosis. Note what changed immediately before the symptom—direct sun, gusts, rain or a low night—so you can adjust the next outing rather than guessing.
At the first sign of significant stress, move trays to bright shelter and check the mix, roots and leaves. Correct a dry medium, but do not add water automatically if the root zone is already wet. Wait until plants have recovered before trying again, and return to the last exposure they tolerated rather than repeating the difficult conditions. Allow enough space in the greenhouse or sheltered holding area to bring a whole tray back inside, even while other seedlings remain there. If comparing T-Model Orangery Greenhouse, check the exact option and bench layout: its listed 16.52 to 30 m² range is floor area, not guaranteed usable bench surface.
Plant out when the crop and weather are ready
Plant out when seedlings tolerate the outdoor light and ordinary air movement they will meet, and when the near-term forecast suits the crop. The bed or container should be ready before the tray leaves shelter, so roots are not left exposed while you finish preparing. Choose a calm, mild or overcast period where possible; avoid moving a recently hardened tray into severe heat, strong wind or a cold night simply because a planned date has arrived. Follow the crop’s own advice for spacing, planting depth and minimum temperatures: hardening off does not replace those requirements.
Water the seedlings and planting area as appropriate for the crop, keep the root plug intact, and settle each plant without compressing the surrounding soil excessively. After planting, continue to watch for wilting, sun scorch, wind damage and drying soil; newly planted roots are still adjusting. Use temporary shade or wind protection if conditions warrant it, making sure it does not trap excessive heat, and remove it gradually when plants cope. A calm first day outside is not proof that a new bed will stay gentle, so keep the forecast in view while the plants establish.
Frequently asked questions
How long should hardening off take?
There is no fixed duration that suits every crop or spell of weather. The process may need to pause when conditions become harsher, and the pace depends on how seedlings respond to sun, wind and cooler temperatures. Follow crop-specific guidance and move on when plants tolerate the conditions they are likely to meet outside.
Can I start hardening off on a cloudy day?
A calm, cloudy period can be gentler than strong direct sun, so it may suit an early exposure. Still check wind, rain and the overnight forecast. Cloud can clear, and it does not make a cold or gusty day suitable for every seedling.
Should seedlings stay outside overnight?
Only when the crop can tolerate the forecast minimum and the plants have already coped with their daytime exposure. A warm afternoon does not guarantee a mild night. Use crop-specific guidance rather than applying one temperature limit to every tray.
What should I do if seedlings wilt during hardening off?
Move the tray to bright shelter and check the growing medium before watering: wilting can follow dry mix, heat, root problems or other stress. Wait for the seedlings to recover, then resume with the level of exposure they previously tolerated. Persistent or worsening symptoms need closer investigation.
Can I harden off seedlings during very hot or windy weather?
It is usually better to wait for a more manageable spell or keep seedlings protected than to use severe heat or gusts as a shortcut. If conditions change suddenly, shorten or pause the exposure. Gradual adjustment is the aim, not testing how much stress a plant can withstand.
The useful measure of progress is not the number of days outdoors but what each seedling has already tolerated. Let crop guidance set the limits, let the forecast shape each outing, and let the plants’ response decide whether to advance or pause. That makes planting out the final, manageable step of acclimatisation rather than a sudden change from greenhouse to garden.
