
Pricking Out Seedlings: When They Need Larger Pots
Propagation guide
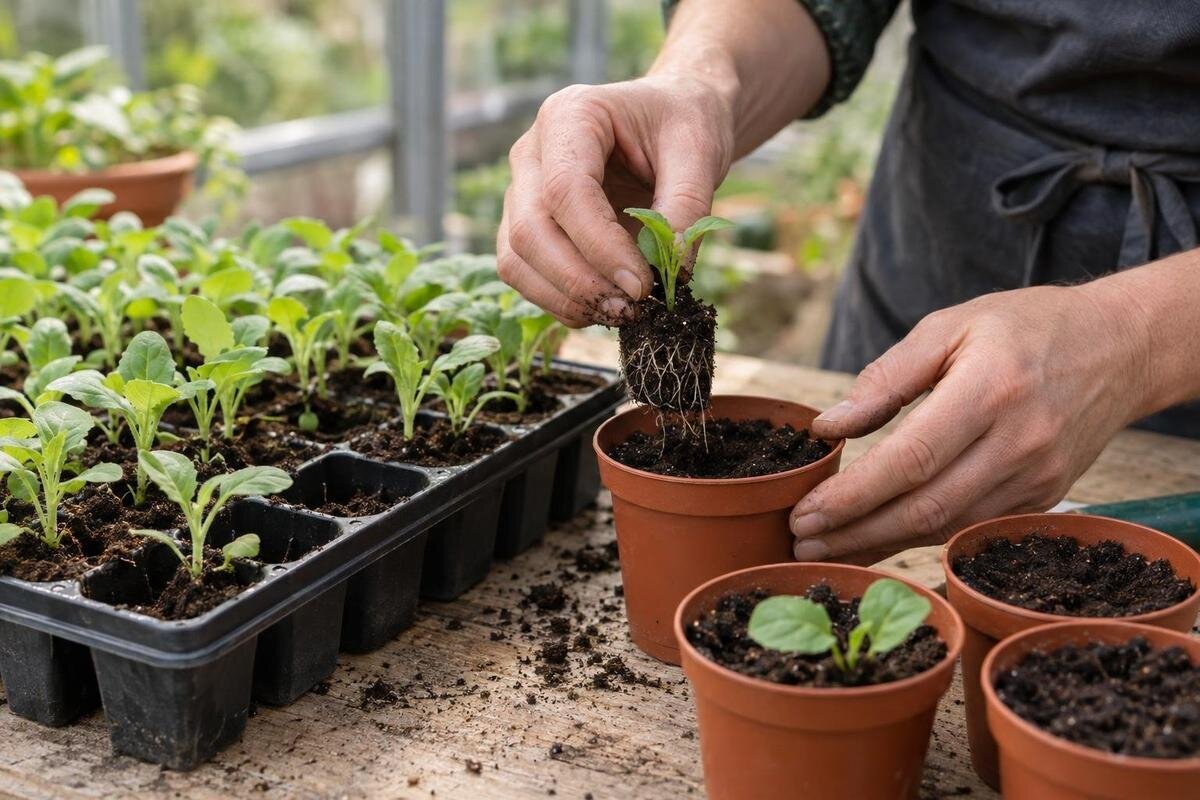
Pricking out is the move from a shared seed tray into separate cells or small pots. The right moment is not a fixed number of days after sowing: look at the leaves, the seedlings’ strength and how easily their roots can be separated. Move too early and the plants may be difficult to handle; wait too long and neighbouring roots can become entangled. The aim is to give each selected seedling room while disturbing its roots as little as possible. This guide explains how to recognise readiness, transfer seedlings and care for them afterwards.

01
What pricking out involves
Pricking out means separating young seedlings that were sown together and setting each into its own cell or small pot. It is useful when several seedlings share a tray and need room to develop separately. It is not the same as thinning: thinning removes extras where they are growing, whereas pricking out keeps selected plants and gives them an individual container. Nor is it the final move outdoors or into a permanent growing position; that later transplant has its own timing and acclimatisation steps. Seedlings already in individual cells do not need pricking out simply because they have grown a little; they may need potting on later, once their current container becomes restrictive. Choose only as many plants as you can sensibly grow on.
The method suits plants that can tolerate some root handling, but crops vary. Check the seed packet or a reliable crop-specific guide if a plant is known to resent root disturbance, or if direct sowing into individual pots is recommended. Label each batch before you start; similar seedlings can be difficult to identify once separated. If batch size is prompting greenhouse comparisons, the Spacious Greenhouse is listed in sizes from 47 to 70 m², but its stated floor area is not a measure of bench space or working clearance. Sketch the trays and access route before judging how much room is useful.
Leaf development and crowding
Before making a move, distinguish cotyledons—the first seed leaves—from true leaves that appear afterwards. Cotyledons are often simpler in shape; later leaves begin to show features associated with the plant. Many seedlings are easier to handle once the first true leaves have opened, because the seedling is larger than it was at emergence. Treat this as a useful stage, not a rule that every species must meet on the same day. A delicate plant with one true leaf may still be too small, while a robust one may be ready sooner than a calendar suggests. Use the seed packet or a guide to identify crop-specific exceptions.
Look across the whole tray as well as at one plant. If neighbouring leaves are touching or seedlings are beginning to shade one another, separation may soon become harder; do not wait for a particular week number if the plants are crowded. But leaf contact alone does not prove every seedling is strong enough to lift. Check a representative plant near an edge rather than assuming the whole row is ready. When comparing sizes in the Classic aluminium greenhouse range, listed from 3.77 to 28.08 m², allow room to turn trays so you can inspect the seedlings at the back as well as those nearest you.
02
Check roots without disturbing every seedling
Roots offer another clue, but you do not need to unearth every seedling. Fine roots visible at a drainage hole or tray edge show that growth has reached the bottom or sides. A small plug that holds together when gently lifted is usually easier to move than one that crumbles, provided it is not saturated. If roots from neighbouring seedlings are woven together or form a dense mat, separation is likely to become harder if you wait. Roots do not need to be tightly pot-bound before pricking out; the aim is to move them before handling becomes difficult. Root visibility alone is not an instruction to transplant: consider leaf stage, strength and crop preferences together.
Check one plant carefully by loosening the medium around it with a dibber or label, then inspect the root ball and return it if it is not ready. Avoid tugging by the stem or testing the same plant repeatedly, because fine roots tear easily. Roots that look discoloured, or a seedling that is already failing, call for a broader health check; a bigger pot will not correct every problem. The Wall Greenhouse range is listed from 3.69 to 14.34 m². When considering a layout, make sure you can reach a tray’s edge and have a clear place to examine a sample without mixing it with another batch.
When a seedling needs more time
Do not prick out just because the calendar says seedlings should be ready. Cotyledons may be open while the stem and roots remain too fine to handle, especially if growth is uneven. A plant that has only just emerged, has a very small root system or cannot be lifted with a small clump of growing medium is safer left in place for now. Give it a little time and check again rather than trying to compensate for a rough move with extra watering or feeding. Where crop-specific instructions recommend another method or stage, follow those rather than a generic timetable. Avoid disturbing the same seedling repeatedly just to test progress.
Consider the condition of crowded seedlings before separating them. If they are leaning into one another, separating promptly may reduce competition, but weak, collapsed or pinched stems are not simply a sign that they need larger pots; investigate the cause before moving them. Keep plants that are not yet ready in their tray, and move only seedlings that can be handled and identified clearly. The Limited Edition Aluminium Greenhouses are listed in areas from 3.77 to 28.08 m². For batches developing at different rates, plan separate places for the original seed trays and newly potted plants so neither group becomes difficult to inspect.

03
Choose pots and compost to suit the roots
Use clean individual pots or cell inserts with drainage holes; a seedling that has been lifted should not sit in a container where water cannot escape. Choose a pot large enough for roots to spread and for compost to hold moisture, but not so oversized that a small root ball sits in a large volume of wet compost for long periods. There is no single diameter for every crop: root size, expected time before potting on and the plant’s normal habit all affect the choice. Follow crop-specific instructions when they name a container size or type. Check that the new pots are stable enough not to tip as you handle them.
Use a fine-textured compost intended for seedlings or young plants; it is easier to position around delicate roots than dense garden soil or a coarse mix. Fill containers loosely, moisten the compost evenly before planting and leave room to water without washing it over the rim. Prepare a few spare pots rather than forcing a seedling into one that is too small. If comparing options such as the T-Model Orangery Greenhouse, listed from 16.52 to 30 m², include space for pots and compost in your plan. These supplies need a place alongside the plants, rather than occupying the surface needed for lifting and replanting.
Prepare the work area before lifting
Gather labelled pots, a dibber or narrow plant label, clean trays and water before opening the seed tray. If the compost in the original tray is very dry, it crumbles and roots can be exposed; if it is saturated, seedlings are harder to separate and stems may slip. Aim for evenly moist, workable medium. Fill and firm the new pots lightly, make planting holes in advance, and decide where lifted plants will wait while you work. Handle a manageable batch at a time so the remaining seedlings do not sit exposed while you search for equipment or another container.
Work on a stable, clean surface with enough light to distinguish leaves and enough room to set plants down briefly without mixing labels. Clean tools and surfaces between batches, especially if any seedling shows signs of disease. Keep lifted roots protected from drying air and do not leave seedlings in direct sun, strong draughts or hot conditions while you prepare the next pot. The Pyramid Greenhouse is listed in areas from 5.53 to 18.9 m². When planning a work surface within the chosen footprint, leave enough aisle clearance to carry trays without having to move pots out of the way.
04
Lift and replant each seedling gently
Loosen compost underneath and around a seedling with a dibber, lifting from below instead of pulling upwards. Hold it lightly by a sturdy leaf, often a cotyledon, rather than squeezing the thin stem. If the leaves are too small to hold safely, use the dibber to support the compost around the roots. Separate roots patiently when they come away readily; do not yank a knot apart. In a crowded tray, loosen a small section at a time so you can see which roots belong to which seedling. If roots are firmly interwoven, preserve as many as possible instead of forcing a perfectly clean separation.
Guide roots down into the prepared hole without sharply folding them, then draw compost around them and press lightly so the seedling stands upright. Set it at a depth appropriate to the crop, generally keeping the growing point and leaves above the compost; follow crop-specific advice where planting depth differs. Do not bury a stem just to make a weak plant look shorter. Return seedlings promptly to a labelled tray. If comparing the Aluminium Greenhouses with Storage – Limited Edition range, listed from 5.52 to 28.08 m², plan where that tray will go before lifting plants, so you can replant each one without stopping to rearrange the work area.
Water and allow seedlings to recover
After planting, water gently around the base to settle compost against the roots, then allow excess to drain. Use a fine rose or small stream that will not dislodge the seedling; keep the root zone moist but not waterlogged, and do not leave pots sitting in standing water. If the old tray was already wet, check the new compost before adding more water. Judge moisture in the pot rather than following a fixed timetable: drying varies with container size, medium, airflow and surrounding conditions. The aim is to settle the compost around the roots without saturating it.
Keep plants in a bright, sheltered position suited to the crop while roots re-establish, avoiding sudden exposure to harsh conditions. A little temporary droop can follow root disturbance, but persistent wilting, a loose plant or stems that darken and collapse call for checks of moisture, depth and root damage; adding water without checking may worsen a saturated pot. The Bloomcabin Prestige Greenhouse is listed in areas from 3.77 to 28.08 m². In your intended layout, allow space between the newly potted plants so their leaves are not crushed and you can inspect each one during recovery without repeatedly moving its neighbours.

05
Know when potting on comes next
Pricking out separates seedlings from a shared tray; potting on moves a plant from its individual container into a larger one. Seedlings sown in separate cells may therefore need potting on without ever needing to be pricked out. For potting on, combine signs: roots filling the compost or appearing at drainage holes, a root ball that holds together, and a plant that is otherwise growing well. One root at a hole is not enough to show that the container is too small. If a seedling is healthy and there is still room for its roots, leave it undisturbed rather than changing pots repeatedly.
Planting out into a final bed or larger growing position is another stage. Seedlings raised under cover may need gradual hardening off before they face outdoor conditions, but the method and timing depend on crop and local conditions; follow reliable crop guidance rather than a fixed interval. Record the date, leaf stage and any delay or recovery for each batch. These notes help you compare future batches and distinguish a seedling that needs more root room from one that simply develops more slowly.
If seedlings struggle after the move
If a seedling wilts soon after pricking out, check whether compost around its roots is too dry or saturated, whether roots were exposed too long, and whether it was planted too high or too deeply. Firm the mix gently if it is loose, but avoid repeated handling. Growth may pause while roots settle; look for the direction of change rather than expecting a new leaf immediately. Make one sensible adjustment at a time so you can see what helped. A plant that looked weak before the move may need a different assessment from one that declines afterwards.
It may be more practical to discard one badly damaged seedling than to keep rehandling it, but a single wilted leaf is not enough to diagnose disease. If stems are constricted at compost level, several seedlings collapse, or symptoms continue after basic moisture and handling checks, separate affected material and seek advice from a trusted horticultural source. For the next batch, change one part of the process—perhaps wait for stronger true leaves, moisten the tray before lifting or prepare pots in advance—and record the result. A simple note about what changed makes improvement easier to recognise.
Frequently asked questions
How do I know when seedlings are ready to prick out?
Look for opened true leaves, a seedling sturdy enough to lift and roots that can be separated without force. Many seedlings reach this stage after their first true leaves appear, but crop guidance and actual growth matter more than a set number of days.
What counts as a true leaf?
True leaves develop after the first seed leaves, called cotyledons. They often begin to show the shape associated with the plant. Check a crop guide or seed packet if you are unsure, as cotyledons and early true leaves can look similar on some seedlings.
Can I prick out seedlings that have only cotyledons?
Usually it is easier to wait until true leaves have opened and the seedlings are large enough to handle. If a crop-specific guide recommends an earlier move, follow it; otherwise, avoid lifting tiny seedlings whose stems and roots are difficult to manage.
Should every seedling in a tray be moved?
No. Move the seedlings you intend to grow on and can handle safely. Leave plants that are not ready in the tray, and keep them clearly labelled. If a tray contains more seedlings than you need, select healthy plants rather than trying to pot up every one.
Do seedlings need watering straight after pricking out?
A gentle watering usually helps settle compost around the roots, but check how moist the pot already is. Water enough to moisten the root area, then let excess drain away. Avoid leaving pots in standing water or adding more just because a seedling looks briefly unsettled.
Readiness is a combination of opened true leaves, a seedling sturdy enough to lift and roots that can be separated without force. Move only the plants that are ready, prepare their pots first and give them time to settle afterwards. A tray offers useful clues, but the seedling’s development—not the calendar—should guide the decision.
