
Growing Ranunculus in a Greenhouse in Malta
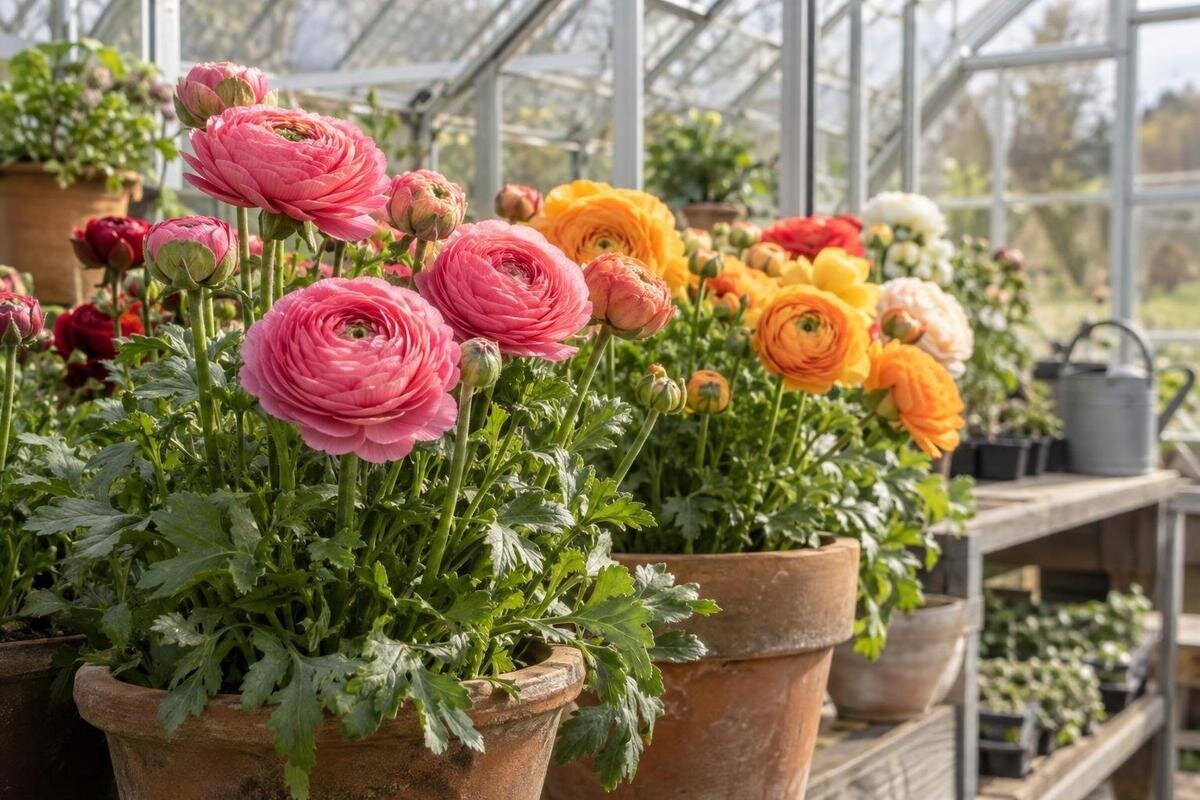
Ranunculus growing guide
Ranunculus are cool-season flowers, so in Malta a greenhouse is most useful as a sheltered, ventilated growing space. Plant after summer heat has eased, start with healthy corms and give the roots free-draining medium. Bright light matters, but a closed greenhouse can warm quickly even on a clear winter day. Careful temperature checks, measured watering and steady airflow help protect the crop from heat and disease.

Ranunculus need a cool growing season
Ranunculus asiaticus is a cool-season crop. Its roots and leaves establish in mild conditions, and the plants flower before rising temperatures bring them towards dormancy. A useful planning reference is about 10–15°C by day and 5–10°C overnight. Treat these as working bands rather than strict thresholds: cultivar, growth stage, airflow and the thermometer’s position all affect the reading. The aim is steady, cool growth, not a perfectly fixed setting. Excessive warmth can shorten stems or the flowering period, so extra greenhouse heat is usually something to manage rather than a benefit to seek.
In Malta, autumn is generally the natural planting window once peak summer heat has eased, with flowering often taking place in winter or spring depending on cultivar and conditions. A calendar date alone is a poor cue: a bed that is still warm can slow rooting and stress recently hydrated corms. Place a maximum–minimum thermometer near the crop and note both sunny-afternoon peaks and overnight lows over several days. If daytime readings rise into the low 20s °C repeatedly, ventilate and consider temporary shade. A small trial batch can show whether your particular site cools enough before you plant all the corms.
Choose a bright site and check winter shade
Ranunculus need bright light for compact growth and good flowers. Full sun is the usual position, and six or more hours of direct light is a helpful benchmark for a bright site; it does not guarantee the same result under every greenhouse covering. Glazing, frame members, nearby walls and trees reduce the light reaching plants, with winter shadows especially relevant during the growing season. Check the proposed bed or bench at different times of day before the greenhouse is full. If sunlight reaches only one end, reserve that brighter area for ranunculus instead of assuming every part of the floor receives equal light.
A bright day in Malta can warm a greenhouse quickly, so plan how excess heat and moisture will escape. Ventilate before plants overheat rather than waiting for wilting, and use removable shade only when readings justify it; permanent heavy shade can leave ranunculus short of light. If comparing a Wall Greenhouse, check how the adjoining wall affects winter sun and whether the planned position allows practical access and air exchange. The product name does not establish the light at your site, so assess the actual wall, openings and surrounding shade.
Allow space for beds, pots and paths
Plan around usable growing area, not the greenhouse footprint alone. Deduct door clearance, paths, a staging bench and any area set aside for supplies before estimating how many corms to plant. A bed provides a continuous root zone; pots are easier to move and label, but each needs drainage and regular attention. Leave room to reach every row without brushing buds or stepping on soil beside the plants. Include space for mature leaves, harvest buckets and removal of unhealthy plants. A crowded layout makes it harder to water evenly and maintain good air movement around the crop.
Decide whether you want a few pots for home colour, a dedicated cut-flower bed or several batches planted at intervals; each uses benches and paths differently. The Spacious Greenhouse listing covers sizes from 47 to 70 m². Compare that stated range with your actual plan rather than treating the entire floor as planting space. Measure the beds, aisle and reach to the far end, then check that doors and ventilation openings remain accessible. A larger structure still needs sensible crop density, temperature management and irrigation. Keep unused areas clean instead of filling them simply because space is available.
Select sound corms and confirm the cultivar
Ranunculus are usually sold as dormant corms, often called claws because of their finger-like roots. Choose firm, dry pieces without soft areas, wet dark marks, visible mould or obvious mechanical damage. Confirm the cultivar, flower colour, expected flowering period and any supplier notes on planting depth or pre-treatment; cultivars can differ in timing and plant habit. Inspecting the corms before soaking helps prevent questionable pieces from sharing a tray with healthy stock. Keep each cultivar labelled from the moment it arrives, since similar-looking dormant material can be difficult to identify after planting.
Until planting, keep corms labelled and in the dry, ventilated conditions recommended by the supplier. Avoid leaving them in damp potting mix, a sealed wet container or a hot shed. If you want a place for routine tools and labels, the listing for Aluminium Greenhouses with Storage – Limited Edition identifies built-in storage. Check how it is arranged before deciding what to keep there, and do not assume that this storage is suitable for dormant ranunculus. Corms waiting to be planted or saved for another season need conditions appropriate to planting material, not just a convenient shelf.

Rehydrate and pre-sprout corms with care
Dry corms are often rehydrated before planting, but follow the supplier’s directions for the batch you have. A brief soak—commonly around three to four hours in clean, cool-to-room-temperature water—is a useful starting point for dry material. Leaving corms submerged overnight can deprive damaged tissue of air and encourage breakdown. Drain them thoroughly and plant promptly. If corms arrive pre-hydrated, have active shoots or look soft, do not apply a generic soaking routine; check the supplier’s guidance and keep suspect pieces away from healthy stock.
Pre-sprouting is optional, not a requirement. It lets you see which corms have started growing and can help a batch establish more evenly, but crowded roots are easily damaged during planting. Set corms claws down in a shallow, clean tray with barely moist, free-draining material, and keep it in a cool, bright place out of harsh sun. Check often: the medium should not become sodden, and the tray should not sit in water. Plant once short roots or shoots are visible, before roots tangle or become brittle. If you cannot inspect the tray regularly, plant directly into the prepared bed instead.
Prepare a free-draining bed or container mix
Use a loose, fertile medium that drains freely and holds enough moisture for active growth without becoming saturated. In a garden bed, clear old roots and plant debris, loosen compacted areas and incorporate only mature organic matter; fresh manure can damage roots and make water management harder. Choose a spot where irrigation or rain drains away rather than standing around the corms. For pots, use a clean container mix and confirm that drainage holes are open before filling. Avoid reusing soil or compost from a crop that had unexplained rot, as disease organisms may remain in reused material.
Set permanent beds and benches only after the greenhouse location and base are settled, so later changes do not disturb the root zone. The Prestige Greenhouse with metal foundation listing identifies a metal foundation; use its product information and a qualified installer to clarify what is required for your particular site. The product description does not establish whether a specific patch of ground is level or ready. Once the structure is in place, leave access to bed edges and drainage points, and make sure irrigation can reach the whole crop without running across the aisle.
Plant corms at a consistent depth and spacing
Plant when the medium has cooled and drained, rather than while late-season heat still warms the root zone. Set each corm with its claw-like points facing down and the crown up. Around 5 cm deep and 10–15 cm apart is a practical starting point for many garden plantings, but follow cultivar-specific supplier instructions if they differ. Cover lightly without pressing hard over the corm, water to settle the medium, and mark each row with the cultivar and date. Consistent depth makes later watering and batch comparisons easier; avoid burying corms deeply in soil that stays wet.
Spacing should leave room for leaves to expand and air to pass between plants as the canopy fills out. In containers, avoid crowding several corms into one pot simply to make a display look fuller; dense foliage holds moisture and makes it harder to spot a weak plant. When comparing the Aluminium Greenhouses range, listed from 3.77 to 28.08 m², relate the chosen floor area to real planting beds or benches and an accessible aisle. Total area does not determine a suitable number of corms. Keep labels visible and leave enough reach to inspect the back of each pot and check the medium before watering.
Water by root-zone moisture and feed modestly
Watering should follow the moisture in the root zone, not a fixed daily timetable. At planting, water enough to settle the mix; while roots are sparse, avoid repeatedly soaking cool soil. As shoots and leaves expand, aim for evenly moist medium without standing water. Check below the surface with a finger or a small trowel in a bed, and lift a pot to compare its weight if that helps you judge drying. The surface may look dry while the root zone is still wet, especially after a cool, overcast spell. Where practical, water at the base in the morning and avoid leaving foliage and flowers wet for long periods.
Feed according to the fertility of your soil or container mix rather than assuming more fertiliser means more blooms. Mature compost may provide enough for a short crop; if using a commercial feed, follow its label and avoid a high-nitrogen routine that favours soft leaf growth over sturdy stems. Track greenhouse temperatures as well: warm air increases water loss, but it does not mean roots should stand in water. When comparing a Limited Edition Aluminium Greenhouse, check the ventilation provision in the exact configuration you are considering and whether its openings will remain accessible beside your beds or benches. A thermometer near the leaves helps distinguish heat stress from under-watering.

Ventilate to limit disease and protect flowers
Good airflow is one of the simplest disease-prevention measures. Open available vents or doors to release warm, humid air, especially after watering or when condensation persists; avoid allowing a dense canopy to stay wet overnight. Botrytis, or grey mould, can affect ranunculus in humid, poorly ventilated conditions, and dead petals or damaged leaves provide material on which it can develop. Remove faded blooms and fallen foliage promptly, keep tools clean, and discard badly affected plants rather than leaving them beside healthy ones. If rot or spotting spreads despite improved hygiene, seek a reliable local diagnosis before applying a treatment.
For cut flowers, harvest stems when buds are coloured and beginning to open, adjusting to the cultivar and the stage you want for the vase. Use clean, sharp secateurs, cut without damaging nearby shoots and place stems promptly in a clean container of water. Remove spent flowers from plants you are not cutting while preserving healthy leaves for continued growth. The T-Model Orangery Greenhouse listing gives sizes from 16.52 to 30 m²; for any footprint, sketch row and aisle access before buying so you can reach stems, clear diseased material and ventilate without moving through the crop.
Let foliage die back before storing corms
After flowering, the leaves continue feeding the developing replacement corms. Keep the foliage until it yellows naturally; cutting it while green reduces the time the corm has to replenish. As temperatures rise and leaves die back, reduce watering and allow the medium to dry instead of keeping dormant corms wet. In Malta, summer warmth makes this transition important, but do not force dormancy by cutting foliage early. If plants remain in a bed, the soil needs to stay dry enough for dormancy and drain well. Where conditions remain damp or disease has occurred, lifting can make it easier to inspect and separate the corms.
If lifting, wait for foliage to die back, lift gently, remove loose soil and dry the corms in a shaded, airy place before storing. Discard soft or mouldy pieces, label the remainder and keep them in a dry, ventilated place out of direct heat; check occasionally for deterioration. When planning space for the following season, compare the Pyramid Greenhouse listing, which covers 5.53 to 18.9 m², with the area your trays or pots will occupy and the access they need. Choose the layout for the actively growing crop, while allowing for saved corms to be stored separately in suitable conditions over summer.
Frequently asked questions
When should I plant ranunculus in a greenhouse in Malta?
Plant in autumn once the summer heat has eased and the growing medium is no longer warm. Flowering often follows in winter or spring, but cultivar and greenhouse temperatures affect the timing. Use thermometer readings, not a fixed calendar date, to judge when conditions are cool enough.
Can ranunculus flower in a greenhouse all year?
They are a cool-season crop, not a reliable year-round greenhouse flower in Malta. As temperatures rise, flowering can shorten and the plants move towards dormancy. Plan the crop around the cooler part of the year rather than trying to maintain it through summer heat.
How much light do ranunculus need under glass?
Give them a bright position; full sun is usual, with six or more hours of direct light a useful benchmark. Glass, frames, walls and trees can reduce the light reaching a bed. Check winter shadows, and manage heat with ventilation rather than leaving the crop in heavy shade.
Should I soak ranunculus corms before planting?
Dry corms are often soaked briefly, but follow the supplier’s instructions for your batch. Around three to four hours is a common starting point; avoid leaving them submerged overnight. Drain them well and plant promptly. Already hydrated or soft corms may need different handling.
What causes ranunculus corms to rot?
Persistently wet medium, poor drainage and limited airflow are common contributors. Corms can also deteriorate if they are damaged, mouldy or left in water for too long before planting. Remove suspect pieces, keep healthy stock separate, and avoid reusing medium from a crop that had unexplained rot.
A successful ranunculus crop in Malta depends on matching planting to the cooler season and responding to conditions inside the greenhouse. Start with sound corms, give them bright light and a free-draining growing medium, then adjust watering and ventilation as growth develops. Allow the foliage to finish naturally after flowering, and store any saved corms separately in suitable dry conditions.
