
Selecting Greenhouse Drip Irrigation for Pots and Beds
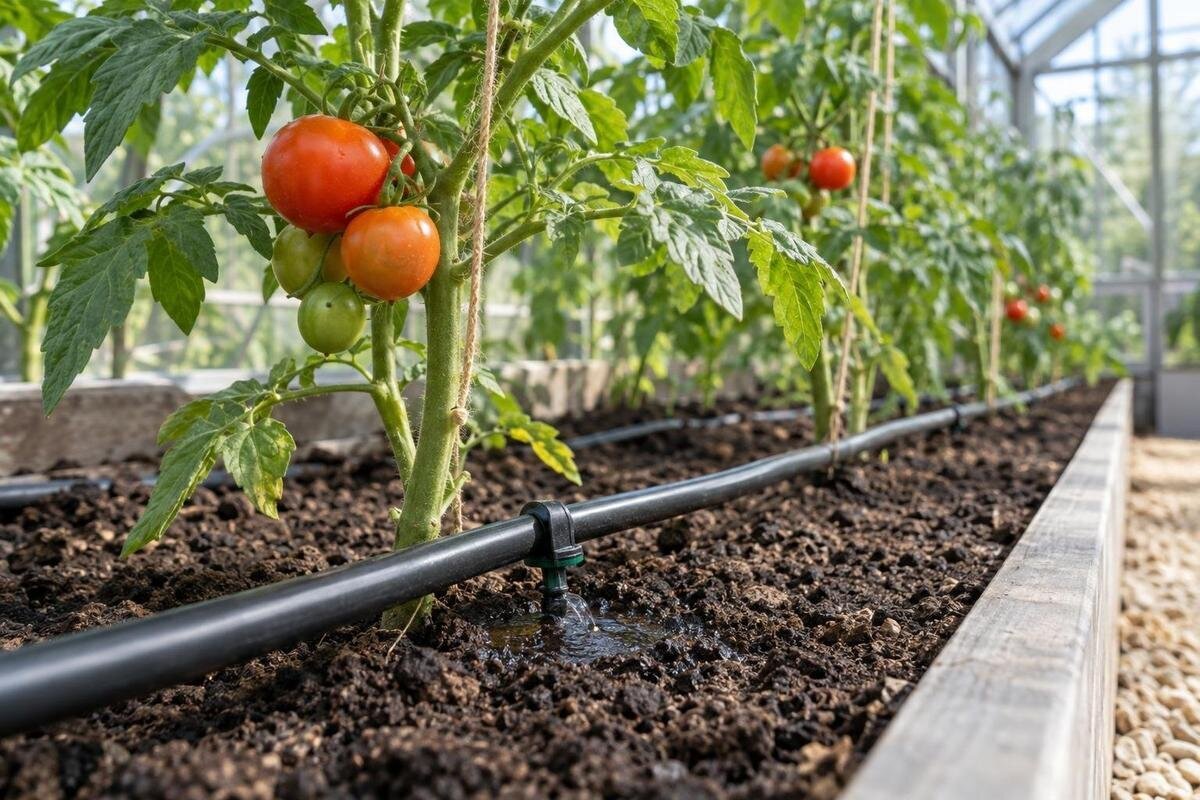
Greenhouse irrigation
Selecting greenhouse drip irrigation is less about buying the kit with the most outlets than matching each outlet to a growing area and confirming the supply can run it. Pots need outlets positioned for each container; beds often suit lines arranged along their rows. Filter rating, rated pressure, total flow and pipe length determine whether those choices work together. This guide shows how to map the layout, divide zones and test the system before relying on it.

Map pots and beds before choosing emitters
Before comparing drippers, draw the growing area as it is used, not as an empty greenhouse. Mark each bed, grow bag, shelf and group of pots, then record where plants sit now and how they may move as the season changes. Count containers and rows, and group crops with similar watering needs. Separate permanent bed rows from temporary plantings and containers that are often shifted. A kit diagram can look simple until every pot needs an outlet; in another layout, one line may serve a row if its emitter spacing and flow suit the planting. These details determine how many outlets, branches and valves you actually need.
Mark the water entry point, doors, main walkway and fixed benches on the same sketch. Draw possible routes for the main pipe and smaller laterals, leaving room to pick, clean and move containers. If you are still comparing greenhouse footprints, the Classic aluminium greenhouse range is listed from 3.77 to 28.08 m². Use the actual size under consideration: floor area alone does not show where beds sit or how long a pipe run will be. Label areas that may need different watering times as possible separate zones now; that can prevent a line being routed through another bed later.
Choose point-source drippers for pots and grow bags
Container layouts commonly use a supply pipe with narrow microtubes ending in individual point-source emitters, or a dripline laid beside a regular row of pots. Microtubes can be easier to reposition when containers differ in size or move; a fixed dripline is tidier when spacing stays consistent. Compare each outlet’s stated flow and operating-pressure range with the crop and potting mix, and check how many outlets the system can supply. A nominal litres-per-hour figure applies only under the pressure conditions given by the manufacturer, so do not select by outlet colour or shape. If adjustable drippers are offered, find out whether each one needs manual balancing.
Count containers rather than assuming one outlet will wet every pot on a shared line. A wide container, several plants in one pot or a fast-draining mix may not wet in the same pattern as a small pot; run a short trial and inspect moisture around the root zone before settling the outlet position. Add or move outlets only in ways allowed by the system design. Group pots with similar needs and mark each tube so it can be checked after rearrangement. For a wall-side growing plan, the aluminium lean-to greenhouse range is listed from 3.69 to 14.34 m². Mark the pots and their individual outlets on your layout, and recheck outlet positions after moving containers.
Match dripline spacing to bed rows
Beds suit a different starting point: match the number and position of laterals to the crop rows. Dripline with built-in outlets can keep a regular row tidy, while individual inline emitters or short microtubes can suit an irregular planting pattern. Check outlet spacing, flow per outlet, maximum line length and operating-pressure range in the manufacturer’s information. Outlet spacing need not match plant spacing: a plant may need more than one wetting point, while neighbouring outlets may moisten a shared area. Soil texture affects how water spreads, so trial a short section and inspect beneath the surface at the root zone rather than judging only by a wet strip on top.
Treat different beds as separate irrigation areas if their planting patterns or soil conditions call for noticeably different run times. A close-planted row and widely spaced crops, for example, may need different lateral positions or outlet arrangements; running them together can leave some locations too wet while others remain dry. Sketch each bed’s length and row positions, include turns and end connections, and compare the drawing with the line manufacturer’s limits. If you are comparing greenhouse footprints too, the Limited Edition aluminium greenhouse range is listed from 3.77 to 28.08 m². Use the chosen model’s plan to draw the beds and work out the lateral lengths.
Use a filter that suits the water and emitters
For most drip emitters, filtration is a design requirement rather than an optional extra. Begin with the water source and the filter specification required by the chosen drippers or dripline: its stated filtration rating and flow capacity must match the outlets and expected supply. Water that looks clear can still carry particles too small to notice, while stored or collected water may bring other debris, so choose for the actual source rather than appearance alone. Screen and disc filters are common options, but neither type is automatically right for every emitter. Check the required mesh or micron rating and the flow and pressure limits in the system instructions.
Place the filter where the supply can reach it and where it can be opened and cleaned without dismantling a planted bed. Follow the manufacturer’s instructions for installation and flushing, and note its condition after the first few runs so gradual clogging is easier to recognise. A filter protects downstream outlets only when correctly sized and maintained; it does not remove every dissolved substance or correct unsuitable water chemistry. If you plan to inject fertiliser, verify that the method is compatible with the filter, emitters and water source. Where visible sediment or repeated clogging occurs, investigate the source before choosing a finer element, which could restrict flow if the system is not designed for it. The T-Model Orangery Greenhouse range is listed from 16.52 to 30 m²; use the actual plan to locate a filter with room for cleaning.

Measure pressure and flow under working conditions
Before buying a kit, establish what the supply can provide at the point where irrigation will connect. A static pressure reading with every outlet closed is not enough: pressure may fall when water is flowing, particularly through a long or restricted supply route. Use the chosen system’s stated operating range and check pressure under representative flow. If you are unsure how to take or interpret a reading, ask an irrigation supplier or qualified installer. Account for restrictions from the filter, regulator and fittings as well as the main pipe. A regulator may reduce excessive pressure, but it cannot create pressure that is missing.
Estimate demand by adding the nominal flow of every outlet intended to run at once: the number of emitters multiplied by the stated litres per hour, under the pressure conditions for which the rating applies. For example, 24 emitters rated at 1.5 L/h have a nominal combined demand of 36 L/h. That calculation does not show whether the supply can maintain the required pressure along the pipes. Compare the zone total with measured available flow, then allow for line losses and fittings. A timed container test at the source can help establish flow, but it cannot confirm output at the farthest dripper. If you are planning irrigation for a model from the Pyramid greenhouse range, listed from 5.53 to 18.9 m², base the demand on the outlets you intend to install.
Plan the mainline and lateral routes
Divide the pipework into a main supply line, any submains and the laterals serving each bed or pot row. The manufacturer’s layout limits should determine pipe diameter and maximum run; long runs, many outlets and narrow pipe can affect pressure at the line ends. A connector that appears to fit is not proof that two components are compatible. Check flow direction, operating-pressure limits and fitting requirements for each part, and choose an arrangement that can be isolated and flushed. For a complicated greenhouse, draw pipe lengths and count bends and junctions before ordering, rather than cutting pipe until the route seems to fit.
Keep pipes accessible and away from door swings and the main walking route; avoid joints where pots or tools will repeatedly catch them. Mark shut-off points and removable end caps on the plan, since both need to remain reachable for maintenance. If a route crosses a surface that needs regular cleaning, make it possible to lift or inspect the line rather than hiding it under a fixed bench. Do not drill into greenhouse framing or glazing for clips unless the greenhouse manufacturer approves the fixing. If storage is part of your plans, the aluminium greenhouse range with storage is listed from 5.52 to 28.08 m²; mark the storage area as well as the growing space when drawing pipe routes.
Separate irrigation zones by water demand
One zone should contain outlets that can work within the same pressure range and need a broadly similar watering pattern. Pots and beds can share a zone only if their emitters, flow demand and run times are compatible; otherwise, separate them with valves or use a system designed for distinct zones. Too many small zones add connections and operating steps, while one oversized zone can exceed the available flow. Where very different line lengths share a zone, check output at the ends before accepting the arrangement. List the outlets intended to run together and calculate each zone’s total demand before choosing a timer or manifold. Follow the controller and valve manufacturers’ requirements for pressure, flow and connection compatibility.
Manual valves provide a straightforward way to start and stop different areas; a compatible timer can repeat a schedule, but neither makes a poor layout uniform. Leave controls reachable, label each zone and make sure you can stop the water at the supply. When crops move or growth changes, review the schedule and check soil moisture rather than assuming an old setting still suits the plants. If you are considering the Prestige greenhouse range, listed from 3.77 to 28.08 m², mark the proposed zones and their controls on your planting plan.
Commission the system and check each outlet
Before planting or attaching small emitters, follow the manufacturer’s commissioning sequence; some systems require the main and lateral lines to be flushed before outlets are fitted or put into service. Check joints at operating pressure, then run one zone at a time and collect water from representative outlets near and far from the supply. Use the same collection period and comparable containers so the readings can be compared fairly; a marked measuring jug can help quantify samples. Judge each result against the emitter’s stated rating and operating pressure, not an arbitrary universal target. If flow is uneven, check for a kink, blockage, pressure loss or loose fitting before changing the watering schedule.
Inspect where the water reaches the soil or potting mix as well. Surface wetness alone does not show whether roots are being watered evenly; check moisture at root depth with minimal disturbance to the plant, and adjust the emitter position or configuration only as the system allows. Repeat the test after changing lines, adding outlets or cleaning the filter. When planning irrigation for the Spacious Greenhouse range, listed from 47 to 70 m², include sampling points across the growing area and test the farthest outlets as carefully as those near the inlet.

Maintain filters, lines and watering schedules
Make filter checks and line flushing part of routine maintenance, following the equipment manufacturer’s instructions and taking the water source into account. Inspect outlet samples periodically: a dripper with much lower output than others may be blocked, while a row that weakens towards the end can point to a pressure or layout problem. Check tubes for kinks, displaced ends and leaking joints before assuming that plants simply need a longer run. Clean or replace filter elements only as specified; forcing a wire into an emitter can damage its small passage. Keep a note of cleaning and changes in output so a recurring fault is easier to trace.
Watering settings need review as crops grow, pots are moved and conditions change. A timer is a convenient control, not a measurement of what each root area receives. Check moisture in representative pots and beds, especially after adjusting flow, relocating emitters or changing the number of outlets on a line. Containers with different mixes or sizes may respond differently under a shared schedule, which may be a reason to reorganise groups or zones. Adjust one factor at a time—such as run time, outlet position or zone grouping—so it is easier to see what improved the result.
Compare system specifications before buying
Compare full specifications rather than the headline number of outlets. For each emitter or dripline, record its flow at the stated pressure, operating-pressure range, outlet spacing and maximum recommended line length. Confirm the filter rating and flow capacity, pipe and fitting compatibility, regulator needs and how many outlets can operate in one zone. Then compare these requirements with your measured supply and the plan of the actual growing area. If a kit listing does not provide enough detail to check these points, ask for the manufacturer’s diagram and technical sheet instead of guessing from product photographs.
Check what is included and what must be sourced separately: filter, pressure regulator if required, connectors, end caps, valves and timer may be separate parts. Ask how replacement emitters and filter elements are identified, and whether later additions can connect to the same system; do not assume similar-looking components share a fitting or specification. A small trial layout can reveal awkward routes and uneven wetting before you commit to every bed. Keep the final map, part details and test results together so maintenance or a future change of crop does not depend on memory.
Frequently asked questions
Which drippers work best for greenhouse pots?
There is no single best type for every pot. Individual microtubes and point-source emitters allow you to position outlets for each container, while a dripline can suit a stable, regular row. Compare rated flow and operating pressure, then test how the potting mix wets around the roots.
How many emitters should each pot have?
There is no reliable rule based only on pot size. The number of plants, the container’s shape, the potting mix and the emitter’s flow all affect where water reaches. Trial the arrangement, check moisture around the root zone and adjust the number or position of outlets if the system allows.
What filter rating should I choose?
Use the filtration rating and flow capacity specified for your emitters or dripline. Check whether the rating is given in mesh or microns, and choose with your actual water source in mind. A filter that is too restrictive or unsuitable for the system can reduce flow.
How can I tell whether my water pressure is sufficient?
Compare the system’s stated operating-pressure range with a pressure reading taken while water is flowing, not just with the supply closed. Test the zone as it will normally run and check output at outlets near and far from the supply. A flow test alone does not confirm adequate pressure.
Can pots and beds run from the same timer?
They can if their emitters, combined flow and watering times are compatible. If pots need a different run time from the beds, put them on separate zones where the system allows. A timer repeats a schedule; it does not correct uneven output or make mismatched outlets deliver the same amount.
A workable drip-irrigation layout reflects where water needs to reach, not just the shape of a kit. Use adaptable point outlets where containers move, choose bed lines to suit the rows, and keep filters and pipes accessible. Then size each zone from the system’s stated limits and the supply you have measured. Testing the farthest outlets turns a plausible plan into a system you can maintain.
