
Siting a Greenhouse Near a Pond: What to Assess
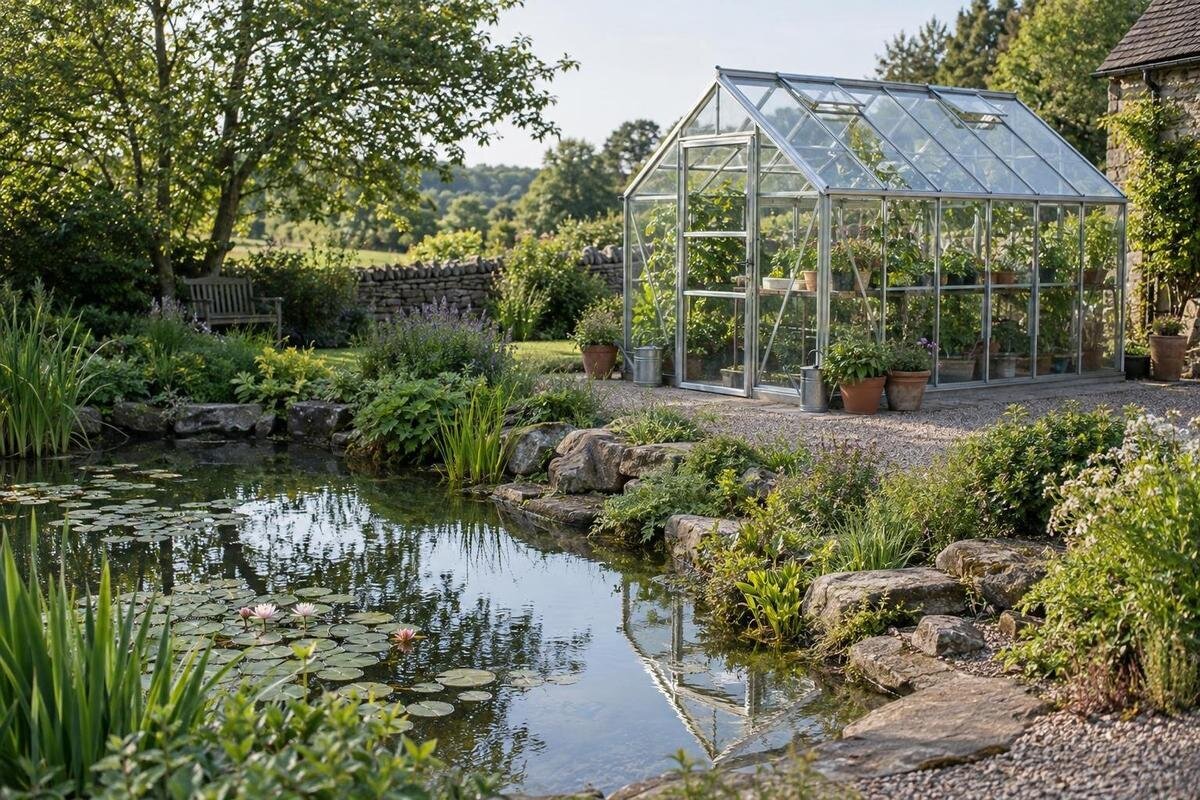
Greenhouse location
A greenhouse can stand near a pond, but a good view does not show whether the site is suitable. Bank condition, ground beneath the proposed base, water movement, seasonal shade, delivery access and room for pond maintenance all need assessing together. Begin with a scaled sketch that places the pond edge and greenhouse footprint in the same garden plan, then add observations from wet and dry conditions. There is no universal setback: level ground set back from a bank and a narrow strip beside an unstable bank present very different siting problems.

01
What changes when a greenhouse is near a pond?
“Near” can describe firm, level ground with room between the bank and the greenhouse, or a narrow strip at the top of a steep edge. Those are different siting problems. Water beside a greenhouse does not automatically improve growing conditions or provide a dependable irrigation supply, and the visible pond edge says little about how the proposed base area behaves. Seasonal water levels, an overflow route or a maintenance path may affect land that appears unused. Treat the pond as a feature to assess, not a growing benefit to assume. Even an apparently separate lawn or gravel strip needs checking for how it connects to the bank and any wet-weather flow.
Before choosing a model, define what you mean by proximity: immediately beside the water, along the same boundary, or simply in the same garden zone. Put the pond, bank, proposed greenhouse, paths, trees and walls on one scaled sketch. Record what you have observed at higher water levels and after rainfall, and identify who needs to reach each area for routine care. The drawing should show both the structure and the space around it, not just the hoped-for position. A greenhouse may fit near a pond when its base, water routes, light and access all work; no universal distance can replace checks of the actual site.
Check the bank and proposed base area
Look for changes rather than trying to certify the bank by eye. Fresh cracks in soil or paving, a newly uneven edge, slumping, soil washed from beneath edging, exposed roots, leaning posts or repeated soft patches are reasons to investigate further; none alone tells you what is happening below ground. Take dated photographs from safe, repeatable viewpoints and compare them after wet weather or a change in pond level. A neat border or an old retaining edge does not, by itself, demonstrate that adjacent ground is stable. Note any known repairs or fill, too, and do not approach a visibly unstable slope just to take a photograph.
Record what lies between the water and proposed greenhouse base: a slope, retaining wall, filled ground, repair or drain may change what needs assessing. The surface can look even while conditions below it remain unknown, so do not use appearance as a foundation assessment. The Prestige greenhouse with metal foundation is listed with a metal foundation, but that product detail cannot establish whether a particular pond-side site is suitable. Confirm the chosen model’s base requirements and seek site-specific advice from a suitably qualified ground or structural professional if the bank, retaining work or underlying ground is uncertain. Their assessment needs to address the actual location, not a generic pond-side distance.
02
Trace overflow, surface water and roof runoff
On the sketch, mark the pond’s usual level and any high-water marks you have observed, alongside visible inlets, outlets and spill paths. Note where water collects or travels across the wider garden after heavy rain, not only what the pond looks like on a dry day. If an overflow channel passes near the proposed greenhouse, trace its route beyond the water’s edge towards any low point, path or other part of the garden. Photograph these observations from fixed points and date them; one visit may not show the full pattern. Do not assume the bank is the only ground affected by rising water.
Keep pond overflow, garden surface water and the greenhouse roof’s planned runoff as separate lines on the drawing. Ask the installer or a drainage professional where roof water should go; do not send it towards the bank, base or path simply because that is convenient. Mark visible pipes, pumps and cables, and have buried services identified before ground work begins. If you cannot trace the route of water after rain, or the intended discharge is unclear, resolve that uncertainty before settling on the site. Assess the route in the context of the whole garden, rather than stopping at the greenhouse boundary.
Map seasonal shade at the proposed position
Make a shade record at the exact proposed footprint, not just from the garden entrance. On a scaled plan, note the direction and shadows cast by trees, boundary walls, buildings and other structures at different times of day. Repeat the observation as the seasons change and when deciduous trees are in leaf; one midday visit or winter photograph may miss conditions during the growing period. Photos from the same points at similar times make comparisons clearer. Include nearby trees that may grow or be pruned, rather than treating today’s canopy as permanent. A simple diagram is more useful than a general note that the corner feels sunny.
If the Limited Edition aluminium greenhouse range is on your shortlist, mark the exact version’s outline on your shade diagram rather than estimating its position from a photograph. Trace whether shade falls across the roof and working area, then compare that record with the light needs of the crops you plan to grow. Do not count reflected light from the pond as guaranteed extra sun. A bright view over the water may still leave the greenhouse shaded by a wall, tree or neighbouring building. Recheck the diagram if you move the proposed position, because a change of location alters the shade map.

03
The greenhouse footprint is more than its floor area
Draw the selected greenhouse’s full external outline on the same plan as the pond edge, top of any bank, overflow route, existing planting and approach path. Use the exact product drawing to identify the base perimeter, door position and any roof projection shown; do not assume the listed growing area equals the ground space required. Mark the room needed to open the entrance, walk to the structure, clean it and carry out routine maintenance. The route must not depend on stepping onto a bank that needs separate inspection. If the actual door swing or base outline is unclear, ask for that information before preparing the site.
The Classic aluminium greenhouse range lists floor areas from 3.77 m² to 28.08 m². This helps compare sizes, but it does not give the exact external length and width, entrance swing or ground-preparation needs for the selected version. Transfer those measurements from the model-specific plan instead of estimating from a photograph or choosing from floor area alone. Check whether the drawing includes the base and any projecting parts you need to allow for. If the outline occupies an overflow route, the bank or a necessary garden path, reconsider the model or position rather than treating that space as spare.
Freestanding and wall positions need different checks
A freestanding greenhouse can be plotted independently of a wall, while a lean-to needs a suitable wall and a workable position along it. Near a pond, note wall openings, downpipes and paths as well as the greenhouse outline. Check whether the entrance would face a narrow bank-side strip or obstruct a route used to inspect the water. Consider how people will reach the wall for its own maintenance and whether its drainage route crosses the proposed base. Record doors, windows and services that need to remain accessible. The garden plan should show the whole wall, not only the length covered by the greenhouse.
The aluminium lean-to greenhouse range is described as a wall greenhouse and lists floor areas from 3.69 m² to 14.34 m². Treat that category as one possible arrangement, not proof that a particular wall or pond-side location is suitable. Check the exact model’s external dimensions, installation requirements, door position and base details with the product information and installer. A freestanding option may allow a different orientation, but the better choice depends on the actual wall, access and overflow route. When comparing layouts, redraw the approach to each entrance rather than assuming the same path will serve both.
04
Delivery and pond maintenance both need access
Draw the delivery route from the gate or unloading point to the proposed base, including steps, turns, narrow passages, slopes and soft ground. Check that installers or people carrying components can reach the site without using a pond bank as a shortcut. Separately mark the route for cleaning the pond, reaching pumps or filters, moving a wheelbarrow and carrying garden waste. If both tasks rely on one narrow path, show where materials could obstruct it during installation and whether the route will remain usable afterwards. Measure pinch points rather than judging them from a photograph, and ask the supplier or installer what access the selected model requires.
Inside the greenhouse, map the entrance, working aisle and any storage before assuming the floor area will feel usable. When considering a greenhouse with built-in storage, include the storage area and its access in the internal layout. Check how you would carry tools between it, the growing area and the garden without obstructing the entrance. The external delivery path and the day-to-day route inside the structure are separate checks. Do not guess unloading arrangements from an image; confirm what the selected model and installation method require. Distinguish temporary space for installation materials from the paths that must remain clear for everyday greenhouse use and pond care.
Leave room for the rest of the garden
Once the greenhouse outline fits, put the rest of the garden back on the sketch. Keep beds, gates, taps, compost, seating, pond equipment and routine maintenance routes visible; these are easy to disregard when a new structure is drawn in isolation. Check whether the greenhouse blocks a useful view of the water, casts shade over existing planting or leaves a pinch point between its wall and the bank. The aim is a layout that lets the greenhouse, pond and existing garden uses remain accessible, not simply an empty rectangle beside the water. Think about the path people actually use, not only the shortest line on paper.
For a larger option, the Bloomcabin Orangerie is listed with floor areas from 47 to 70 m². Those figures are not the external footprint or a recommended clearance, so compare the exact selected plan with the pond edge, overflow map and garden routes. A greenhouse that fits on paper can still remove room needed for pond care or make another part of the garden difficult to reach. Ask everyone who will use or maintain the area to review the drawing before deciding; their tasks may reveal a route or pinch point that a floor-area figure cannot show.

05
Use the exact plan for the selected shape
A product photograph can help identify a design, but it cannot show exactly how that greenhouse will occupy your pond-side plot. For an unfamiliar or distinctive outline, use the plan for the exact version and note overall dimensions, entrance position and the space needed for setup. Overlay it on the same drawing as the bank, water routes and paths. If the outline includes corners or a wider section, check whether each part sits on suitable ground and leaves room to move around it, rather than checking only the central area. Compare the plan with your actual boundaries, since a narrow space can look more generous from across the garden.
The T-Model Orangery Greenhouse lists floor areas from 16.52 m² to 30 m². Those figures identify size options, not the outline of each version. On the selected model’s drawing, identify which parts would face the pond, the path and the rest of the garden. Check each part against the bank and overflow route rather than judging the fit by overall floor area. When comparing it with another greenhouse shape, keep the pond and boundaries at the same scale so that differences in the remaining access space are clear.
When site-specific advice is needed
Before deciding, mark each point on the plan as known, uncertain or needing professional review: bank and base condition, high-water observations, overflow and runoff, shade, exact footprint, delivery access and routine pond maintenance. An unanswered question should stay visible rather than being replaced with an assumed safe distance. If you have noticed fresh movement, recurring pooling or water travelling towards the proposed base, pause the siting decision and ask a suitably qualified ground or drainage professional to assess the actual location. Keep dated photographs with the drawing so your observations can be discussed clearly.
The Oasis Pyramid greenhouse range lists floor areas from 5.53 m² to 18.9 m². Select a particular version before comparing it with other shortlisted options on the site drawing. Separate concerns about the model’s fit from concerns about the site itself: a different outline may leave a clearer path, but it does not resolve uncertainty about the bank or drainage. This distinction helps you decide whether to reconsider the greenhouse, move its proposed position or obtain professional advice. Keep unresolved site concerns visible even if one model appears to fit neatly beside the pond.
Frequently asked questions
Can a greenhouse be installed beside any pond?
Not automatically. A firm area with a known water route and usable access may work, while a sloping bank, retaining edge, soft ground or untraced overflow needs closer assessment. Check the exact base location and model drawing. If the bank is moving or ground conditions are uncertain, ask a suitably qualified professional to assess the site before work begins.
Does a pond improve greenhouse growing conditions?
Not by itself. A pond does not guarantee more heat, useful humidity, irrigation water or sunlight. Shade, the greenhouse position, ventilation and the needs of the intended crops still matter. Treat the pond as a separate water and access feature, rather than basing your greenhouse choice on an assumed growing benefit.
How far should a greenhouse be from the pond?
There is no single distance that suits every pond. The appropriate position depends on the bank, ground conditions, observed water behaviour, overflow route, base requirements and access. Use a site plan and the exact model dimensions. Where the ground, a retaining wall or drainage remains uncertain, seek site-specific advice rather than borrowing a distance from another garden.
How can I check whether water might reach the greenhouse?
Record the usual and highest water levels you have observed, note inlets, outlets and overflow routes, and inspect the wider plot after heavy rain. Trace garden surface water and proposed roof runoff separately. A dry-weather view is incomplete; if the route or intended discharge remains unclear, ask a drainage or pond professional to assess it before siting the greenhouse.
Can I use pond water or direct greenhouse roof water into it?
Do not assume that nearby pond water is suitable for irrigation or that the pond is an appropriate destination for roof runoff. Water supply and discharge are separate questions: consult an appropriate provider if you plan to use the pond water, and have the intended roof-water route assessed. Keep both decisions separate from the greenhouse’s physical location.
A pond does not automatically rule out a greenhouse, but neither is the water’s edge spare land. A sound choice comes from considering the base area, high-water and runoff routes, seasonal shade, the selected model’s outline and the paths used for delivery and pond care together. Where bank movement, ground conditions or drainage remain uncertain, pause for site-specific professional advice. The aim is a greenhouse position that preserves access to the pond and suits the garden, without relying on an assumed growing benefit from nearby water.
