
Splitting Greenhouse Watering into Zones for Pots and Beds
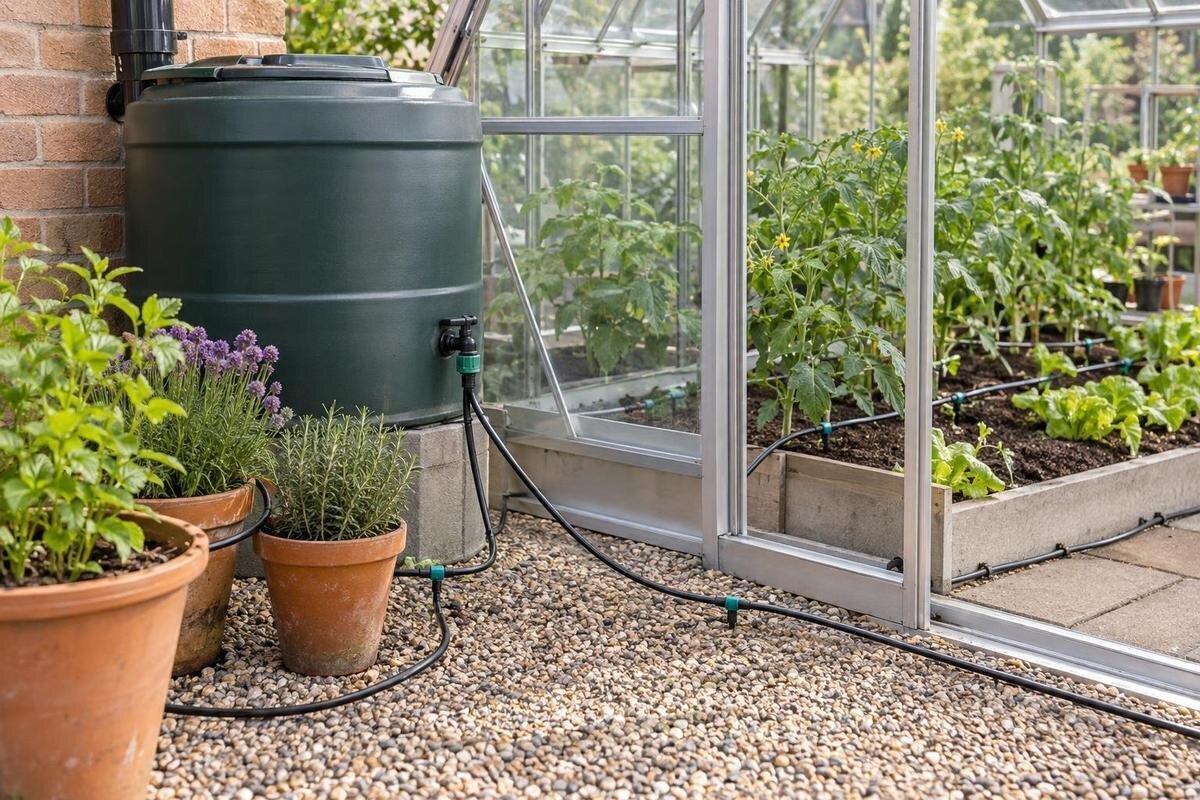
Greenhouse watering
Greenhouse pots and planted beds may share a water source and timer, but their roots do not always need the same schedule. A container holds a limited volume of growing medium and drains through its base, while a bed draws on a soil profile whose moisture depends on depth, texture and planting. One programme can therefore leave some pots dry before a bed needs water, or water a bed too frequently to meet the needs of faster-drying containers. The useful approach is to group plants by how their root zones behave, then give groups with consistently different needs independent watering control.

Why pots and beds often need different watering
Potting mix in a container occupies a finite volume, so roots are confined to a relatively small reservoir of moisture. A small pot, a densely rooted container or a fast-draining medium may dry out sooner than a bed, particularly when the pot is exposed to sun or moving air. Where drainage holes are present, some water can drain away after irrigation rather than remaining around the roots. A bed draws on a connected soil profile, but depth, texture, compaction and planting density affect how much moisture remains available. Root growth and plant stage matter too. Pots and beds are useful starting categories, not rules that determine a fixed watering interval.
One shared timer programme forces the two areas into a compromise. If it runs often enough for a group of fast-drying pots, a slower-drying bed may be watered before its root zone needs it; if it is adjusted for the bed, a small container could become dry between cycles. These are risks to check, not outcomes guaranteed by the type of planting. A separate zone lets you change frequency or run time for one group without changing the other. The aim is not to give every plant its own line, but to separate groups when their observed drying patterns consistently differ. That keeps the setup manageable and makes each adjustment easier to judge.
Map root volumes and growing conditions
Before dividing pipework, list the pots and beds rather than sorting them only by crop name. Note container size, depth, medium, how densely roots fill it, and whether plants occupy a sunny shelf or a shaded floor position. For beds, record soil depth and texture, planting density, and any patch that drains or dries differently from the rest. Two pots of the same crop may not behave alike if their volumes or media differ; two different crops may be compatible if their root-zone needs and watering response are similar. Group plants by recurring moisture behaviour, not by a rule that every species needs a separate line.
Draw a simple plan showing the water source, paths, benches, beds and movable containers. Mark places where pots can be shifted, and note changes in shade or ventilation rather than treating the greenhouse as one uniform space. The listed options for the Pyramid Greenhouse range run from 5.53 m² to 18.9 m², so choose the actual footprint before sketching a layout. Floor area is not a circuit count or a flow specification. The useful map is the one that matches where plants and pipework will sit, with enough access to inspect the outlets and move each group.
Choose controls with genuinely independent schedules
A zone is a group of outlets that can be controlled independently from another group. A branch pipe or Y-connector alone does not make a separate zone: if the same valve opens both branches together, they still receive the same timing. With one timer, a manual shut-off valve may let you isolate a branch, but someone must change it; it does not provide two unattended programmes. Independent scheduling normally needs a controller and valve arrangement with separately addressable outputs, or a timer specifically designed with independent channels. Check how the actual equipment defines a station or outlet before buying.
Read the controller instructions for the features that matter: separate start times, run times and watering days; the number of independent zones; and whether stations run sequentially or can overlap. Do not assume that two outlets on one device have separate schedules, or that both can operate at once. Allow space to reach the controls without obstructing access to other areas. If your greenhouse plan includes dedicated storage, distinguish it from the growing areas on your map. The Aluminium Greenhouses with Storage – Limited Edition page identifies a built-in storage option; use the selected layout, not the product name alone, to decide where pots, beds and accessible pipe routes can go.
Check the water supply before selecting equipment
Check the water supply and equipment limits before selecting a controller, valves or outlets. The number and type of emitters in a zone affect the flow it requires, while pressure can vary with the source, filters, valves, pipe length and operating conditions. A greenhouse’s floor area cannot tell you whether a particular supply will meet those requirements. The Bloomcabin Prestige Greenhouse range lists sizes from 3.77 m² to 28.08 m²; those areas describe greenhouse footprints, not the pressure or flow at your tap. Use information for the irrigation components and the actual growing layout.
Where possible, obtain pressure and flow measurements under the conditions specified by the irrigation supplier or equipment maker, with the intended zone operating. If you lack suitable test equipment or the result is unclear, ask an irrigation supplier or qualified professional to assess it rather than guessing from a label. Check whether the chosen components require filtration or pressure control, and confirm they are compatible with one another and with the water source. A stored-water source may behave differently as its level changes, so include that in the assessment. A timer cannot correct a supply that falls outside the equipment’s requirements.

Route pipes around beds, benches and paths
Plan the physical pipe route as well as the schedule. Sketch the main feed and branches, then identify which pots might be moved and where a hose, tray or tool needs to pass. Avoid loose pipe across a walking route where it could be snagged or become a trip hazard; use a method suitable for the chosen system to keep lines in place. On a large footprint, note the longest planned route and the points where it needs inspection. The Spacious Greenhouse range lists footprints from 47 to 70 m², but the chosen layout—not the range name—determines where a practical route can go.
Leave valves, filters and connection points reachable, and keep outlets visible enough to spot a leak or blockage. Mark each branch with its zone name somewhere you can still read after plants grow. Avoid hiding joins under pots, stored items or soil, because you will not be able to inspect them easily when delivery changes. If containers move frequently, plan how their lines can be accessed or disconnected in line with the system instructions. A neat route is useful only if it remains manageable when the greenhouse is full.
Match outlets to the planted area
Choose the number and position of outlets for the roots and layout in each zone, not just for a row that looks uniform from above. In one container, water delivered at a single point may not spread evenly through a large or tightly rooted root ball; in another pot, an extra outlet may be unnecessary. Follow the emitter maker’s instructions and check how moisture spreads through the medium after a run. Group pots only if their outlet arrangement and drying patterns can be managed by the same programme. For any chosen option in the Aluminium Greenhouses range, count outlets from the pots and benches in your actual planting plan.
For a bed, relate delivery points to the planted rows, root distribution and the soil’s ability to spread water, then observe the result in more than one position. A long bed with different crops, soil textures or sun exposure may need to be split if one end repeatedly behaves differently from the other. Conversely, making a separate zone for every short row adds valves, tubing and programme settings to manage without necessarily improving control. Compare moisture across the root area before changing the layout. Check that outlet types are compatible with the system’s pressure and water quality.
Set schedules by checking root-zone moisture
Treat a timer setting as a working starting point, not a permanent prescription. Use reliable crop or equipment guidance where available, then check moisture in representative pots and beds at root depth, not only on the surface. A dry-looking surface can sit above a moist root area, while the top of a pot may look wet even though its lower mix has dried. Check before the next planned watering as well as after a run, using the same kind of observation each time. If the root zone is still too wet or dries sooner than expected, adjust frequency or run time for that zone and check again.
Make one change at a time where practical, and record the date, zone and result; changing several settings together makes it harder to see which one helped. Reassess after repotting, a change in crop stage, or a marked shift in light and airflow. A sunny, exposed bench and a shaded, sheltered corner may not dry at the same rate. If you are planning around a Wall Greenhouse, observe actual shade and air movement rather than infer them from the product category; its listed footprint does not tell you which containers dry first at your site. Adjust to what the root zones show.
Test every zone before relying on its timer
Before relying on an automatic programme, run each zone separately and walk its full route. Confirm that the expected outlets operate, look for leaks or disconnected joints, and check the beginning, middle and end of each branch. You can place identical small containers beneath selected outlets and compare what they collect over the same period; this can reveal obvious differences in delivery, but it is not a substitute for checking the equipment’s operating limits. Inspect several pots and several points in each bed after watering. A timer display confirms that a command was scheduled; it does not prove that water reached each root zone.
Check how the zones behave when the controller runs them in its intended sequence, and confirm that no manual setting or temporary adjustment has been left in place. Look for water pooling at one end, a dry section further along, or containers draining sooner than their neighbours. Test again after clearing a blockage, moving a pot group or changing an outlet. For the chosen layout in the Limited Edition Aluminium Greenhouses range, mark the furthest outlet along each branch and check it after the route is settled. A timer should be trusted only after you have checked both delivery and root-zone moisture.

Troubleshoot uneven watering and routine wear
Build a brief inspection into normal greenhouse work. Look at filters and outlets for debris or deposits, check accessible joints for leaks, and make sure lines have not been kinked, crushed by a pot or pulled loose as containers move. Follow the equipment maker’s instructions for cleaning, flushing or replacing parts; components can have different limits, so do not assume one treatment suits every system. If the timer has a battery or another power source, follow the maker’s checks for that device. A visual check is more useful when you know how each zone normally behaves during operation.
Trace uneven delivery before extending the programme. If one outlet is affected but the rest of its zone behaves normally, inspect that outlet and its nearby line first; if a whole branch is weak, check the shared supply, filter, valve and any visible restriction. These are clues rather than a diagnosis, so use the maker’s troubleshooting advice or ask a specialist when the cause is unclear. A timer cannot compensate for a blocked outlet or leaking joint. Note the fault, the action taken and the result, so a recurring problem is easier to recognise than if you repeatedly add minutes to the schedule.
Review zone boundaries when planting changes
Review the map whenever the planting changes. Repotting increases root volume; seedlings moved into larger containers may no longer dry like their former group; a crop change can alter a bed’s watering needs. Those changes do not automatically require new pipework, but they are a reason to check whether the old grouping still makes sense. Move a group to another schedule if its root-zone checks consistently diverge, or combine groups if their needs have become similar. The practical test is whether one programme can keep both groups appropriately moist without leaving persistent wet or dry areas.
Keep the map beside a short record of timer settings, valve labels, outlet types and changes you make. When the layout changes, update the map and labels, then repeat the zone test. If you are using a footprint option from the T-Model Orangery Greenhouse range as a planning reference, draw your actual pots, beds, paths and water source rather than assume the model name sets a watering layout. A clear record saves guesswork when you move plants, replace an outlet or compare how the setup behaves at different stages of the growing year.
Frequently asked questions
Do pots always need more frequent watering than beds?
No. A small pot in a sunny, exposed position may dry quickly, but a large shaded container may hold moisture longer than a shallow or fast-drying bed. Check moisture at root depth in representative places and base the schedule on what you find, rather than on the category alone.
Can a Y-connector make two independent watering zones?
Not by itself. If both branches open and close together, they share the same timing. To run separate programmes, the controller and valve arrangement must provide genuinely independent outputs. Check the instructions for the specific timer before treating its outlets as separate zones.
Should each crop have its own watering zone?
Usually, group plants that have similar root volumes, growing media and drying patterns instead of giving every crop a separate zone. Add another zone only when observations show that one programme cannot serve a group without leaving another persistently too wet or too dry.
How should I decide when to change a programme’s run time?
Check moisture in the root zone, both after a run and before the next scheduled watering. Use representative pots and more than one point in a bed. If the root zone is still wet or dries sooner than expected, adjust that zone and check again.
How can I check that water reaches the whole zone?
Run the zone and inspect its full route, including outlets near the beginning and end of each branch. Look for leaks, blocked outlets and uneven wetting. Identical small containers under selected outlets can help reveal obvious differences in delivery over the same period.
A useful greenhouse watering plan is based on root-zone observations, not on the assumption that every pot or bed behaves alike. Map the plants, choose controls that can run genuinely independent programmes, check the water supply and test delivery along each line. Then adjust schedules when moisture checks or planting changes show that a group needs different treatment. Separate zones work best when they are simple enough to inspect and flexible enough to reflect how the greenhouse is actually planted.
