
Using a Greenhouse to Start Plants for Outdoor Raised Beds
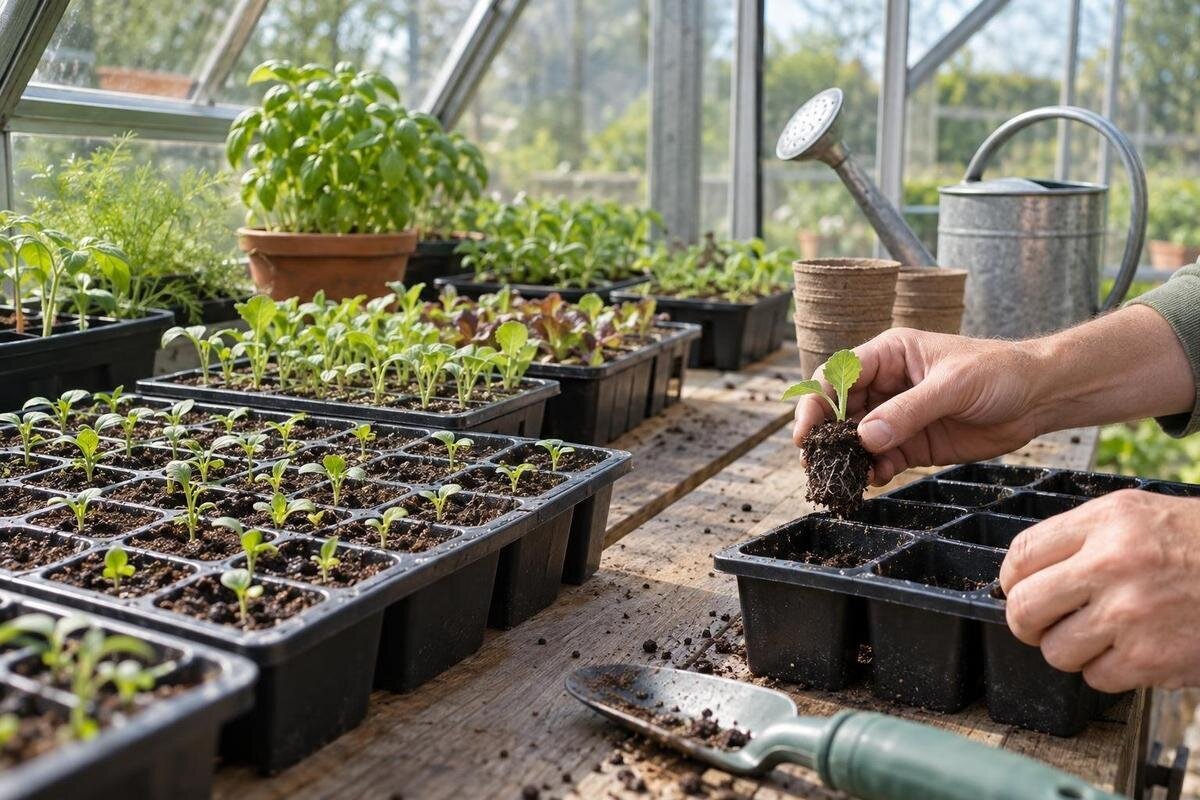
Greenhouse growing guide
A greenhouse can give young plants a protected place to germinate and grow while outdoor raised beds are being prepared. It works best as a nursery with a clear destination for each batch: choose the crop, bed position and likely planting window before sowing. That link helps prevent an early flush of seedlings from filling the greenhouse while the soil or outdoor conditions are still unsuitable. It also keeps the aim distinct from permanent greenhouse growing: the goal is a healthy, manageable transplant, not a full-season crop under cover.

01
The greenhouse’s role as a temporary nursery
Think of every tray as a future part of a named bed. Before sowing, decide what will go outdoors, how many plants that space can take and approximately when the bed should be ready. A greenhouse can shelter germination and give seedlings a head start, but rapid growth alone does not mean they are ready to plant out. In bright, warm conditions, seedlings can outgrow their containers before the beds are prepared, leaving them needing more space, larger pots or extra care. Linking each sowing to a bed and a likely planting window keeps the greenhouse’s nursery role clear. If you have several beds, give each batch a specific destination rather than treating all available outdoor space as interchangeable.
Make a simple drawing of the greenhouse and mark benches, floor space, door access and any area that has another use. Total floor area is not the same as a usable growing surface: trays need room to sit level, and you need to reach them to water, label and move them. For a sense of the listed footprint options, the Pyramid Greenhouse page shows sizes from 5.53 m² to 18.9 m². Use the plan for the particular model you are considering and measure your trays and bench before estimating capacity; do not infer bench space from the area figure. Include room to set a tray down while sorting seedlings, and leave a practical route between the door and benches.
Plan the raised beds before sowing
Draw the bed layout alongside the greenhouse plan. For each crop, note the bed, the final spacing recommended for that variety and how many plants the available row or block can hold. Count planting positions first, then decide how many seeds or plugs to raise. A few extra seeds can allow for uneven germination or a plant that fails, but a large surplus uses bench space and compost without a clear destination. Leave room for access and supports rather than filling every centimetre with seedlings on paper. This simple count turns a broad wish list into a manageable nursery plan.
Group the sowing list by when each crop is likely to leave the greenhouse. A bed planted in stages may need several small batches, not one large tray that must be held until every space is free. Mark each tray with the crop, variety, sowing date and intended bed; labels that say only “tomato” or “salad” become hard to interpret if batches overlap. When comparing greenhouse layouts, include somewhere to keep spare labels and empty containers as well as the trays in use. The Aluminium Greenhouses with Storage – Limited Edition page lists size options from 5.52 m² to 28.08 m². Compare the layout you are considering with your batch list, allowing for seedlings from successive sowings to occupy the nursery together.
02
Work backwards from the planting window
Set a likely outdoor planting window first, then check the seed packet or reliable crop guidance for the recommended sowing period and transplant stage. Work back from that outdoor window rather than simply choosing an early sowing date. The time from emergence to planting size varies with crop, variety and growing conditions, so there is no single lead time that suits a whole bed. Check local seasonal guidance and conditions at your site; a calendar is a planning aid, not proof that the bed is ready. If the recommended planting period shifts, adjust the sowing plan instead of forcing seedlings outside.
Create a short sequence for each crop: the intended planting window, when the bed needs preparing, the likely sowing period and any intermediate potting stage recommended for that crop. Review the sequence as the season develops, because unexpected weather, slow germination or faster growth can change the gap. If you sow everything at once, quick-growing plants may be too large before slower crops are ready to leave. A small succession of sowings spreads the workload and gives each batch a clearer destination. Keep the schedule visible beside the trays so it informs daily decisions, not just the initial plan.
Choose crops that suit transplanting
Consider which crops benefit from a start under cover in your own growing conditions. Plants that need a longer growing period can be candidates; tomatoes and peppers are familiar examples where the sowing and planting guidance supports this approach. Some lettuces, brassicas, herbs and flowers can also be raised in trays for transplanting. Starting a suitable crop under cover can help you raise a known number of plants while the outdoor bed is still being prepared. Decide crop by crop and variety by variety, rather than assuming every seed packet calls for sowing in the greenhouse.
Crops normally sown in their final position, especially many root crops, may not benefit from being moved from a cell: transplanting can disturb developing roots. Follow the packet’s method before allocating tray space, and mark direct-sown crops separately on the bed plan so they are not included in your nursery total. Once you have this shortlist, you can compare greenhouse sizes against the plants you actually intend to raise. The Bloomcabin Prestige Greenhouse page lists options from 3.77 m² to 28.08 m². Base the comparison on your selected batches; extra greenhouse space is not a reason to transplant crops that are better sown in place.

03
Tray dimensions and usable bench space
Work out growing capacity from the number and footprint of trays you actually use, not from the greenhouse’s total floor area. Measure each tray and the bench depth, and consider whether you can reach the back row without moving other pots. Mark space for newly sown trays, larger seedlings waiting to be planted and empty trays, since these stages can overlap. Include room to carry a tray through the doorway and set it down; otherwise, theoretical capacity may be awkward to use in daily care. Leave labels visible and keep the route to water practical.
Staggered sowings need room for seedlings at different stages, so do not treat every bench as interchangeable. Keep the plan flexible enough to move a batch or pot on if it grows faster than expected. When comparing larger formats, the Spacious Greenhouse page lists sizes from 47 m² to 70 m²; those overall figures still do not tell you the usable bench layout. Draw fixed features and areas reserved for other greenhouse activities, then count the trays that fit in the remaining work zones. Check that nursery use will not block access to plants with a separate purpose.
Monitor conditions around young plants
Conditions under cover can change quickly with sunlight and the position of a tray. A greenhouse may become much warmer during a bright part of the day, while temperatures can still fall at other times. Check conditions at seedling height rather than relying on how the greenhouse feels when you walk in. A thermometer can help you notice patterns; use crop-specific guidance to interpret them. Ventilate according to the greenhouse design and the conditions outside, and pay attention to trays near bright or sheltered spots. The aim is to observe what the seedlings experience, not to assume that every part of the space is alike.
Check compost moisture regularly, since small cells can dry out sooner than larger containers. Water gently enough to avoid dislodging seeds or flattening young plants, and make sure excess water can drain rather than leaving trays standing in water. The surface alone may not show whether the growing medium below is dry, so check below it as well. Keep containers and the work area clean between batches, and remove plants that are clearly failing rather than letting them occupy space indefinitely. When comparing the 3.77 m² to 28.08 m² options in the Aluminium Greenhouses listing, consider how you will inspect and water each row of trays. You should be able to reach individual containers without repeatedly moving neighbouring batches.
04
Prepare the beds while seedlings grow
Use the time under cover to prepare the destination beds. Clear weeds and old crop debris, arrange supports where they will be needed and make sure you can reach the planting spots without damaging neighbouring plants. Check the growing medium in the bed itself: it may not hold moisture in the same way as a seed tray, and a greenhouse schedule cannot tell you whether the outdoor bed is too dry or too wet. Follow crop guidance for bed preparation, and avoid leaving this work until the seedlings are already waiting to be planted.
Add the greenhouse, beds and the route between them to one site sketch. The Wall Greenhouse page shows size options from 3.69 m² to 14.34 m²; when considering this format, mark the proposed doorway position and trace the journey from there to each bed. Check that you can carry a full tray without stepping into planted areas, and identify a sheltered outdoor spot for acclimatising seedlings along the route. Allow somewhere to put trays down while you organise planting, rather than balancing them beside an occupied bed. This connects the nursery layout with the outdoor work and makes the handover easier to organise.
Harden off plants gradually
Hardening off gives seedlings time to adjust to outdoor light, wind and temperature changes after growing under cover. Begin by placing trays in a sheltered outdoor spot for a limited period, then increase their exposure as the plants tolerate it. Avoid an abrupt move into strong direct sun, drying wind or conditions unsuitable for the crop. Bring trays back under cover or protect them if the weather turns harsh, and use crop guidance to decide when overnight exposure is appropriate. The pace depends on the plants and conditions, so a fixed number of days is less useful than watching how each batch responds.
Make the hardening-off spot part of the nursery plan rather than trying to find room at the last moment. Keep trays accessible for checking and watering, and avoid letting the compost dry while plants are outside. If you are considering one of the 3.77 m² to 28.08 m² options on the Limited Edition Aluminium Greenhouses page, include the return journey indoors in your daily routine. Keep the batch’s bench space available while it is being acclimatised, so there is somewhere to put it if outdoor conditions deteriorate. Moving seedlings outside temporarily should not be treated as permanently freeing their space for the next sowing.

05
Transplant when plants and beds are ready
Readiness is a combination of plant development and the state of the bed, not a single date or leaf count for every crop. Look for sturdy growth and a stage appropriate to the species; roots should hold the growing medium together without the plant being crowded in its tray. Check the seed packet or crop guidance for the right transplant stage. At the same time, confirm that the bed is prepared and outdoor conditions are suitable. If either the plant or its destination is not ready, adjust the plan rather than making the move just to clear a bench.
Water the tray as appropriate before planting so the growing medium is easier to handle, then lift seedlings carefully, supporting the root ball rather than pulling on the stem. Follow crop guidance for planting depth and spacing, firm the soil gently around the roots and water in if appropriate. Keep labels with the correct bed or row, especially when varieties look alike. A calm, organised planting session reduces mix-ups and gives each seedling its intended place. Keep checking newly planted seedlings rather than assuming that the move completes their care; observe the bed afterwards and respond to the conditions there.
Review the handover and plan the greenhouse’s next use
After planting, check how the seedlings settle into their new beds. Look at soil moisture and the plants’ condition, and respond to the weather and crop guidance rather than following the greenhouse watering routine automatically. Replace a plant only if you have a suitable spare and the bed still has room; keeping a few extras in trays indefinitely can recreate the space problem the plan was meant to prevent. Once a batch has moved, clear its labels and trays so the next sowing is not confused with the previous one.
Note which batches were ready when expected, which beds were delayed and whether you raised more plants than you used. These observations help you adjust sowing quantities, bench space and planting windows next time. Also decide when each nursery bench will become available for another purpose, distinguishing plants still being hardened off from batches already planted outdoors. If you are comparing the 16.52 m² to 30 m² options on the T-Model Orangery Greenhouse page, show both the propagation layout and the intended later use on your plan. That makes the temporary nursery allocation clear without assuming that the whole greenhouse must remain devoted to seedlings throughout the season.
Frequently asked questions
Can I move seedlings straight from the greenhouse into a raised bed?
It is better to acclimatise them gradually first. Seedlings raised under cover may not be ready for outdoor sunlight, wind and changing temperatures. Increase their time outside in a sheltered place, and plant them out when the crop guidance and conditions suit.
How many seeds should I sow for a raised bed?
Work out how many plants fit using the crop’s recommended spacing and your bed plan. You can sow a small number extra to allow for uneven germination or losses, but avoid raising a large surplus without somewhere to plant it.
Which crops are suitable for starting in a greenhouse?
It depends on the crop, variety and growing guidance. Some vegetables, herbs and flowers can be raised in trays for transplanting. Many root crops are normally sown in their final position because moving young roots can disturb them.
Does a greenhouse make seedlings ready to plant out sooner?
Not necessarily. Conditions under cover can help germination and growth, but the bed and outdoor conditions still need to be suitable. Use crop-specific guidance and check the plants rather than relying on a fixed date.
How can I tell when a seedling is ready to transplant?
Look for sturdy growth and a stage appropriate to the crop. The roots should hold the growing medium together without the plant being crowded in its tray. Check the crop guidance, and make sure the bed is prepared before moving it.
A successful handover begins before the first seed is sown. Plan the raised beds, choose crops that suit transplanting, and raise only the number of plants you can use. Then keep the greenhouse routine focused on healthy growth, prepare the outdoor beds in parallel and acclimatise each batch before planting. With a clear destination and a flexible timetable, the greenhouse can support the garden without becoming a holding space for seedlings that are waiting for somewhere to go.
