
Testing Water Butt-Fed Drip Irrigation in a Greenhouse
Greenhouse watering guide
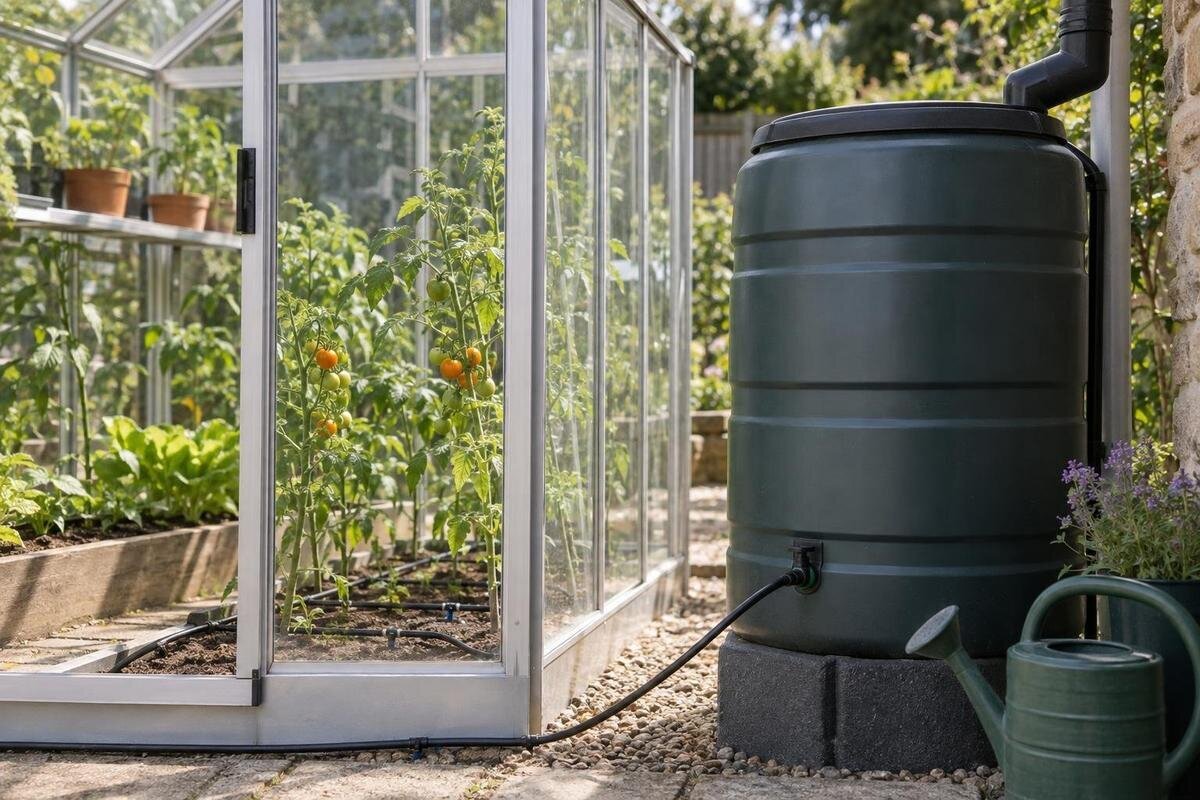
Water-butt-fed drip irrigation can work in a greenhouse, but gravity alone does not guarantee even flow. The useful pressure comes from the vertical difference between the water surface and the emitter outlets; it falls as the butt empties and is reduced by the filter, valve and pipework while water is moving. A dependable answer needs two checks: compare available head with component specifications, then measure the flow at the emitters in the layout you intend to use.

Can a water butt run greenhouse drippers?
Gravity can run a greenhouse drip line from a water butt, but only if the water surface sits sufficiently above every emitter and the components can work at the resulting pressure. A metre of vertical water head produces about 0.1 bar (roughly 10 kPa) of static pressure. If the surface is 50 cm above an outlet, that is about 0.05 bar before losses while water is moving. This conversion helps screen a design; it is not a promise of emitter performance. As the butt empties, the surface drops, so a line that flows well at the start may slow or become uneven later.
That is why a full-butt test or a bucket held under the tank tap can mislead. The outlet valve, filter, timer, fittings, main line and emitter all affect delivery; an emitter on a raised pot also has less head than one lower down. Check the minimum operating pressure for each emitter and the pressure, flow or resistance limits for other components. Pressure-compensating drippers regulate only inside their maker's stated range; they do not create pressure. The Classic aluminium greenhouse range is listed from 3.77 to 28.08 m², but floor area does not establish tank-to-emitter height or irrigation compatibility. Treat greenhouse choice and hydraulic suitability as separate questions.
Measure head from the water surface
Mark two tank levels: full and the lowest level at which you expect the line to operate. Measure vertically from the water surface to an emitter outlet; do not measure from the butt's base or along sloping ground. A metre of difference is about 0.1 bar, 50 cm about 0.05 bar and 10 cm about 0.01 bar, before losses under flow. These figures are a quick conversion from water head, not a substitute for component data. Record the result in metres or centimetres and convert only when needed, as a data sheet may use kPa or bar. If the low-level head is below an emitter's stated minimum, a full-tank reading cannot make the design dependable.
Check more than one outlet: note the highest dripper, the far end of each branch and a low outlet near the butt. The highest outlet has the least static head; distant outlets may also have more friction loss along the pipe. If pots sit on benches or hang above beds, include their actual outlet heights in the sketch. When planning a layout for a model in the Wall Greenhouse range, use the chosen model's drawing to mark the planting positions and the proposed pipe route. Then measure the water surface and outlet heights in the real installation. Keep those measurements beside the sketch so that a reading at the nearest dripper does not stand in for the whole system.
Choose emitters specified for low pressure
Read the specification for the exact dripper or dripline rather than relying on a broad label such as “low pressure”. Look for its minimum operating pressure, flow at that pressure, filtration requirement and permitted line length. A pressure-compensating emitter does not make pressure: below its stated range it may stop regulating or deliver too little. Drip tape, adjustable outlets and porous hose can each have different operating conditions, so do not assume one type will work because another did. If the manufacturer gives flow only at a higher pressure, do not extrapolate the figure unless a pressure-flow curve or written guidance supports it.
Check how flow is expressed: per emitter, per metre of line or for a whole section. Also check whether the stated value assumes a filter, regulator or other component, and confirm that the connectors suit the chosen tubing. If you are considering the Limited Edition Aluminium Greenhouses, draw the planting positions in your preferred layout before ordering irrigation equipment. Count the outlets and compare their documented operating requirements with the head you measured. Keep the emitter specification with your plan so you can compare the eventual catch-test results with the stated output. Where low-pressure data are missing, ask the equipment supplier before buying rather than assuming that a brief trial will establish reliable performance.
Plan pipe runs around the actual planting layout
With a small head, keep the route uncomplicated. Every narrow section, kink, unnecessary fitting or long branch can use some of the available pressure while water is flowing. Follow the emitter supplier's specified pipe diameter and maximum run; there is no universal tubing size that suits every gravity system. A suitably sized main line feeding shorter branches can be easier to test than one long loop. If outlets sit at different heights or need different amounts of water, consider separate zones, but test each zone with the number of outlets that will actually run together. Label the branches and keep their ends accessible for flushing.
For a model in the T-Model Orangery Greenhouse range, draw the actual pipe route around the intended beds, pots and access paths. Mark the first and last emitter on each branch, along with any changes in outlet height; these positions help identify where flow might differ. Note which branches will run together and which will operate separately, so the test follows the planned watering arrangement. A larger or more complicated layout does not automatically need a pump, but it gives you more reason to compare the farthest outlet with those nearer the supply. Keep the route drawing for later tests, particularly if you move pots or extend a branch.

Filtration for a low-pressure drip line
Roof runoff can carry leaves, grit and other debris, while sediment may collect in a water butt. Small passages in drippers can clog, so follow the emitter manufacturer's guidance on filtration and mesh rating. Do not simply choose the finest screen: a dirty or overly restrictive filter can reduce flow, which matters when there is little head to spare. Make the filter easy to inspect and clean, and check it during early tests. A screen at the butt outlet may catch larger debris, but it is not necessarily the filtration required by the emitter. Flush the line in the way specified for its components.
If you plan to collect rainwater from a model in the Pyramid Greenhouse range, check the roof and collection components separately from the drip equipment. The listed floor area is not the roof catchment area and does not establish gutter compatibility. For a meaningful irrigation test, use the water source and filter you intend to keep in place: a clean-water test without the installed filter may conceal a restriction. Record whether the filter was clean when you measured the output, so you have a useful comparison if delivery later slows. If collected water contains visible sediment, inspect the filter and outlets more often while establishing a reliable cleaning routine.
Turn a timed catch into a flow figure
Once you have a timed catch, convert it to an hourly rate so it can be compared with other outlets. Use this calculation: flow in L/h = collected mL × 60 ÷ (minutes × 1,000). For example, 120 mL collected from one emitter in 30 minutes equals 0.24 L/h. This is only that emitter's measured output under the test conditions, not a guaranteed rate at every tank level. Record the collection time and water level beside each result. If emitters differ, keep their readings separate rather than multiplying one convenient sample by the total number of outlets.
When planning watering for a model in the Aluminium Greenhouses with Storage range, calculate water use from the outlets in your planting layout. Add their measured rates to find the total flow for the branches that run together, then multiply by the run time in hours to estimate the volume delivered. Keep separate totals for zones that operate independently. Compare the result with the water available above your chosen minimum operating level, rather than the butt's full capacity. This connects the catch test to a practical question: whether the usable supply can support the intended run without dropping below the level at which you tested the system.
Test the complete system as the butt empties
Set up the butt, filter, valve, timer and tubing in their intended positions. Fill the butt to a measured level, open the line as it will be used and allow the branches to fill before collecting water. Ideally, catch water from every emitter at once. If there are too many, select representative outlets, including the first, highest, farthest and lowest, and keep all other emitters open during collection. Choose a timed interval long enough to measure the output; 15, 30 or 60 minutes may suit different flows and measuring containers. Record each volume, then repeat at a mid-level and at the lowest normal water level.
For a planned Prestige Greenhouse layout, test the installed irrigation arrangement rather than relying on water collected from the butt outlet or a short sample of tubing. Keep the same filter, valve position, emitter count and zone configuration between readings, so the comparison is meaningful. If the system is intended to run two branches together, test them together; testing each alone can hide a flow problem that appears when both are open. Label the collection containers to match the outlet positions on your sketch. This lets you compare the same outlets at each water level without confusing a change in location with a change in delivery.
Compare measured flow with plant demand
An output test tells you how much water the line delivers, not how much each plant needs. Requirements differ with the crop, container or bed, growing medium and conditions, so one flow reading cannot set a universal watering schedule. Use the measured rate to work out the volume delivered over a possible run, then check moisture where the roots are and adjust the plan to the plants. A line can have even output and still deliver too much or too little for its purpose. If crops have different needs, group them deliberately rather than assuming one setting suits every pot.
The Spacious Greenhouse range is listed from 47 to 70 m². Depending on the planting layout, that space may involve more outlets, longer routes or several watering zones. Count the planned emitters and use their measured rates to estimate the combined output at the low tank level. Compare the volume delivered during a proposed run with the usable water supply and the amount your planting plan calls for. Keep the results for different crop groups separate where their watering needs differ. If flow is uneven or insufficient, divide the beds into zones and test each zone on its own before deciding whether the route or water supply needs to change.

Check timers and valves before adding automation
A timer or automatic valve can introduce another pressure or flow requirement. Check the manufacturer's minimum pressure and flow, and include the device in your test. Battery-powered does not mean pressure-free: the battery operates the control, but the timer does not raise the water pressure. Some devices may also restrict flow even when open. If the timer fails to open or output drops when it is fitted, compare the results with and without it; do not assume a timer designed for a hose supply will operate reliably from a butt.
If the results are poor, work through the simple causes first: confirm the water level, check for a kink or blockage, clean the filter and inspect the far end of the line. You can then shorten or simplify the route, reduce the number of outlets running at once, or divide the system into zones, following the component limits. Raising the butt may increase head, but a full butt is heavy: use a stable support suitable for its filled load and seek qualified advice if needed. If the available head still falls below the equipment requirements, ask a supplier to match a suitable alternative or pump to the measured pressure and flow.
Clean the system and repeat the test
Once the line is working, keep the filter and butt accessible for inspection. Remove collected debris, check for leaks and look for outlets that have slowed or stopped. Follow the component instructions for cleaning and flushing rather than using an unverified treatment. A blocked emitter can make a line appear to have inadequate head, while a dirty filter can reduce flow throughout the system. Rechecking the farthest outlets after maintenance helps distinguish a local blockage from a general pressure problem.
Keep a short record of the butt's water level, the measured head, which branches were open, the test duration and the collected volumes. Repeat the catch test after changing an emitter, filter, timer, pipe route or outlet height, as each can affect the result. Retest at a low water level as well as when the butt is full. These notes turn a one-off trial into a useful comparison: you can see whether the setup still delivers the flow you measured, rather than relying on how it looked during its first run.
Frequently asked questions
Will pressure-compensating drippers work from a water butt?
Only if the available head at the dripper meets the manufacturer's stated operating range. Pressure compensation does not create pressure, and an emitter below its minimum may deliver too little or stop regulating. Test the complete line at the lowest water level you plan to use.
How high does a water butt need to be?
There is no single height that suits every system. One metre of water head is about 0.1 bar, but the usable pressure also depends on emitter height and losses through the filter, valve and pipework. Measure the vertical gap and compare it with the equipment specifications.
Can I use a timer with gravity-fed drip irrigation?
Possibly, if the timer is specified for the available pressure and flow. A battery-powered timer does not increase pressure. Include it in the test, as a timer that works on a mains-fed hose may not work reliably from a butt.
What is the best way to measure dripper flow?
Run the complete system, collect water from each outlet for a timed interval and record the volume. Convert the result to litres per hour using the collection time. Test with the outlets operating as they will in use, not with the other emitters shut off.
Will the system keep working as the butt empties?
Its available head falls as the water surface drops. Test at the lowest level at which you expect to irrigate, and set a practical minimum water mark if output becomes too weak below it. A full-butt test alone cannot confirm performance through the whole drawdown.
Treat a water-butt-fed line as a low-pressure system that needs to prove itself under real conditions. Measure the vertical head, choose components with suitable specifications and catch-test the complete layout at the lowest water level you expect to use. If the measured output is too uneven or weak, check restrictions and zones before deciding whether gravity is workable. The test results, not the greenhouse's floor area or a full-tank trial, give you the practical answer.
