
Condensation on Greenhouse Plants: Finding the Drip Source
Greenhouse troubleshooting
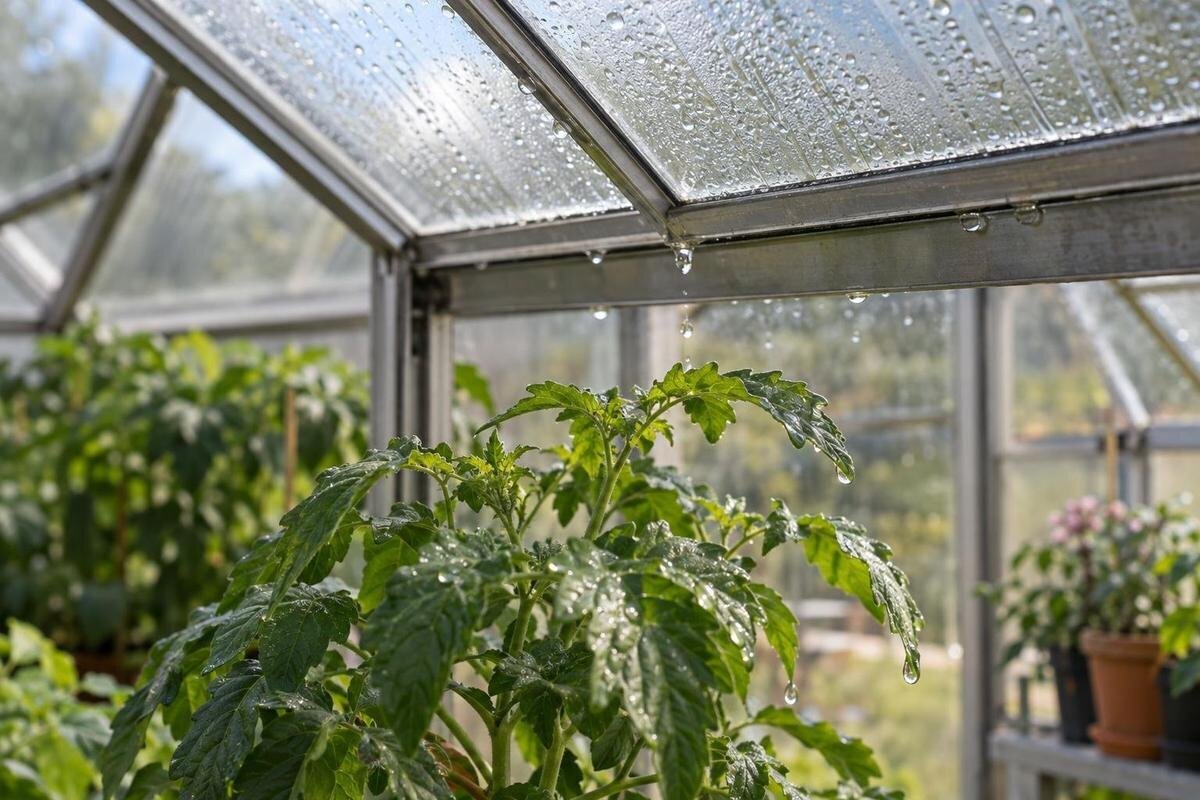
Water on greenhouse leaves at dawn can look as though it has fallen straight from the roof, yet condensation may have formed on a panel or frame some distance away. A drip can follow a slope or structural member before it drops. The quickest useful diagnosis is to mark where plants are wet, photograph the structure above them, and compare the route with overnight temperature, relative humidity, rain, watering and vent notes. A single reading or image rarely identifies the source, but a consistent record can narrow the possibilities.

What condensation does—and does not—show
Water vapour is present in greenhouse air even when the structure looks dry. When an interior surface cools to the dew point of the air touching it, vapour can condense into beads or a thin film. A roof panel is an obvious place to look, but the first wet surface could also be a frame, fixing, edge or another exposed part. As droplets join, gravity carries them along the local slope; the shape of a panel or its contact with a frame can redirect the route. A plant may therefore be wet beneath a part of the roof that looks dry.
Treat the wet leaf as the landing point, not proof that the water formed directly above it. Moisture may begin upslope, follow a ridge or rail, then fall at an edge. Foliage can also be wet because of irrigation, rain entering through an opening, or condensation formed directly on a leaf. A few droplets do not identify which process occurred. Ask where water appears first, whether the same patch returns after a dry night, and what lies along the likely path above each affected plant. Widespread beads on the roof and isolated leaf-tip drops offer different clues, but neither is conclusive alone.
Map wet leaves before wiping them
Before moving pots or wiping surfaces, sketch the greenhouse floor. Mark the door, benches, vents and fixed frame lines, then mark each wet patch and the affected plants. Note whether water is on the upper or lower leaf surface, whether only exposed foliage is wet, and whether a visible trail appears on the roof at the same time. Label places by bench row or plant position instead of using vague descriptions such as near the back. A rough grid is enough; it lets you see whether the same route repeats, shifts, or appears in separate zones.
Take a wide image that shows the layout, a closer view connecting the plant to the roof above it, and close-ups of beads or trails. Photograph the area as soon as you find the water, before wiping, then repeat from the same position later. Include a recognisable frame member and record the date, time, recent rain and watering. Keep this floor plan if you later compare greenhouse sizes: the Wall Greenhouse is listed from 3.69 m² to 14.34 m². Mark the proposed footprint alongside your benches and affected plants so the comparison relates to your actual growing space.
Trace the drip back along the roof
Start above the wet foliage, but keep looking along the roof rather than stopping at the exact point overhead. Inspect the interior face of panels, the ridge and eaves, the meeting points between panels and frame, and the lines where water could run towards a low edge. Water can turn where a panel meets a rail, so do not assume it followed the shortest straight line. A narrow damp trail may lead back to the first beads; if it disappears, check the next structural line. Compare more than one affected plant: separate wet patches may share a route further uphill.
Use a torch from floor level when the greenhouse is dim, and take a second photo of the likely route. Do not climb on glazing, press a roof panel or dismantle a joint to follow water; use the instructions or qualified help for parts that are difficult to reach. For a future purchase, turn the route you have traced into specific questions about roof and joint details. The Limited Edition Aluminium Greenhouses listing gives a size range of 3.77 m² to 28.08 m². Compare the documentation for the size under consideration with your notes, rather than judging the roof arrangement from its overall area.
Find the first wet surface
At first light, inspect which surfaces are wet and where the first visible beads sit. A film or many small beads across an interior panel can be consistent with condensation; beads gathered along a frame, edge or fixing show where water is collecting or travelling. Neither pattern alone proves why it is wet. Airflow and exposure can vary across a roof, and a frame may show a different pattern from nearby glazing. Record the exact surface and location rather than writing only roof wet. A short sequence—panel, frame, trail, drip point—can reveal more than one photograph of a single bead.
Look closely at panel edges, seams, corners, fixings and the lower end of any visible trail. Compare the same spots after a dry night and after rain; a recurring overnight pattern may suggest condensation, while a rain-linked line at a joint deserves a leak check. Label these locations clearly in your photographs so they can be matched to the structure. When assessing another roof arrangement, such as the T-Model Orangery Greenhouse, listed from 16.52 m² to 30 m², ask to see the corresponding roof and frame details. Use those details to identify the surfaces you would need to inspect, not to predict condensation from the model name.

Compare the pattern across the night
Condensation often becomes visible overnight because the greenhouse and its exposed surfaces lose warmth after sunset. Relative humidity can rise as air cools, even if the amount of water vapour changes little, so a high dawn reading does not by itself prove that plants or soil added moisture. Note when the first film appears, when a drip is first seen, and whether the area dries as the day warms. If you check only at midday, you may miss the formation and see only a dried trace. Include the time of your first observation in every photograph or log entry.
Compare several nights rather than treating one morning as a pattern. Note the date, rain, watering time and whether vents were open or closed; keep these observations with the photographs. Similar drips after dry nights direct attention towards the condensation route, while water that appears only with rain points elsewhere, though conditions can overlap. This record also helps you explain the problem when discussing a replacement. If the Pyramid Greenhouse, listed from 5.53 m² to 18.9 m², is on your shortlist, describe when and where your current drips occur. Keep that discussion separate from the footprint comparison: the size range does not describe overnight conditions.
Read temperature and humidity records carefully
Place a temperature and humidity logger at a consistent point around plant height, away from direct sun, a heater, a wet leaf and the immediate airflow from a vent. If a second sensor is available, put it near the suspected roof zone without touching the surface, and label its location. Record air temperature in °C and relative humidity in per cent. Note the logging interval, or the time of each reading if recording manually. Follow the equipment instructions and keep it dry. A reading beside a crop and one near the roof are not interchangeable; their difference can help map local conditions, but neither measures the roof itself.
Read the trend alongside the photographs: note what happens as temperature falls, humidity changes and the drip begins. Relative humidity can rise as air cools, while a new moisture source can also affect it. Air data can help establish when condensation is plausible, but cannot show whether a particular panel is below the dew point. Include sensor positions when planning a different internal layout. The Limited Edition greenhouse with built-in storage is listed from 5.52 m² to 28.08 m². Check the layout for the version you are considering, including access to inspection points and a suitable place for the logger, rather than choosing its position around storage after installation.
Distinguish condensation from other water sources
Compare the drip with weather and plant-care times. If it appears after rain and starts at a roof joint or outside edge, record the timing and follow the visible path; a rain-linked leak needs a different assessment from beads forming after a dry night. Wind-driven rain can enter in ways that vary, so timing alone is a clue, not proof. Note when plants were watered, whether water splashed onto leaves, and whether the floor or pots were already wet. Avoid reproducing a leak by spraying or pouring water on the roof: an improvised test can obscure the original route and may be unsafe at height.
Check the leaf pattern too. Water across a leaf surface may be dew or run-off; droplets limited to the margins can have another plant-related cause, so their position alone does not identify a roof problem. If rain timing points to a joint, match the location to the instructions for the installed structure before touching seals or fittings. For example, the Prestige Greenhouse listing spans sizes from 3.77 m² to 28.08 m². The catalogue name and area can help identify a model, but you still need the details for the installed version to discuss a particular joint or fitting.
Check ventilation without guessing
Ventilation can affect how quickly moist air leaves and how air moves around the greenhouse, but an open vent does not automatically warm every cold surface or prevent condensation. Record which vents were open, when they were opened, whether an automatic opener moved, and whether anything obstructed an opening. Consult the exact equipment manual before changing an adjustment or holding a vent in a position outside its instructions. The aim is not to prescribe a universal setting; it is to see whether a repeatable change in airflow coincides with a different drip pattern.
When comparing nights, change one factor at a time where practical and only within the equipment’s normal operation. Keep watering, photo points and sensor positions consistent. If a change improves one area but worsens another, record both results rather than treating the improvement as a complete solution. Bring these observations into any comparison of ventilation layouts. The Spacious Greenhouse listing covers 47 m² to 70 m²; check the number and position of vents in the exact configuration under consideration. Compare their locations with the growing areas and access routes on your plan instead of assuming that overall size describes ventilation.

Record sun and shade around the greenhouse
Note where direct sun and external shade fall during the later part of the day, and whether any roof or wall area remains shaded. Photograph the same locations and mark nearby trees, walls or screens on your plan. A shaded surface may not follow the same warming pattern as a sunlit one, so the observation can help explain why one area differs from another. It does not prove that shade caused the drip. Seasonal changes in the sun’s path can also alter which areas receive light, so date each observation rather than relying on a memory of last month’s pattern.
Do not add shade as an automatic fix: reducing daytime sun can change light and temperature without removing moisture from the air. First use your dated observations to identify which areas are already shaded and when. If you are considering a shade product or a different greenhouse, check the compatible options for that exact model in its current documentation. For the Aluminium Classic Greenhouse, listed from 3.77 m² to 28.08 m², identify the size and version you are considering before asking about shade options. Keep the proposed footprint and the position of existing trees, walls or screens together on your plan.
Decide when a repair assessment is needed
Repeated water along one seam, visibly displaced glazing, a damaged frame or a trail that appears to come from a joint calls for a model-specific inspection. Follow the manufacturer’s manual for routine visual checks, and do not climb onto the roof or remove panels to test a theory. For surfaces you can see safely, note whether they are wet before rain, whether a route appears and whether the same location recurs. Avoid applying sealant or changing hardware on the strength of a photograph alone; the cause may be different from the visible drip point.
If the evidence instead points to condensation on cold surfaces, use the recorded pattern to decide what to review in the existing routine, ventilation or moisture sources. One morning cannot establish that a new greenhouse or accessory is needed. Keep the plan, dated photographs, temperature and humidity readings, rain and watering notes, vent observations and exact model name together. That gives a supplier or qualified greenhouse professional specific evidence to assess, and helps distinguish condensation from water entering through an assembly before any components are altered.
Frequently asked questions
Why are my plants wet when the roof looks dry?
Water can form on a different part of the roof or frame, run along a slope or rail, then fall onto the plants. Condensation can also be patchy or become hard to see as surfaces warm. Photograph the foliage and structure together when you first notice the water, then look for a route above and uphill from the wet area.
Is condensation more likely to appear overnight?
It often becomes visible overnight or at dawn because exposed surfaces cool after sunset. Condensation can form when a surface reaches the dew point of the air touching it. Relative humidity may rise as air cools, too, so the time of day is a useful clue but does not prove the source. Compare several nights, including dry nights.
How can I tell condensation from a leak?
Compare the timing, weather and route. Beads that recur after dry nights may point to condensation; water that appears with rain and follows a joint or edge merits a leak check. Neither pattern is conclusive on its own. Keep photographs and notes, and follow the instructions for the exact greenhouse before touching seals or fittings.
Will a humidity meter identify where the drip starts?
No. A humidity and temperature reading describes the air at the sensor, not the temperature of a roof panel or frame. Consistent readings can help show when condensation is plausible, especially alongside photographs and the time a drip begins. Record where the sensor was placed and avoid treating a single dawn reading as proof.
Should I open vents or add shade to stop the drips?
Neither is a guaranteed fix. Ventilation can affect moisture and air movement, while shade can change how surfaces warm during the day; the result depends on the greenhouse and conditions. Record what is already happening, check the exact equipment instructions and change one factor at a time within normal operation.
Follow the water upstream rather than assuming the wet leaf sits directly below its source. Dated photographs and a short overnight log can help separate a recurring cold-surface drip from rain or watering, and show whether the pattern changes with ventilation or shade. The more precisely you record the first wet point and the route, the less likely an adjustment or replacement will be chosen for the wrong reason.
