
Winterising Pipes, Pumps and Tanks in a Greenhouse
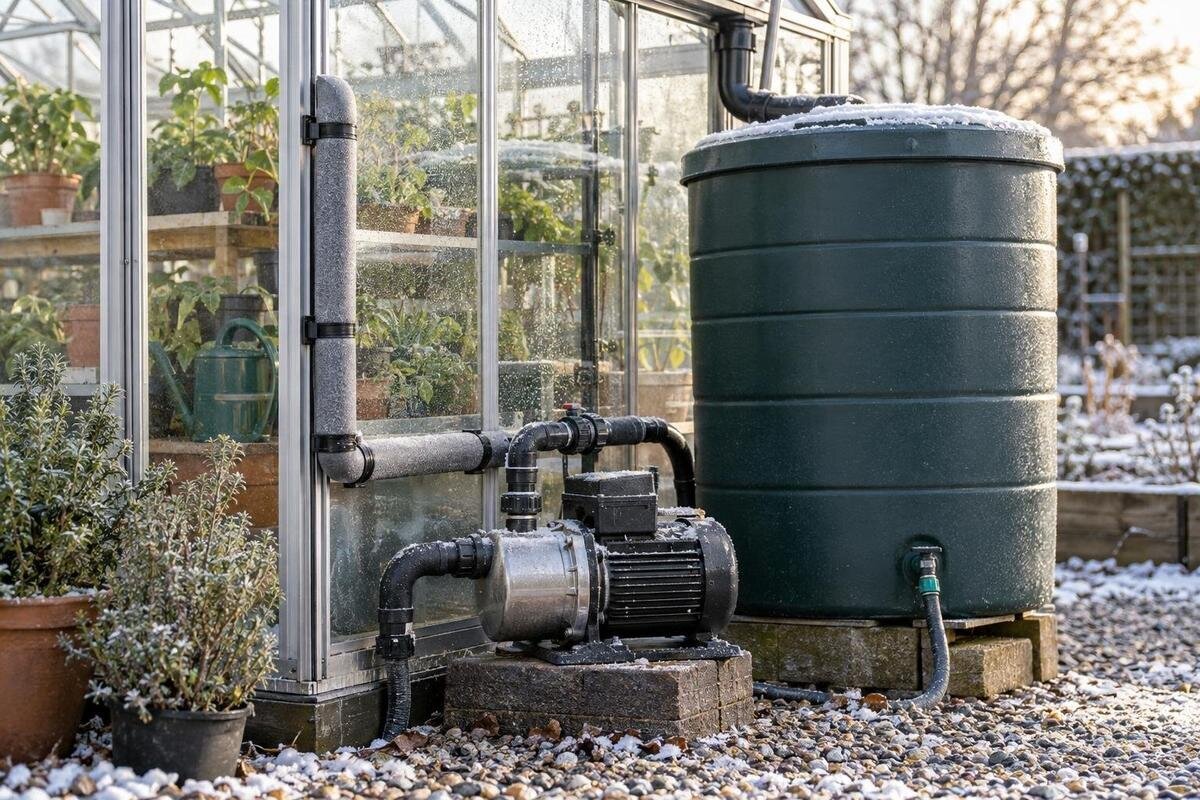
Greenhouse water systems
Malta's winters are generally mild, but an occasional cold snap can still catch water in an exposed pipe, hose, filter, pump casing or tank outlet. Winterising is a water-system task, not a general greenhouse clean-up: the right response depends on which parts are exposed, what can safely be drained and whether crops still need irrigation. This guide covers each component, whether you are planning a shutdown or keeping essential irrigation in service, with the instructions for your exact equipment taking precedence.

Where cold can affect a greenhouse water system
Malta's winters are generally mild, but an occasional cold snap can still expose a weakness in a water system. Conditions vary across one installation: an outside supply line, a run near an opening, a shaded low point and a pipe inside the growing area do not have identical exposure. A greenhouse should not be treated as a guaranteed frost-free enclosure, and a warm afternoon does not show how cold water in an exposed fitting may become overnight. Small trapped volumes in valve chambers, filter bowls or pump housings are easy to overlook when the main pipe looks clear. If trapped water freezes, expansion can stress a fitting. Assess each component's position before deciding what needs attention.
Choose whether the system will be shut down for a period or kept available for winter watering. A full drain-down is not automatically the safest choice: some components have a prescribed drainage method, while others must remain assembled or be stored in a particular condition. If plants still need water, identify essential zones and any exposed sections that can be isolated, then follow the instructions for each item. Do not rely on greenhouse air alone to decide what can remain in service. If you are choosing a structure such as the Wall Greenhouse, include the water supply route in your site plan. The greenhouse model alone does not establish how the irrigation equipment should be winterised.
Map the system before opening any fittings
Walk the water path from its source to the last outlet and draw a simple map. Mark the supply shut-off, tank inlet and outlet, pump, filter, pressure regulator, timer, valves, separate irrigation zones, hose connections and manual taps. Note whether water comes from a storage tank or another supply, since the source affects the order in which equipment is isolated. Add arrows for flow direction and note which branches are automatic or manual. Label controls that look alike, or take clear photographs. Keep the sketch with the manuals so you can repeat the sequence and show another person which parts may still be connected to water.
Next, mark low points, rises, loops, capped ends and sections hidden behind benches. A closed valve can leave water trapped on one side, and small branches serving drippers may not empty when the main pipe stops draining. Use the system diagram to locate designed drain points and note which valves need attention for those points to work. When comparing options in the Limited Edition Aluminium Greenhouses range, use the chosen model's technical drawings alongside your site plan to plot pipe routes around benches. Mark where you will need to reach valves and remove serviceable parts, rather than relying on the overall floor area to judge access.
Draining greenhouse pipework
Start at the water source rather than by loosening a fitting. Close the designated supply valve and follow the equipment instructions for releasing pressure before opening a filter, connector or drain point. If an automatic timer controls a valve, use its documented shutdown procedure instead of assuming that switching off the display has stopped the water. Open only outlets and drains intended for this purpose, in the sequence shown by the system instructions. Work through one zone at a time, noting when it has emptied and whether another branch remains connected. Account for any alternate supply or tank feed, and never loosen a joint that could still be under pressure.
Inspect each branch from its source to the end after draining. A sagging run, loop around a bench leg, closed non-return valve or low connector may retain water even when the main outlet has stopped dripping. Check drain points separately, but do not drill, cut or dismantle pipework merely to create a way out. Compressed air is not a default shortcut: it can damage components if the method or pressure is unsuitable. If the system gives no clear draining procedure, contact its installer or irrigation supplier. For a new T-Model Orangery Greenhouse installation, include access to joints in the pipework plan so these checks remain possible after benches and growing equipment are in place.
Flexible hoses, valves and irrigation branches
Flexible hoses and small-bore irrigation lines need a separate check. After shutting off the supply and relieving pressure, disconnect a portable hose only as its instructions allow, then drain it using the specified method. Inspect couplers, end caps, emitters, spray heads and shut-off valves: water may remain behind an internal valve or in a connector even when the main run is empty. If several lines serve separate beds, label both ends before removal. This is especially helpful where small branches are difficult to see from the main valve, and it prevents a hose being returned to the wrong zone when watering resumes.
Do not pull a fixed line hard, kink it to force out water or seal a wet end without checking the manufacturer's advice. If removable parts are to be stored, clean and dry them as directed, keeping small seals and connectors together and labelled by location. Avoid applying oil, grease or sealant unless the instructions specify a compatible product. Take a photograph of the route before lifting or coiling a line. If you are planning the watering layout for a Pyramid Greenhouse, decide which branches will be removable and mark their connection points on the plan. Leave their endpoints and valves accessible so seasonal removal does not require disturbing fixed lines.

Filters, regulators and controllers
Filters, regulators and automatic controls often contain small cavities where water remains. Shut off the supply and release pressure before opening a filter housing. Remove and clean a screen or cartridge only as the manufacturer describes; do not scrape fine mesh, soak a cartridge in an unapproved cleaner or disturb seals without instructions. Empty the housing through its intended drain, if it has one, and check the bowl, lid and connections for retained water. If a seal looks damaged, use only a replacement specified for that component rather than one that merely looks similar. Keep parts in order and note their orientation for reassembly.
Treat timers and controllers separately from wet plumbing. If a unit is removable, use its manual to decide whether it should be stored indoors and whether its battery should be removed; not every timer is designed to be detached or left exposed. Record its settings before changing them, especially where zones have different schedules. Do not open fixed electrical equipment or improvise wiring; ask a qualified professional if a controller is hard-wired or its condition is uncertain. When considering the Aluminium Greenhouses with Storage range, distinguish between space for fixed controls and storage for removable timers. Check the equipment's storage requirements rather than assuming any enclosed area is suitable.
Preparing an irrigation pump
Identify the pump type and find its specific winter instructions before touching a drain plug or disconnecting a pipe. Some pumps have a designated way to empty the water-filled section; others must remain assembled or be drained differently. After closing the water source, follow the documented steps for making the unit safe and releasing pressure. Consider both inlet and outlet connections: draining one side does not show that the other is empty. Do not open a motor casing, disturb wiring or run a pump dry to clear water. If it is fixed in place, hard-wired, difficult to isolate or has no clear manual, use a qualified pump or irrigation technician rather than guessing.
If the instructions allow removal, mark the inlet and outlet, keep loose fittings together and store the pump in the conditions specified by its manufacturer. Never carry it by a cable or attached hose, and do not assume a covered spot inside the greenhouse is a suitable storage location; moisture and temperature limits vary by model. Keep the manual with the unit or the system map. When it returns to service, prime and start it only by the stated procedure, then inspect its connections while it runs. For a Prestige Greenhouse installation, plan the pump's position around the space needed to inspect, disconnect and remove it. Use the pump instructions to establish that clearance rather than judging it from greenhouse dimensions alone.
Storage tanks and rainwater lines
A tank's correct winter treatment depends on its material, construction, installation and manufacturer guidance, so there is no universal rule to leave it full or empty. If exposed to cold, check whether it should be drained and how its outlet, tap and any level-control device should be cleared. Switch off automatic refill using the documented control before emptying the tank. Check whether a drain valve is intended for routine use. Do not remove a fitting while it is under water pressure, and do not discharge water where it could make a path slippery or collect against the greenhouse base. For a difficult-to-access tank, seek advice instead of improvising.
Where rainwater is collected, include the inlet, overflow, outlet and pipe leading to the greenhouse in the same check; draining the tank alone may not clear those lines. Remove leaves or sediment only as the tank instructions permit, and keep covers and removable fittings accounted for. Do not add antifreeze or other chemicals to irrigation water unless the equipment manufacturer expressly allows the product for the intended use. If you are considering the Spacious Greenhouse, measure the proposed tank position as part of your site layout. Account for access to its outlet and the route of connecting pipes, rather than assuming the greenhouse's overall size establishes room for tank maintenance.
Keeping selected irrigation zones in service
Some crops still need water through the cooler months, so a blanket shutdown may not suit your growing plan. Separate the installation into zones: keep only the parts needed for irrigation in service, and only where the component instructions permit the expected conditions. Isolate or remove unused exposed equipment if it can be drained safely. If one valve controls both a sheltered bed and an exposed line, check its effect on both zones before relying on it. Keep a manual watering option available if the automatic system is offline, and note which zones remain live so another person does not mistake them for drained lines.
Before a forecast cold snap, inspect the vulnerable points on your map: fittings, filters, taps, pump casing and tank outlets. Use a cover or insulation only where the equipment maker approves the material and method; it is not proof that water inside a line cannot freeze. Check again after the cold spell, before assuming that a system left running is undamaged. If you are considering the Aluminium Classic Greenhouse, plot both indoor and outdoor pipe runs on your site plan when assessing winter exposure. Decide which components may remain in service from their separate specifications and actual positions, not from the greenhouse model name.

Inspecting and restarting after a cold spell
Before refilling a drained system, look for visible cracks, bulges, loose couplings or distorted filter bowls, and inspect the pump body, tank outlet and hoses. Check accessible joints for damp patches or movement before turning the water on. Replace damaged components rather than testing them under pressure. Refit filters and removable parts in the order shown in their instructions, confirm that drain points are closed, and reconnect only the lines you labelled. If a part is missing or a valve position is uncertain, pause and consult the diagram. A rushed restart can send water into the wrong zone or create a leak on the greenhouse floor.
Bring sections back into service according to the manufacturer's procedure, watching each connection as water is restored. Prime a pump only by its stated method. Test every zone rather than assuming flow at the first outlet proves all branches are clear, and compare performance with the system's normal operation instead of inventing a pressure target. Check accessible joints again after the first run, since a connection may seep only once the line is fully wet. If a pump sounds or behaves unusually, or water appears where it should not, stop the system and ask an installer to investigate before using it again.
Records and when to get professional help
Make next winter's routine easier by keeping the system map, manuals, model numbers, filter details and drain-point locations together. Add a brief note of what was isolated, what was stored and which zones remained in service. Date the note and photograph the final valve positions so the record reflects the actual setup. If a cold spell reveals a section that cannot be drained or protected as instructed, ask a professional to assess the route or a suitable system change; do not cut into an unknown line. Repeated leaks, a pump that cannot be isolated or unclear fixed electrical connections are also reasons to stop and get qualified help.
For a new greenhouse installation, ask the installer to identify which parts can be drained, which must remain assembled, and where each isolation valve is located. Keep the exact instructions for the pump, filter and controller rather than relying on a general product description. A serviceable layout lets you reach valves and remove components without shifting benches or dismantling unrelated equipment. Ask for the documented sequence to be shown and mark it on your sketch. This makes winter care specific to the actual system: pipes, pumps and tanks differ, and no single drain-down sequence safely suits them all.
Frequently asked questions
Do I need to drain every greenhouse pipe in Malta each winter?
No. Malta's winters are generally mild, but exposed components may still be affected by a cold snap. Decide from the pipe route, the equipment instructions and whether irrigation must continue. Drain only sections with a suitable documented method; do not assume that one tap empties every branch.
Can I leave water in the storage tank?
There is no universal rule to leave a tank full or empty. Its material, installation and instructions determine the right treatment. Check the outlet, tap, inlet, overflow and any level-control device as well as the tank itself, and turn off automatic refill before draining it.
Can I use a compressor to clear drip lines?
Not as a default method. Compressed air can damage components if the method or pressure is unsuitable. Use it only if the instructions for your system specify how to do so; if the procedure is unclear, ask the installer or an irrigation professional.
Should I remove the pump for winter?
Only if its manufacturer allows removal and gives instructions for draining and storage. Some pumps have a specific drain procedure; others must remain assembled or be treated differently. Do not open the motor casing or run the pump dry to clear it.
Can automatic watering stay on through winter?
It can remain in service only if the equipment instructions allow the expected conditions and the exposed parts are monitored. If some zones are shut down, record which ones and keep a manual watering option available for plants that still need water.
Winterising a greenhouse water system is best treated as a component-by-component check before cooler weather and again after an unusual cold spell. Map the route, follow each manufacturer's draining and storage instructions, and keep needed irrigation zones in service only when their equipment is suitable for the conditions. That makes hidden water easier to account for and helps make restarting more predictable, without treating every pipe, pump or tank as though it were the same.
