
Planning Clear Working Space Around a Greenhouse
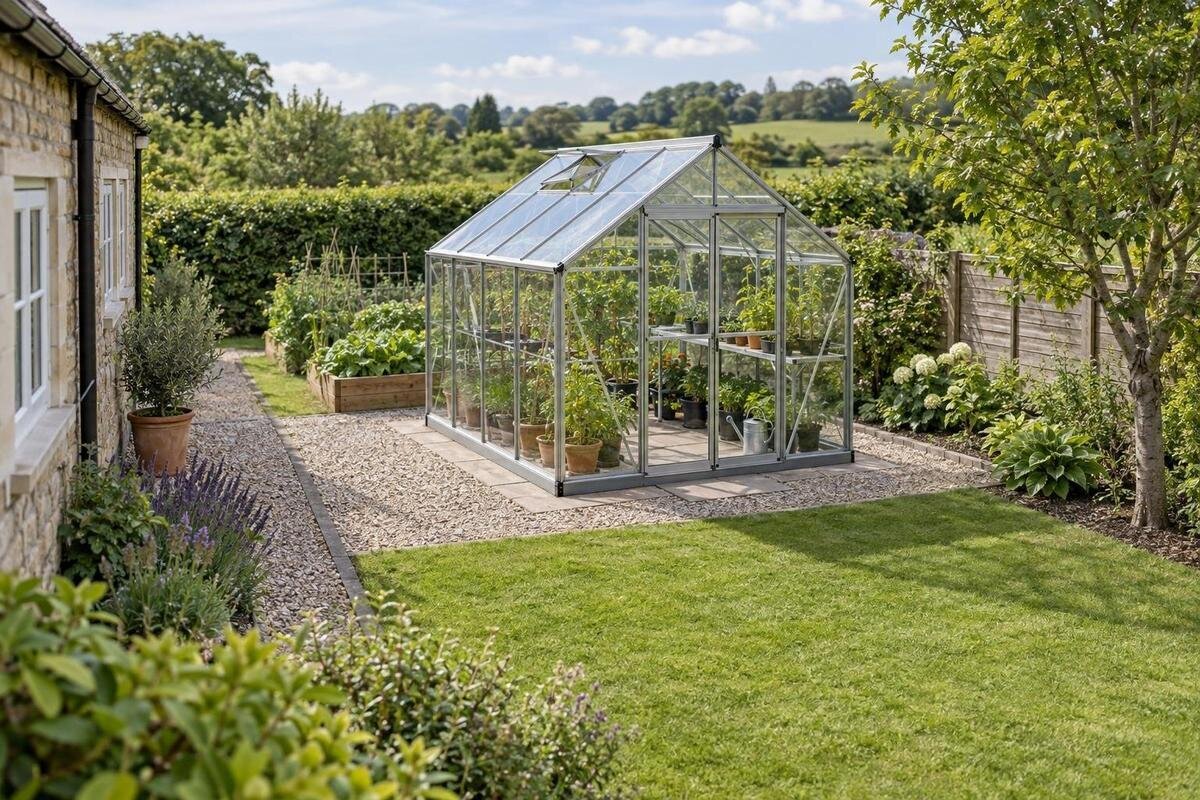
Greenhouse site planning
Planning a greenhouse means reserving more than the rectangle it occupies. Someone needs a route to the site for installation, and later there must be room to reach the outside surfaces, any fitted gutters and the surrounding garden. A scaled perimeter-access plan turns those jobs into measured work zones without assuming that the same clearance suits every side or every plot.

Checks before choosing 1
Greenhouse footprint and working space
The greenhouse footprint is only the area the structure occupies. A working perimeter is the extra space needed for people, tools and movement during specific tasks, and it can vary by side. Assembly might require temporary room for components and tools; routine checks may need only a clear approach; cleaning a high or awkward panel can require room for the method and equipment chosen. A path or paved strip may already provide some of that space, whereas a planted bed, wall or narrow passage may make it inaccessible. Treat these as separate questions rather than assuming a neat, equal band around the whole structure. Also distinguish a person's route from a position where tools can be handled: a passage you can walk through may not be wide enough for a cleaning or repair task.
One clearance figure cannot replace the installation and maintenance instructions for the chosen model or the constraints of the actual plot. Check what the supplier requires around the structure and whether the planned working area falls within land you can use. A boundary, shared access, existing services or a fixed wall may make an apparently clear strip unavailable in practice. Do not assume that space across a boundary can be used for cleaning or repair, or infer a legally required distance from a general article. If the position touches a boundary or involves a technical installation, confirm the relevant requirements with the owner, supplier, installer or appropriate professional. On the drawing, distinguish permanent access from space available only temporarily.
Measure the full exterior footprint
Start with the exact external dimensions of the selected greenhouse, not only a catalogue area figure or the broad category name. Trace the outside edges on the site plan and note any parts that extend beyond the main frame, such as a base, eaves, gutters or downpipes, where fitted. Mark the full door opening separately. Check what the supplier's drawing includes: if the stated width and depth stop at the frame, do not assume they also cover a foundation or roof projections. Record the measurement units and whether each figure is internal or external. These details determine whether a nearby wall, path or hedge remains reachable, and whether the stated outline fits beside another fixed feature.
A listed size range helps compare options, but it cannot stand in for the dimensions of the version you plan to install. The Spacious Greenhouse range is listed from 47 to 70 m²; use the exact selected version's drawing to plot its outside edges rather than estimating from the range label or a product image. Write the measurements beside the outline and note where they came from. If dimensions depend on the configuration or foundation, request the corresponding plan before deciding how much room remains for access.
Checks before choosing 2
What to show on a scaled perimeter-access plan
Choose a scale that keeps the whole plot and its narrowest gaps legible. Draw property boundaries, walls, sheds, gates, trees, drains and existing paths first, then place the measured greenhouse outline on that base. Label the sides by direction or simply call them A, B, C and D. Add the entrance and its opening area, plus any part that needs space outside when opened. A rough sketch is useful for comparing positions, but it cannot show whether a tight passage is usable unless the distances are measured. Keep units consistent and add a scale bar so that someone else can read the plan without guessing.
Make the perimeter-access drawing clear with a simple line key. Use a solid line for the greenhouse, a separate outline for space kept clear during routine work, and a dotted or hatched outline for temporary assembly or repair space. Draw the approach route as an arrow from the gate or delivery point, and mark pinch points and turning areas. Label the measured width of critical gaps and hatch inaccessible areas. When comparing options in the Aluminium Classic Greenhouse range, use the same scale and line key for each version so that differences in the space left around it are easy to see.
Delivery and assembly need temporary space
Plan how the greenhouse, its components and the people assembling it will reach the site, not just where the finished structure will stand. Trace a route from the entrance or unloading point to the footprint, including gates, corners, steps, changes of level and narrow passages. Measure the tightest point and compare it with the largest item or handling method specified for the selected model. Do not assume that every component can pass through a doorway simply because the finished footprint fits in the garden. Include room to turn items around corners and to set tools down without blocking the route.
Keep the temporary assembly area distinct from the permanent maintenance zone. Installation may need room to place components in sequence, open packaging and collect offcuts; that space should not occupy a route that needs to stay open or an area you cannot use. If you are considering a T-Model Orangery Greenhouse, ask which parts of the selected version are assembled on site and what access the installer needs. Mark the component staging area separately from the route used to carry items into place. Keep that route clear until the work is finished and tools and packaging have been removed.

Checks before choosing 3
Doors and paths need usable approach space
An entrance needs a clear approach as well as room for the door to operate. Confirm whether the selected model has a hinged or sliding door and mark its actual opening area from the relevant drawing; do not guess from a photograph. Show where a person can stand, turn and carry items through the entrance without colliding with a wall, bed, stored equipment or another door. If the entrance opens towards a narrow path, test the layout with the door fully open. Include the space needed to reach the handle and move through without twisting around an obstacle.
Continue the route around the sides that need regular attention, but do not assume every face needs identical access. A connected path may be more useful than isolated pockets of space, especially for someone carrying a bucket or hand tool. If a wheelbarrow or larger equipment is part of the garden routine, measure its passage and turning needs on the actual route. For an option from the Pyramid Greenhouse range, use the selected version's drawing to locate the entrance and connect it to the surrounding paths. Mark sections that can only be reached from a particular end, rather than showing a continuous route where none exists.
Cleaning access for glazing and gutters
Think through how the outside surfaces of the selected greenhouse will be cleaned. The space needed depends on the method: working from standing level, using a long-handled tool or using appropriate access equipment all call for different positions. Avoid planning a route that requires stepping into a planted bed or leaning equipment against glazing. Follow the maintenance guidance for the chosen model and leave room to work without blocking a garden path. If a roof area or high panel cannot be reached safely from the ground, plan an appropriate professional method rather than treating a very narrow strip as adequate.
If the chosen greenhouse has gutters or downpipes, include them on the drawing and make sure the parts needing inspection can be reached. Note where debris can be removed, where a tool can be held and where collected water drains, so maintenance does not require leaning across a boundary or directing water onto a doorway or path. When considering an option from the Limited Edition greenhouse range with storage, include the storage section in the complete external outline. Work around that full outline when marking cleaning positions, and distinguish places where you can stand from passages used only to reach them.
Checks before choosing 4
Repairs can need a wider temporary work zone
Repairs may be occasional, but they can require a different approach from routine cleaning. Replacing a panel or reaching a connection can call for a clear working position beside the affected face, a place to set down a removed part and a route for bringing a replacement into the garden. Check the model's service instructions to see what needs to be reached from outside, and note any work that calls for a specialist or particular equipment. A narrow or uneven path may not provide a suitable position for the person doing the repair, even if it allows someone to pass.
On the sketch, distinguish everyday access from an area that can be cleared only when a repair is scheduled. Temporary space may be available on a nearby paved area, but do not rely on blocking a shared route or using land without permission. When comparing options in the Limited Edition Aluminium Greenhouses range, ask how the selected version can be serviced from outside. Mark the route for carrying a replacement part as well as the position where the repair would take place. This separates gaps that need to stay open from areas that can be cleared for a particular job.
Keep everyday garden routes in the plan
Show how the greenhouse fits with ordinary work elsewhere in the garden. Add existing paths, lawn edges, beds, hedges, trees and any gate or storage area that is part of the route. Allow for plants that grow into a passage and for space needed to trim them; a gap that is clear at installation may become difficult to use later. If a wheelbarrow, mower or other equipment passes nearby, trace its route and mark where it needs to turn or be set down. This helps prevent the greenhouse work zone from cutting across a useful route to another part of the garden.
Do not count every paved or planted strip as free working space. A path may also need to carry garden traffic, while a bed may need room for access and maintenance of its own. Show where hoses, movable equipment or waste may temporarily cross a route, and note any point where garden work and greenhouse access would conflict. If the same narrow passage serves several jobs, decide which tasks need it regularly and whether other work can be done without blocking it. The plan should reflect how the garden is used, not just how it looks when empty.

Checks before choosing 5
Walls and boundaries change which sides are accessible
A freestanding greenhouse and a lean-to have different access patterns, so show any blocked side clearly. A wall, fence or dense planting may prevent inspection, cleaning or repair even if a gap is visible; do not label that gap as usable unless a person and the chosen equipment can reach it. For a wall-mounted option, establish how any wall-side components requiring attention can be reached, as well as the ends and outer face. For a freestanding option, compare each side with nearby garden features instead of applying the same distance everywhere. The drawing should show both clear routes and places where access is restricted.
If you are considering a model from the Wall Greenhouse range, measure the selected option's outside depth and identify the space needed for work along the wall. Establish how the wall-side surface can be inspected before choosing its position; do not treat a visible gap as proof that maintenance is possible. Keep the proposed working area within space you are entitled to use, rather than planning routine access through adjoining property. If the layout relies on shared space or involves a technical installation, confirm the arrangement with the owner, supplier, installer or appropriate professional before fixing the position.
Test the marked plan at the site
Before fixing the position, transfer the measured footprint and access markings to the ground with removable markers, string or chalk where suitable for the surface. Recreate the route from the entrance, the door opening, turning points and the tightest work gaps. Walk the route with the kind of item or tool that will be used. Notice whether a wheelbarrow, cleaning tool, replacement part or person carrying components must squeeze past a bed or another door. This simple test can expose a conflict that is difficult to see on paper, while keeping the scaled plan as the source for the actual measurements.
Take photographs from the entrance and from each side, then compare them with the drawing and note any hidden obstruction or change in planting that affects access. If you have selected a Prestige Greenhouse, compare its exterior drawing with the marked footprint, including projections and the entrance. Record any point where the outline fits but the planned working space is obstructed. Date the plan, keep the units consistent and update it if the selected model, access route or nearby garden layout changes. Keep the photographs with the drawing as a useful record for installation and later maintenance.
Frequently asked questions
How much clear space should I leave around a greenhouse?
There is no single distance that suits every greenhouse and garden. Measure the selected model's exterior footprint, then allow for the actual installation route, maintenance tasks and garden access needed on each side. Check the model instructions and any site-specific constraints before settling on the layout.
Do I need access on all four sides?
Not always. Decide which sides need regular access for cleaning, inspection or garden work, and whether an occasional repair can be reached another way. Show inaccessible sides honestly on the plan; do not count a narrow gap as useful access if a person or the required equipment cannot reach it.
Can an existing garden path count as working space?
Yes, if it provides the access the task requires and remains usable when the door is open or garden equipment is being moved. Check whether other routes depend on the same path. A shared path may be passable but still too restricted for carrying components, turning a wheelbarrow or working beside the greenhouse.
Is the greenhouse area in square metres enough for a site plan?
No. A catalogue area figure does not show the exact outside edges, projections, door opening or space needed for work. Use the dimensions for the selected version, then add the approach route and task-specific working areas to a scaled drawing.
What should I do if the site is too narrow for access on one side?
Mark that side as inaccessible rather than drawing a usable work zone there. Check whether the necessary inspection, cleaning and repairs can be carried out from another position, and confirm this against the model's instructions. If the layout depends on access across a boundary or on a technical installation, ask the relevant owner or professional first.
A useful perimeter plan matches the selected greenhouse to the way the garden is actually used. Keep the outside footprint, approach route, task-specific work areas, obstacles and everyday paths visible on the same drawing. Label the measured gaps and distinguish permanent access from space needed only during installation or a repair. That makes it easier to see where access is essential, where it is unavailable and how the layout can leave the rest of the garden working well.
