
Hidden Pipes and Cables: Checks Before Pergola Drilling
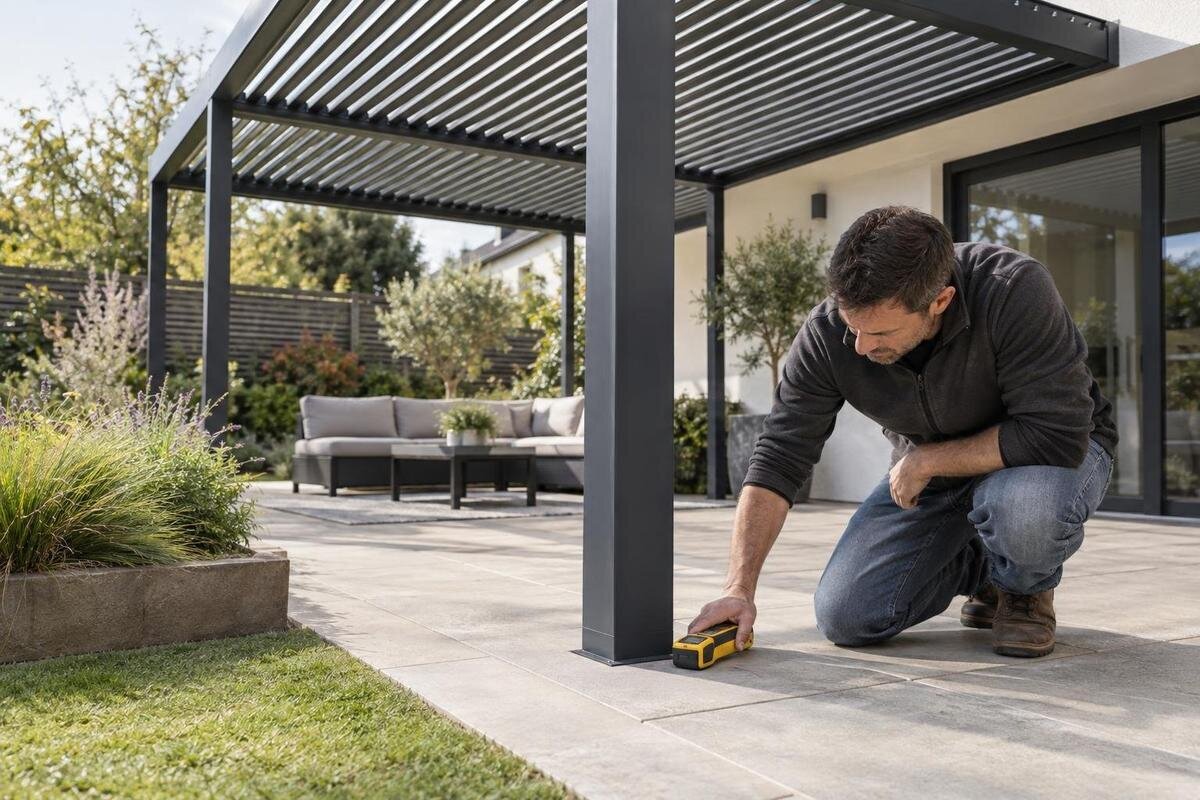
PERGOLA SITE PLANNING
A pergola post or wall anchor has to meet an approved fixing design, but an apparently clear patch of paving may conceal a water pipe, cable, drain or heating circuit. Damage to a hidden service can injure someone or interrupt a supply; discovering a conflict after the frame is ordered can also mean reworking the layout and installation plan. Treat the ground, paving and any wall to be drilled as unknown until records, site clues and suitable detection have been reviewed. The aim is not to guess every route, but to reduce uncertainty, mark areas that need protection or avoidance, and agree a buildable set-out before drilling or excavation begins.

Survey the whole installation zone
Pergola installation can involve several kinds of intrusive work: holes for anchors in an existing slab or wall, and excavations for posts or separate foundations. Each proposed position may intersect a different service. A buried electric cable could cross the route between the house and a garden socket; a water supply, irrigation pipe or drainage run may approach from a boundary; heating pipework may sit within a paved area. The visible pergola footprint therefore does not define the full survey area. Include the places where a tool, foundation or access for the work could disturb the ground or structure.
Mark the complete frame outline, each post centre and every fixing plate or wall bracket shown on the relevant design. Add excavation limits when they are available from the project design; do not invent a trench size to complete the drawing. If positions are provisional, survey the plausible installation zone first, then arrange a focused check once the exact points have been set out. Include any wall to be drilled, along with paving, steps or raised beds that may conceal routes. Show drains, planters and doors on the same dimensioned drawing so alternative layouts can be assessed against the whole usable area. This also helps the surveyor distinguish the intended work area from parts of the terrace that will remain undisturbed.
Get the fixing layout before agreeing anchor positions
A catalogue footprint cannot show where an anchor must land. Obtain current model-specific setting-out information before asking a surveyor to check exact positions: post spacing, fixing locations and approved anchoring drawings relevant to the substrate and proposed arrangement. Request missing documents rather than measuring from a photograph or assuming supports sit at the outer corners. When requesting drawings for the Bloomcabin Bioclimatic Aluminum Pergola, identify the exact configuration you are considering so the supplier can confirm which documents apply.
Ask for dimensions from a clear reference point, such as a finished wall face or a marked edge of paving, and check that the drawing refers to the configuration being considered. Put the dimensioned positions on a site plan alongside drains, steps, boundaries and fixed garden equipment. Keep preliminary and final set-outs separate: the first helps define where the survey is needed; the second is the one an installer uses after design and site checks. Where the pergola may move slightly to avoid a service, show more than one whole-layout option rather than treating an isolated post as freely movable. Mark the drawing’s status and revision date so a preliminary concept is not mistaken for authorisation to drill.
Collect service records and the property’s history
Gather property plans, records of extensions and patio works, and notes from contractors who installed outside taps, lighting, irrigation, drainage or garden power. Ask the owner or facilities manager what is known, and request relevant utility records where appropriate. Distinguish utility networks from private services: records for one may omit the other. Include outbuildings and later garden additions rather than relying solely on the original house drawings. On a shared site, establish who can provide records and arrange access for a survey. If you are considering the wall-mounted pergola option, gather records for both the wall and adjoining ground; neither set of drawings necessarily covers the other.
Read every plan critically. Note its date, scale, orientation, stated coverage and whether it shows a verified position or a route inferred from older records. A drawing may stop at a boundary, omit installations added after it was made, or show an intended route that changed during construction. Keep the original document and copy relevant information onto a current site plan, labelling uncertain sections as uncertain. Records are valuable for directing a survey and identifying questions to ask; they are not a substitute for on-site location work before intrusive installation. If sources disagree, preserve that discrepancy rather than choosing whichever line best fits the pergola.
What meters and access covers can tell you
Walk the area and note service entry points and access covers: meters, stop taps, external taps, drainage inspection covers, gullies, downpipes, outside sockets, lights, boiler outlets, heat-pump connections and irrigation controls may all help identify systems to investigate. Photograph them and plot their locations, including the route from the house to garden buildings. A cover marks an access point, not necessarily the straight line to the next one; pipes and cables can change direction, branch or have been altered. A recent strip of paving or a surface patch may be a clue, but it cannot confirm what lies beneath. Note whether covers are accessible, but do not assume appearance alone tells you whether a route is still in use.
Do not assume a cable runs directly from an outside light to the nearest wall, or that a drain follows the easiest-looking fall. Services may have been routed around earlier foundations, trees or boundaries, with later work adding unrecorded crossings. Label visible clues separately from confirmed routes on the site plan. When discussing the Bloomcabin Pergola with an installer, share that annotated plan alongside the proposed layout so the installer can see which positions still need investigation.

Choose detection methods for the services and surface
Where plans and clues leave uncertainty, arrange a survey by a competent service-location specialist before fixing the design. Detection methods have different limits. Electromagnetic equipment can help trace services that are detectable and accessible to the chosen method, but it cannot be assumed to find every cable or pipe. Non-metallic plastic pipework, unmarked ducts, services without a usable signal and abandoned lines can be difficult or impossible to identify using a single approach. Ground-penetrating radar may add information in suitable conditions, but the surface, ground composition, depth and congestion affect what can be interpreted. A negative result in one pass does not prove the ground is clear. Ask the surveyor which methods suit the site and what remains uncertain.
Request a survey record showing the areas checked, detected routes, estimated depths where supported by the method, and unresolved zones or other limitations. Agree how ground markings will be preserved until work starts. A mark helps with setting out; it does not establish that an unmarked point nearby is safe to drill. Provide the surveyor with the proposed layout for the bioclimatic pergola you are considering and the installer’s exact anchor positions. If the layout changes, ask whether the existing survey covers the revised work area.
Check the wall and ground wherever drilling is planned
A wall-mounted arrangement requires checks for services concealed in the wall as well as below the patio. Cables may serve sockets or lights, while water and heating pipes may supply fittings on the other side. Their visible positions offer clues, not a reliable map, particularly after renovations. For a proposed Bloomcabin Lean-To Pergola, obtain the relevant bracket layout and available building-service drawings, then arrange appropriate checks at each proposed wall fixing. The fixing design must also account for the wall’s construction and condition; detecting services does not establish its structural suitability.
Check the ground separately for buried feeds, drainage and any services incorporated into a paved build-up. A surface that looks solid does not establish what lies within it, nor whether the substrate can accept the specified anchor. The installer’s approved anchoring drawings, a structural assessment and evidence about the actual substrate need to agree with the service survey. Record the wall and slab materials if known, but do not assume the visible finish represents the layer that carries the anchor. If reinforcing steel, a void or an unknown layer is encountered, stop the planned drilling and ask the relevant professional to reassess; do not improvise a different anchor, depth or position. Wall and ground findings should sit on the same set-out plan so a change to one fixing does not create an unexamined conflict elsewhere.
Plan excavation after routes and footing requirements are known
For a freestanding pergola, the project may need excavation as well as drilling. Agree the intended foundation positions and approved design before a groundworks plan is finalised. There is no single footing size or depth that can be prescribed for every garden: the appropriate arrangement depends on the structural design and the actual site, so it must be set by the responsible professional. Give that person the service plans and detection results before excavation is scheduled. Include the work area needed to form the approved foundations, not only the centre of each post, and identify any uncertainty that could affect the method or location.
Record which areas may be opened, which must remain undisturbed, how marked routes will be protected and who will confirm the set-out on the day. The competent installer or groundworker should select excavation methods and controls using the survey, design and site conditions. Include equipment access and spoil storage, which may affect areas beyond the footing holes. Give the crew the current plan rather than relying on a verbal handover. For the regular pergola model, obtain model-specific anchoring information and a site assessment before finalising that plan.
When a proposed anchor conflicts with a service
If a proposed anchor or foundation falls on a detected or suspected service, keep that position off the approved work plan until the conflict is resolved. Simply sliding a post a short distance may change the frame geometry, loads, clearances, foundation arrangement or compliance with the model’s approved design. The service may also need access for maintenance, and a route cannot be declared safe to cross just because the post base looks small. The right response may be a wider redesign, not a small offset. Mark the conflict on the drawing and ask the designer, installer and structural professional to assess a permitted alternative. Do not alter an anchoring drawing on site or assume a different fastener will solve the problem.
Possible solutions include moving the whole pergola within a surveyed area, choosing another layout, obtaining a professionally designed anchoring alternative, or having a qualified service specialist assess a diversion. Each must satisfy both the pergola’s support requirements and the service owner’s requirements. If you are considering the Bloomcabin bioclimatic pergola, ask for revised model-specific drawings before accepting an alternative arrangement. If no acceptable solution is demonstrated, change the location or postpone installation. Record the agreed revision on a dated plan and update the survey markings and excavation instructions accordingly.

Coordinate the surveyor, installer and final set-out
Agree responsibilities before booking work. The owner supplies property history and access; utility providers may hold network records; the locator reports survey findings; and the installer or structural professional assesses those findings against the design and substrate. Share one current drawing and name the person responsible for resolving discrepancies or late changes. For the Bloomcabin wall-mounted model, include proposed wall and ground fixing positions wherever both form part of the installation. Ask each contributor to identify assumptions and unverified areas rather than leaving the installation crew to reconcile conflicting information.
At the pre-installation check, compare the physical set-out with the current approved design, not with an old sketch or photograph. Confirm that each marked drilling or excavation point matches the surveyed position and that route markings have not been washed off, covered or shifted. If the frame position, anchor type, paving or ground conditions have changed since the survey, pause while the relevant professional decides whether another check is required. Keep the survey record, approved anchoring drawings, substrate evidence and final marked-up plan together so an installer can see the basis for the work without reconstructing it from memory.
Stop if the site does not match the survey
Plans and detection describe conditions only to the extent that they were available, visible and covered by the survey. If a crew finds an unexpected cable, pipe, duct, void or marked route during drilling or excavation, stop the affected work and do not cut, move or investigate it by probing. Keep people clear of the immediate work area if there is any sign of damage or danger, and contact the relevant service owner or a qualified professional for direction. If a service has been damaged or a serious hazard is suspected, use the appropriate emergency route. Do not resume just because the exposed item appears inactive or its purpose is unclear.
Also pause if markings are missing, the drawing cannot be matched to the ground, or the actual post position differs from the agreed set-out. Reconcile the difference with the surveyor and installer before work resumes; if necessary, obtain fresh location work or revise the design through the proper approval route. An unexplained mark or uncovered duct is a reason to check, not proof that it is dangerous or harmless. Photograph and record discoveries, locations and agreed changes, then update every copy of the plan used by the crew. A documented stop point helps prevent uncertainty becoming damage to a hidden service or an unapproved change to the pergola supports.
Frequently asked questions
Are service plans enough to decide where pergola anchors can go?
Usually not on their own. Plans can be old, incomplete, limited to a utility’s assets or omit private garden work carried out later. Use them to guide an on-site survey, then compare detected routes with the exact anchor and excavation positions. If the records and site evidence disagree, leave the affected position unresolved until a competent professional has investigated it.
Will a cable locator find plastic pipes and every buried cable?
No single detector should be treated as finding every service. Some locating methods depend on a detectable signal and may not identify non-metallic pipes, ducts or untraceable cables; ground-penetrating radar also depends on site conditions and interpretation. Ask the surveyor what method was used, which services it can reasonably detect on that site, and where uncertainty remains.
Can I shift one pergola post a little to avoid a pipe?
Do not move a post or anchor on site without approval. Its position may be part of the frame and anchoring design, and a nearby route may still be at risk. Have the installer or design professional assess a revised layout or an approved alternative; use a qualified service specialist if relocating the pipe or cable is considered.
Does a wall-mounted pergola need a separate wall survey?
Yes, if its brackets or anchors will be drilled into a wall, check the wall independently as well as the ground. Concealed electrical, water and heating routes may differ from those shown on ground plans. Use available building records and suitable detection, then have the proposed fixing positions checked against the wall substrate and approved anchoring design.
Can the surveyor choose the foundation size once services are mapped?
A service-location survey alone cannot establish the foundation design. The professional responsible for that design must assess the pergola loads, substrate and site conditions, using the service findings as constraints. A surveyor could undertake both roles only if appropriately qualified for both. There is no universal footing size for every pergola site, so do not choose dimensions or alter the design simply to work around a detected route.
The useful outcome of a pergola service survey is a set of agreed, traceable fixing positions—not simply a coloured line on the patio. Start with records and site history, have uncertain routes located by a competent specialist, then compare those findings with the current approved anchoring drawings and an assessment of the actual wall or ground. Keep excavation limits and areas to avoid clear on the version the installation team will use. Where services and support positions conflict, resolve that conflict through the right professional before work begins; only then can the final layout be treated as ready for drilling.
