
How to Grow Cauliflower in a Greenhouse
Bloomcabin growing atelier / cool-season crop
How to Grow Cauliflower in a Greenhouse
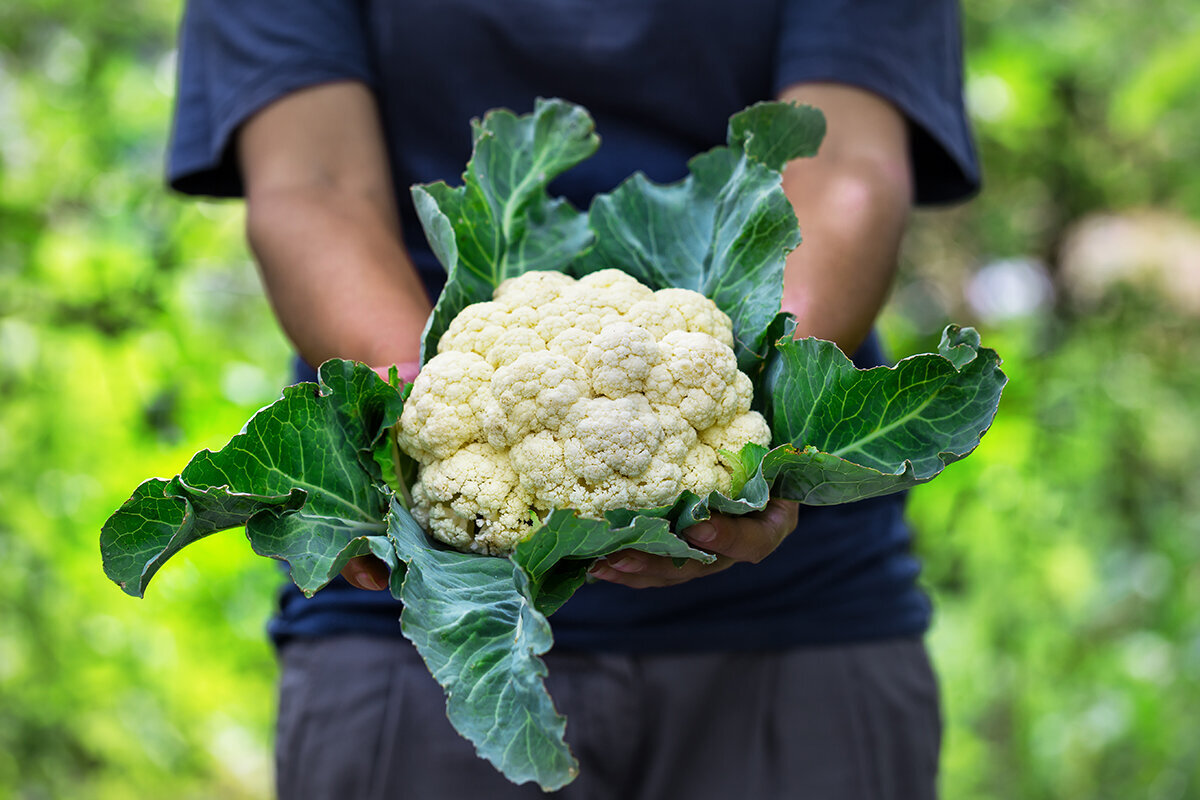
The most handsome cauliflower is not forced into being white. Its flawless curd is the visible finish of steady growth: broad blue-green leaves, an evenly moist root zone, cool moving air and protection applied at precisely the right moment.
In a greenhouse, that finish can be remarkably consistent—but only when the structure is treated as a cool-season growing room rather than a warm shelter. Use it to raise robust modules, bridge unsettled spring and autumn weather, and manage moisture carefully. In a British summer, ventilate actively: cauliflower is not a heat-loving glasshouse crop.
Crop fitting noteBest greenhouse window: late winter into spring, or late summer into autumn, according to the cultivar. Plan for broad mature leaves, early ventilation, steady root moisture and one decisive harvest.
For a structure with room to give full-sized brassicas proper spacing, practical access and dependable airflow, explore the Classic Aluminium Greenhouse.
01 / The desired finish
The pale curd records the whole crop: substantial leaves made first, cool conditions maintained, moisture kept even and a protected head cut before its surface begins to loosen.
Cauliflower can seem exacting because the edible curd records the plant’s earlier experience. A dry spell, constricted rootball, cold shock or sudden run of heat may appear weeks later as a small button, uneven surface, leafy bracts or loose head. Problems visible at harvest often began during propagation or establishment.
That sensitivity makes a well-managed greenhouse genuinely useful. It shelters seedlings from hard weather and slugs, keeps irrigation deliberate and allows ventilation to be adjusted with intent. The governing principle is uncomplicated: establish a substantial, healthy leaf frame first, then preserve an even rhythm while the plant forms one clean, compact curd.
02 / Cultivar, maturity class and season
Fit the crop to the coolest part of your calendar.
For most British home greenhouses, cauliflower works best as a shoulder-season crop. Sow early kinds under protection in late winter or early spring, then plant while conditions remain cool. Summer and autumn cultivars are often the most accommodating, provided the greenhouse is thoroughly ventilated. Long-season winter and spring types need space, patience and reliable airflow. Protection helps at either end of the season, but a shut greenhouse can become too hot surprisingly early on a bright day.
Choose varieties by their intended harvest season, sowing window, blanching habit and known garden conditions—not simply by a promise of an enormous head. Packet instructions remain the final authority for timing and spacing. Substantial wrapper leaves help shield a white curd naturally. If club root has occurred in your garden, consider a resistant cultivar; the RHS lists ‘Clapton’ among resistant cauliflower choices.
Early-summer / protected start
Prompt growth, cool finish
Use where the crop can establish and finish before sustained summer heat. Vent progressively as spring brightens, and never leave young plants confined in modules while they wait for bed space.
Summer-and-autumn / main crop
Measured growth, cooler finish
Often the most practical choice for UK gardeners. Sow in small spring batches, transplant promptly, then use the greenhouse as a ventilated crop room through unsettled summer and autumn weather.
Self-blanching / white curd
Leaves designed to shelter
Useful where daily intervention is impractical. Natural wrapper leaves reduce light exposure, but they cannot compensate for excessive heat, drought, hunger or a congested root system.
03 / Propagation
Raise plants that are young, rooted and ready to move.
01 / Seed
02 / Module
03 / Young plant
04 / Transplant
Make a clean start
Fill clean individual modules with fine seed compost and sow one seed per cell. Cover lightly, water gently and label the cultivar and intended planting window at once.
Build roots, not length
After germination, provide maximum light and cooler growing conditions rather than prolonged heat. Keep compost moist but never saturated, and maintain airflow so seedlings develop as sturdy, compact plugs.
Keep seedlings moving
Do not let plants become crowded, starved or tightly root-bound while waiting for a bed. Thin immediately if more than one seedling appears in a module.
Plant at five or six leaves
Transplant when plants have roughly five or six true leaves and a cohesive, uncongested rootball. Set them at module depth, firm the soil carefully, then water thoroughly.
Treat propagation as the first quality-control stage. Cauliflower is unusually unforgiving of plants held too long in small cells. Spiral roots, dusty compost and repeated wilting interrupt growth and may contribute to buttoning later. The temptation to keep spare modules for another week is understandable, but misplaced. If the bed will not be ready, sow another small batch rather than carrying stressed plants beyond their useful transplant stage.
Harden young plants with intention over about a week. Gradually expose them to the brighter, cooler and breezier conditions of the greenhouse bed, keeping the rootball moist and protecting them from frost. Avoid moving a soft plant directly from a heated propagator or warm windowsill into cold soil. The ideal transition is almost invisible: no prolonged wilt, no cold shock and no pause that the eventual curd will record.
04 / Mature plant pattern
Make room for the leaves you will have, not the plug you hold.
60 cm centres75 cm access path30 cm glazing marginClear ventilation route
Plant centres
Use the seed packet as your final guide, but allow generous spacing for a full-sized greenhouse crop. Around 60 cm between plants gives mature leaves room to expand and dry.
Access aisle
Keep a working path of about 75 cm where the structure permits. You need to reach leaf undersides, inspect curds, test soil moisture and harvest without compressing the bed.
Glazing margin
Keep outer foliage clear of the greenhouse wall and glazing. A margin of roughly 30 cm supports air movement and reduces direct contact with particularly hot or cold boundaries.
Vent corridor
Do not allow a crowded bed to obstruct doors, low vents or moving air. Cauliflower needs a gentle through-draught rather than a stagnant, overlapping canopy.
A row of young transplants may initially look extravagantly sparse. Leave it that way. Mature cauliflower leaves form the working frame that supplies a generous curd, while compressed foliage traps humidity and makes inspection difficult. Two rows can work in a broad bed only when both remain accessible without stepping onto cultivated soil or brushing repeatedly through wet leaves.
Where space is limited, grow fewer plants well rather than squeezing in a nominally productive row. Consider the dimensions and ventilation of the Classic Aluminium Greenhouse when your crop plan requires broad brassicas, protected propagation space and a usable central path—not merely enough floor area for closely arranged pots.
05 / Temperature, ventilation and light
Make the greenhouse a cool room with bright, airy edges.
Cauliflower has little use for a sun-baked greenhouse. On clear spring days, open roof vents and doors early rather than waiting until the interior feels hot. In summer, establish a through-draught and use shading when necessary, while recognising that ventilation and sensible crop timing remain the principal controls. A minimum-and-maximum thermometer positioned near canopy height gives more useful evidence than a general impression of comfort.
Aim for cool, bright and stable conditions rather than chasing a rigid temperature. Sharp heat around curd formation can encourage inferior, loose growth, while severe cold can check young plants. British greenhouse temperatures can rise rapidly even in spring sunshine, so respond to light as well as the outdoor forecast. Protect recently planted crops during frost, but remove or loosen fleece promptly as the day warms.
Ventilation is also part of crop hygiene. Water the root zone in the morning, allow humid air to escape afterwards and avoid wetting a developing curd late in the day. If plants begin to overlap, increase inspection and airflow rather than accepting a stale canopy. A structure designed with effective roof ventilation, wide access and practical bed space makes this routine easier; see the Classic Aluminium Greenhouse.
06 / The consistency room
Every interruption travels forward into the finished curd.
A cauliflower crop should not alternate between lush, saturated growth and thirsty pauses. Nor should it receive a sudden late surge of nitrogen in an attempt to catch up. Uneven root conditions produce uneven leaf growth, and that instability may later appear in the curd as buttoning, graininess, bracting or premature loosening.
01 / Root zone→
02 / Leaf frame→
03 / Curd initiation→
04 / Finish
Keep the soil evenly moist through the active rooting depth. Check beneath the surface with a trowel or finger instead of judging only a dry-looking crust.
Steady moisture and proportionate nutrition build broad, healthy leaves. This leaf frame gathers the energy required before the plant begins forming its edible curd.
Cool conditions and uninterrupted growth allow the curd to initiate at a useful size instead of appearing prematurely as a small button.
A calm routine supports a dense, even curd. Heat, drought, saturation or abrupt feeding can leave the finish loose, leafy, stained or grainy.
Water with a measured hand
In a greenhouse border, water deeply enough to moisten the active root zone, then inspect the soil again before repeating. There is no reliable fixed interval: sunlight, plant size, soil texture and ventilation all alter demand, while the covered bed receives no useful rainfall. Drip irrigation or a slow, low soak is preferable to frequent surface splashing. The aim is even moisture, never a dramatic swing from dusty to sodden.
Feed according to the bed
Cauliflower is demanding, but more fertiliser is not automatically better husbandry. Enrich the bed with mature compost before planting and feed according to the fertility of the soil or growing medium. A modest balanced feed may help during active leafy growth, particularly in containers or repeatedly cropped borders. Avoid excessive nitrogen late in the crop, when soft, abundant foliage is less useful than a composed finish and compact curd.
For a greenhouse where measured irrigation, access and controllable ventilation can become part of the daily routine, consider the Classic Aluminium Greenhouse as a practical growing room.
07 / Curd initiation
Watch closely when the first pale dome begins to appear.
Once the centre starts to thicken, inspect every plant at least every few days. This is no longer the moment for radical correction. Keep moisture stable, continue ventilating and remove only damaged lower leaves that touch the soil or prevent access. Do not strip sound foliage: it is still supplying the head and will later provide its most natural protection.
White cauliflower curds keep their cleanest colour when protected from strong direct light. The canopy is both built-in shading and a sign that the plant established well enough to support its head. Many modern varieties are self-blanching, with wrapper leaves that curl inward naturally. Coloured cauliflower and Romanesco have different presentation needs, so follow the packet guidance rather than automatically covering every curd.
08 / Blanching and leaf protection
Close the leaves like shutters—never as a sealed, wet package.
Blanching means shading a developing white cauliflower curd with its own outer leaves. It helps preserve a clean pale colour where the head would otherwise receive strong sunlight. Begin only once a firm curd is clearly visible and needs protection. There is no need to cover every plant by routine: substantial wrapper leaves may already be providing exactly the right degree of shade.
Self-blanching varieties may complete the task without help, but inspect each plant because one side can remain exposed. Gather leaves loosely only when bright light, frost or persistent weather makes extra protection useful. A dry, airy cover is protective; a tightly tied bundle of wet foliage can hold moisture against the curd and encourage softness or decay.
01 / Open
02 / Shade
03 / Secure
04 / Check
Open growth
Wait until a visible, firm white curd has formed before deciding whether its natural leaf cover needs assistance.
Initial shade
Bring several clean outer leaves gently over the curd without breaking their thick ribs or stripping useful foliage from the plant.
Loose fastening
Tuck one leaf beneath another or use a soft tie, keeping a generous air space around the head rather than compressing it.
Frequent check
Lift the cover briefly to check compactness, dryness and hidden pests, then replace it loosely if further protection remains useful.
09 / Finish inspection
Read the curd as a record of the crop.
Not every imperfect cauliflower is a failure, and many irregular heads remain perfectly good to eat. Yet the finish reveals what happened earlier. Diagnose the pattern so the next sowing can be better timed and managed, rather than attempting to rebuild a curd that has already formed.
Compact
Buttoning
Riceyness
Bracting
Soft or stained
Compact and clean
The desired finish is a firm, dense and relatively smooth curd with tightly held florets. Harvest while it retains that texture rather than waiting for maximum diameter.
Buttoning
A tiny, premature head commonly follows checked growth: an overgrown module, cold stress, drought, heat, loose soil, pests or disturbed roots.
Riceyness
A grainy surface with separating buds is often associated with heat or unstable conditions around curd development. Harvest promptly while its kitchen quality remains acceptable.
Bracting
Small leaves growing through the curd may follow heat or low soil moisture during early head formation, shifting the plant back towards leafy growth.
Staining or decay
Yellowing, brown marks or softness warrant a review of sunlight, trapped leaf wetness, hygiene and airflow. Remove decayed material and do not store a soft head.
What to alter next time
Review sowing season, transplant condition, ventilation and irrigation before adding fertiliser. A finished curd cannot be reconstructed, but the next batch can be established more evenly.
Buttoning is the classic signal that the plant formed a curd before producing enough leaf mass to support a full head. Its cause may date back weeks to propagation or the first days after transplanting. Extra fertiliser will not enlarge a finished button. Harvest it as a small kitchen cauliflower while the texture remains pleasant, then refine the timing and handling of the next batch.
Riceyness and bracting call for a climate and moisture review. Loose, fuzzy curds or leaves within the head are associated with heat, drought and unstable growing conditions. Schedule the next batch so curd development falls in cooler weather, open vents earlier on bright days and keep the root zone reliably moist instead of flooding it after a dry interval.
10 / Pests, disease and hygiene
Keep the growing room clean and every plant visible.
Protected cultivation does not exclude brassica pests. Fit fine insect-proof mesh over openings where practical, especially around vulnerable transplants, and inspect new growth and leaf undersides at least weekly. Look for aphids, eggs and caterpillars, removing small colonies or individual larvae by hand where possible. Cabbage root fly larvae can cause young plants to wilt or fail, making a physical mesh barrier particularly useful during establishment. Early identification is far more effective than allowing concealed pests to reach the curd.
Club root deserves especially disciplined prevention. Symptoms include stunting and swollen, distorted roots. Do not bring questionable soil or plants into the greenhouse; use clean growing media, improve drainage and consider resistant cultivars where the disease is known. Contaminated soil can travel on trays, tools, boots and wheelbarrows, so clean equipment thoroughly and avoid transferring suspect compost. Remove badly affected roots from the growing area rather than returning them to a compost system that may spread the problem.
After harvest, clear all spent brassica leaves and roots promptly, then clean modules, tools, benches and paths. Maintain sufficient spacing and airflow throughout the crop. Greenhouse hygiene is not merely presentational: it removes pest shelter, limits contaminated soil movement and breaks the bridge between one carefully managed brassica planting and the next.
11 / Harvest and storage
Cut at peak compactness, then keep the curd cool and protected.
Readiness cues
Harvest when the curd is tight, dense and firm, with florets still closely held. Do not wait for maximum diameter if the surface is beginning to loosen, particularly in warm weather. Head size varies between cultivars, so compact texture is more dependable than a target measurement. Check beneath protective leaves every few days as maturity approaches.
Use a clean, sharp knife and cut through the stem below the curd, retaining several wrapper leaves. They protect the head from handling damage during the walk from greenhouse to kitchen.
Cooling
Bring the harvested head into a cool place promptly. For brief storage, protect it from drying out but do not seal a wet curd into an airtight bag. Leave useful wrapper foliage in place until preparation, and wash immediately before cooking rather than before refrigeration.
Storage and preserving
Use the cauliflower promptly for its finest flavour and texture. Storage life varies with harvest condition and refrigeration, so inspect rather than relying on a fixed period. Keep the head cool, dry on the surface and uncrushed. If several plants mature together, separating the curd into florets, blanching them and freezing is a practical way to preserve a larger flush.
12 / Questions from the greenhouse bench
Greenhouse cauliflower FAQ
Can cauliflower grow entirely in an unheated greenhouse?
Yes, provided the cultivar and season suit cool conditions, the bed is sufficiently deep and ventilation is managed actively. Across much of the UK, an unheated greenhouse is particularly useful for raising strong plants and sheltering early or late crops. It should not be treated as a permanently warm room, and summer overheating may be a greater limitation than the absence of heating.
Must every self-blanching cauliflower be tied?
No. Self-blanching varieties produce leaves that naturally arch around the developing curd. Inspect each head and intervene only when part of a white curd is exposed to strong light, frost or persistent wet weather. Bring clean leaves together loosely, and never bind wet foliage tightly around the head in humid conditions.
Why has my cauliflower made a tiny head?
This is called buttoning. It usually follows a check to growth, such as transplanting an old or root-bound module, cold shock, drought, excessive heat, loose soil, inadequate fertility, pest damage or rough handling. The small curd is edible, but it cannot be forced into a full-sized head. Improve propagation and planting continuity for the next sowing.
How many cauliflower plants fit in a home greenhouse?
Count mature leaf spread and working access, not simply the length of the empty bed. With full-sized plants around 60 cm apart, a modest greenhouse may accommodate only a small number well. Preserve enough room to open vents, inspect leaf undersides, irrigate at root level and harvest without constantly brushing or damaging the foliage.
Can cauliflower grow in large greenhouse containers?
Yes, but a deeply rooted cauliflower is less forgiving in a pot. Choose a large, stable container with good drainage and fresh, fertile compost. Container roots dry and warm more quickly than those in a greenhouse border, so moisture needs close attention. Keep pots away from the hottest glazing; a deep border is usually the easier route to full-sized curds.
13 / Sources and further reading
Technical references for a more reliable crop.
These UK and European horticultural resources informed the cultivation, pest, disease and physiological-disorder guidance. Always check variety-specific timings and spacing on the seed packet.
More from Bloomcabin: UK greenhouse setup guide · UK greenhouse gardening guide · Continue with the UK greenhouse gardener’s calendar
- Royal Horticultural Society — How to grow cauliflower
- Royal Horticultural Society — Club root prevention and treatment
- Royal Horticultural Society — Cabbage root fly identification and management
- Royal Horticultural Society — Mealy cabbage aphid identification and management
- AHDB — Brassica Crop Walkers’ Guide to physiological disorders
- Teagasc — Vegetable Growing Guide
- RHS guidance on growing and harvesting cauliflower
The final fitting
Give a cool-season crop a greenhouse that knows when to breathe.
- Timing: choose a cultivar whose intended harvest season matches your sowing plan.
- Leaf spread: allow mature-scale room, an accessible path and clear margins beside the glazing.
- Ventilation: open early on bright days, water at the roots and keep protective foliage airy and dry.
