
How to Grow Potatoes in a Greenhouse
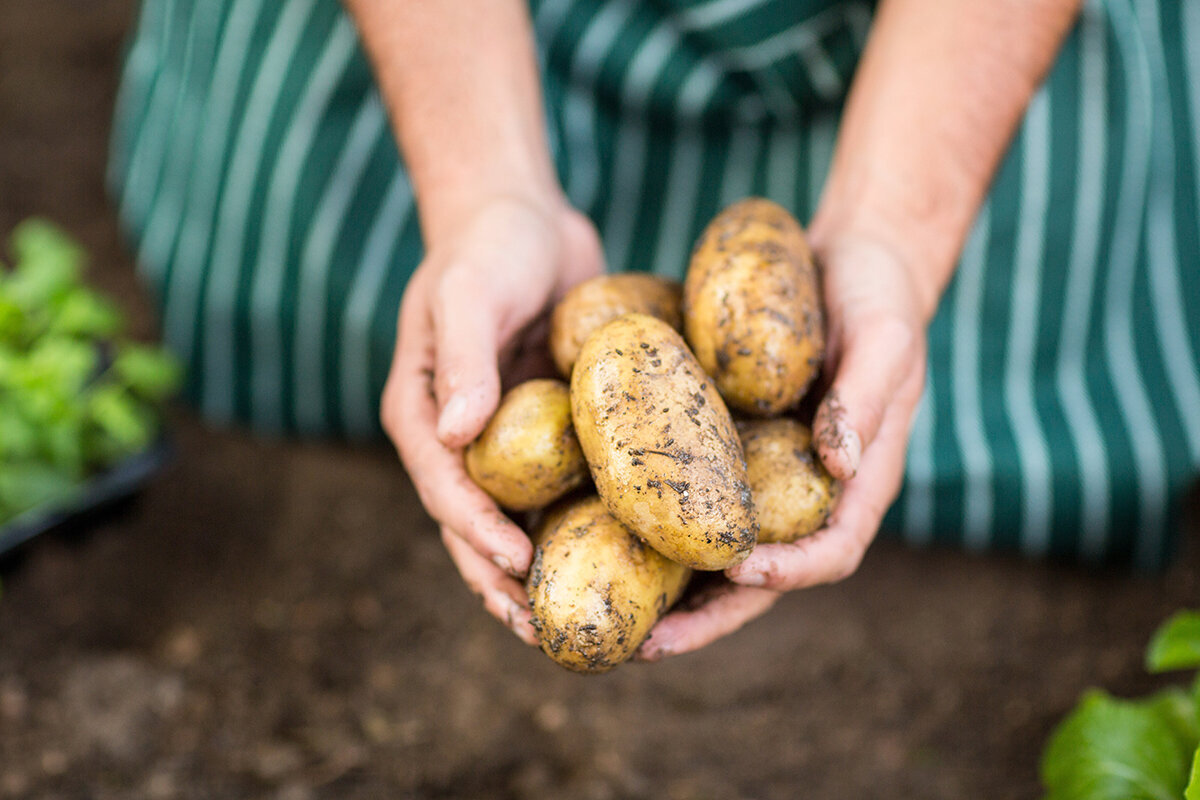
The Hidden Yield Ledger · Greenhouse Crop No. 09
How to Grow Potatoes in a Greenhouse
Potatoes reward gardeners who think below the surface. Leaves, stems and flowers are only the visible receipt; the real account is written in dark compost, where buried stems produce stolons and each stolon may quietly form a new tuber.
A greenhouse lets you manage that underground account with care. You control the growing medium, watering rhythm, ventilation, hygiene and, crucially, the compost reserved for earthing up. The structure does not turn potatoes into a heat-loving crop. Instead, it provides a deliberate way to bring first earlies forward in spring or raise a contained late crop for autumn and Christmas harvesting.
Folio 09 · United Kingdom · Seed tuber to dark storePlate A · Where the harvest forms
Chapter one · Read the underground plant
A potato is a stem story, not a root story.
Potatoes are normally grown from seed tubers rather than true seed. Their eyes produce shoots, which develop into stems. Slender horizontal structures called stolons emerge from the buried stem, and new tubers swell at their tips. This distinction explains the greenhouse method: establish a protected base, add compost as the stems lengthen and never allow developing potatoes to reach the light.
Earthing up is therefore more than decorative mounding. It keeps the developing crop dark and creates a protected lower storey around the buried stems. In a bed, loose soil is drawn towards the plant; in a pot or grow bag, peat-free compost is added gradually. Do not fill a tall container to its rim on planting day. Reserve sufficient clean medium for several measured rises as the canopy develops.
Ledger correction — myth versus fact.
Myth: the deepest possible mound automatically produces the largest crop. Fact: useful compost volume must be matched by healthy foliage, steady moisture and oxygen around the roots. A deep but waterlogged container is not a generous storehouse; it is a setting for weak growth and rot.
Myth: the deepest possible mound automatically produces the largest crop. Fact: useful compost volume must be matched by healthy foliage, steady moisture and oxygen around the roots. A deep but waterlogged container is not a generous storehouse; it is a setting for weak growth and rot.
A greenhouse changes the conditions surrounding the foliage, not the potato’s preference for a relatively cool and steady root zone. Its advantage is precision: the roof limits rain-driven wetting, containers can hold clean compost, and vents can clear humidity. Yet glass also collects heat rapidly. Avoid abrupt swings between dry midday compost, evening saturation and damp leaves held overnight in still air.
Chapter two · Opening inventory
Begin with seed stock worth recording.
Clean planting material is the first disease-prevention decision, not an indulgence. Ordinary supermarket potatoes may have been treated to suppress sprouting and come with an unknown disease history. Buy certified seed potatoes prepared for propagation from a reputable supplier, particularly when planting into valuable greenhouse beds or fresh container compost.
01
Choose the purpose
Early · salad · late
For a tightly planned greenhouse season, first earlies are usually the most comfortable fit. They mature quickly, remain relatively compact and can be lifted before tomatoes, cucumbers or peppers demand the space. Choose salad types for waxy new potatoes, or buy cold-stored seed tubers at the correct summer planting time if your aim is an autumn or festive harvest.
02
Inspect every tuber
Firm · sound · healthy eyes
Use firm, whole seed potatoes with several healthy eyes whenever possible. Reject tubers that are soft, deeply damaged, mouldy or visibly rotten. Large tubers can be cut, but every cut creates a wound and another possible point of failure in warm, humid conditions. For a modest premium crop, planting sound tubers whole is the cleaner and simpler approach.
03
Avoid needless wounds
Whole tubers are simpler
If a seed potato must be divided, use a clean knife and allow the cut face to dry before planting. Never place a freshly wounded piece into cold, saturated compost. For most small greenhouse crops there is little advantage in stretching the inventory this way; buying appropriately sized, healthy seed tubers removes an avoidable source of decay.
04
Keep a crop record
Variety · source · date
Record the variety, supplier, planting date, emergence and first earthing up, together with any pest or disease symptoms. Label every pot or row. This modest administration becomes valuable at harvest and in later seasons, when you can distinguish a variety that merely grew from one that delivered the timing, texture and yield you wanted.
Chapter three · Before planting
Chit for short, sturdy sprouts—not pale, brittle growth.
Chitting allows seed potatoes to develop compact shoots before planting. It is particularly useful for first earlies because it advances growth and may bring the first harvest forward. Arrange tubers with the rose end, or the end carrying most eyes, uppermost in egg boxes or shallow trays. Keep them cool, bright and frost-free for four to six weeks, aiming for robust shoots about 2–5cm long.
01 · Sort
Firm and sound
02 · Place
Eyes uppermost
03 · Wait
Short, sturdy shoots
04 · Plant
Ready for compost
- Sort Reject shrivelled, soft, mouldy or badly damaged seed potatoes before they enter the greenhouse growing area.
- Place Arrange tubers in a single layer with air around them. Bright, indirect light helps the sprouts remain compact.
- Wait Four to six weeks is usually sufficient. A few sturdy shoots are better than a tangled mass of fragile growth.
- Plant Handle chitted tubers carefully and place them into prepared, moist compost with the shoots uppermost. Do not saturate the medium.
Chapter four · The protective rise
Plant low. Raise the soil in measured stages.
In a greenhouse bed, set seed potatoes about 15cm deep and space first earlies at roughly 30cm intervals. In a large container, begin with the vessel only around half full of peat-free compost. Position each tuber with its shoots uppermost, cover gently and water once to settle the medium. The unfilled upper volume is your reserve for later earthing up.
Stage 1 · Planting
Cover the seed tuber
Stage 2 · First rise
Shoots reach 20–23cm
Stage 3 · Final ridge
Keep every tuber dark
- Planting Use a loose, fertile and freely draining medium. Avoid compacting greenhouse beds, and fill containers with quality peat-free compost rather than dense garden soil. Confirm that pots and bags have unobstructed drainage.
- First rise When shoots reach about 20–23cm, draw soil or add compost around their bases while leaving approximately 10cm of leafy growth visible. Work gently so that stems, shoots and shallow roots are not damaged.
- Final ridge Repeat the process in stages as growth continues. Aim for a bed ridge around 20–30cm high, or stop just below the rim of a container.
Spacing affects access as well as yield. About 30cm between first early plants is a sound starting point in a greenhouse bed. Maincrops need substantially more room—around 37cm between plants and 75cm between rows—so they are rarely elegant occupants of a narrow house. Preserve a path for watering, inspection and earthing up without stepping on cultivated soil.
Chapter five · Protected-space ledger
Choose a system with volume to spare.
The useful measurement is not only the visible footprint. It is the clean growing volume beneath the canopy, together with the empty vertical reserve that can be converted into a protective hill.
In a roomy greenhouse, a short dedicated bed row offers stable moisture and generous root room. In a compact structure, large pots or deep grow bags can turn the lower storey into a productive early crop without committing every square metre. Whatever the system, insist on drainage, darkness around tubers and a clear route for watering the compost rather than spraying the leaves.
For a purpose-built growing room, consider the practical dimensions, access and ventilation offered by the Classic Aluminium Greenhouse. Its organised interior provides room to position deep containers while preserving the airflow and daily access a carefully managed potato crop requires.
| Growing form | Plant allowance | Hilling reserve | Main watch |
|---|---|---|---|
| Bed row | Earlies about 30cm apart | Side soil for ridging | Access and rotation |
| Grow bag | Sparse planting by available volume | Leave upper depth empty | Fast moisture loss |
| Large opaque pot | One early per 30cm diameter | Layered compost fill | Drainage and crowding |
- Greenhouse bed row. This provides the most stable moisture and generous root volume, while loose side soil can be drawn towards the stems. Retain a working path beside the row and avoid following potatoes repeatedly with tomatoes, peppers or aubergines in the same bed.
- Grow bag. A deep grow bag is movable, contained and useful where the greenhouse floor is paved. Choose one with effective drainage, reserve ample compost for topping up and let its base area determine the planting number. Check frequently in bright weather because bags can dry rapidly under glass.
- Large opaque pot. Use a pot at least 30cm wide and deep, with clear drainage holes; one first early seed potato per 30cm diameter is a dependable starting point. Pots are easy to inspect and tip out at harvest, but overcrowding creates competing foliage and difficult watering rather than an exceptional yield.
Opacity is purposeful because light exposure promotes greening. Whatever container you select, ensure that it blocks light, drains freely and has sufficient depth for both the initial planting layer and later additions of compost. A shallow decorative pot cannot provide the protected volume that swelling tubers require.
Chapter six · Keep the account steady
Water the compost, exchange the air and resist excess.
Moisture
Potatoes respond poorly to wide swings between drought and saturation. Keep the medium evenly moist while tubers are setting and enlarging, then reduce water as foliage naturally yellows towards harvest. Check below the surface rather than following a rigid calendar. Water thoroughly when the root zone begins to dry, allow excess to drain, and remember that containers under glass receive no useful rainfall.
Nutrition
Fresh, fertile greenhouse soil may require little supplementary feeding. For containers, begin with quality peat-free compost and follow the label guidance for a balanced or potato-appropriate feed as its reserves decline. Potatoes need fertility, but excessive nitrogen can produce abundant soft foliage without a proportionate tuber crop. Steady, moderate nutrition is more useful than repeatedly chasing size.
Ventilation and heat
Open doors, roof vents and side vents early whenever conditions allow, before a bright British day turns the greenhouse hot and oppressive. Potatoes appreciate protected early warmth but are not suited to a sealed, steamy summer house. Moving air clears humidity and helps the canopy cool. During intense sunshine, use external shading where possible rather than closing the structure and trapping heat inside.
Leaf dryness
Apply water with a can, drip line or low-flow hose directed at compost level. Avoid wetting foliage late in the day, when leaves may remain damp overnight. Clear airflow and prompt drying make conditions less favourable for foliar disease. Remove declining leaves where appropriate, clean tools after handling suspect plants and keep paths, pots and trays orderly.
A premium greenhouse earns its place when its details support this calm daily routine. Review the Classic Aluminium Greenhouse when planning ventilation, shading, access and the floor area required for serious food crops. Its layout can accommodate contained early crops while maintaining a practical route to doors and vents. The Classic Aluminium Greenhouse offers a considered starting point for organised containers, beds and seasonal protected cropping.
Chapter seven · Risk register
Respond early, before hidden yield becomes a hidden loss.
A greenhouse reduces exposure to rain, but it does not create immunity from pests or disease. Close planting and lingering humidity can make a small crop decline quickly. Walk the plants every day or two, inspecting leaf undersides, stem bases and the compost surface. Before acting, identify whether the warning points to irregular water, overheating, nutrition, pest feeding or disease.
Case file 01 · Blight
Dark, rapidly spreading leaf and stem lesions
Blight may show as dark spreading lesions, sometimes with pale growth in humid conditions, and it can affect both potatoes and tomatoes. Remove and dispose of suspect foliage promptly, clean tools, improve airflow and avoid wet leaves. First earlies are often harvested before peak pressure, but greenhouse glass must never be treated as a complete shield.
Case file 02 · Blackleg or rot
Blackened stems, soft decay and collapse
Blackleg and rots may cause weak growth, blackened or collapsing stem bases and foul-smelling decay. Remove affected plants and their surrounding compost from container systems. Do not retain obviously diseased tubers for planting. Clean seed, clean vessels and free drainage are more effective than attempting to nurse a failing plant beside healthy neighbours.
Case file 03 · Aphids
Clusters, curled leaves and sticky honeydew
Inspect beneath leaves for aphid colonies, curled growth, sticky honeydew or mottling. Small colonies may be washed away where practical. Aphids can transmit potato viruses, so begin with healthy certified stock and do not save seed tubers from questionable plants. Good observation and greenhouse hygiene matter more than a late rescue.
Case file 04 · Overheating
Drooping foliage and scorched leaf margins
Drooping despite moist compost, scorched edges and an oppressive greenhouse by midday point towards heat stress. Ventilate earlier, introduce external shading during exceptional sunshine and water at the root zone. Keep bags away from the hottest south-facing glass and preserve air space around the canopy so plants can cool effectively.
Case file 05 · Uneven moisture
Irregular growth, cracking and erratic sizing
Irregular tubers often record stress rather than one isolated pest. Tuber formation and enlargement need steadiness. Check containers frequently, avoid allowing them to become dust-dry and do not compensate with sudden flooding. Shade and ventilation reduce the rate at which exposed pots lose moisture.
Case file 06 · Green tubers
Green skin or an exposed shoulder
Tubers turn green when they meet light and may develop increased levels of naturally occurring glycoalkaloids. Cover exposed potatoes immediately with compost and keep the harvested crop dark. Do not trim and serve a significantly green potato: discard it. Prevention depends on prompt earthing up, adequate container depth and regular inspection.
Chapter eight · Closing the account
Harvest in stages, then allow the skins to set.
New potatoes and storage potatoes represent different finishes to the season. First earlies are lifted young, with delicate skins, and eaten fresh. Potatoes intended for storage stay in place until foliage has yellowed and died back, unless disease forces an earlier harvest. Do not hurry this final stage: a dry, sound tuber with a firmer skin handles and stores more reliably.
1 · Flowering and shortly afterwards
First new potatoes
2 · Foliage decline
Let maturity announce itself
3 · A short drying period
Dry, sort and darken
4 · The storage shelf
Keep cool, dark and frost-free
- First new potatoes At flowering or shortly afterwards, carefully explore the compost beside a plant and take a few tubers when they reach the size you enjoy. Alternatively, tip out the whole pot. Re-cover disturbed roots if the plant is to continue growing.
- Foliage decline For a storage crop, wait until the foliage yellows and dies back naturally. Reduce and then stop routine watering as growth finishes. Lift gently in dry conditions, using a fork carefully or tipping a container onto a clean sheet to avoid puncturing tubers.
- Dry Allow freshly lifted potatoes a short drying period under cover and away from direct light. Brush off loose soil rather than washing them. Separate cut, bruised, soft or otherwise damaged tubers and use sound minor casualties promptly in the kitchen.
- Storage shelf Store only dry, undamaged potatoes in a cool, dark, frost-free place. Paper sacks, hessian bags or ventilated crates are suitable because they exclude light without sealing in moisture. Inspect the crop periodically and remove any potato that begins to soften or rot.
Chapter nine · British greenhouse timing
Use the structure to shift the season, not ignore it.
Across the United Kingdom, exact planting dates depend on local weather, light and whether the greenhouse remains frost-free. Coastal southern gardens may begin earlier than colder inland or northern sites. Acquire and chit first earlies from January to March in a cool, bright, frost-free place. From early March, chitted tubers can be planted into a frost-free greenhouse for a very early crop, potentially ready from around mid-May. Protect emerging shoots whenever late frost remains possible.
April and May suit more conventional early and maincrop schedules as local conditions permit. A second protected-cropping window opens in July or early August, when cold-stored seed potatoes can be planted for an autumn or Christmas harvest. The greenhouse should shift the shoulder seasons rather than force potatoes through the hottest period. A concise early crop can be cleared before summer fruiting plants occupy the space.
Rotation memorandum
Potatoes belong to the Solanaceae family alongside tomatoes, peppers and aubergines. Avoid asking the same greenhouse bed to host these relatives year after year, especially following disease. Rotate crop families where practical, remove volunteer potatoes and refresh container compost rather than repeatedly using one tired mix for hungry crops. Diseased compost and plant material should not be carried into the next cycle.
For an ordered structure suited to seasonal container crops, explore the Classic Aluminium Greenhouse. If you are arranging beds, staging, deep pots and a productive central path around the way you work, the Classic Aluminium Greenhouse provides useful inspiration for balancing cultivation space, ventilation and unimpeded daily access.
Final seasonal principle: greenhouse potatoes thrive on steadiness rather than intensity. The best crop is seldom made by the hottest house, richest feed or deepest last-minute mound. It comes from sound seed, measured watering, moving air and regular observation.
Potato greenhouse FAQ
Questions from the potting bench.
Can I grow potatoes in an unheated greenhouse?
Yes, provided an early planting remains frost-free, or you wait until conditions are suitable. An unheated greenhouse is particularly useful for chitting and bringing an early container crop forward. Protect newly emerged shoots if a late frost is forecast, and do not assume glass alone guarantees a safe night.
How many potatoes should I put in a grow bag?
Let the bag’s base area and compost volume set the limit, rather than the number of tubers that physically fit. Each early plant needs room to grow, and the bag must retain empty depth for earthing up. A sparse, carefully watered bag will usually perform better than one crowded with competing stems.
Should I plant supermarket potatoes instead of seed potatoes?
It is better not to. Supermarket potatoes are ware potatoes and may have been treated to suppress sprouting; their disease history is also unknown. Use certified seed potatoes from a reputable supplier for a cleaner, traceable and more dependable start in valuable greenhouse compost.
How often should I water greenhouse potatoes?
Water according to the root zone rather than a fixed calendar. Check the compost frequently and irrigate thoroughly when it begins to dry, particularly as the canopy expands and tubers enlarge. Pots and bags may need attention even while rain falls outside. Aim for even moisture and free drainage, never permanently saturated compost.
Why have my greenhouse potatoes turned green?
They have been exposed to light, usually because tubers reached the surface or the compost cracked and settled. Cover any visible tubers immediately and keep the harvested crop dark. Significantly green potatoes should be discarded rather than trimmed and eaten.
Sources & further reading
Field notes behind this guide.
More from Bloomcabin: planning a Bloomcabin greenhouse layout · UK greenhouse gardening guide for beginners · How to Grow Fresh Food 365 Days a Year
- Royal Horticultural Society — How to Grow Potatoes
- Royal Horticultural Society — Growing Potatoes: Secrets of Success
- Royal Horticultural Society — Growing Potatoes in Containers
- AHDB Potatoes — Guidance on Greening
- SASA — Virus Management in Certified or Home-Saved Seed Potatoes
- AHDB — Soil Management for Potatoes
- Royal Horticultural Society — Potato Growing Guidance
Open the lower storey
Plan for yield beneath the visible canopy.
A considered greenhouse gives serious home gardeners more than a place for foliage to stand. It creates an ordered climate for overlooked crops: deep containers, a clean watering route, moving air, carefully raised ridges and the quiet harvest waiting beneath the compost.
Classic Aluminium GreenhouseClassic Aluminium Greenhouse